
Last Updated on June 28, 2026 by Masha Eretnova
Welcome fall and back-to-school season with this simple Toiler paper roll trees craft toddlers and preschoolers can make with a bit of parents’ or teachers’ help.
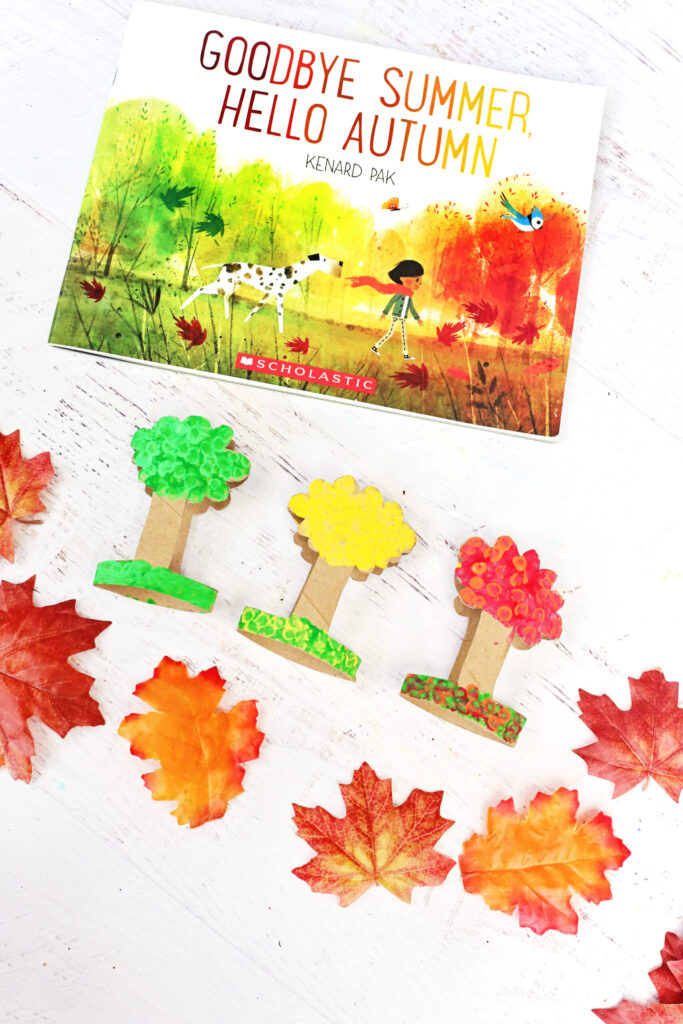
If you want, the fall tree craft pairs nicely with reading Goodbye Summer, Hello Autumn book by Kenard Pak from the serios on seasons and will be just perfect for learning about changes of seasons, colors, and weather with young kids.
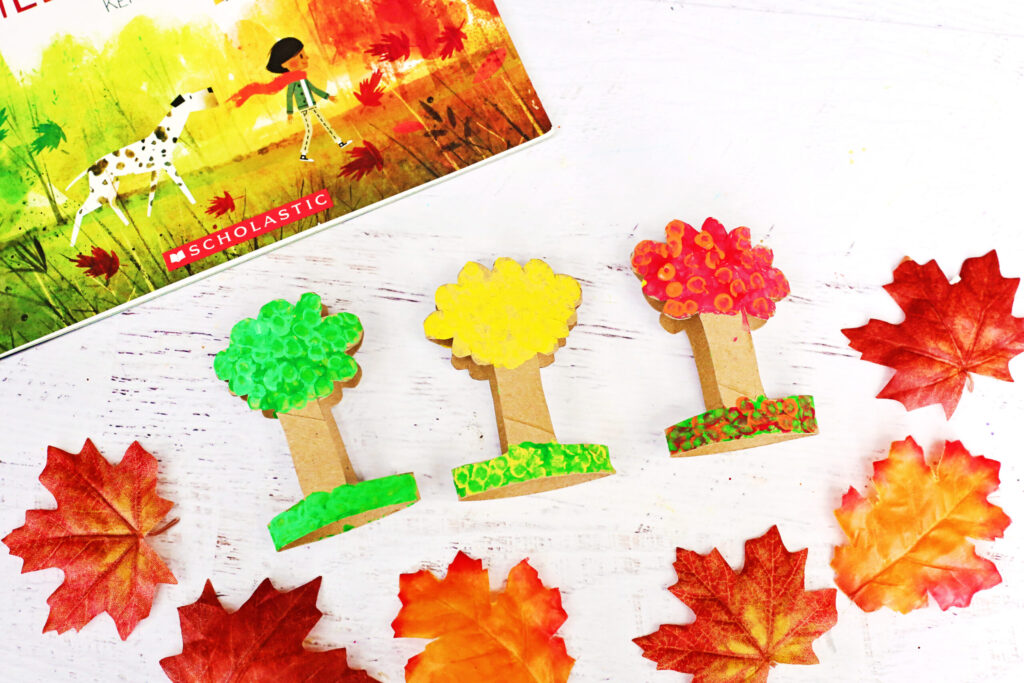
Table of Contents
This article contains affiliate links. It means no extra cost for you but a little commission (2-3%) for me to support my hobby and blog. Thank you!
Supplies
Supplies you will need to make these summer and fall trees with your kids are minimal, cheap, and half of them you have at home already.
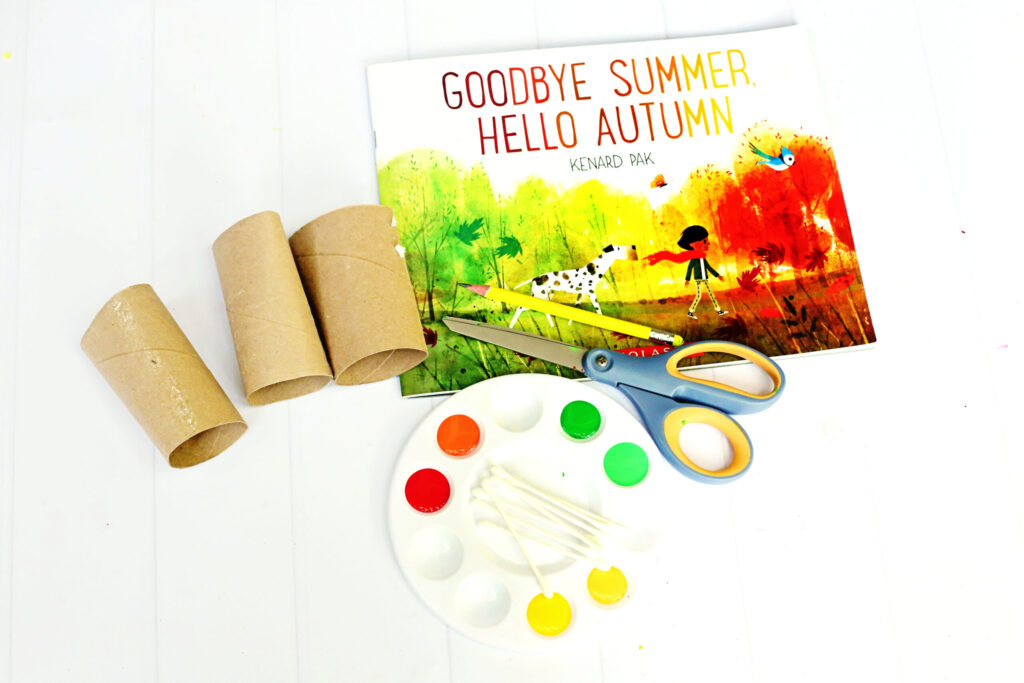
- 3 toilet paper rolls
- Pencil
- Scissors (Working with toddlers cut the trees shapes yourself, you can use child-safe scissors if you want to practice cutting skills)
- Paint (use craft paint set, it is cheap, has all colors, and lasts for a few activities): 2 shades of green paint, 2 shades of yellow paint, red and orange paint.
- Cotton swabs (Q-tips)
- Paintbrush
- Paper plate or paint palette
- Book! If you want to make it crafting + reading quality time
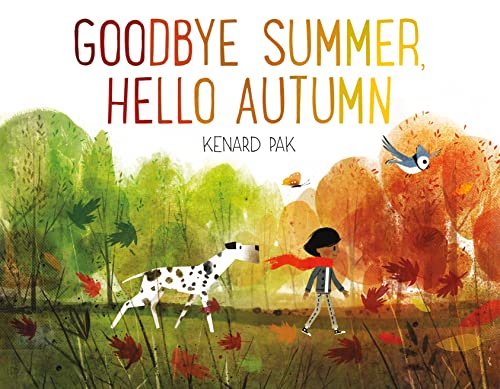
- Hardcover Book
- Pak, Kenard (Author)
- English (Publication Language)
- 32 Pages – 08/16/2016 (Publication Date) – Henry Holt and Co. (BYR) (Publisher)
What Age Are Toilet Paper Rolls Fall Trees For?
The book and the trees craft are best for toddlers and preschoolers aged 2 to 5 years old.
No painting skills required but little hands can practice a bit of cutting, dubbing paint with Q tips (hands coordination), color recognition and, of course, learn about the fall season in conversation.
Amazing screen-free activity to do in September, on first day back to school, or when you spot leaves turning yellow and red.
How To Make Toilet Paper Rolls Fall Trees
Flatten a toilet paper roll.
Draw a simple tree outline on the flattened roll, making sure to include a base at the bottom so the tree can stand upright.
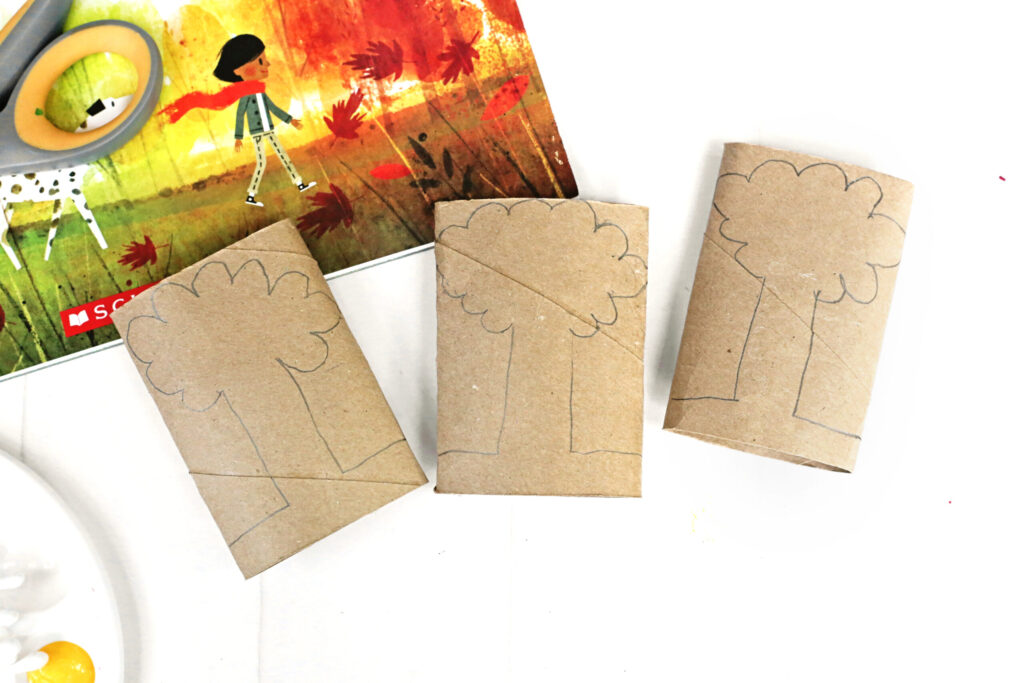
Cut out the tree and gently open it so it stands on its base. Important: Keep the two sides of the toilet paper roll connected at one point when cutting. This allows the tree to pop back open into a standing shape.

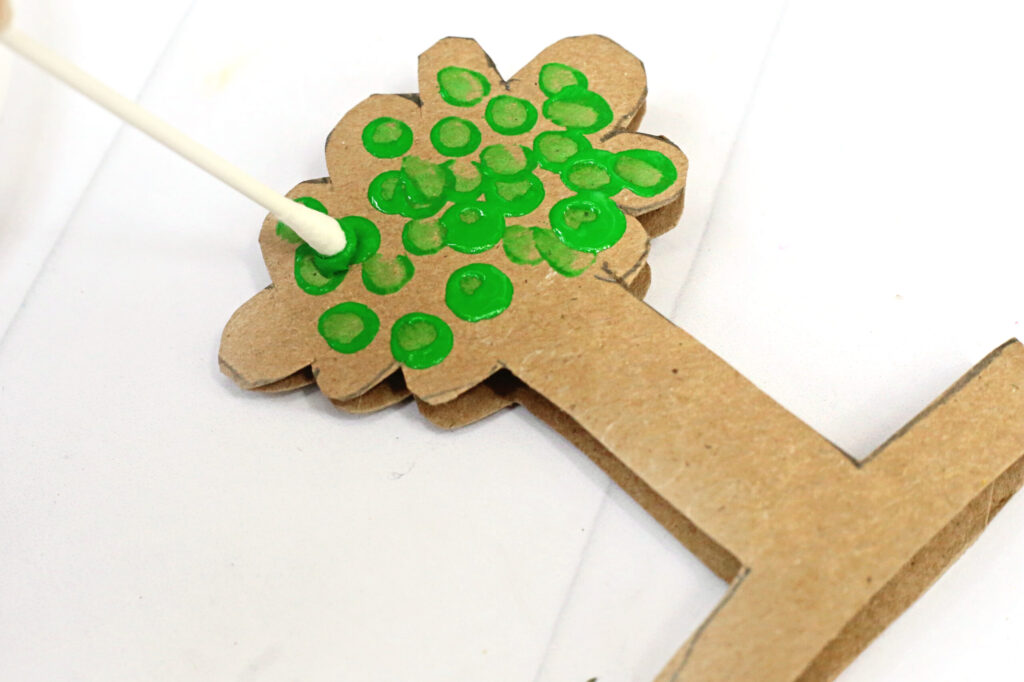
Use a cotton swab dipped in green paint to dot the top of the first tree. Add a lighter green over some of the dots for extra texture.
Paint the second tree with yellow dots, then layer on a lighter yellow to create highlights.
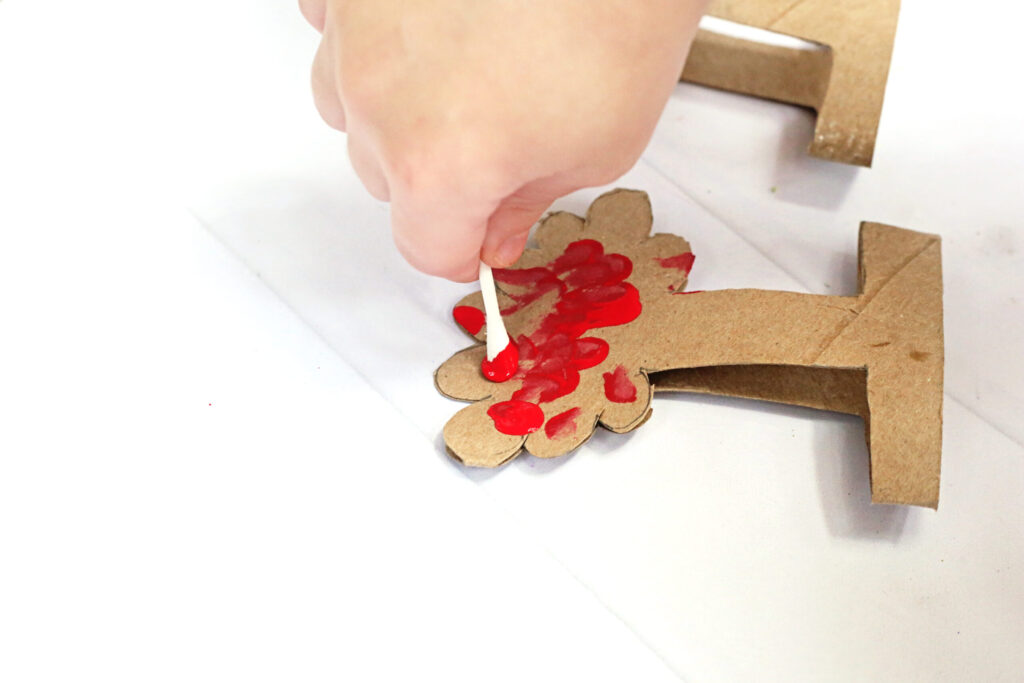
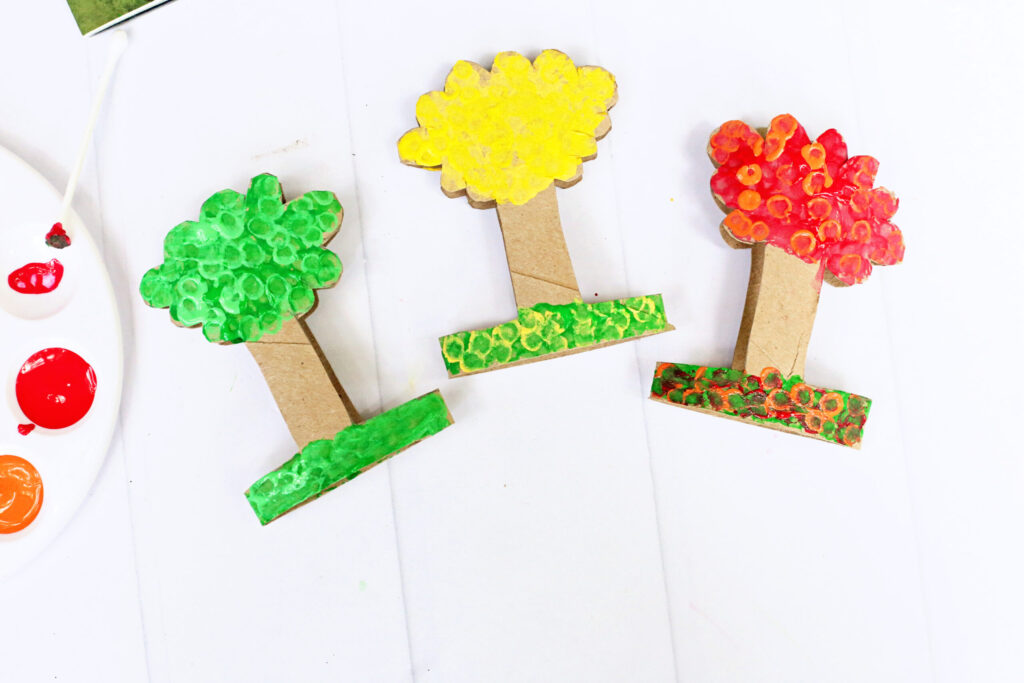
Paint the third tree with red dots. Finish with a few orange dots to give the leaves dimension.
Paint the base of the summer tree green, then decorate it with green dots. Paint the base of the yellow tree green and add yellow dots.
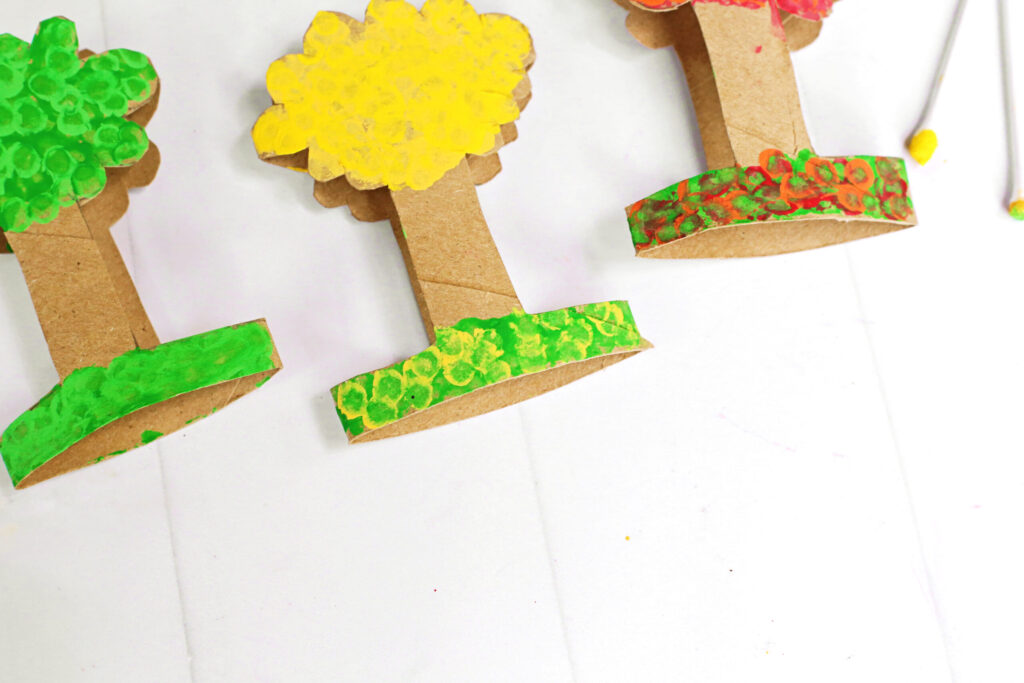
Paint the base of the red and orange tree green and finish with red and orange dots.
Let the paint dry completely before displaying your trees in seasonal order from summer to fall.
Not feeling fall yet? Pin this for later 🙂
Ways To Extend This Fall Activity
Once the trees are dry, the learning does not have to stop.
Line the three trees up in order and ask your child to point to summer, early fall, and deep fall.
Talk about what changes between each one (the colors, the temperature, what you wear outside).
For younger toddlers, just naming the colors on each tree is enough. For preschoolers closer to 5, you can ask which tree has the most colors, or count the dots together on each section.
Q-tip dot counting works well here too. Before the paint dries, press dots in small groups, three green dots on one branch, two yellow on another — and count them together as you go.
Using This Fall Tree Craft in a Classroom
This craft scales easily for a group as you can make many trees and set up painting station.
Cut the tree shapes yourself ahead of time and set up paint stations with one color per table: a green station, a yellow station, a red and orange station. Kids rotate through and add their dots, then collect their own tree at the end.
It pairs well with a circle time discussion about seasons before you start the new term, and a show-and-tell of the finished trees after.
Each child ends up with something slightly different depending on how they dotted the paint, which makes for a good conversation about how the same tree looks different in different light or at different points in fall. Plus, the trees do stand on their own so thay can be used in a play, autumn scene (with added elements) or scenes for Thanksgiving or Halloween with extra decoration.
Toilet Paper Roll Trees Variations
Make a winter tree as a fourth in the set: leave the canopy bare or add a few white and blue dots for snow.
A spring version works the same way with pink, light green, and white dots for blossoms.
For older preschoolers, swap the Q-tips for a crumpled piece of paper towel dipped in paint or pieces of a sponge: it creates a more textured, painterly canopy and gives slightly more control over coverage.
No Q-tips? Fingerprinting works too and skips tools entirely.
If you have leaves to collect outside, press a few small ones onto the wet paint while it is still tacky. They lift off cleanly once dry and leave a leaf-shaped impression in the dots.

Masha Eretnova, born in 1991, is a Chiang Mai-based certified teacher, artist, and blogger with 20+ years of personal painting journey.
She started painting and drawing very early and is now an international abstract artist and educator passionate about acrylic painting, gouache, and crafts.
Her works are part of international exhibitions and contests, including ArtlyMix (Brazil), Al-Tiba 9 (Spain), Exhibizone (Canada), Italy, and many more.
Besides her artistic pursuits, Masha holds a post-grad diploma in Teaching Film Photography and 2 music school diplomas: piano and opera singing.
Last update on 2026-06-28 / Affiliate links / Images from Amazon Product Advertising API