
Last Updated on May 29, 2026 by Masha Eretnova
Summer and reading go well together — the trick is making the book feel worth returning to. A corner bookmark does that in a small, satisfying way. Not a flat strip that falls out, but a folded paper pocket that wraps right around the page corner and stays put.
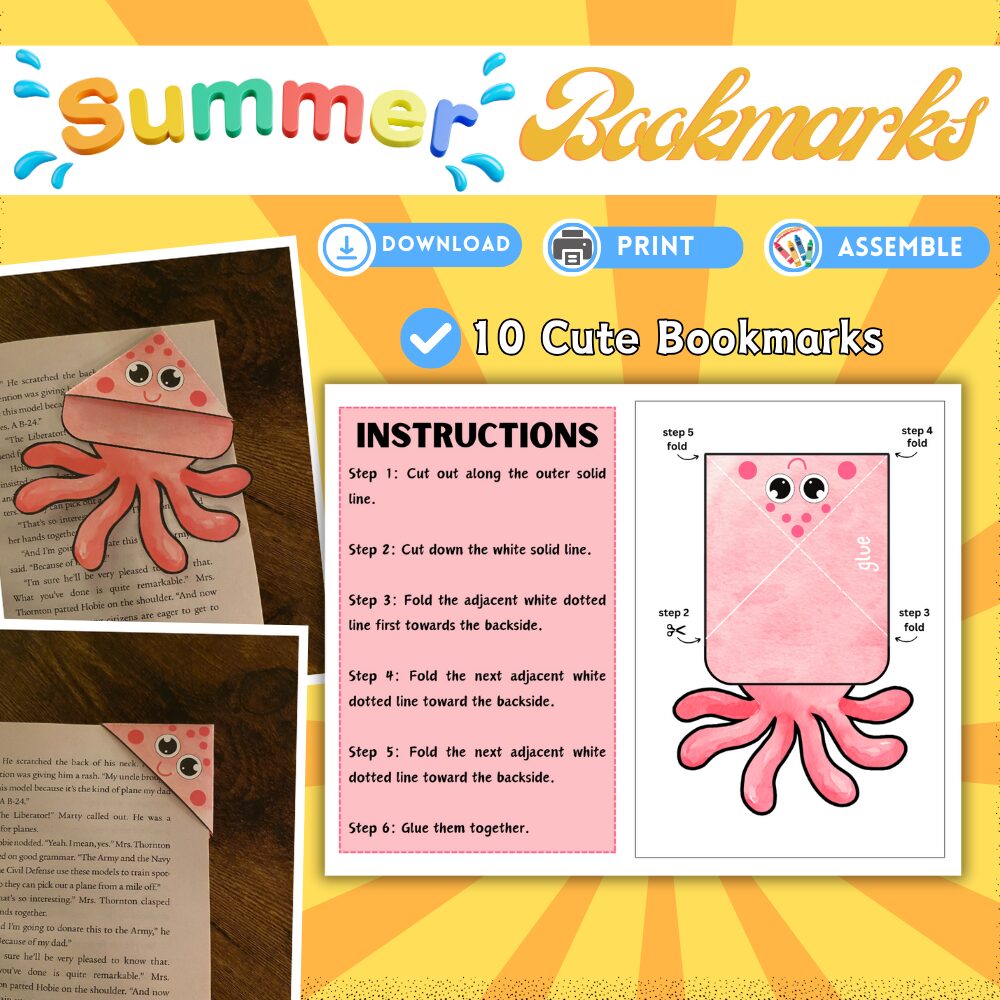
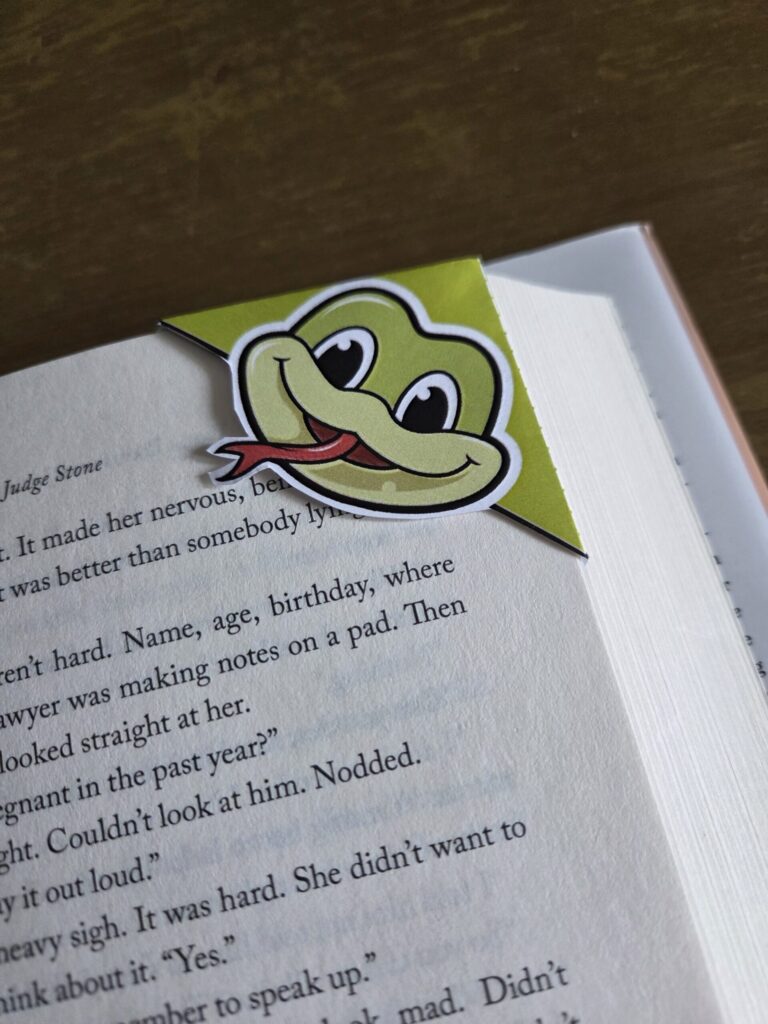
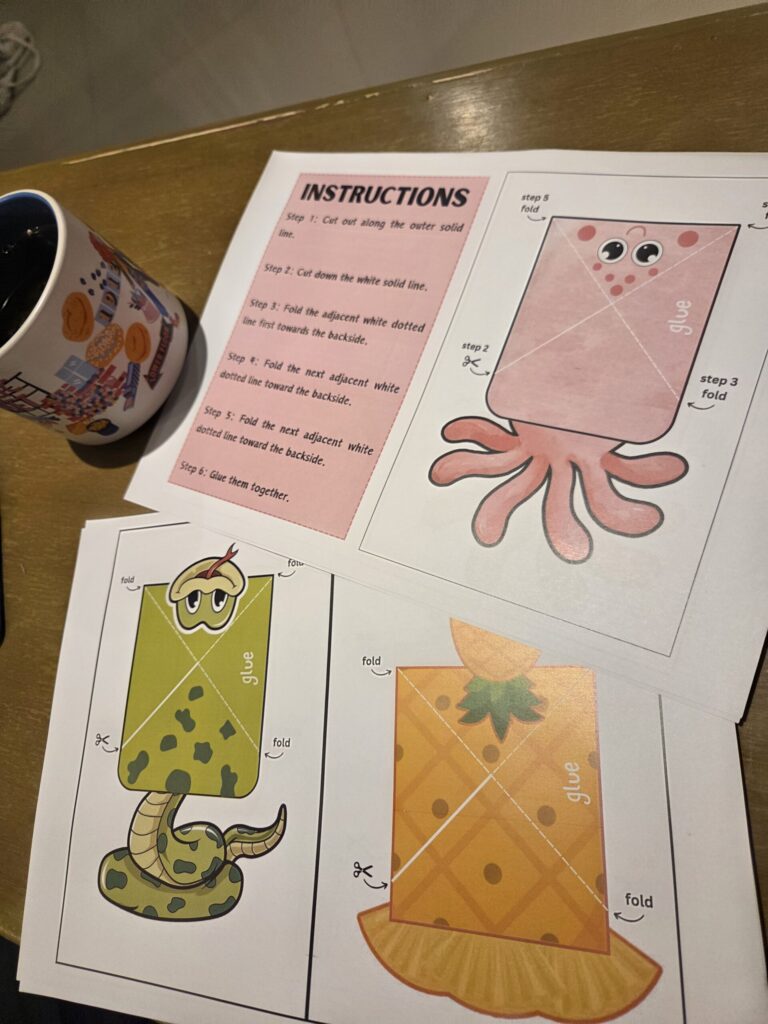
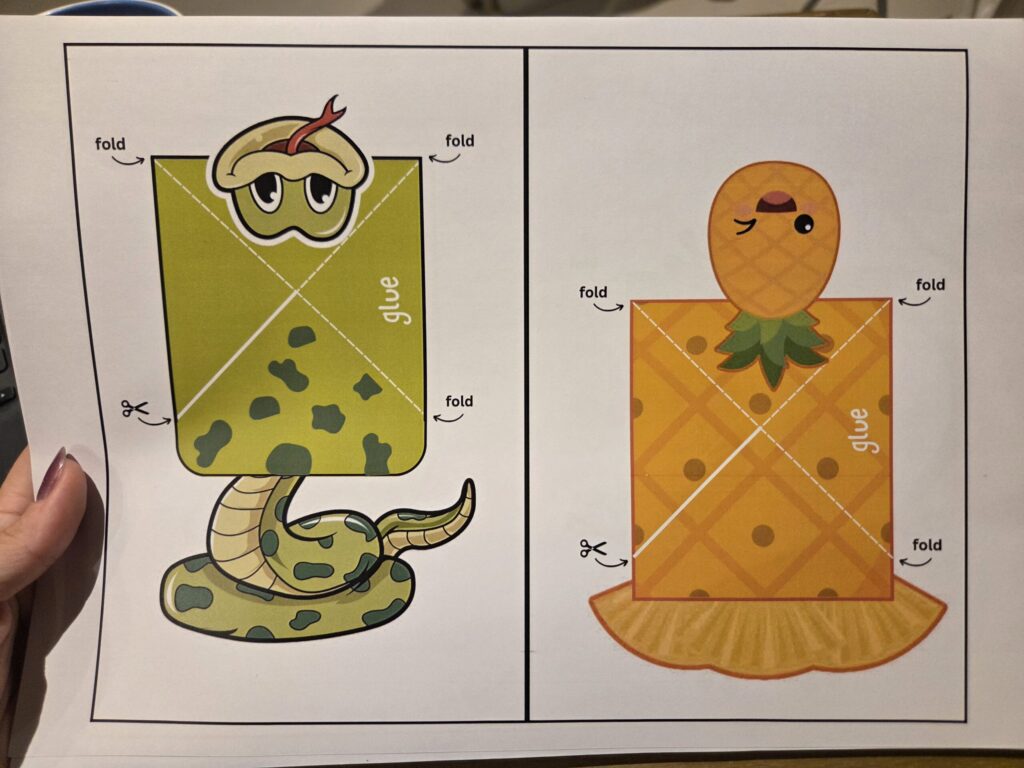
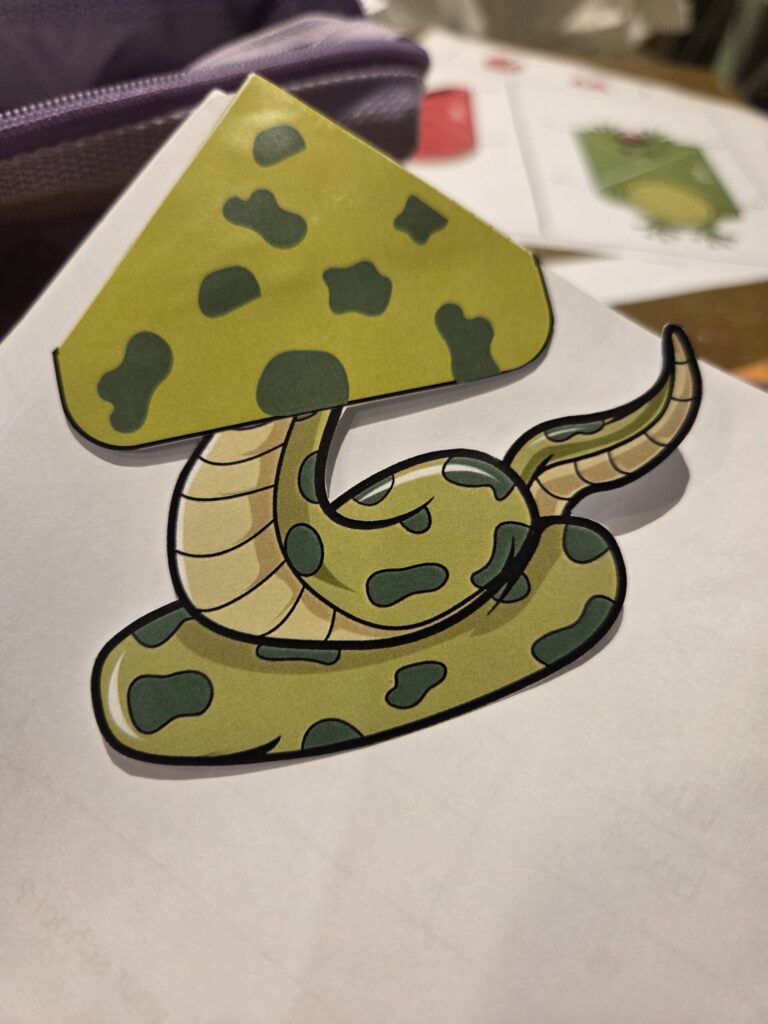
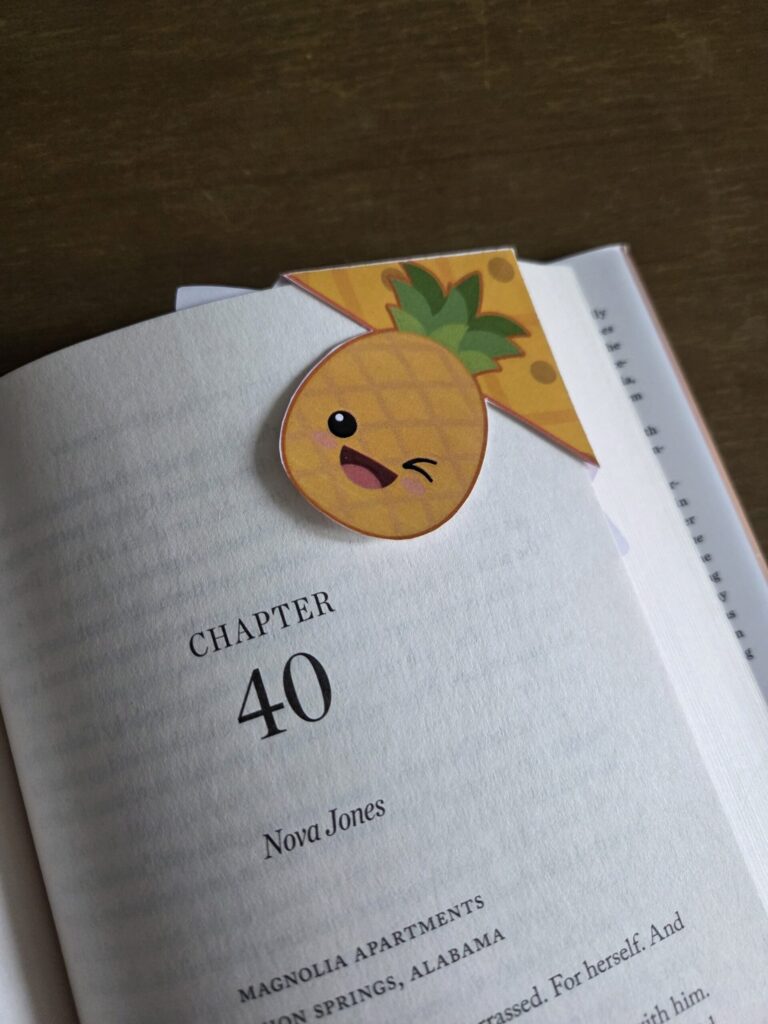
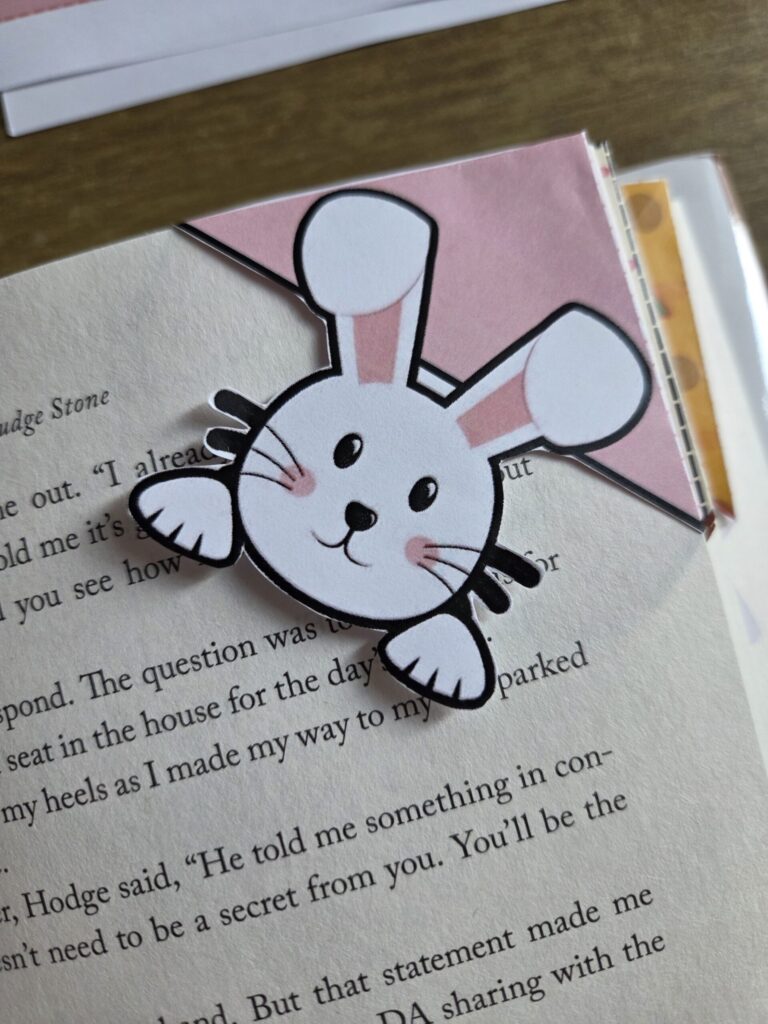
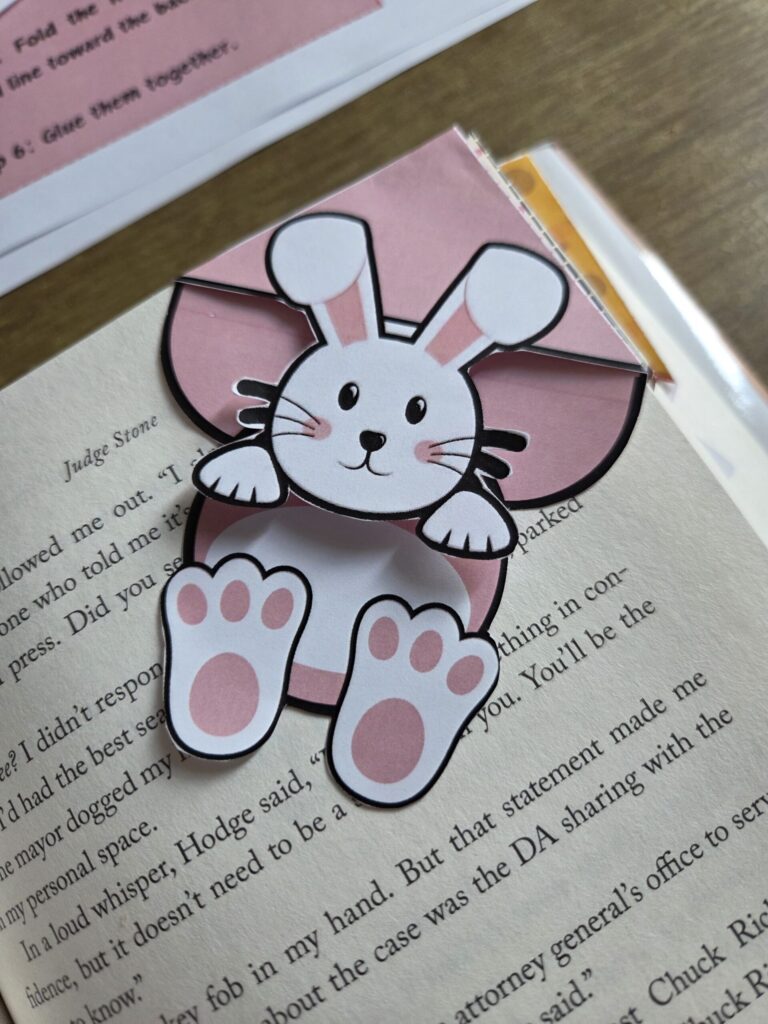
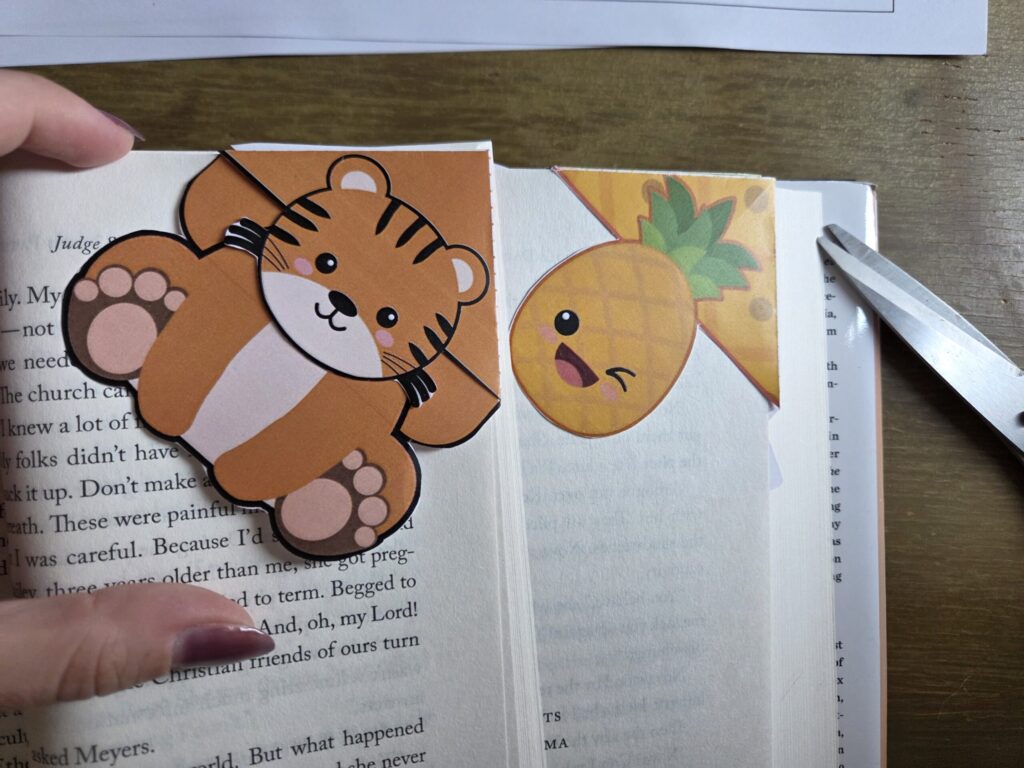
This free printable set has 10 summer corner bookmark designs: a watermelon, a frog, a tiger, an owl, an ice cream cone, a rabbit, a crab, an octopus, a snake, and a pineapple. Cut, fold, glue — done in under ten minutes per bookmark.
What Are Corner Bookmarks?
Corner bookmarks are folded paper pockets that slide over the corner of a book page. Unlike a flat bookmark, they don’t slip out when the book gets tossed in a bag. The design also gives each one a character — the animal or object peeks out from the top corner of the page when the book is closed.
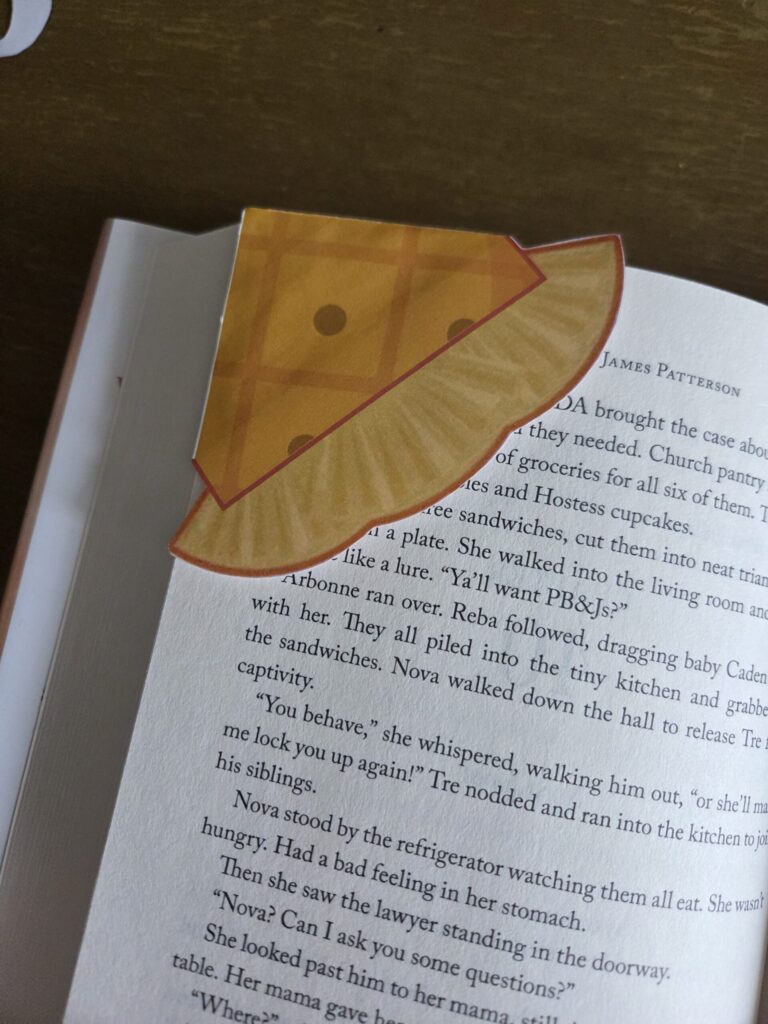
Each template in this set prints as a flat, decorated rectangle with fold and cut lines marked directly on the design. The character’s head or top half sits above the fold line, so it sticks out once the bookmark is assembled. The bottom half of the design forms the pocket that holds the page corner.
What Age Is This For?
The cutting and folding steps suit ages 6 and up working with some supervision. The lines are clearly marked on each template, and the fold sequence is the same for every design, so after the first one most children can move through the rest independently.
For younger children — ages 3 to 5 — a parent or older sibling can handle the cutting and folding while the child chooses which design to make. If you print the black-and-white version, younger children can color the design first before assembly, which adds a whole extra layer to the activity.
For a classroom or summer program setting, these work well as a paired activity: one child cuts while the other folds, then they swap. The finished bookmarks also make a good end-of-activity reward if the group has a shared reading time.
Supplies You Need
- Color printer,
- white cardstock (strongly recommended over regular paper — it holds the fold better and the pocket stays stiff in use),
- scissors (Child-safe scissors for younger kids)
- Glue stick.
If you want to extend the lifespan of the bookmarks, run a strip of clear tape along the inside pocket seam after gluing. Optional, but it makes them noticeably more durable, especially for younger children who aren’t always gentle with their books.
More summer-themed crafts for kids:
How to Make the Corner Bookmarks
Step 1: Print and Choose a Design
Download the PDF, open it, and print on cardstock. The set includes 10 designs across multiple pages. Print the ones you want, or print the full set and let children choose. If you’re running this as a group activity, print one sheet per child and let each person pick a different design.
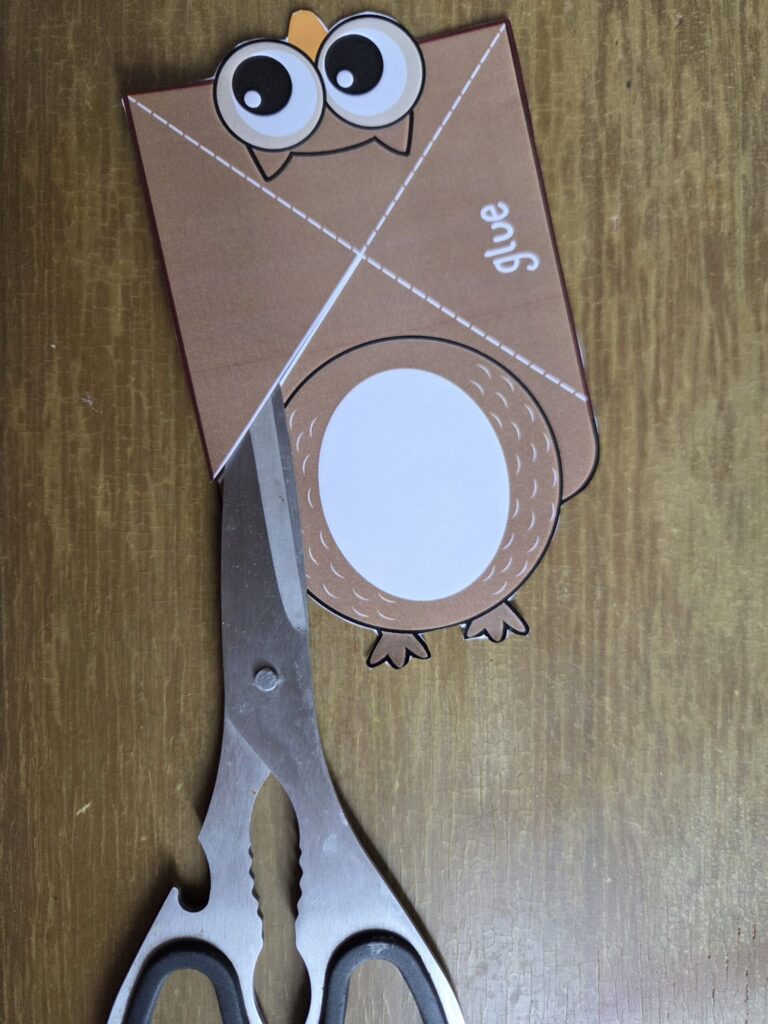
Step 2: Cut Along the Outer Solid Line
Each template has a solid outer border.

Cut along this line to separate the bookmark from the rest of the page. The character’s head, tail, arms, or legs extend beyond the main rectangle on some designs — cut around these carefully to keep the details intact. Child-safe scissors work for most of the shapes; the detailed bits around a frog’s fingers or a crab’s claws are easier with sharper scissors.
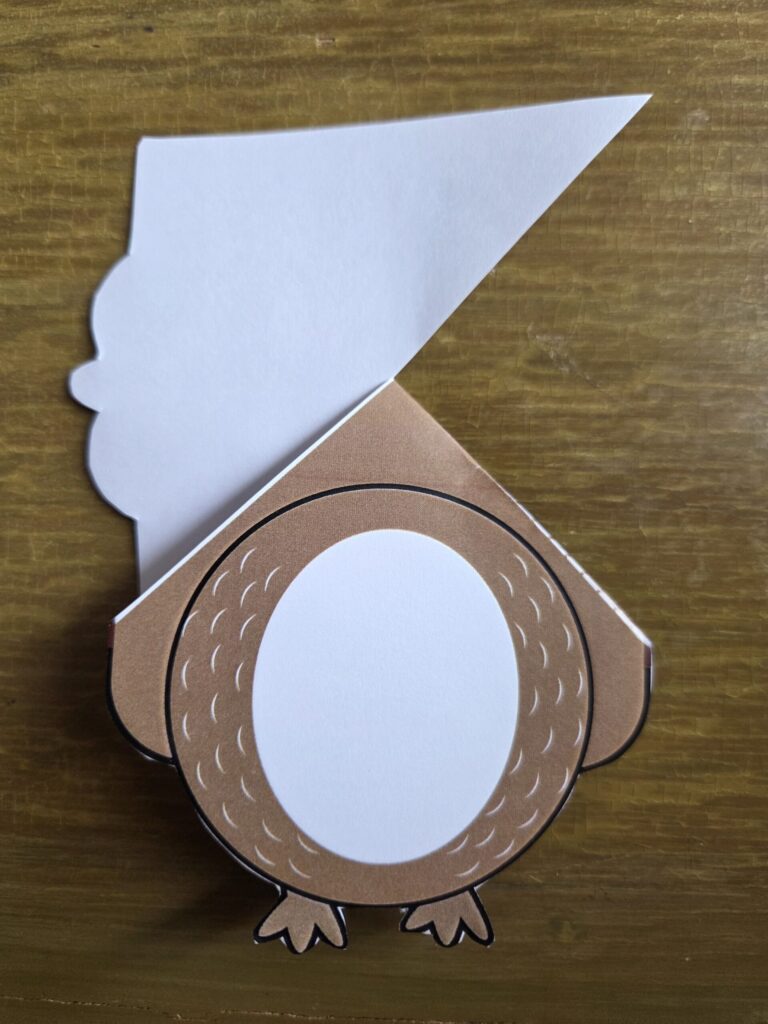
Step 3: Cut Down the Center White Solid Line
Each template has a white solid line running down the middle of the rectangle. Cut along this line from the bottom edge upward to the point where it meets the fold lines. This cut is what creates the two flaps that fold back to form the pocket.

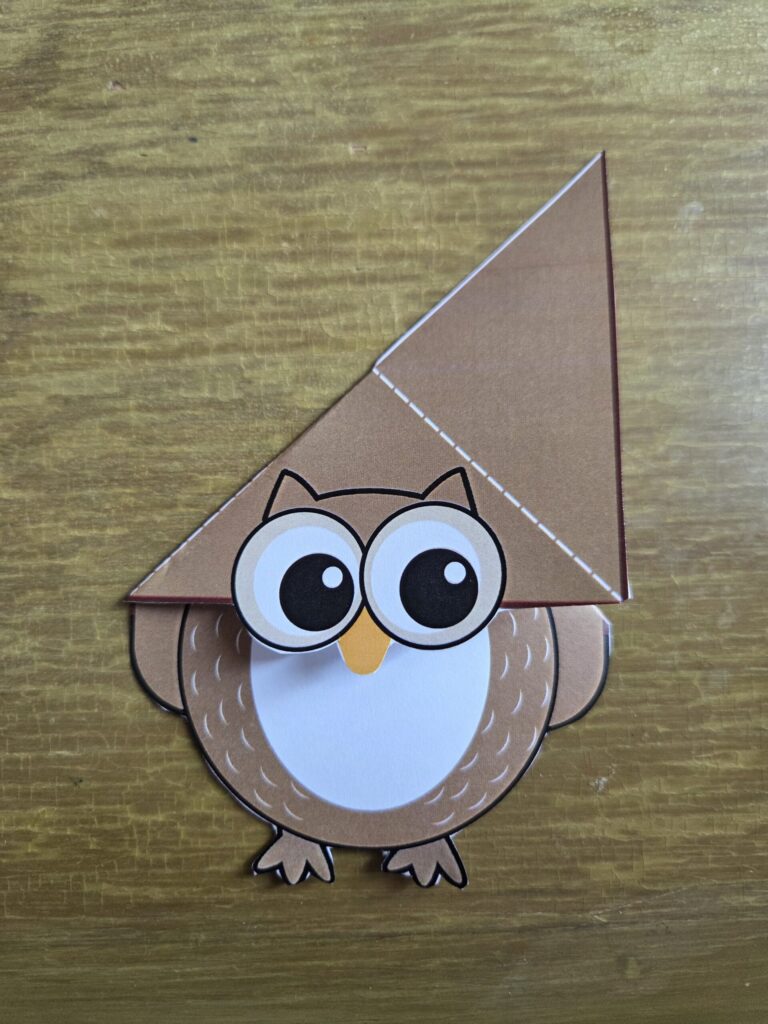
Step 4: Fold the Dotted Lines to the Backside
Each template shows three dotted fold lines forming an X-shape across the rectangle. Fold each dotted line toward the back of the design — the printed side faces out. Work through them one at a time. The fold order is marked on each template (step 3, step 4, step 5 on the design). Take each adjacent flap and press it firmly toward the back.
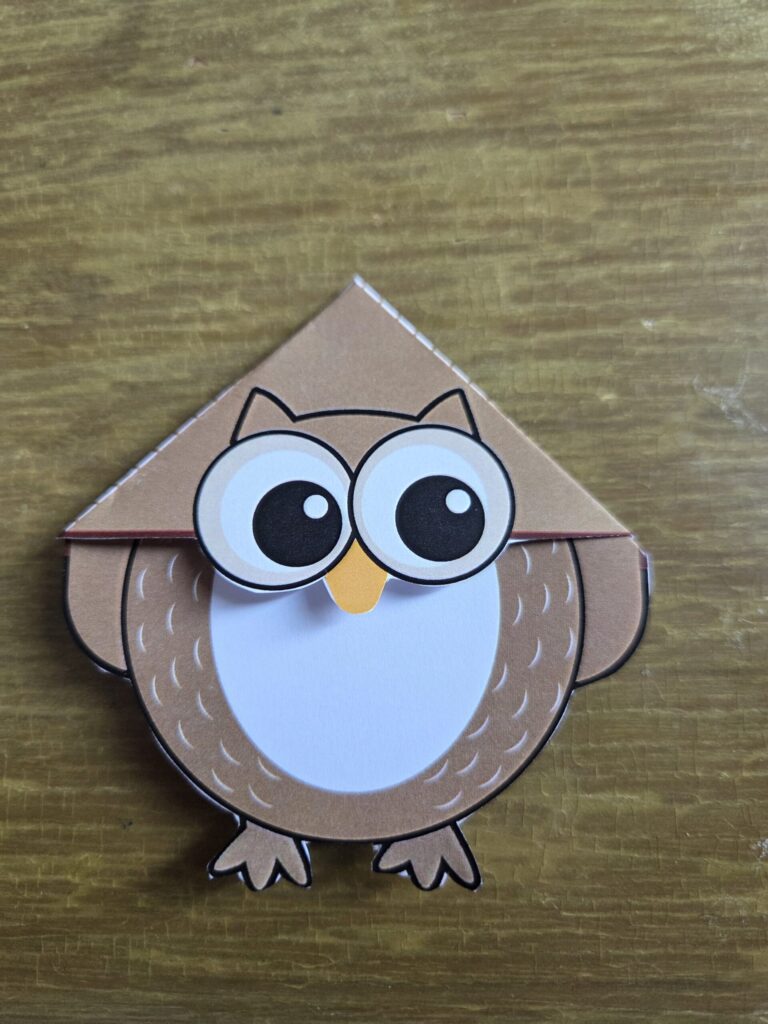
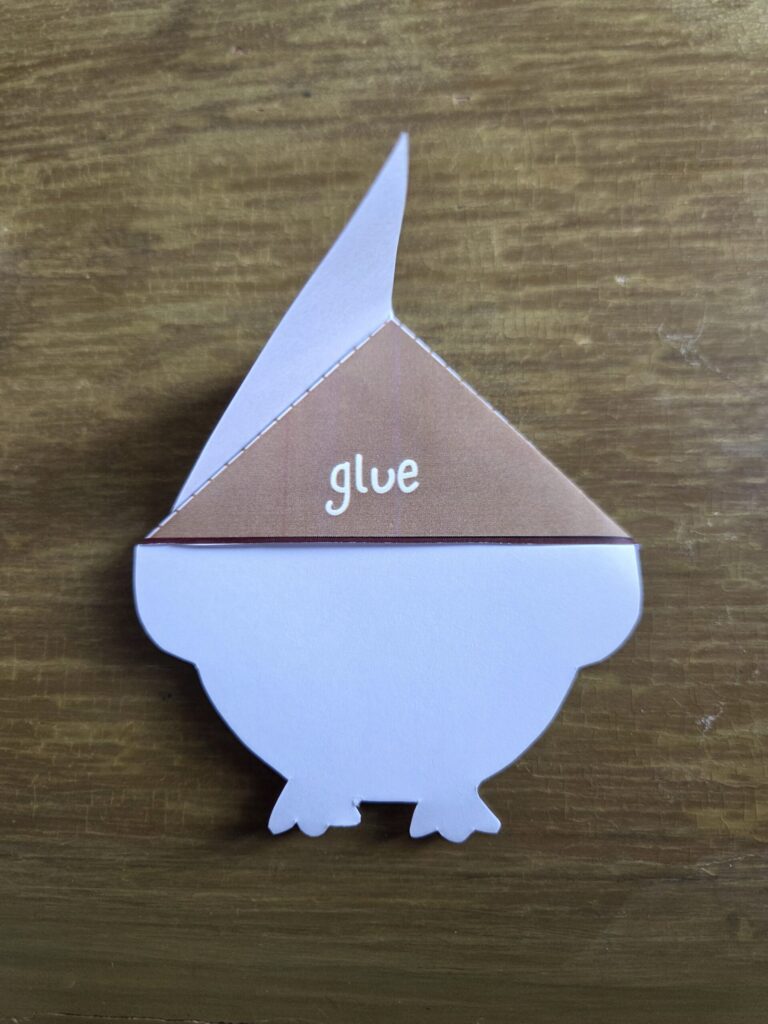
Step 5: Glue the Pocket Together
The center of the design is labeled “glue.” Once all the flaps fold back, apply glue to the overlapping layers and press them together firmly. Hold for 30 seconds or use a binder clip while the glue dries. The pocket forms on the front face — a triangular opening that slides over a book page corner.
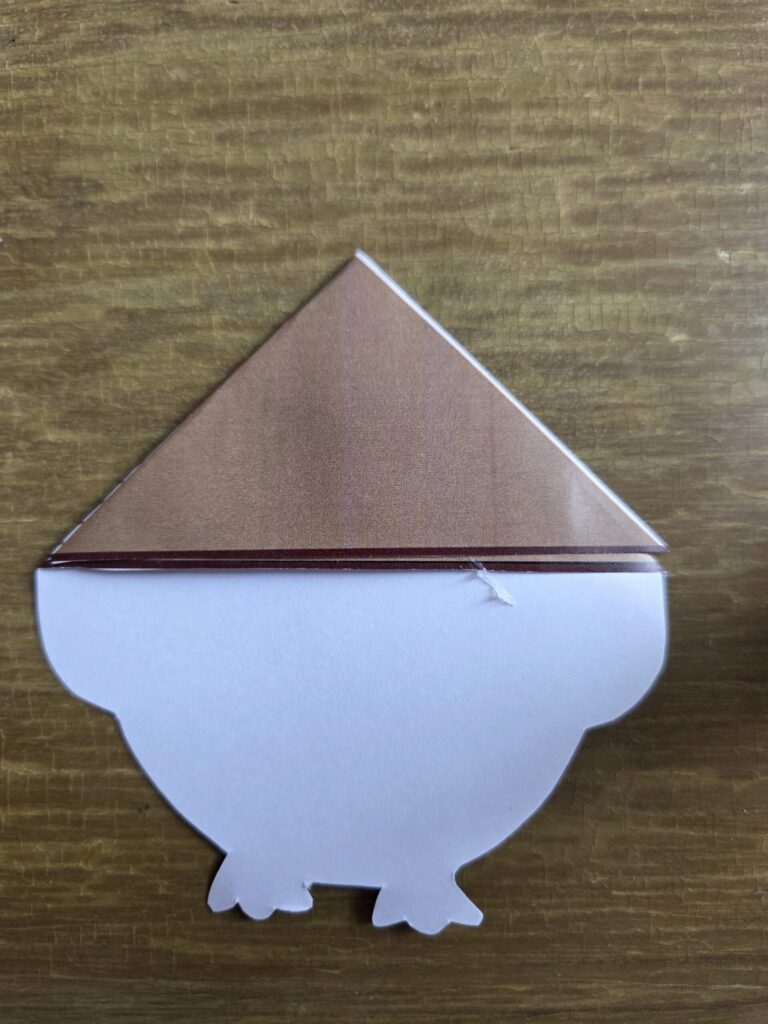
Step 6: Slide It onto a Book
Open to any page, slip the pocket over the bottom or top corner, and close the book. The character’s head sticks up above the cover. Done.
I have accidentaly discovered that there are two ways of making/using these bookmarks. Version 1:
And version two as just as the steps go, then you do not have anything at the back, but you do have two ways of sliding the bookmark on the page: head only or full body:
Tips for Getting the Most Out of This Activity
Print the designs in black and white if you want to add a coloring step before assembly. The outlines are clean enough to color with markers, colored pencils, or crayons. Children who color their own design tend to treat the finished bookmark more carefully.
For summer reading programs, pair each bookmark design with a book theme. The snake or frog bookmark for a nature book. The ice cream cone for a summer story. The owl for anything with a nighttime setting. It’s a loose pairing that makes the bookmark feel connected to what the child is reading.
If cardstock isn’t available, print on regular paper and then glue each printed sheet onto a piece of construction paper before cutting. It adds thickness and stiffness without needing a special paper stock.
Store unassembled sheets flat in a folder so they don’t crease before children work on them. Creased templates are harder to fold cleanly.
FAQ
Do I need to print in color? No. The designs print clearly in black and white, and coloring them first adds an extra activity before assembly. Color printing makes the finished product more vibrant straight away, so both options work depending on what you want from the activity.
What’s the best glue to use? A glue stick gives the most control for small hands. White craft glue works too but needs a few minutes to dry before the bookmark holds its shape. Avoid hot glue — it sets too fast and burns little fingers.
Can these get used more than once? Yes, as long as the glue holds. Cardstock versions last through a whole summer of regular use. Paper versions may need a replacement after a few weeks of heavy handling.
My child is too young to cut and fold — is there still a way to use these? Pre-assemble the bookmarks yourself and let younger children decorate them afterward with stickers or markers. The pocket is already formed, so decoration is the only step they need to do.
How many designs are in the set? Ten: watermelon, frog, tiger, owl, ice cream cone, pink cat, crab, octopus, snake, and pineapple.
Is the download really free? Yes. Enter your email below and the full PDF downloads immediately — all 10 designs with assembly instructions included.

Masha Eretnova, born in 1991, is a Chiang Mai-based certified teacher, artist, and blogger with 20+ years of personal painting journey.
She started painting and drawing very early and is now an international abstract artist and educator passionate about acrylic painting, gouache, and crafts.
Her works are part of international exhibitions and contests, including ArtlyMix (Brazil), Al-Tiba 9 (Spain), Exhibizone (Canada), Italy, and many more.
Besides her artistic pursuits, Masha holds a post-grad diploma in Teaching Film Photography and 2 music school diplomas: piano and opera singing.