Last Updated on March 14, 2024 by Masha Eretnova
Are you a dog person? I AM! I love all doggos of the world and always try to make friends with all of them lol. Most dogs are also very good with kids and when someone is learning how to draw, an idea to draw a puppy or a dog is always one of the first.
But as a parent, or a beginner adult you absolutely need to learn how to draw a dog sitting with cute eyes and ears!
If you are a beginner, you can start drawing a dog or a puppy from the snout! Then goes the head and the body. Paws and tails go last and then you can color it. You can paint a dog with pencils, acrylics or gouache, and markers.
I will also share some popular dog breeds tutorials, including most popular golden retriever:)
Puppy/Dog Drawing Supplies
- Sketchbook or a paper sheet (basically any painting surface)
- Pencils (HB,2B).
- Eraser.
- Ruler.
- Color pencils or crayons, or acrylic paint (or any paint/markers you want to color your dog with)
- In our tutorial you need these colors:
- black
- brown for the fur ( you can pick any color or even make a dalmatian!)
- pink or peach for the tongue
You can use a reference photo of your dog or just draw a cartoon style puppy.
I recommend painting and drawing with a good lighting.
*If you will pick paints for coloring your puppy, you will need some brushes.
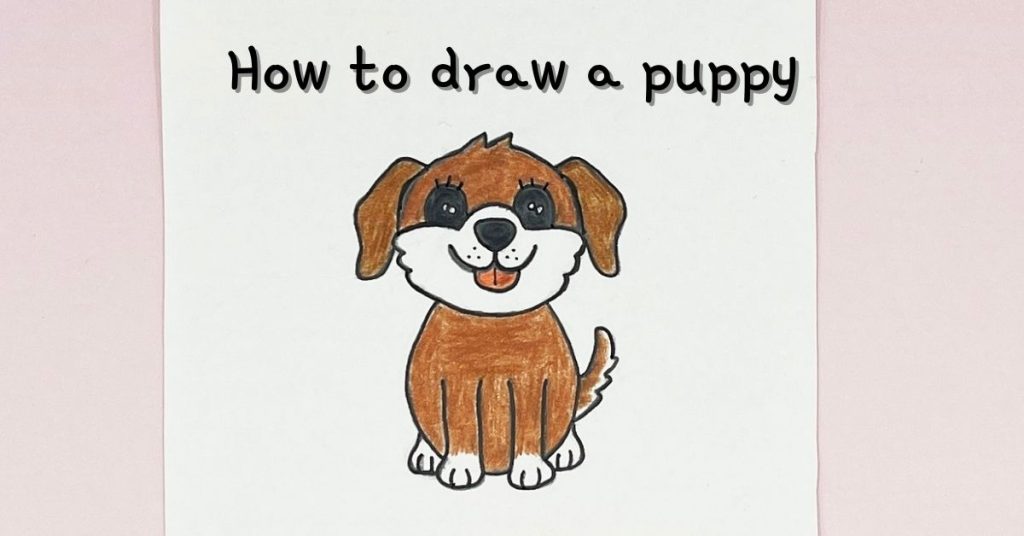
Easy Dog Drawing Step-by-Step Instructions
Key features of a cute dog are snout, happy waggin tail, cute paws and ears, and a pinkish tongue. If you are just a beginner don’t stress too much about shades and background first.
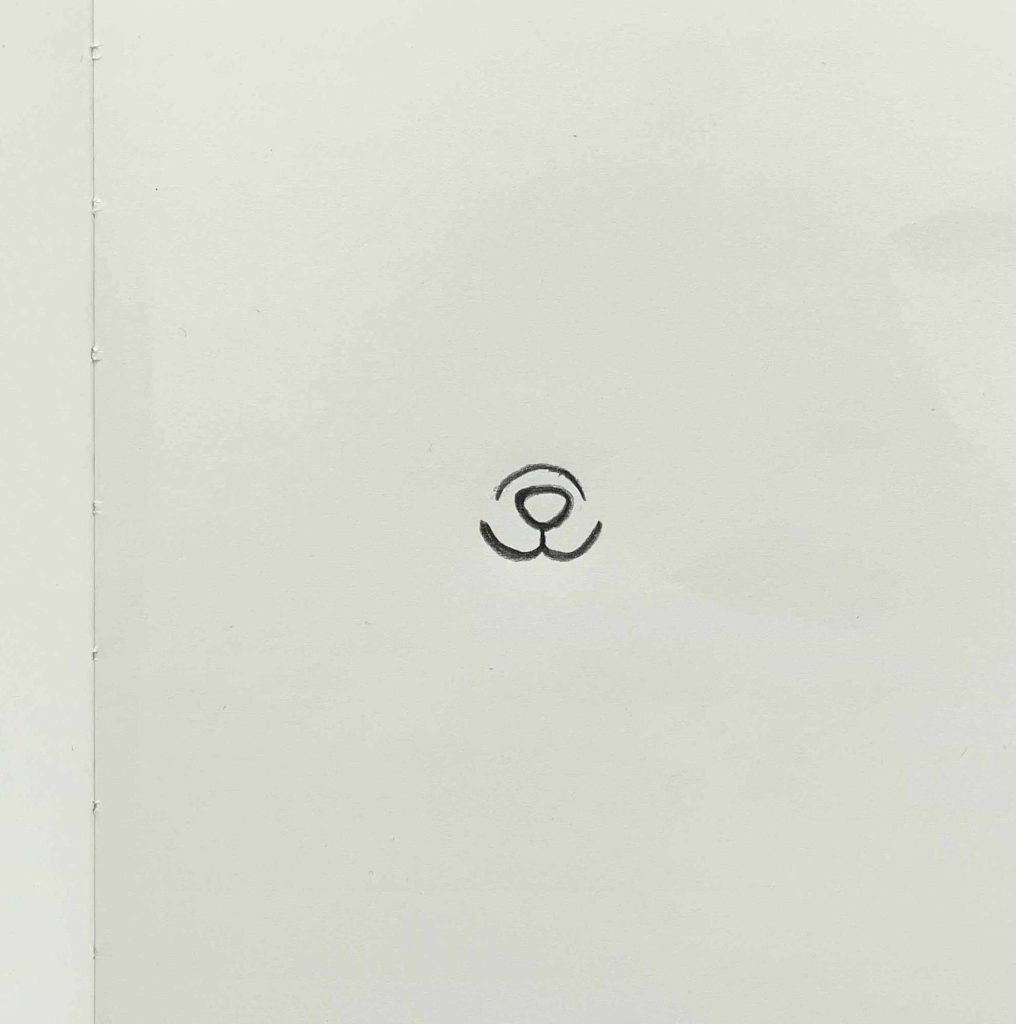
Step 1 – The snout!
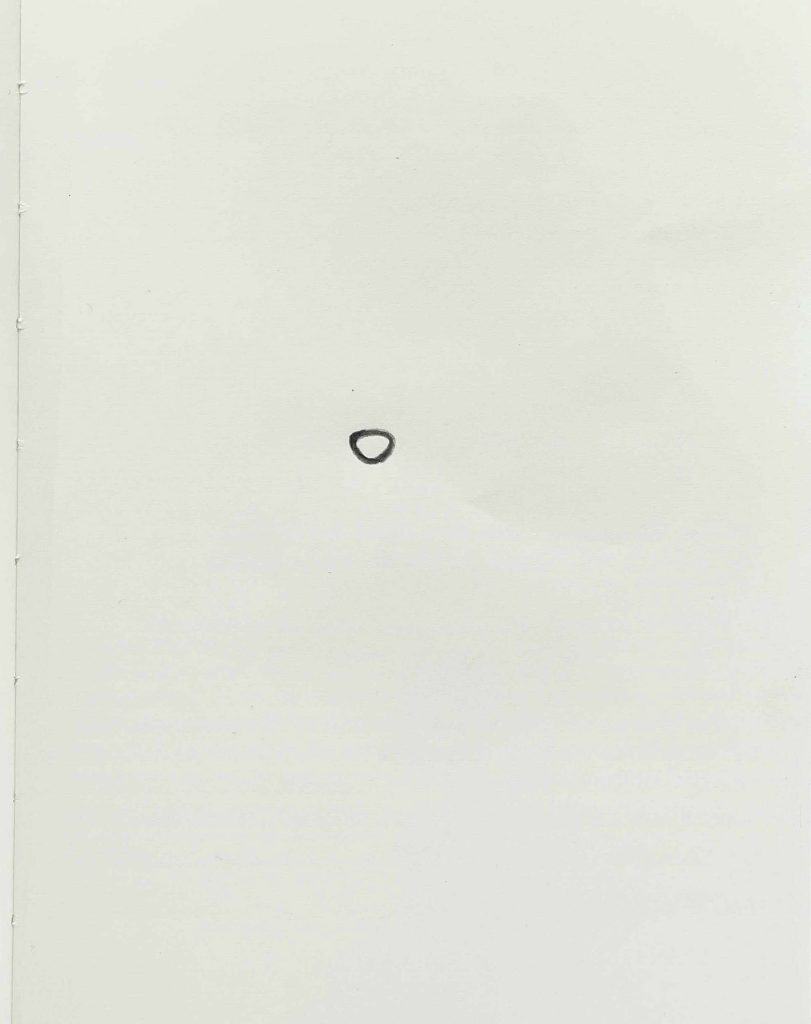
To start drawing the puppy let’s begin from drawing the nose.
Draw a round edged triangular shape. Cute for boop!
Pro tip: You can use black pencil to sketch (if you will later on color it with paint), and in this case don’t press too hard. If you are working with colored pencils or markers, make confident lines 🙂
Step 2
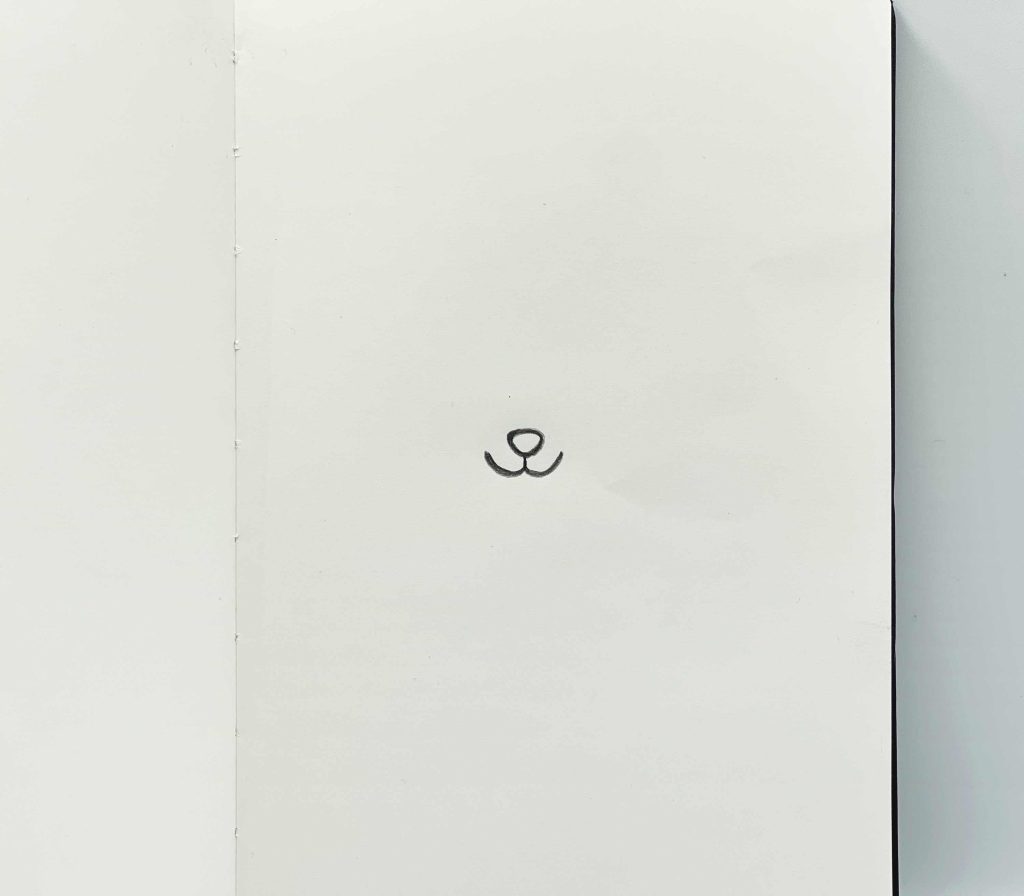
Draw one vertical line from the middle point of the triangle. And then, draw two curvey “U”
shaped lines on two ends of the vertical line.
Step 3
Keep a little gap and draw an upside down “U” shaped line on top of the nose keeping a little
gap.
Step 4
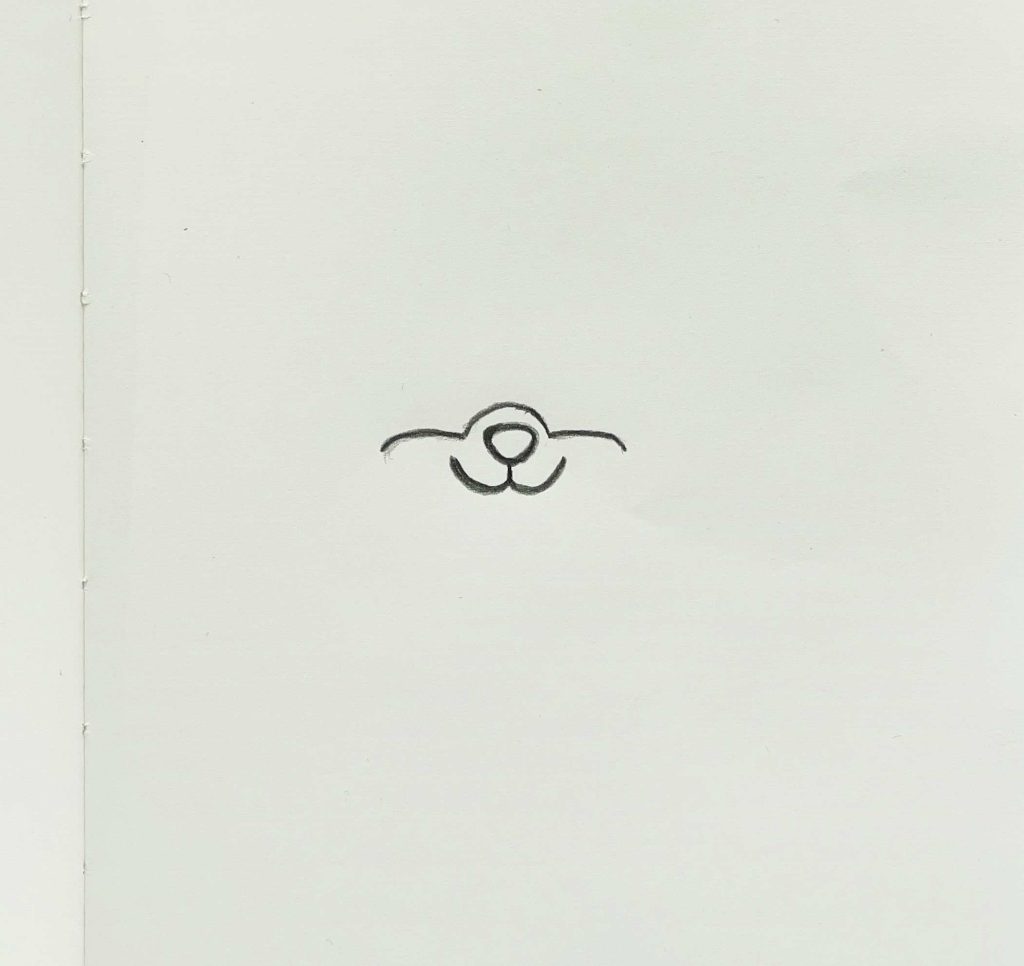
From the ends of the top “U” shaped line draw two two horizontal lines with curved ends.
Step 5 – Drawing chin
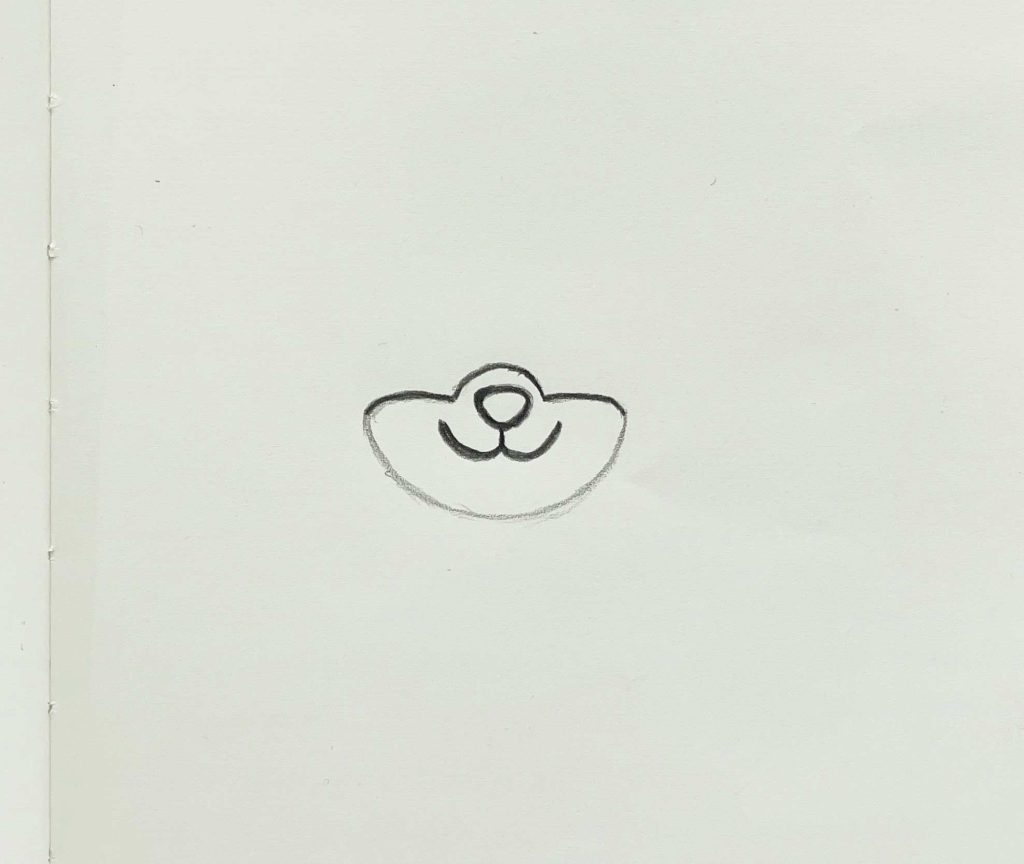
Gently use the pencil to draw a half circular shape from the ends of the two horizontal lines to connect them.
It is important to not make this line bold as we will correct it in the next step!
It’s our puppy chin!
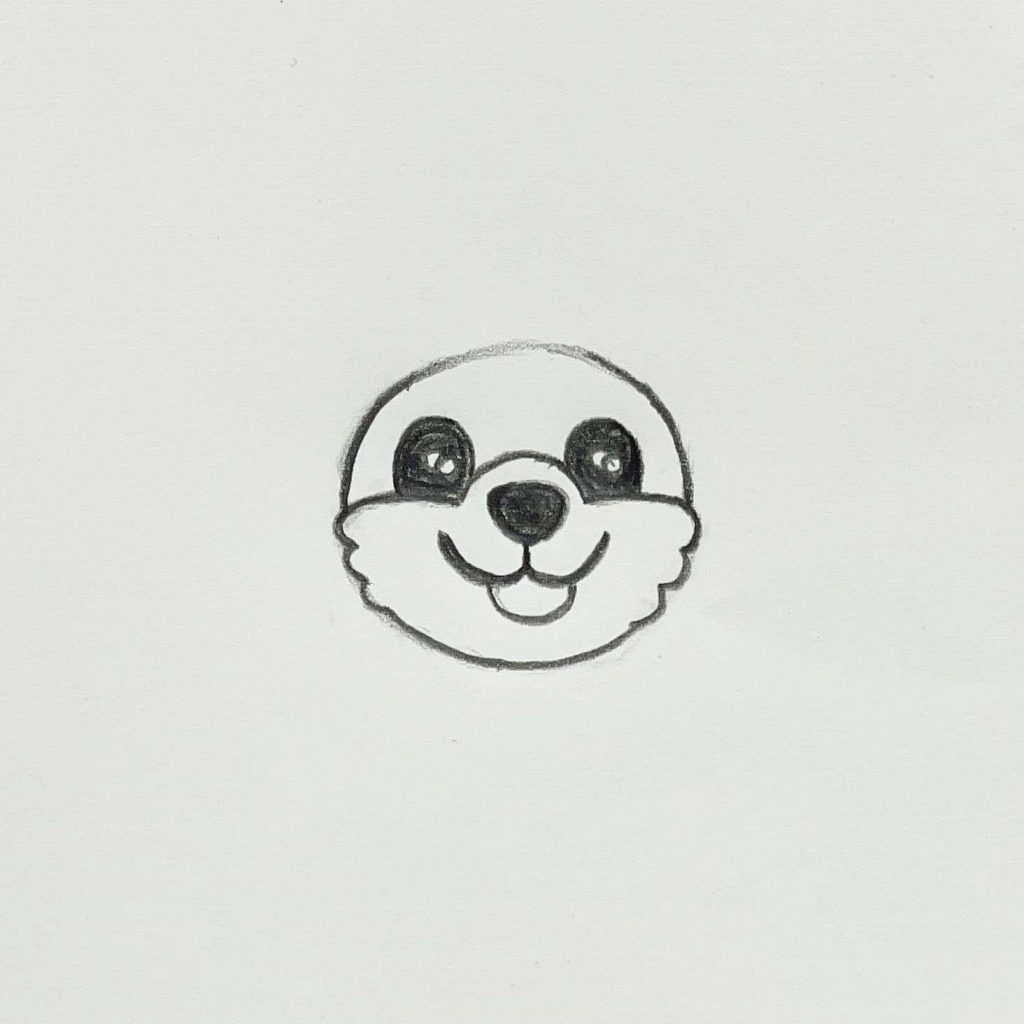
Step 6 – Drawing cheeks
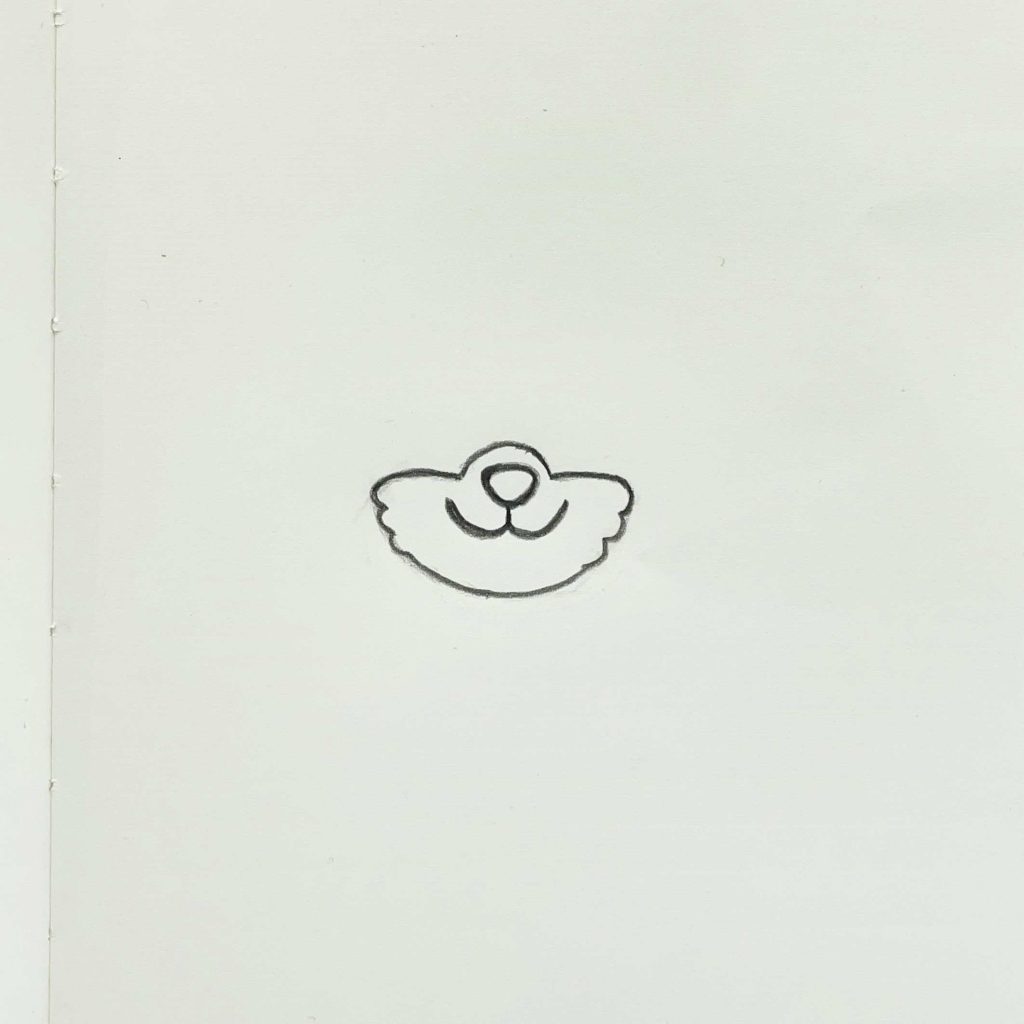
On two sides of the half circular shape draw three round edged zigzag lines.
Erase what’s left extra from step 5.
Cute cheeks!!
Step 7 – Drawing the tongue
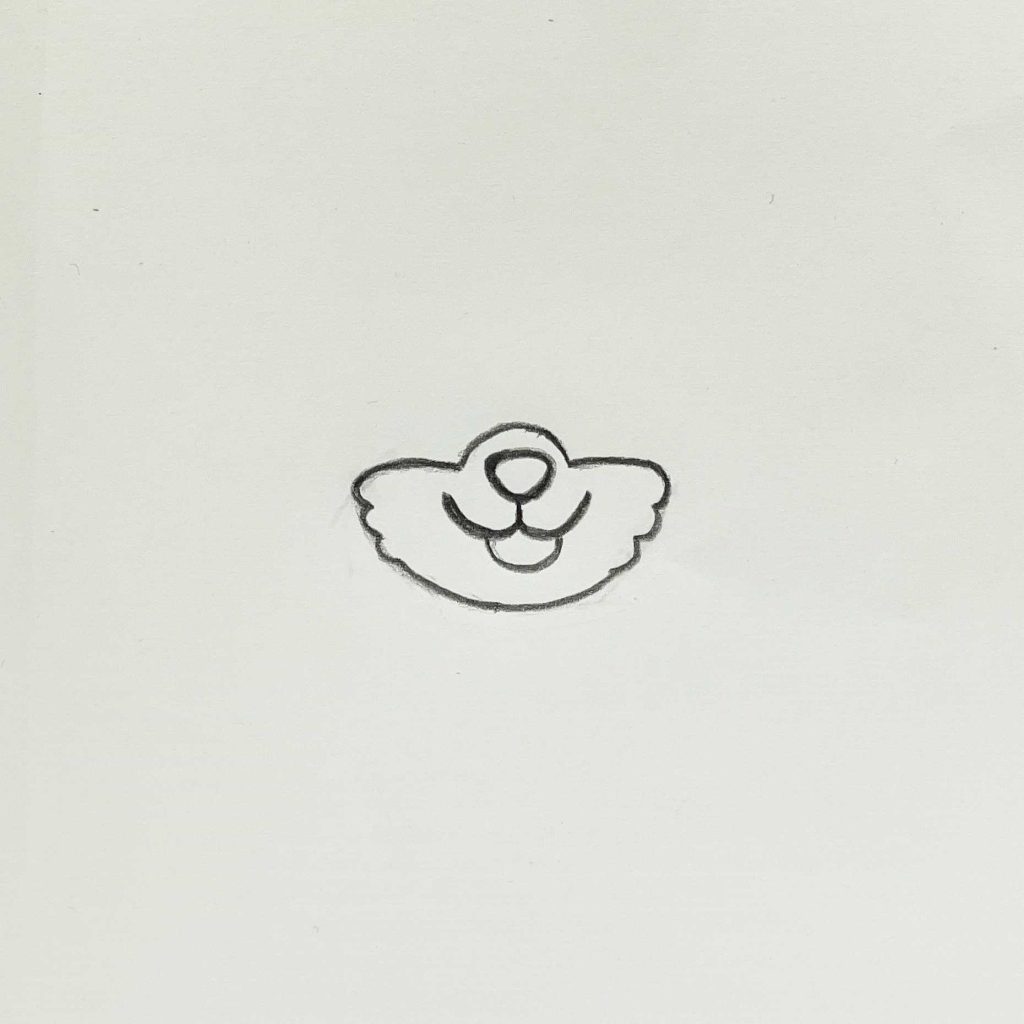
Draw another “U” shaped line to create the tongue!
Don’t make it straingt U, tilt it on one side a bit to make it look more natural.
Step 8 – Eyes
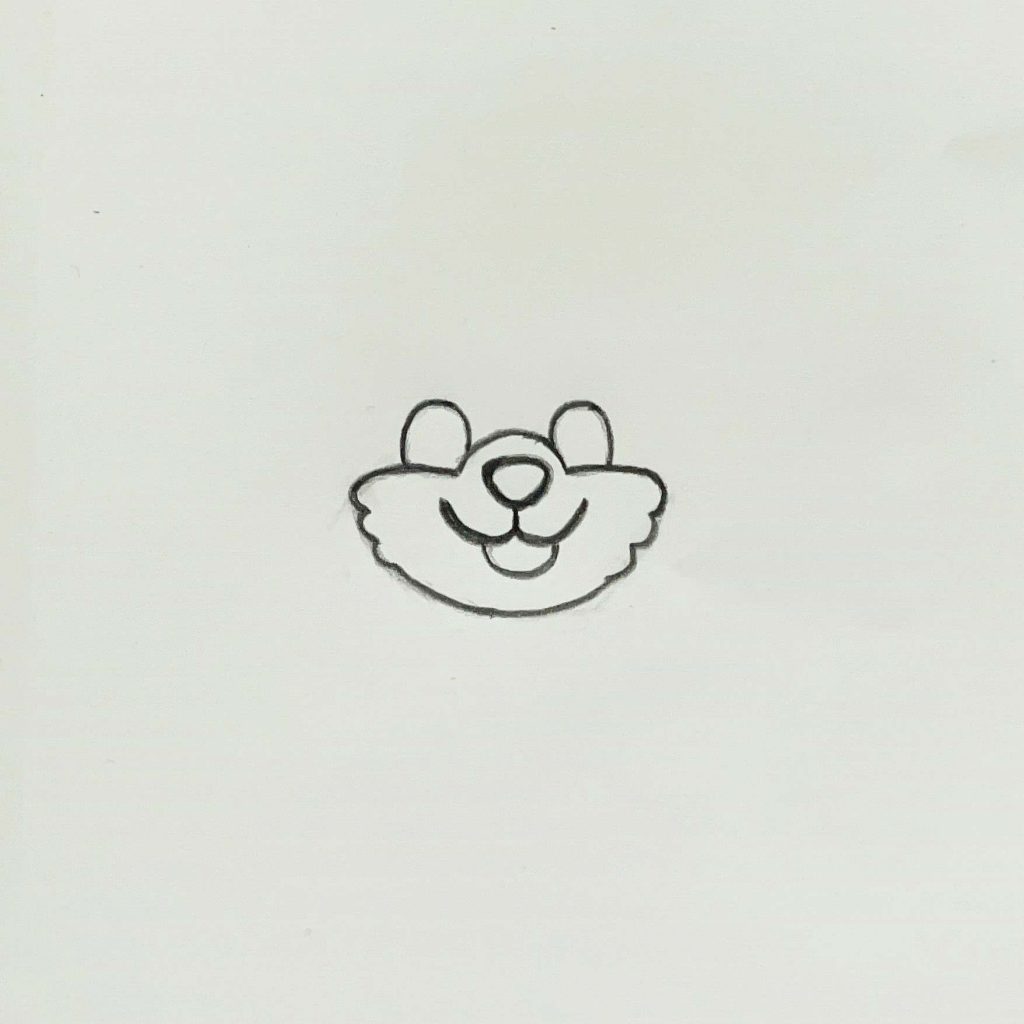
Draw two upside down “U” shapes over the two horizontal lines.
Step 9 – Pupils
Draw the pupils in the eyes.
There are two small circles, it will create a more cartoon style eye.
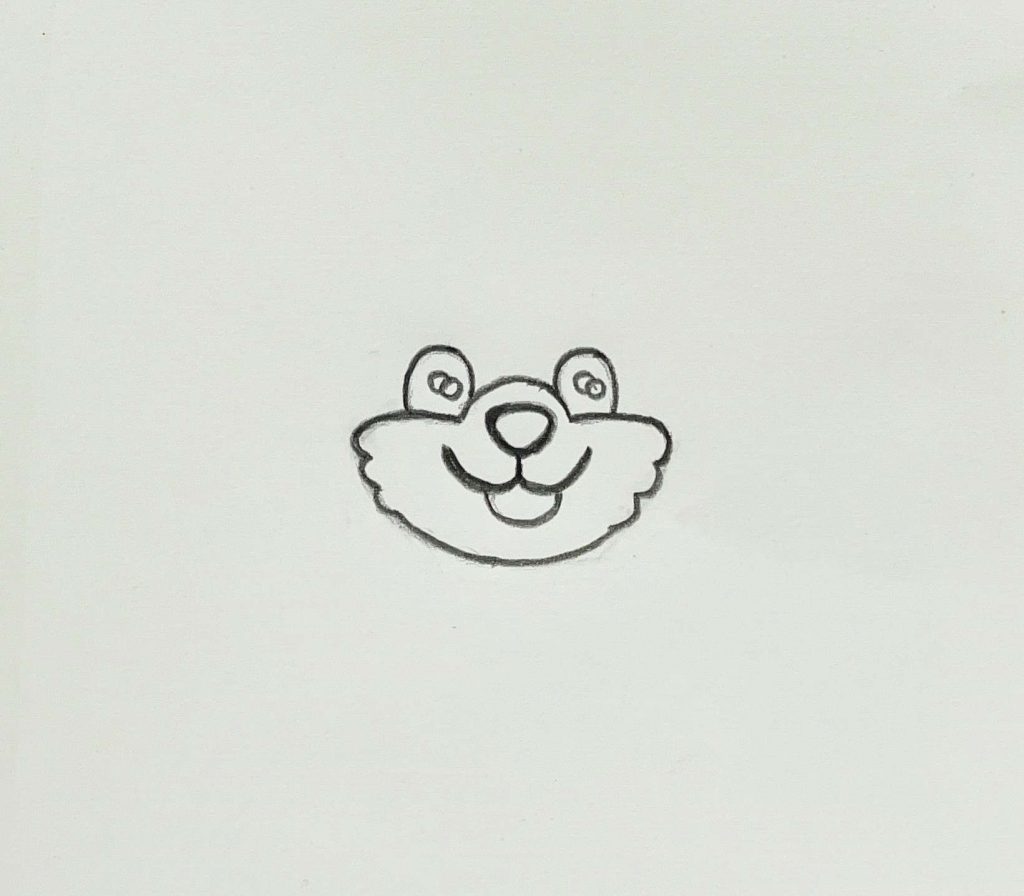
Step 10
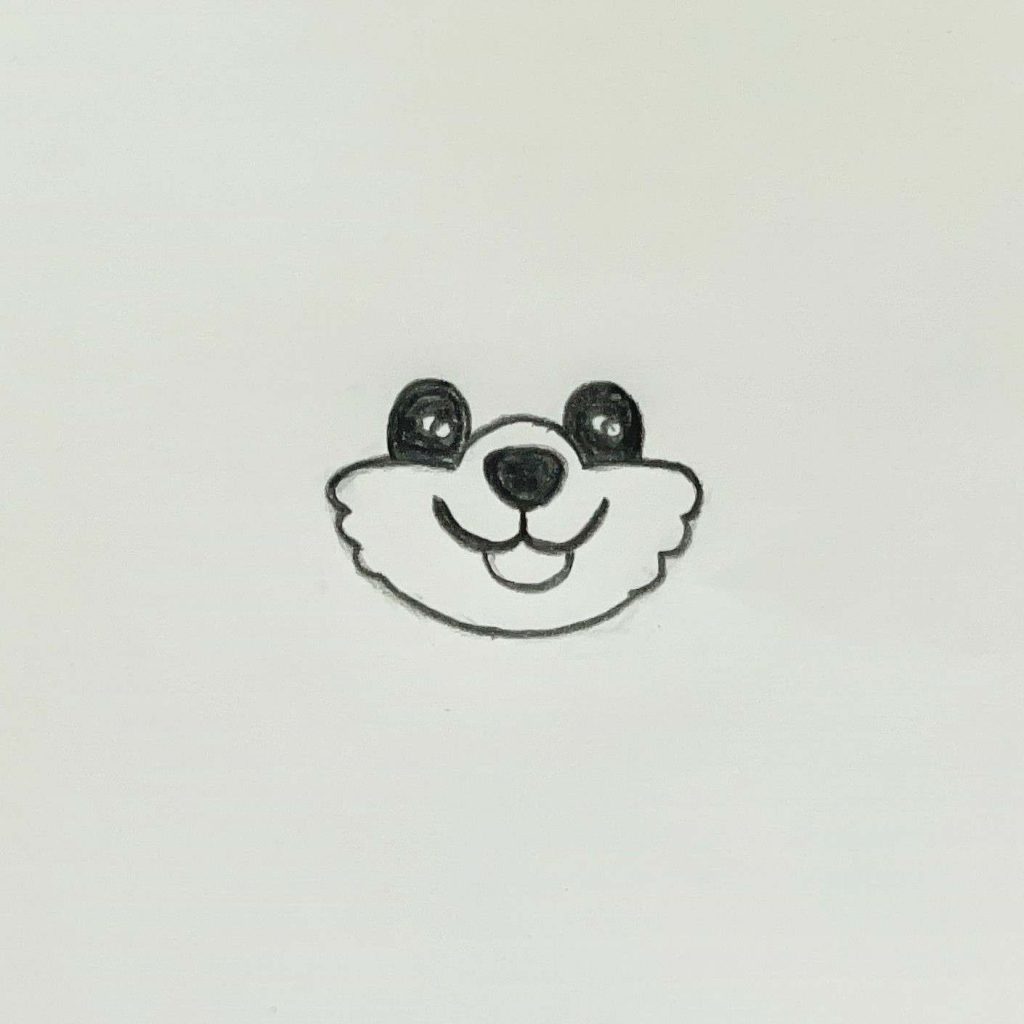
Full in the eyeballs using the pencil.
You can use black color or any other colors, if you want to make your dog’s eyes in a different color.
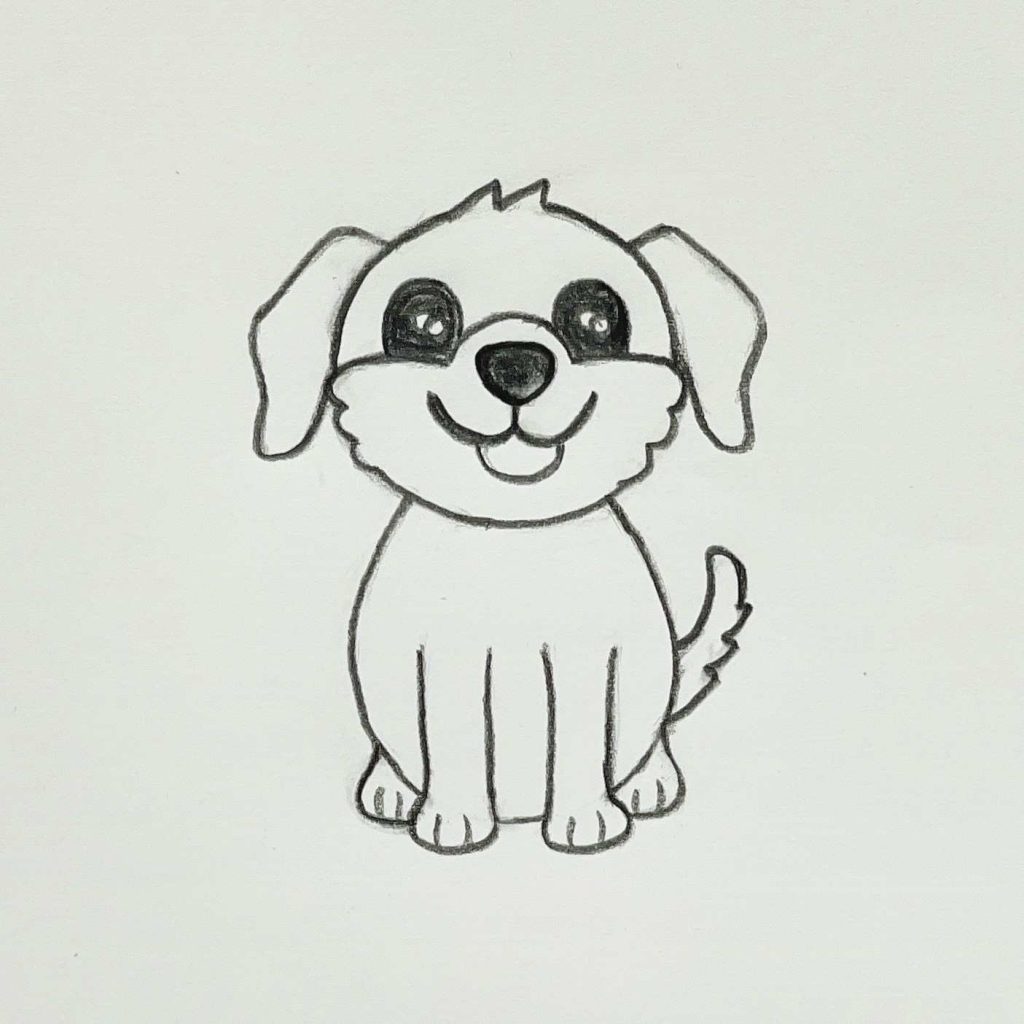
Step 11 – Head
Draw a half circular shapes round head for the puppy.
Step 12
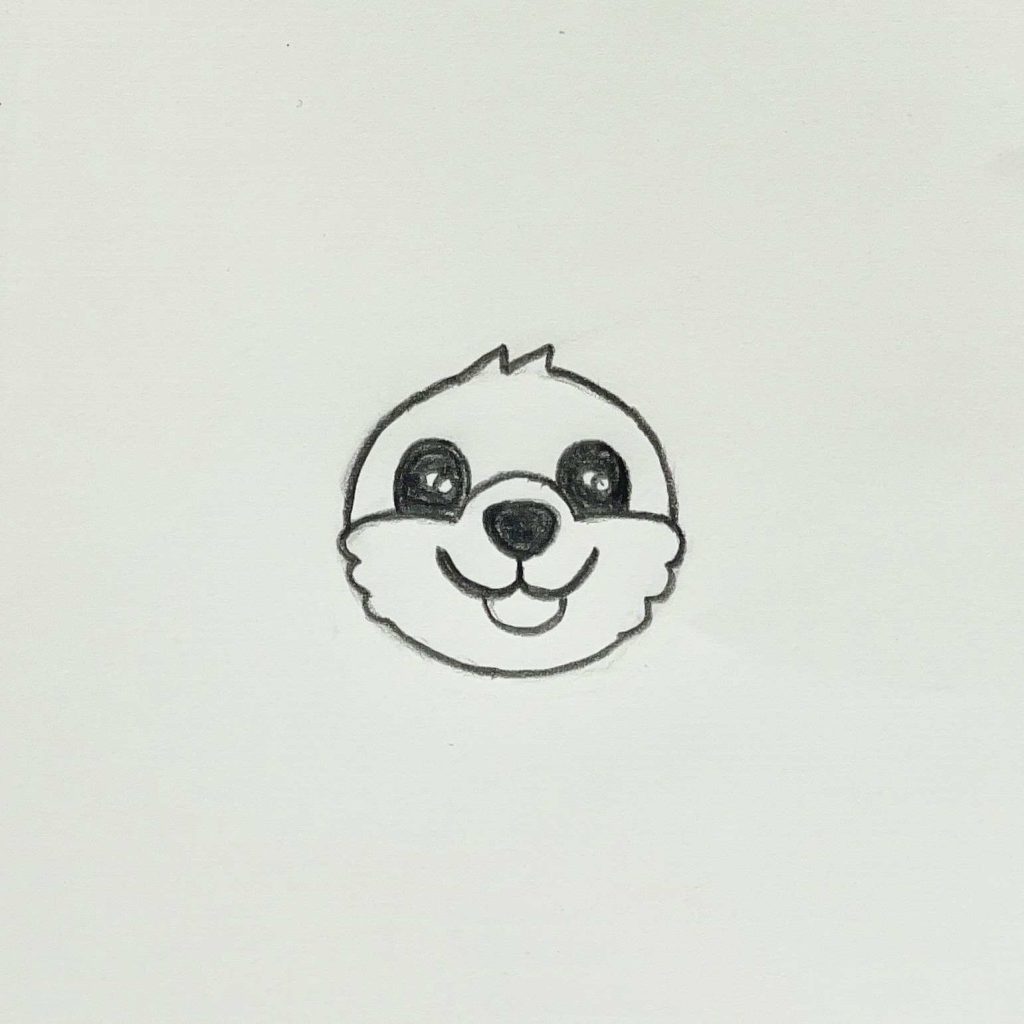
Erase a little portion from the middle of the head and draw two zigzag lines.
Step 13 – Ears
Draw the puppy’s ears. You can use any easy shape you want for the ears.
Start from the top to make it easier.
Even if it is your first time and the ears won’t be perfectly symmetrical or identical it is ok. Nature isn’t perfect either! So it will be more realistic 🙂
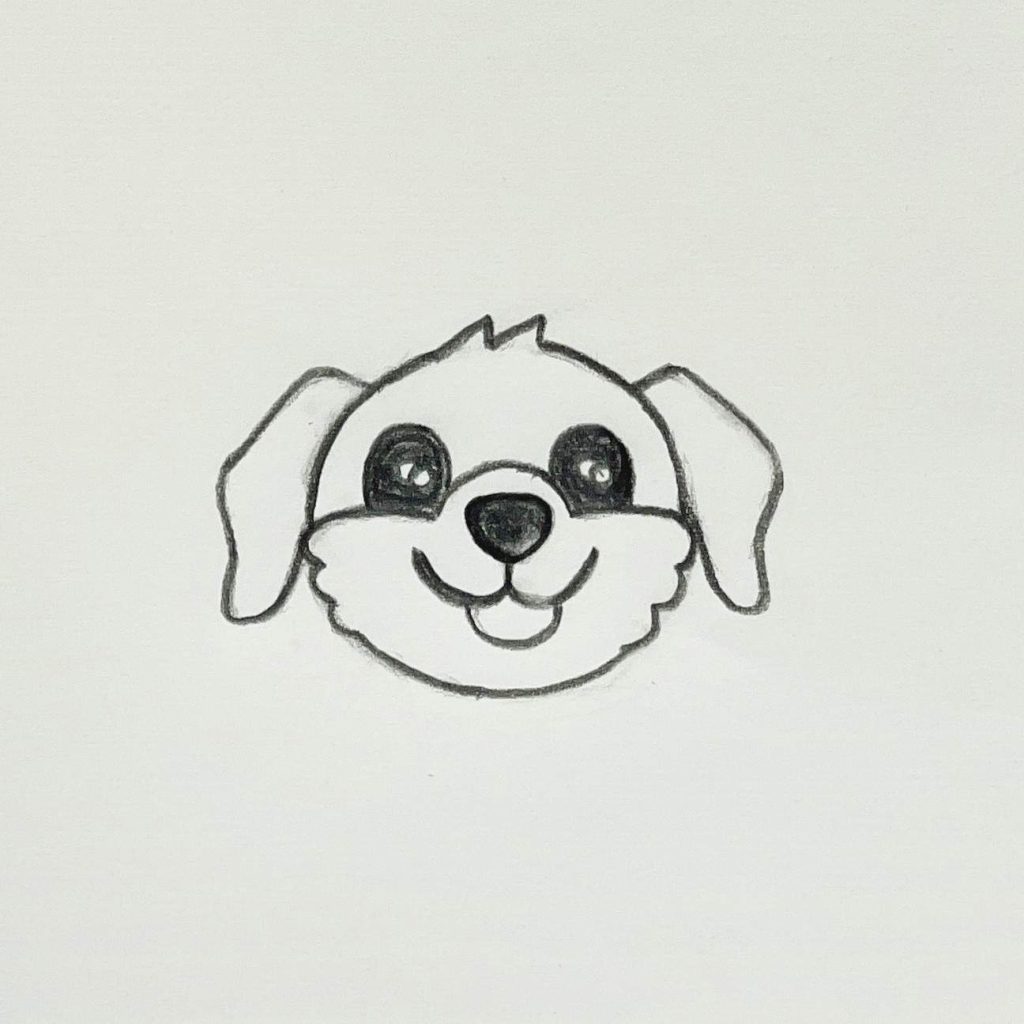
Step 14 – Drawing dog’s body
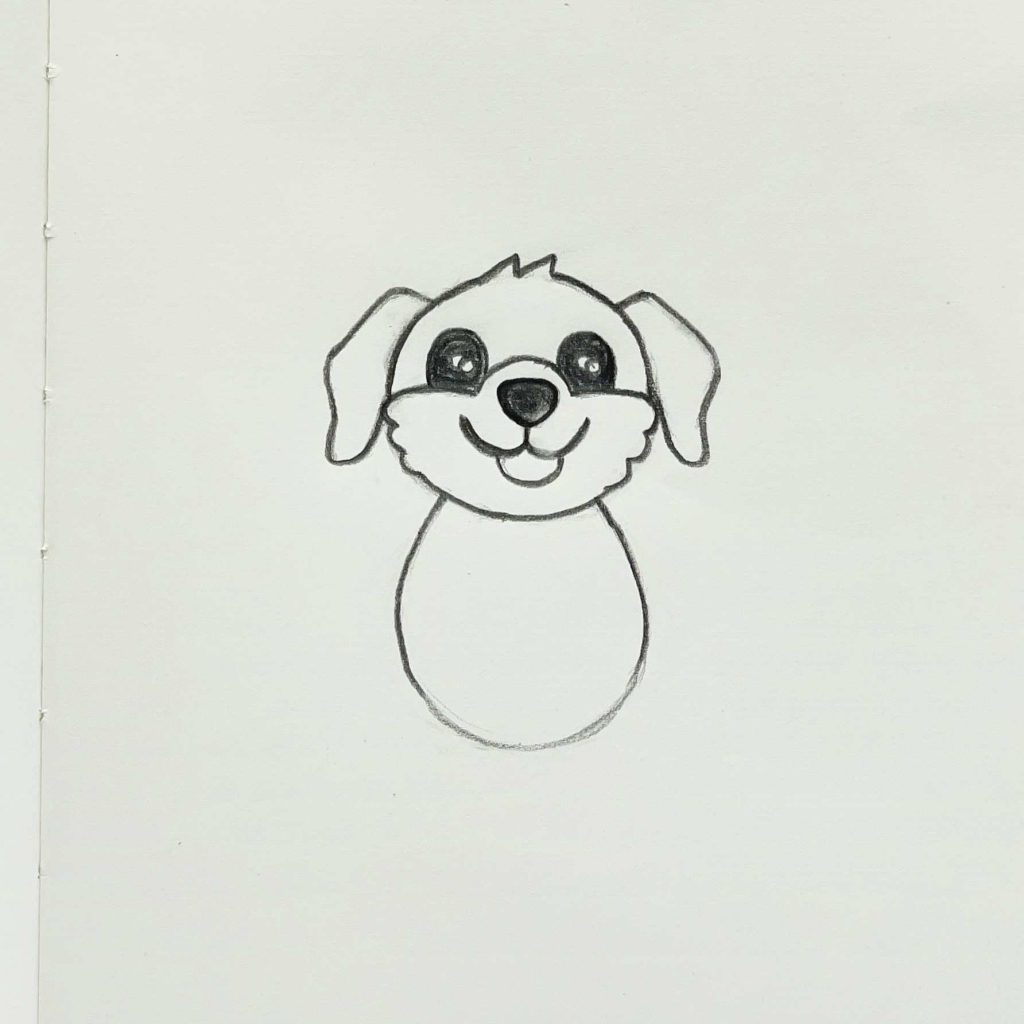
Draw an egg shaped body for the puppy.
Don’t press too hard on the pencil, we will work on some parts later and erase them.
Step 15 – Start drawing the paws
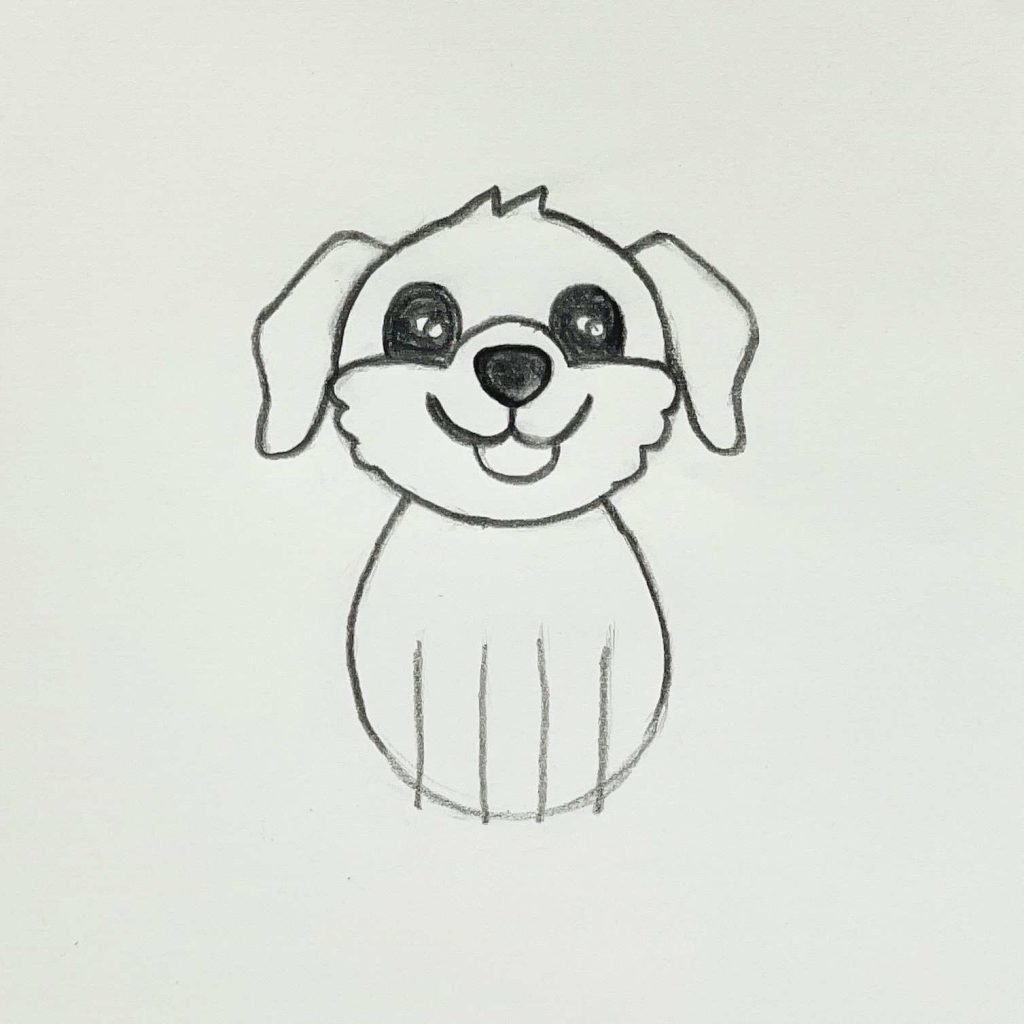
Draw 4 parallel vertical lines on the bottom part of the puppy’s body.
As much as you can parallel, they don’t have to be perfect. More important that both legs were of the same width.
Step 16
Erase the lines and draw the paws. Each paw can look its direction.
Step 17
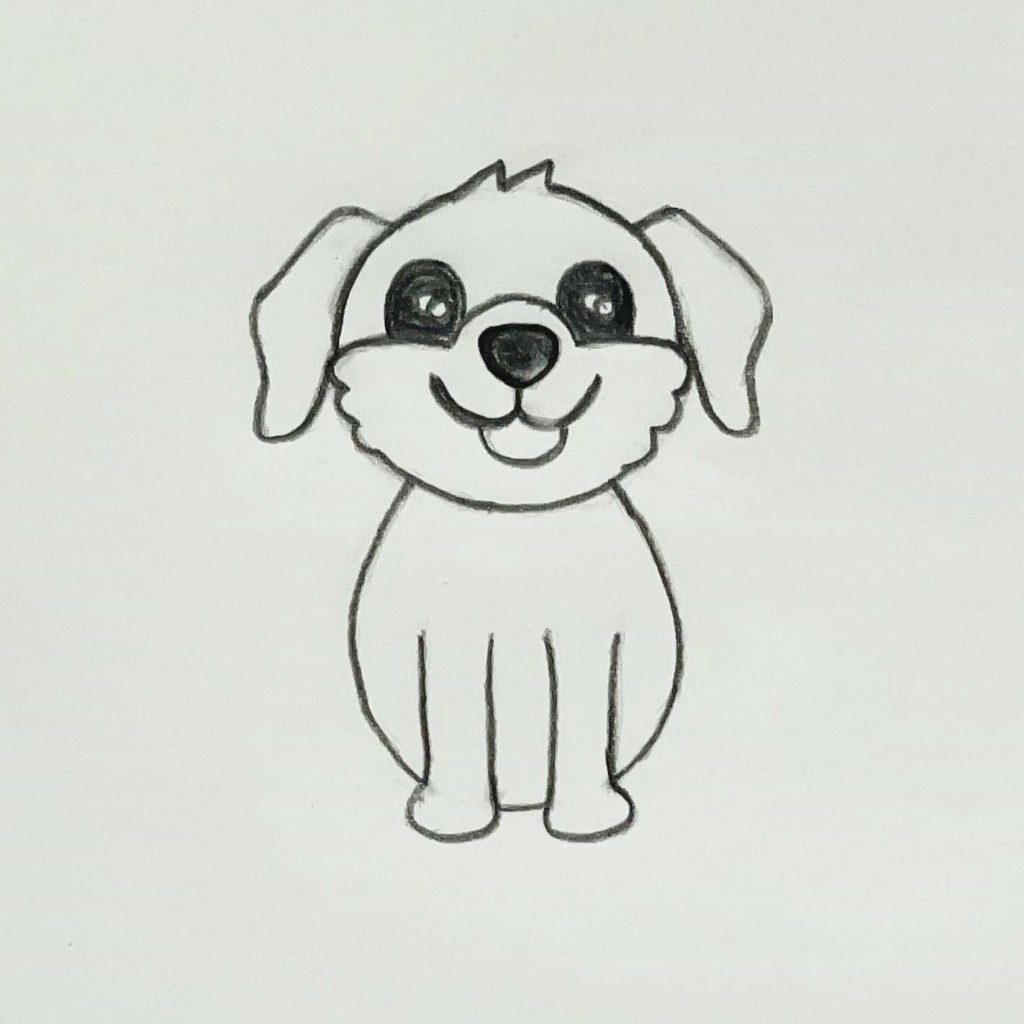
Draw the two hind legs for the puppy. Use an easy circular shape to draw the paws.
Step 18 – Tail
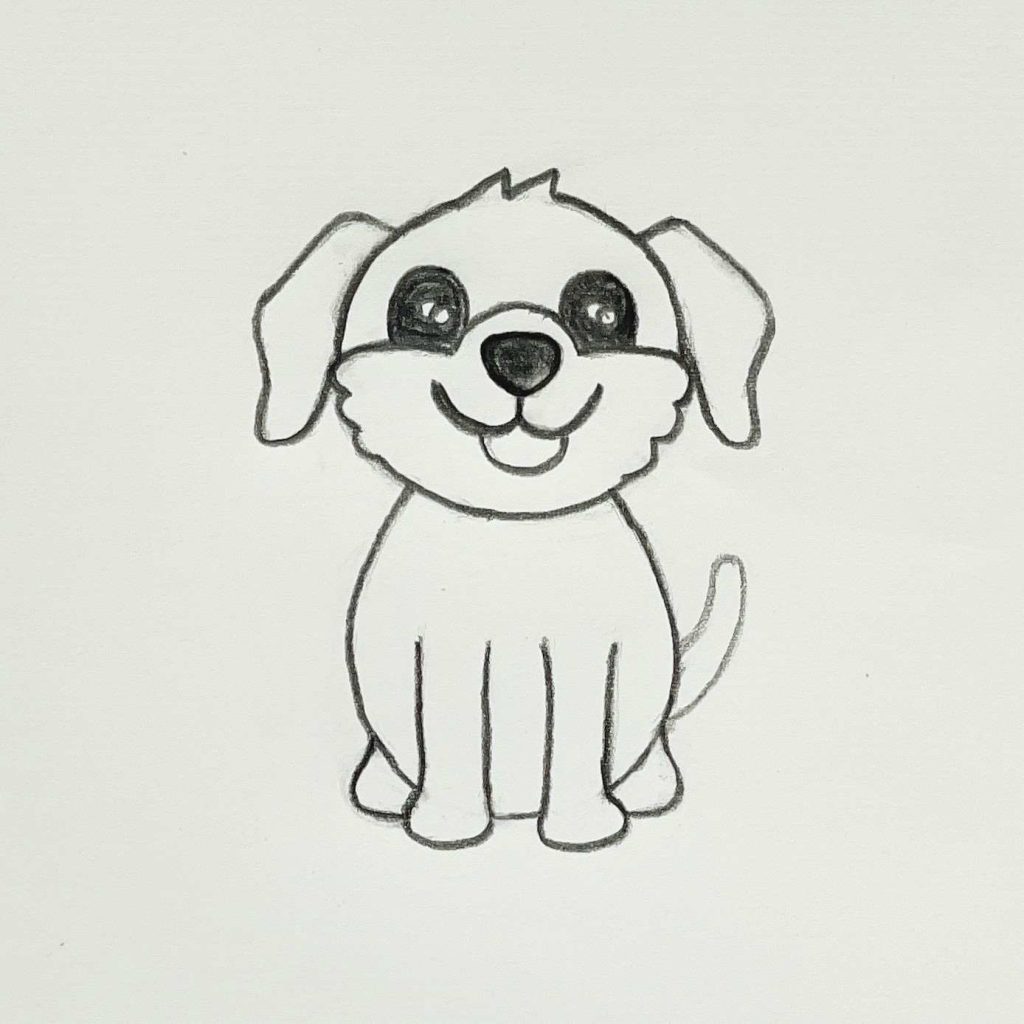
Use the HB pencil to gently draw the tail shape.
Step 19
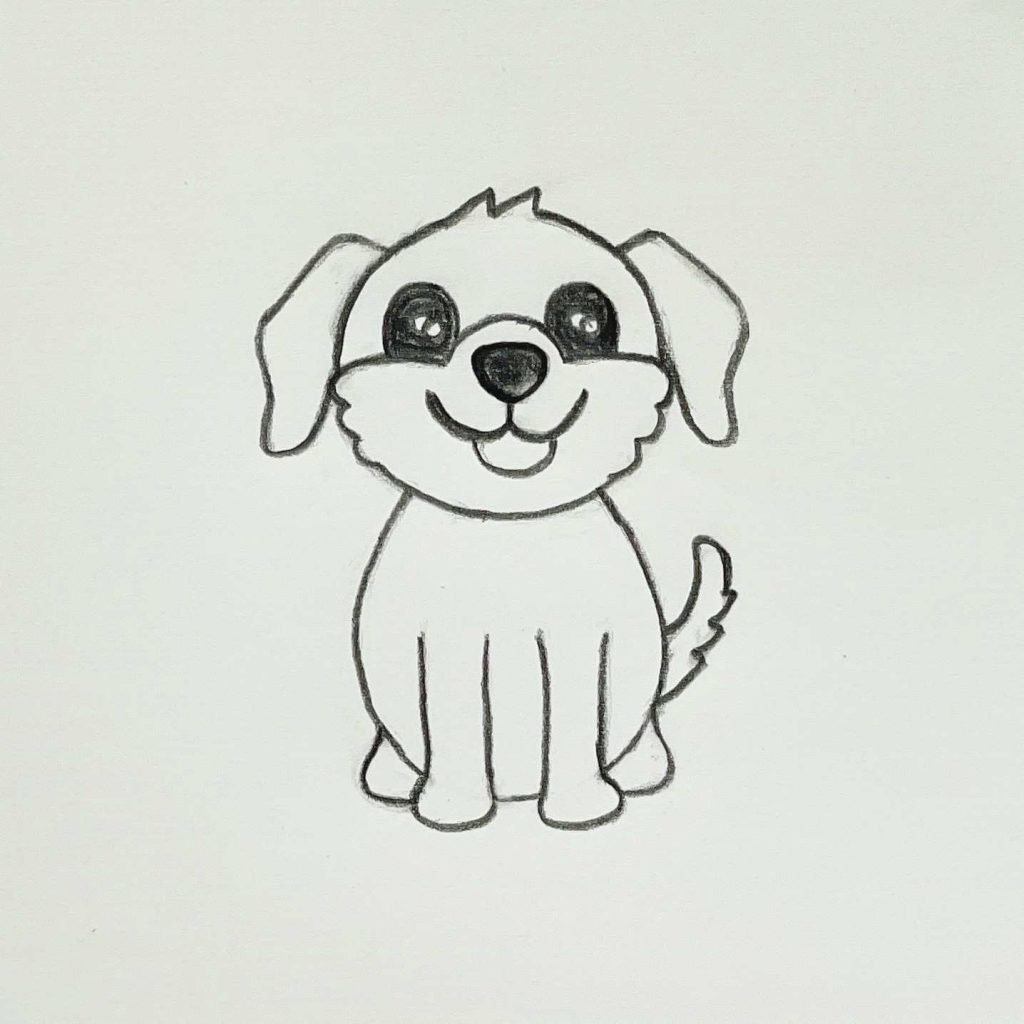
Draw squiggly lines on the tail to add details.
Looks like a happy tail!
Step 20
Draw 2 lines on the paws to add details.
Step 21
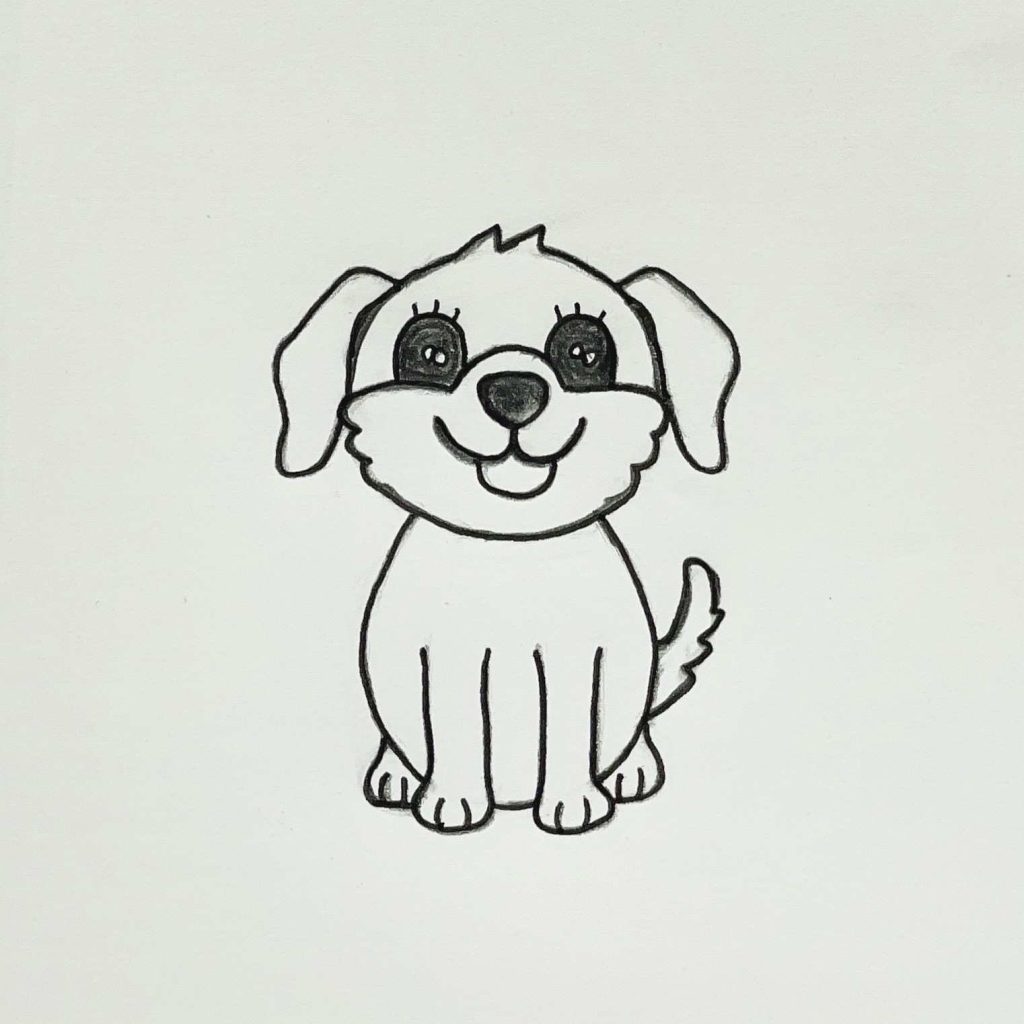
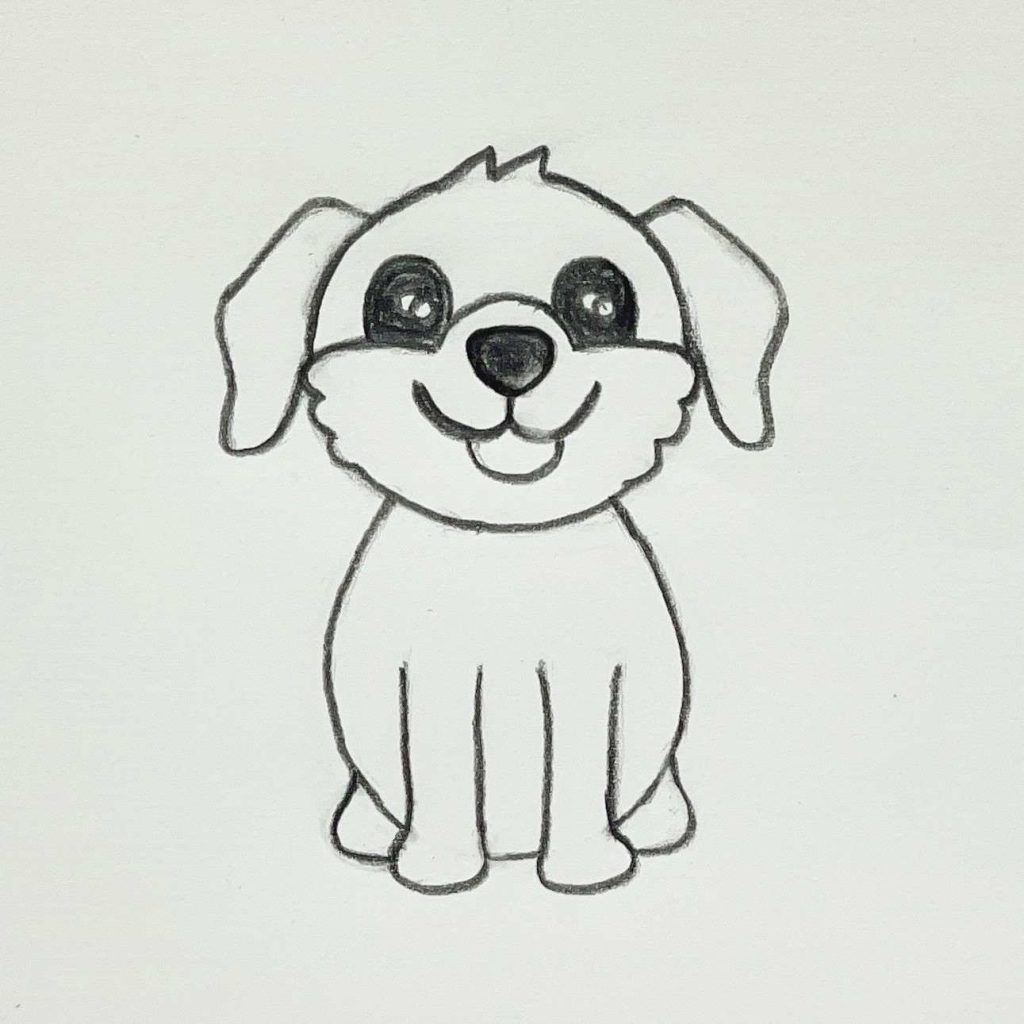
Draw three vertical lines above the eyes if you want to add some eyelashes to the puppy.
Step 22
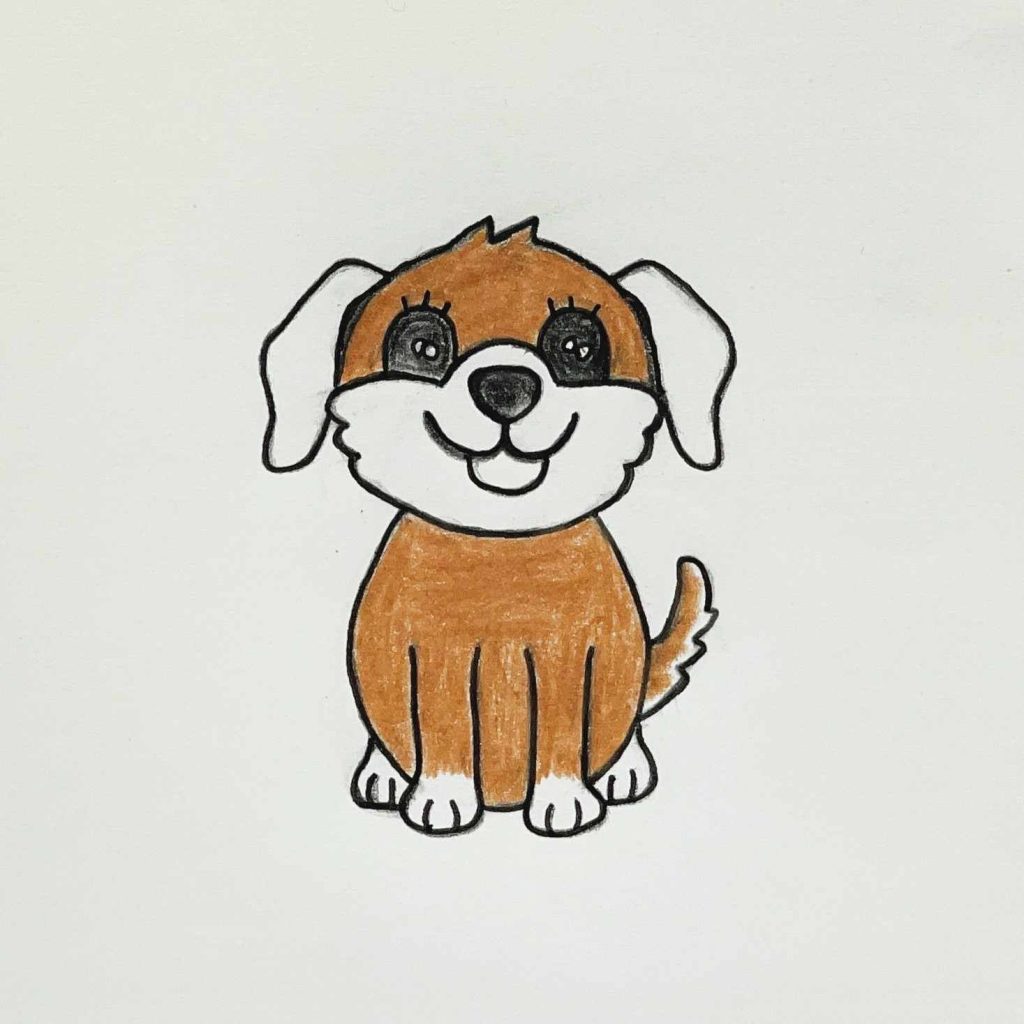
Use a brown crayon or pencil or paint to in the body, legs and top portion of the puppy’s head.
Step 23

Use the same brown shape to fill the puppy’s ears outline.
Step 24
Use and orange or peach shade to color the puppy’s tongue.
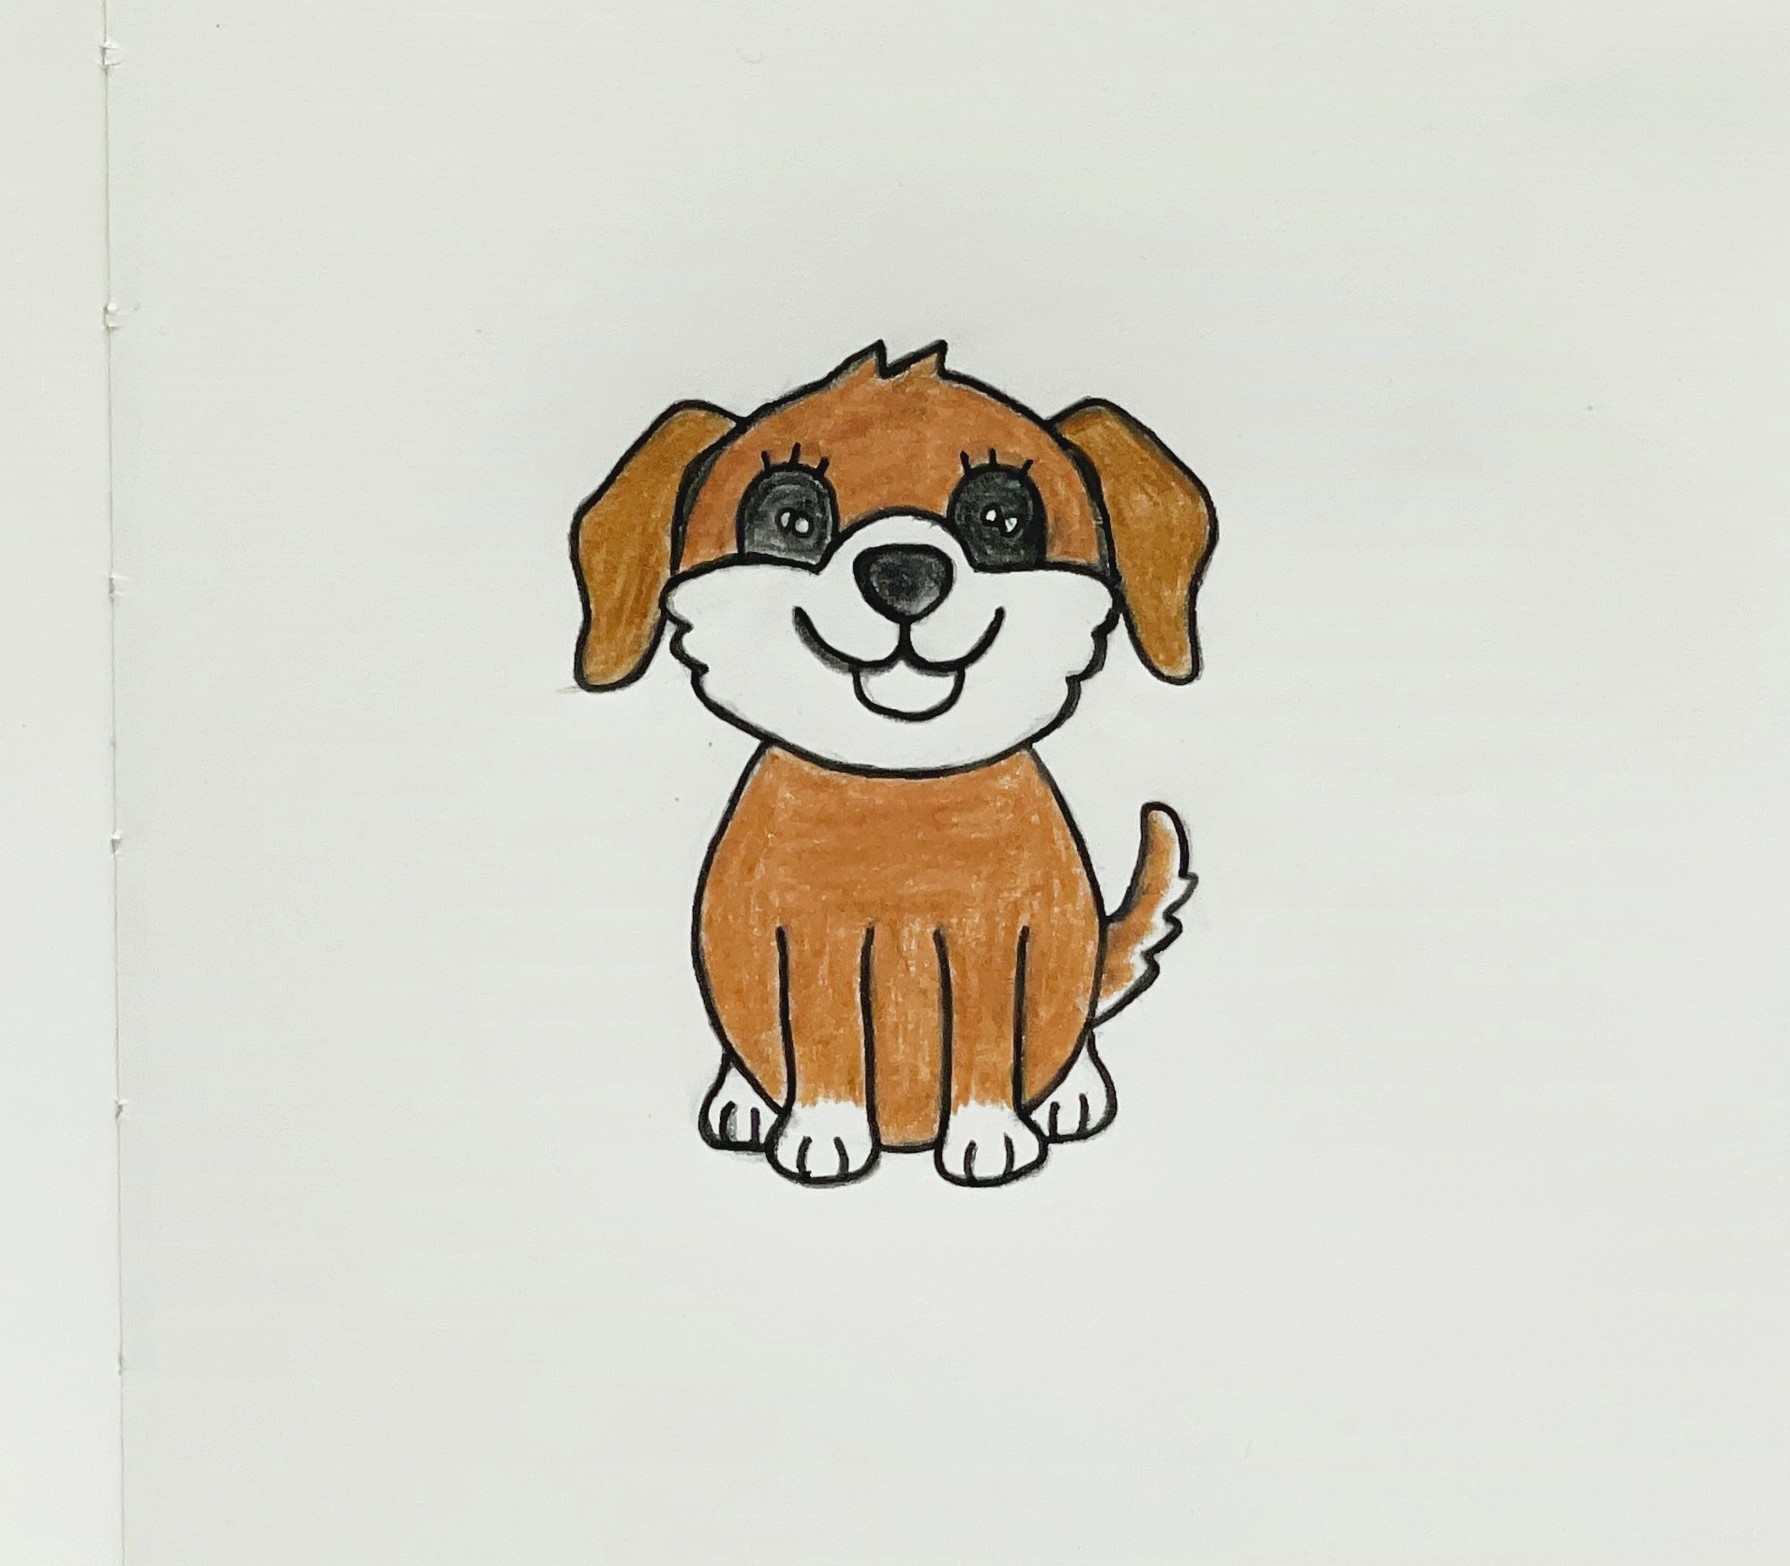
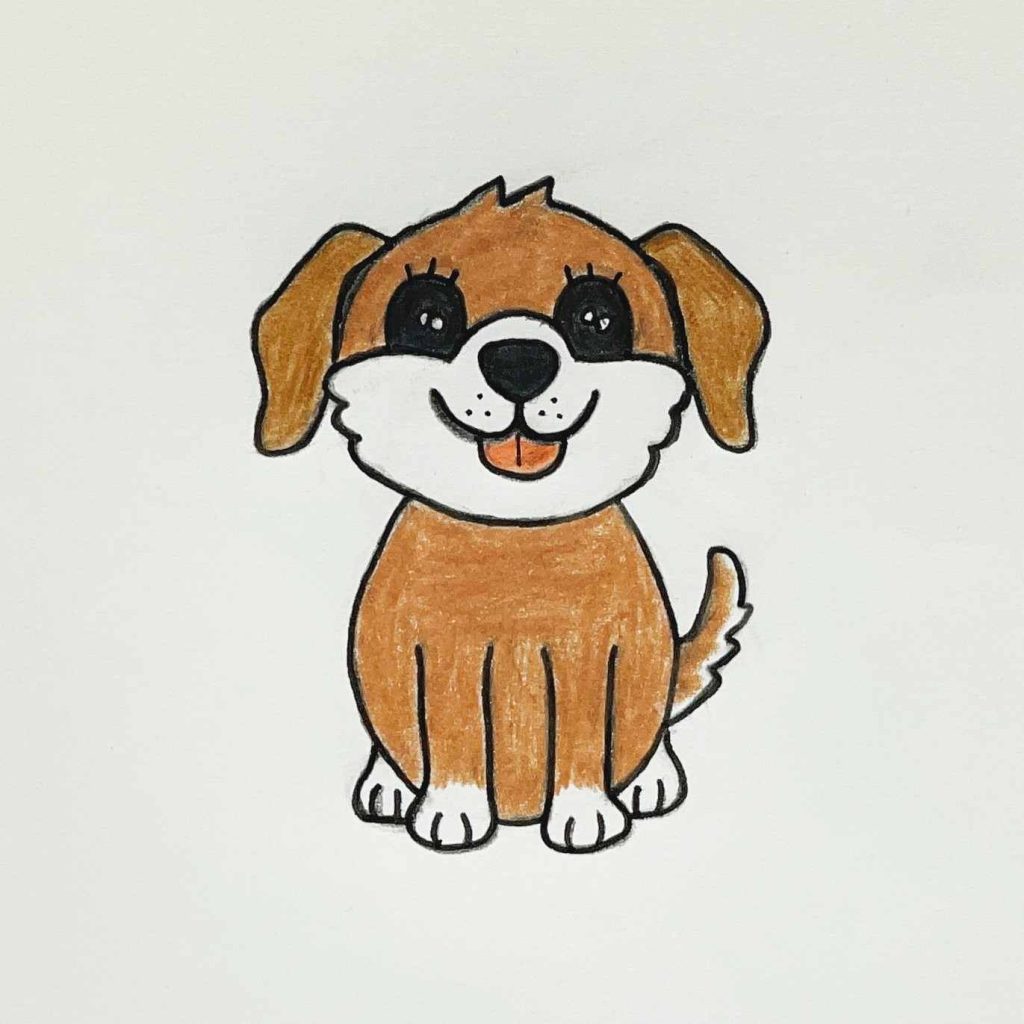
Final Easy Dog Painting for Beginners
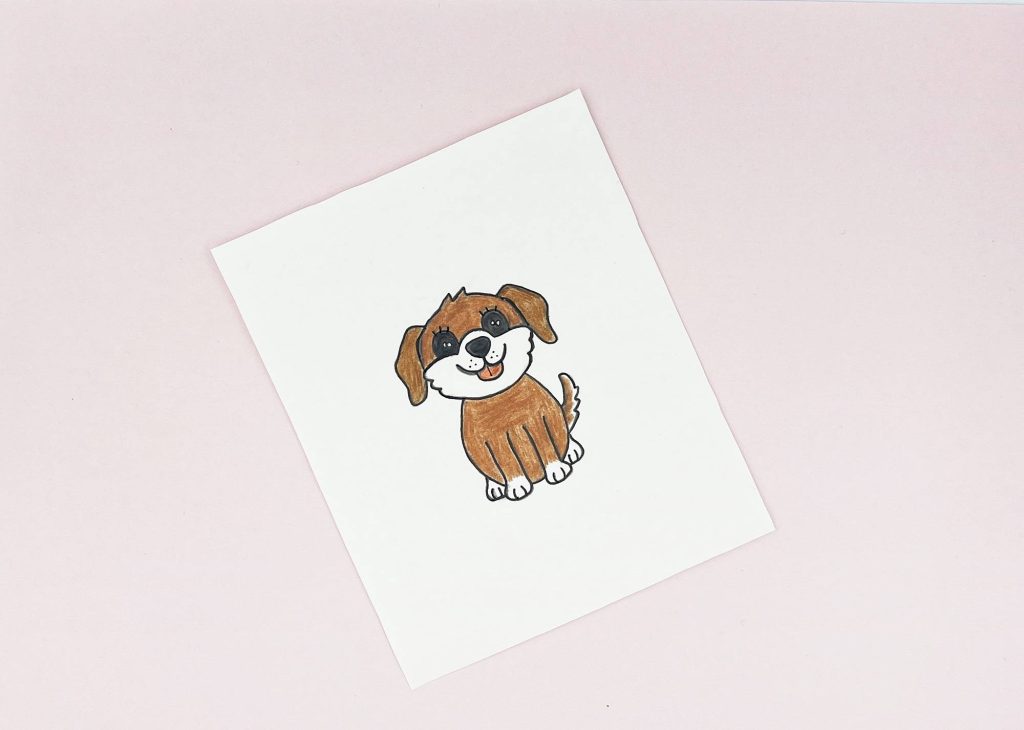
You can recreate this cute dog portrait it in any sizes and colors!
If you will choose acrylic painting, these colors will help you:
- brown
- black
- peach or pink
what is the easiest dog to draw?
A cartoon style dog portrait is the easiest to draw. It is also easier to draw dogs without detailed fur and too many fine details. It is harder to draw from memory so grab a photo of your pet or a reference from a movie, tutorial or cartoon.
I hope now you are ready to make some dog portraits and even have fun with paw-painting!
Did you try to draw and paint the dogs or puppies yet? How was it?

Masha Eretnova, born in 1991, is a Chiang Mai-based certified teacher, artist, and blogger with 20+ years of personal painting journey.
She started painting and drawing very early and is now an international abstract artist and educator passionate about acrylic painting, gouache, and crafts.
Her works are part of international exhibitions and contests, including ArtlyMix (Brazil), Al-Tiba 9 (Spain), Exhibizone (Canada), Italy, and many more.
Besides her artistic pursuits, Masha holds a post-grad diploma in Teaching Film Photography and 2 music school diplomas: piano and opera singing.