Last Updated on May 29, 2026 by Masha Eretnova
If you’re searching for a butterfly craft that is equal parts science lesson and keepsake art project, you’ve landed in exactly the right place.
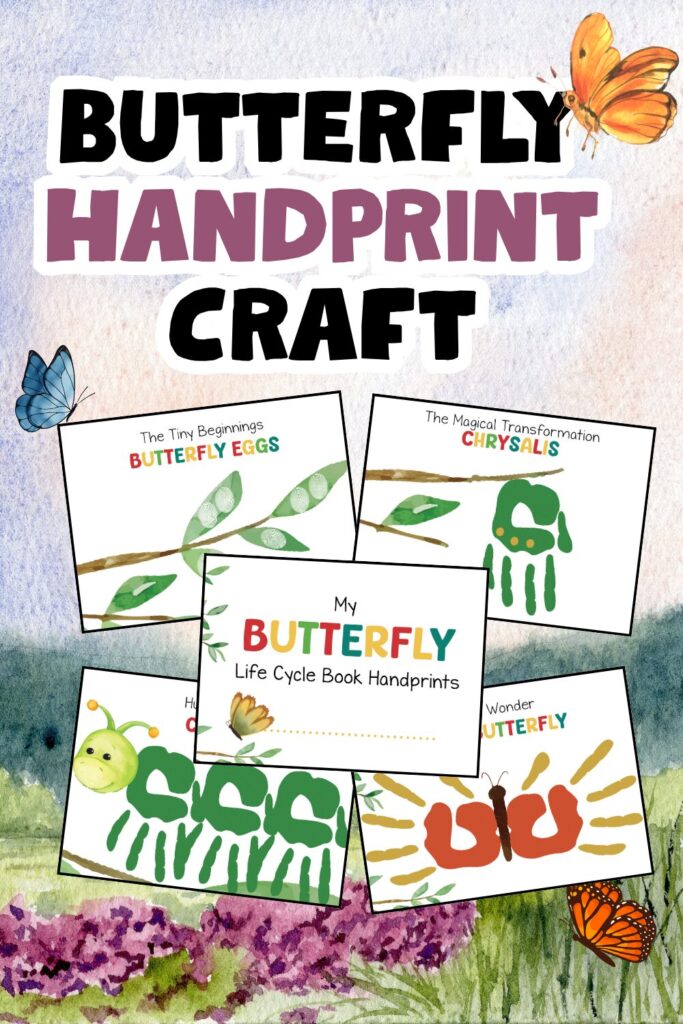
This butterfly handprint craft takes children through all four stages of the butterfly life cycle — eggs, caterpillar, chrysalis, and adult butterfly — using nothing more than paint, little hands, and fingertips. The result is a gorgeous mini book that kids (as well as parents and teachers) will be so proud of.
Whether you’re a teacher planning a spring science unit, a parent looking for summer crafts to fill the holidays, or a homeschooler weaving art into nature study, this project works beautifully for all ages from toddlers to early elementary.
Grab the free printable PDF at the bottom of this post and let’s get started!
What Is the Butterfly Life Cycle Handprint Book?
This printable set is an 8-page guided activity book that walks children through metamorphosis — the incredible journey from tiny egg to soaring butterfly — using their own handprints and fingerprints to create each stage.
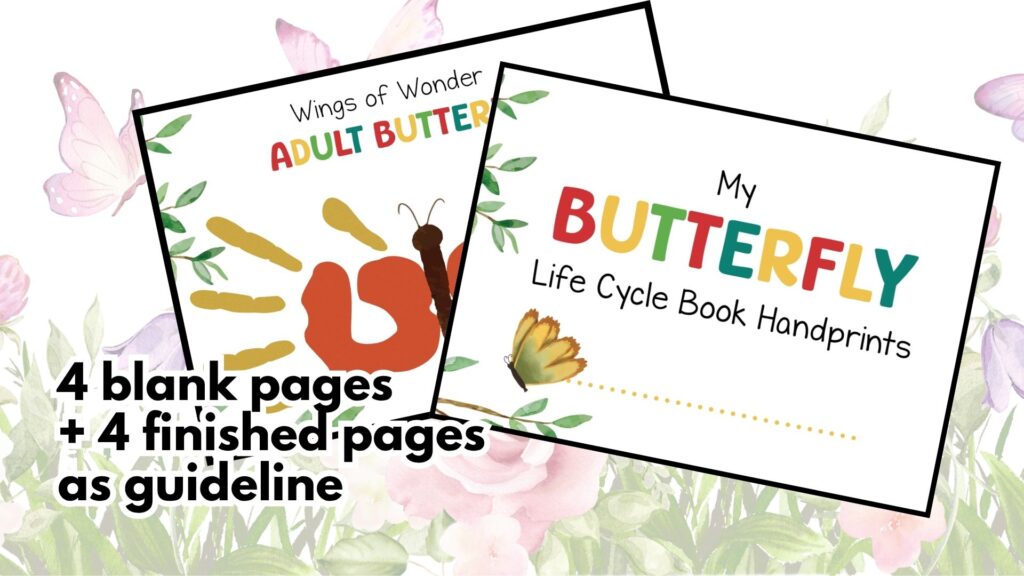
The set includes two versions of every life cycle stage: a blank template page with a beautiful illustrated background ready for handprints, and a full-colour example page showing exactly how the finished handprint should look.
This makes it easy for children to look at the example and recreate it on their own blank page, building both creativity and confidence.
The four stages are:
Stage 1 — The Tiny Beginnings: Butterfly Eggs.
Children press their fingertips onto illustrated green leaves sitting on a watercolour branch. Each oval fingerprint becomes a tiny butterfly egg nestled among the foliage — just like in nature! The example page shows clusters of white fingerprints glowing against the green leaves.
Stage 2 — Hungry and Growing: Caterpillar.
This is the most satisfying page of the whole book!
Children stack their handprints sideways in a row — palm and fingers pressed together — to build the body of a caterpillar. The fingers create the caterpillar’s little legs, and a sweet illustrated caterpillar head (complete with wobbly antennae and big dark eyes) leads the way. The example shows bright green handprints forming a chunky, cheerful caterpillar body.
Stage 3 — The Magical Transformation: Chrysalis.
A single cupped handprint — fingers pointing downward — captures the hanging, teardrop shape of a chrysalis suspended from a branch. Dot fingerprints in gold or yellow add detail along the body.
The illustrated branch and leaf provide all the context needed. This is the quietest, most meditative page of the book, and children love that one handprint can tell such a big story.
Stage 4 — Wings of Wonder: Adult Butterfly.
The grand finale! Two handprints pressed facing each other — thumbs touching in the middle — form the butterfly’s four wings.
Finger prints in a contrasting colour fan outward to suggest the delicate outer wing edges. A sweet illustrated butterfly body sits between the palms, completing the creature.
The example uses warm terracotta for the main wings and golden yellow for the finger details, but children can choose any colours they like.
What You’ll Need — Supplies List
One of the best things about this butterfly handprint craft is that the supply list is wonderfully simple. Here’s everything you need:
- Printer — Any standard home or school inkjet or laser printer. Print in colour to get the full effect of the beautiful illustrated backgrounds.
- Paper — Regular A4 or US Letter paper works well. For a more professional, durable result, use 160–200gsm card stock, especially if children will be pressing wet paint onto the pages.
- Washable paint — Washable tempera or finger paint in green (caterpillar and chrysalis), white or cream (eggs), terracotta or orange-red (butterfly wings), and golden yellow (butterfly finger details). Acrylic paint works too but isn’t recommended for very young children.
- Paint trays or paper plates — For spreading paint flat so little hands can be pressed in evenly.
- Paintbrush (optional) — For painting an even coat of paint onto the child’s hand before pressing, which gives cleaner results than dipping directly.
- Wet wipes or a damp cloth — Essential for quick clean-ups between stages and colours.
- Bowl of water and paper towels — For washing hands between each page.
- Pencil or pen — For writing the child’s name and date on each page — future you will be very grateful.
- Binder, folder, or stapler — To compile the finished pages into a book once dry.
Optional extras for a deluxe version:
- Glitter glue for shimmer on the butterfly wings
- Metallic gold paint for the chrysalis dots
- A simple manila folder as a custom cover
How to Make the Butterfly Life Cycle Handprint Book — Step by Step
Step 1: Print and Prepare
Download the free printable PDF and print all eight pages on your chosen paper. Lay them out in order so you can move through the stages smoothly.
Cover your work surface with a plastic tablecloth or old newspaper — this project is joyful and messy in equal measure.
Step 2: Start with the Eggs
Pour a small amount of white or cream paint onto a plate. Have the child press one fingertip into the paint and then press it onto one of the leaves on the egg page. Repeat to create clusters of two to four fingerprints on each leaf, matching the example page. Clean fingers between colours if needed.
Step 3: Build the Caterpillar
Pour green paint onto a plate. Paint the child’s entire hand — palm and fingers — with an even coat of paint.
Press the hand sideways onto the page with fingers pointing downward, starting just behind the illustrated caterpillar head.
Repeat three times to build the caterpillar’s body, overlapping slightly between prints. The fingers naturally form the caterpillar’s legs. Wash hands well before moving on.
Step 4: Create the Chrysalis
Pour green paint and set up a small amount of gold or yellow paint separately.
Have the child cup their hand slightly and press it downward onto the chrysalis page, fingers pointing down, so the shape mimics a hanging pod.
Once dry, use a fingertip dipped in gold paint to add three dots along the centre of the handprint, just like in the example.
Step 5: Press the Butterfly
This is the most exciting step!
Pour terracotta, orange, or the child’s chosen wing colour onto a plate. Paint both hands fully and press them facing each other onto the butterfly page — thumbs meeting in the middle where the illustrated body sits, fingers fanning outward.
Lift carefully. Once slightly dry, use fingertips in gold or a contrasting colour to press finger prints around the outer edges of the wings for detail.
Step 6: Dry, Compile, and Celebrate
Let all pages dry completely — at least 30 minutes for tempera, longer for card stock.
Stack the pages in order (eggs, caterpillar, chrysalis, butterfly), staple along the left edge, and your butterfly life cycle handprint book is complete! Write the child’s name and age on the cover for a truly special keepsake.

Tips for Classroom & Group Use
For preschool and classroom settings, the best approach is to set up four painting stations — one per life cycle stage — and rotate small groups through each station. This keeps paint colours separate and the process organised.
Use the example pages as a display reference at each station so children can look up and check their work as they go.
Teachers can also talk through the science at each station: “What comes out of these eggs? Why does the caterpillar need to eat so much? What is happening inside the chrysalis?” — turning the art session into a full science conversation.
For a wonderful classroom display, mount the finished butterfly pages on a bulletin board in a circular pattern to show the life cycle loop.
Tips for Home
At home, this project works beautifully as a rainy-day activity, a summer craft to accompany a garden nature walk, or as a special weekend project for any child going through a butterfly unit or just obsessed with bugs.
Do one page per day to build anticipation, or tackle all four stages in one big session with plenty of paint and patience.
The finished book makes a heartwarming gift for grandparents, and the pages are lovely framed individually as nursery art.
Why This Craft Is So Good for Kids
Beyond being genuinely beautiful, this butterfly handprint craft supports a remarkable range of developmental skills.
Fine motor control is practised through careful fingerprint placement and hand-pressing.
Science concepts — metamorphosis, life cycles, insect anatomy — are embedded naturally in the creative process.
Sequencing skills develop as children learn that each stage must come in a specific order.
And there is something deeply meaningful about watching a child realise that their own hand can become a butterfly.
Download Your Free Printable PDF
The full butterfly handprint life cycle book — all 8 pages including both blank templates and illustrated example pages — is available to download for free. Just enter your email address below and the PDF will be sent straight to your inbox.
Perfect for preschool, classroom, and home use — this free printable is one you’ll come back to every spring and summer!
Loved this project? Pin it for later and share with a teacher or parent friend who’d love it too! Check out more butterfly crafts and also bugs and insects crafts
Masha Eretnova, born in 1991, is a Chiang Mai-based certified teacher, artist, and blogger with 20+ years of personal painting journey.
She started painting and drawing very early and is now an international abstract artist and educator passionate about acrylic painting, gouache, and crafts.
Her works are part of international exhibitions and contests, including ArtlyMix (Brazil), Al-Tiba 9 (Spain), Exhibizone (Canada), Italy, and many more.
Besides her artistic pursuits, Masha holds a post-grad diploma in Teaching Film Photography and 2 music school diplomas: piano and opera singing.