Last Updated on June 10, 2026 by Masha Eretnova
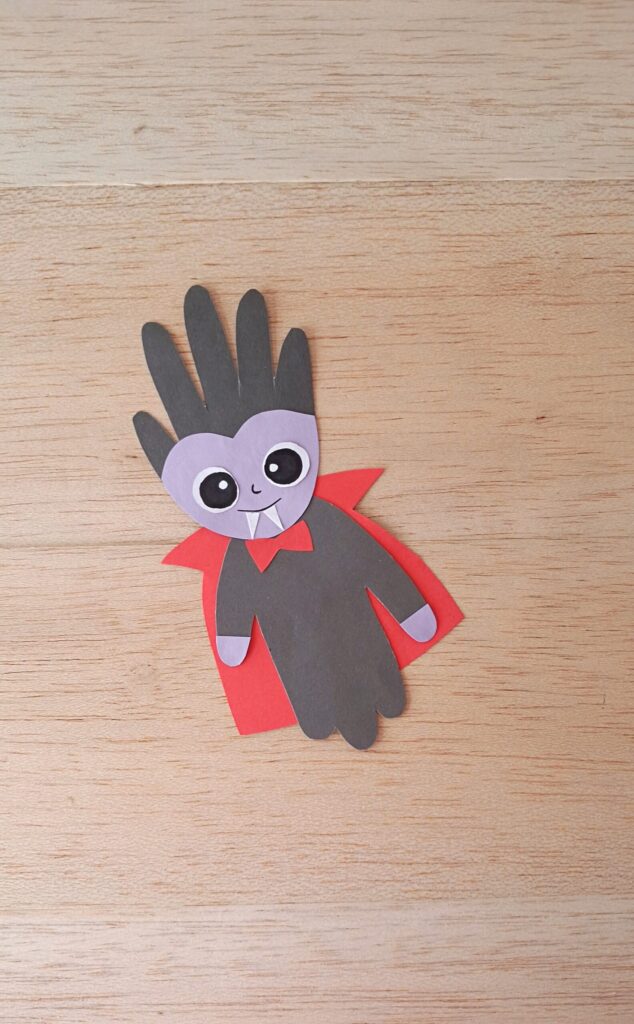
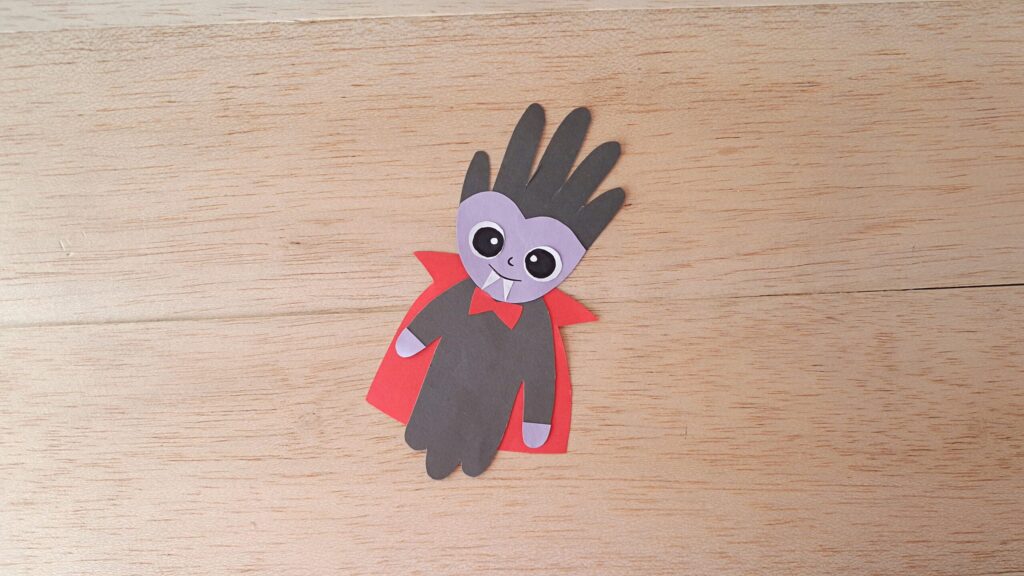
Two traced handprints turn into one little Dracula in this handprint vampire puppet craft.
Fun and quick to finish Halloween craft for kids’ parties, school, and home activity with kids that are about to train scissors and gluing skills.
I love this one for Halloween because it hides a keepsake inside a Halloween decoration. Both handprints come from your child’s actual hand, so the finished Dracula records exactly how small that hand was this October.
My tutorial below covers the right age range, the supplies, all seven steps, and the specific skills this project trains.
What Age Works for This Handprint Vampire Puppet Craft?
This craft suits kids ages 3 to 9, and the handprint base is the reason the range starts so young.
Ages 3 to 4 contribute the most important part: their hands. Trace each hand on the craft paper, cut the pieces out for them, and let them glue. Gluing the eyes, fangs, and bow tie onto a face this size is a manageable job for preschool fingers.
Ages 5 to 7 trace their own hand with a little steadying, cut the larger pieces like the cape and body, and assemble the whole figure. An adult helps with the small fang triangles, which are fiddly for beginner scissor skills.
Ages 8 to 9 finish the project start to end. Hand them the template and the paper stack and let them work. The only step worth checking is the head placement, since the face needs to sit on the palm before the hair fingers make sense.
Tracing a small child’s hand also makes this a strong group project. A classroom of traced hands turns into a wall of vampires, and every single one looks different because every hand is different.
Supplies You Need
- Colored craft papers (black, light purple, red, white)
- Template
- Pencil
- A pair of scissors
- Craft glue
- Markers (black)
The template includes every pattern: both handprint shapes, the heart-shaped head, the cape with its pointed collar, the bow tie, the eyes, the fangs, and the two small half-circle hands. Black paper handles both handprints, light purple covers the face, hands, and eye backing, red takes the cape and bow tie, and white supplies the fangs and eye highlights.
If you want the handprints to come from your child’s real hand instead of the template pattern, trace directly on the black paper. The template handprints work when you need uniform sizing for a group.
How to Make the Handprint Dracula Puppet
Step 1: Trace and Cut the Pieces
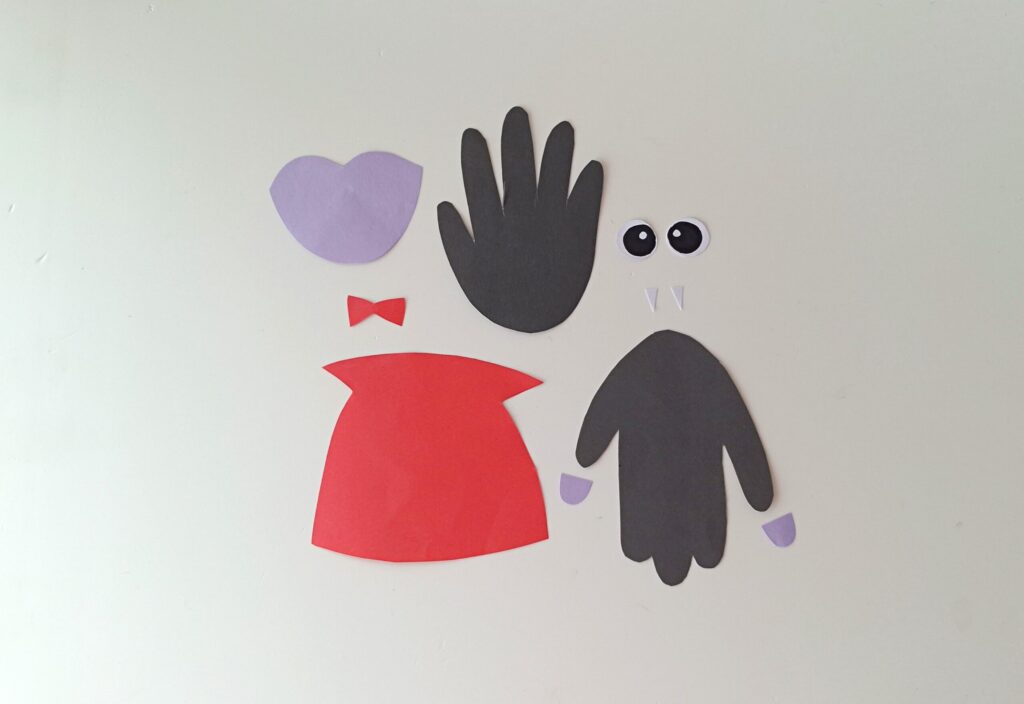
Prep craft paper colors for each pattern: red for bowtie and mantle, black for eyes and handprints, purple for face and hand, and white for eyes and fangs.
Trace the template pieces onto the matching papers with a pencil, including both handprint patterns for the body and the hair.
Cut everything out with scissors. Keep the small pieces, the fangs especially, in one spot so they don’t get lost.
Step 2: Glue the Head to the Hair Handprint
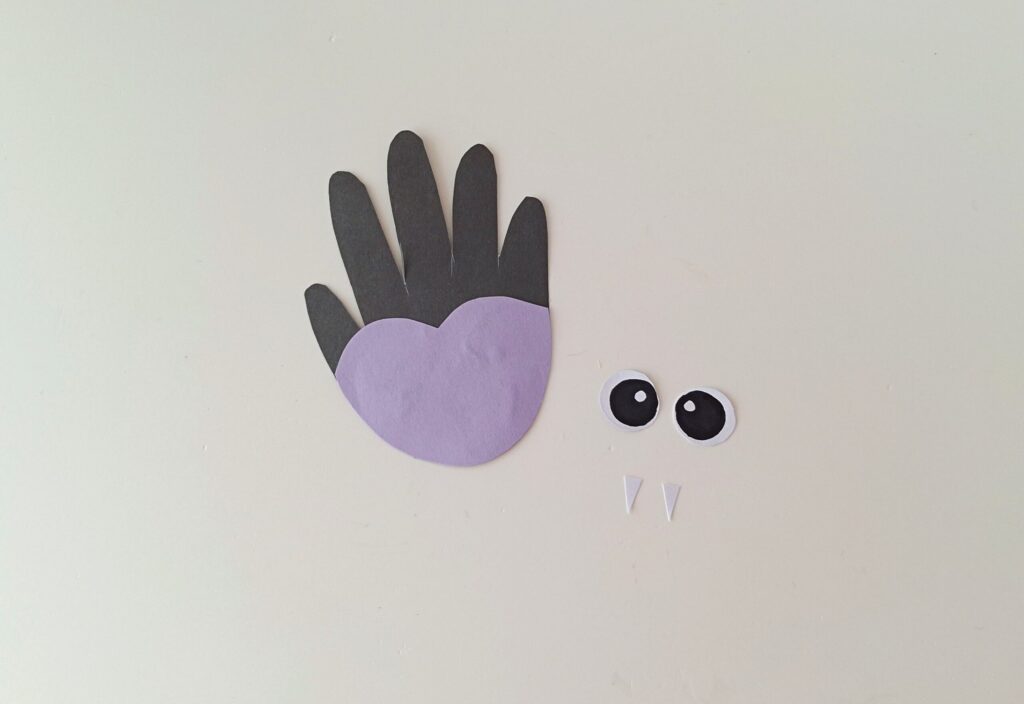
Take the open handprint cutout, the one with fingers spread and pointing up. Glue the heart-shaped head onto the palm.
The fingers now rise behind the face as Dracula’s slicked-back spikes of hair. The pointed dip at the top of the heart shape sits between the eyes and forms his widow’s peak.
Step 3: Add the Eyes
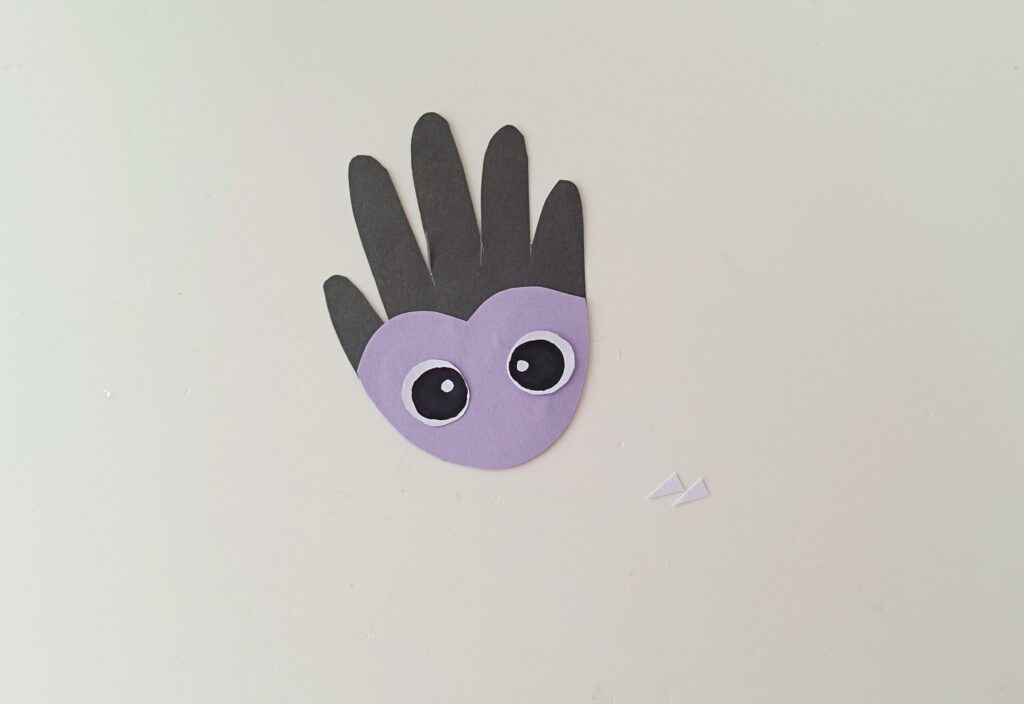
Glue the two eye cutouts onto the head, side by side. Big eyes close together give the vampire a wide-awake, friendly look rather than a creepy one.
Step 4: Draw the Face and Glue the Fangs
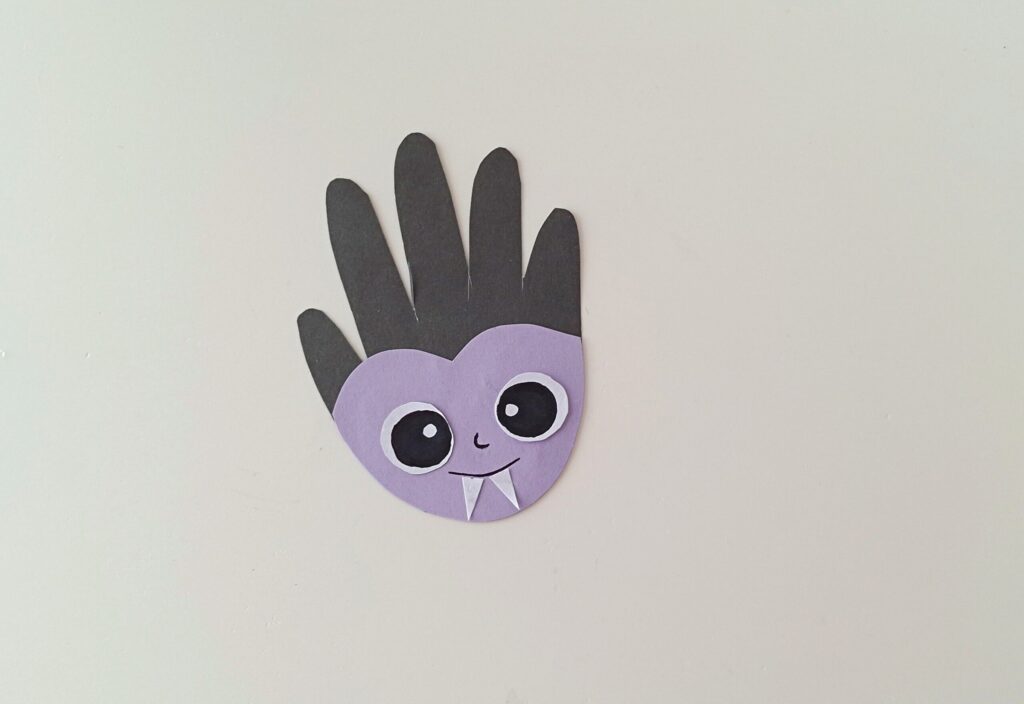
Use a black marker to draw a small nose and a smiling mouth below the eyes. Glue the two white fang cutouts along the mouth line so they hang straight down, vertical to the mouth.
Step 5: Attach the Hands
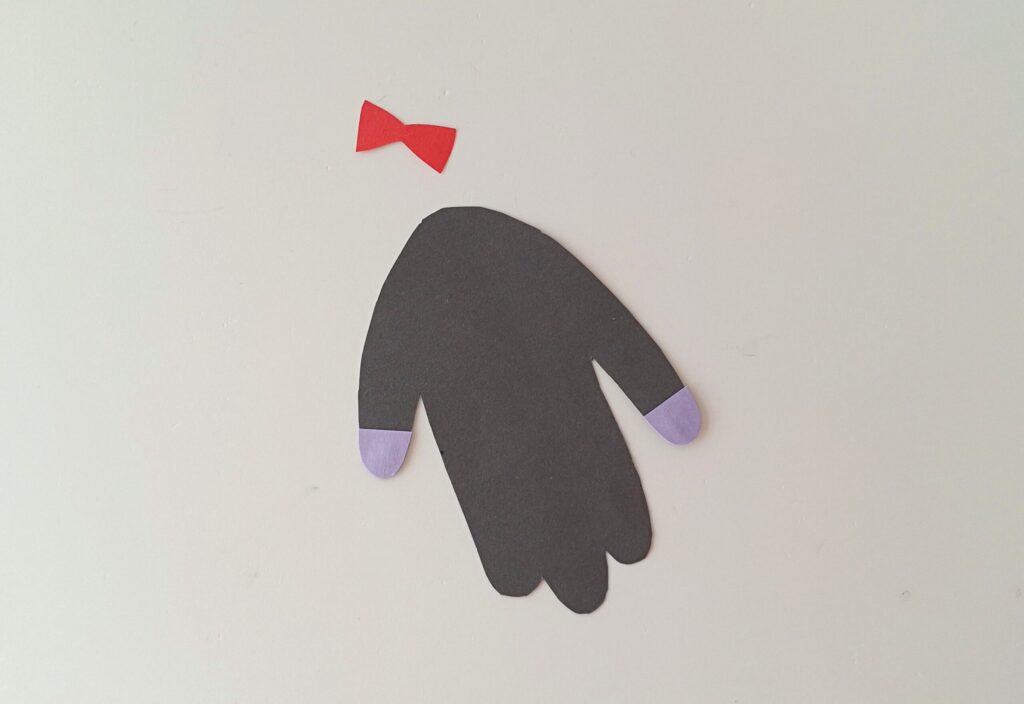
Take the two small half-circle cutouts. Glue one to the tip of the thumb and one to the tip of the pinky on the fingers-down body handprint.
Step 6: Join the Head to the Body
Glue the finished head section to the palm side of the body handprint. Then glue the red bow tie near the bottom of the head pattern, right where his chin meets the body.
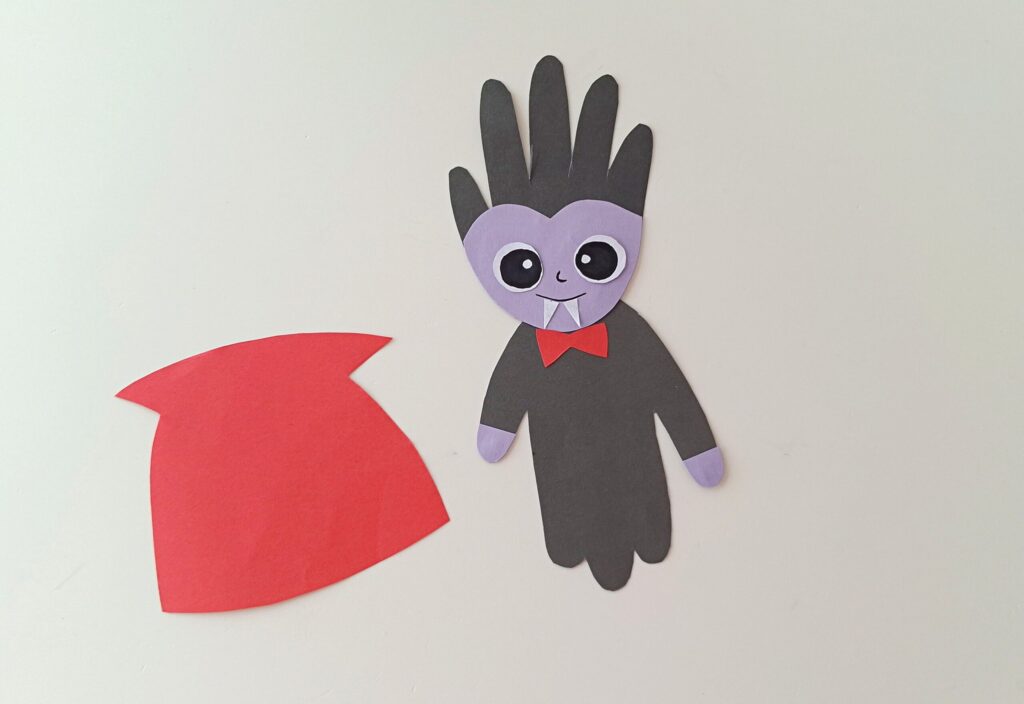
Step 7: Add the Cape
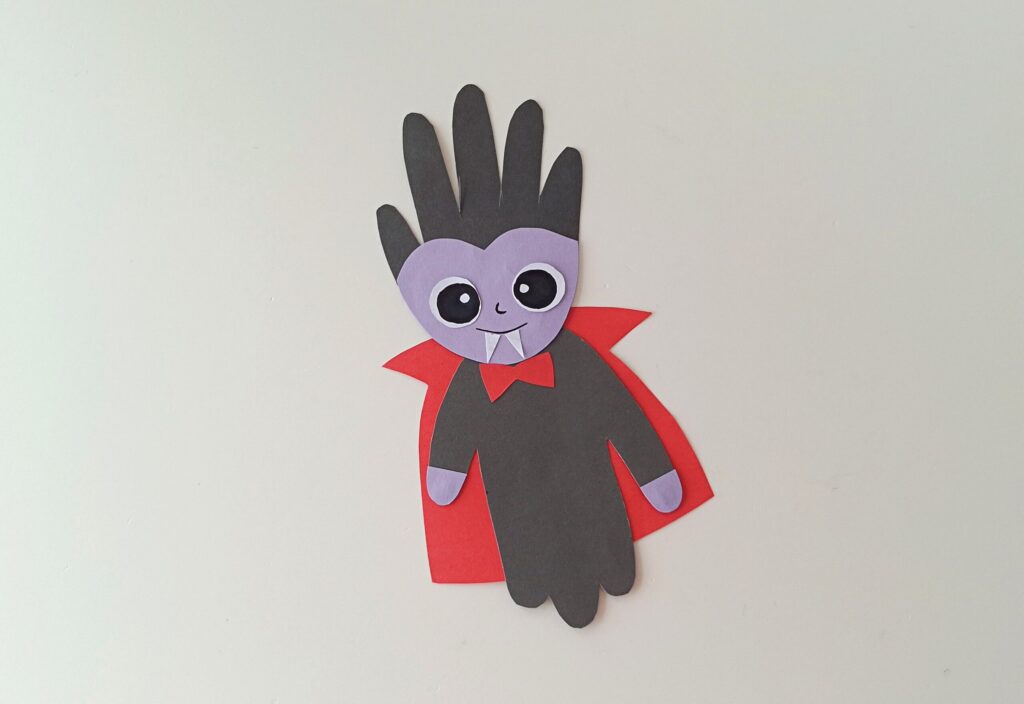
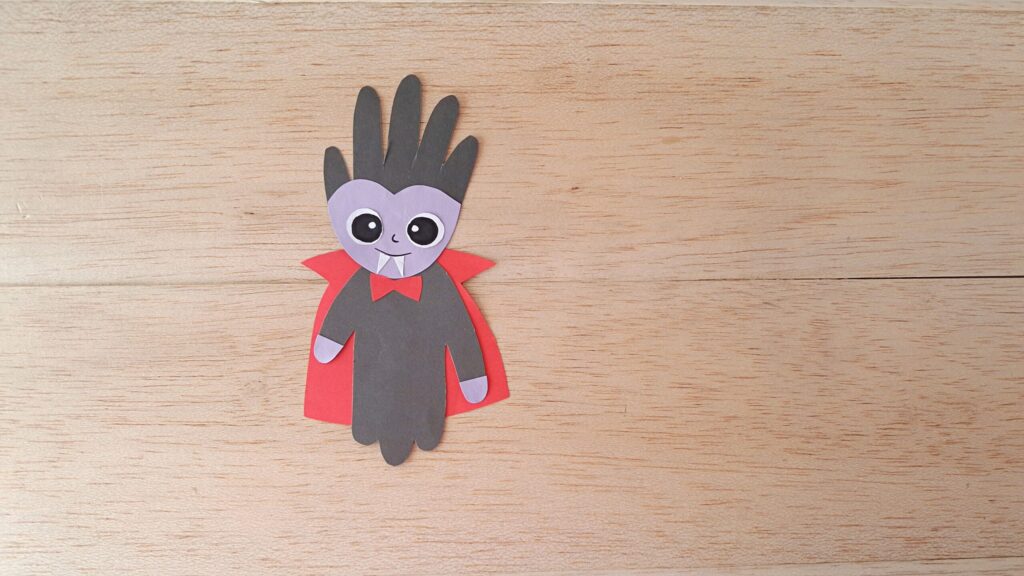
Flip the figure over and glue the red cape cutout to the backside of the body. The pointed collar should peek out above the shoulders when you turn him back around. The cape finishes the costume, and your handprint Dracula is ready to haunt the fridge.
You can glue a popscile stick or a branch behind the cape to make it a full on puppet experience for play pretend.
What Skills This Craft Trains
Tracing a hand builds pencil control along a curved, irregular path. A hand outline forces direction changes at every finger, which is harder than tracing a straight-edged shape.
Cutting the handprint shapes works scissor skills at two levels. The wide cape is a confidence cut. The deep notches between fingers demand slow, precise snips and teach kids to rotate the paper instead of the scissors.
Assembly trains sequencing. The head must attach to the hair before the bow tie makes sense, and the cape goes on last from the back. Kids follow a build order and see why the order matters.
Placing the eyes, fangs, and hands develops symmetry judgment. Two eyes need to sit level, two fangs need even spacing, and the half-circle hands need to land on the right two fingertips out of five.
Ways to Use the Finished Dracula Craft
Tape him to a window or door at kid height for Halloween decor.
Make one each October and write the year on the back, and the stack becomes a hand-size timeline. For a party, prep traced handprints in advance and run the assembly as the table activity. He also works as an oversized greeting card topper for a Halloween note to grandparents, who tend to keep anything built around a grandchild’s handprint.
If your child wants a whole vampire family, change the paper colors between figures. A green face makes a goblin cousin, a white face makes a ghost in a cape, and a smaller sibling’s handprint makes a baby Dracula to stand beside the first one.
Get the Free Template
Want the exact template from this craft, with every piece sized and ready to trace? Download it here by entering your email, and the printable arrives in your inbox ready to print at home or in the classroom.

Masha Eretnova, born in 1991, is a Chiang Mai-based certified teacher, artist, and blogger with 20+ years of personal painting journey.
She started painting and drawing very early and is now an international abstract artist and educator passionate about acrylic painting, gouache, and crafts.
Her works are part of international exhibitions and contests, including ArtlyMix (Brazil), Al-Tiba 9 (Spain), Exhibizone (Canada), Italy, and many more.
Besides her artistic pursuits, Masha holds a post-grad diploma in Teaching Film Photography and 2 music school diplomas: piano and opera singing.