Last Updated on November 23, 2023 by Masha Eretnova
Have you ever tried drawing raindrops? They might seem simple at first, but there’s more to drawing these little droplets than meets the eye.
Raindrops are one of the most beautiful things in the world. They fall from the sky like diamonds and can make any scene more romantic and picturesque.
In this blog post, we’ll teach you how to draw raindrops so that you can capture their magic for yourself. Let’s begin.
The best way to draw raindrops is to start with an irregular circle. From there, you can add smaller circles of different sizes around the outside of the first one.
Once you have your basic shape, you can start to add details. You can also add texture to the raindrop by making small lines around it. To finish off your raindrop, add a few highlights. You can do this by making small white dots on the top and bottom of the raindrop. This will give it a realistic sheen and make it look wet.
I have here a selection of different ways to draw raindrops — different sizes, and different shapes, with or without highlights. Now, let’s begin.
Table of Contents
MORE TUTORIALS:
- How to Paint Peony 23 Beautiful Tutorials (Oil, Acrylic, Watercolor, Gouache)
- Easy Dog Painting for Beginners [Step-by-step Tutorial]
- How To Paint Stormy Sky 20 Great Tutorials For All Levels
- 101 Easy Acrylic Painting Ideas for Beginners on Canvas
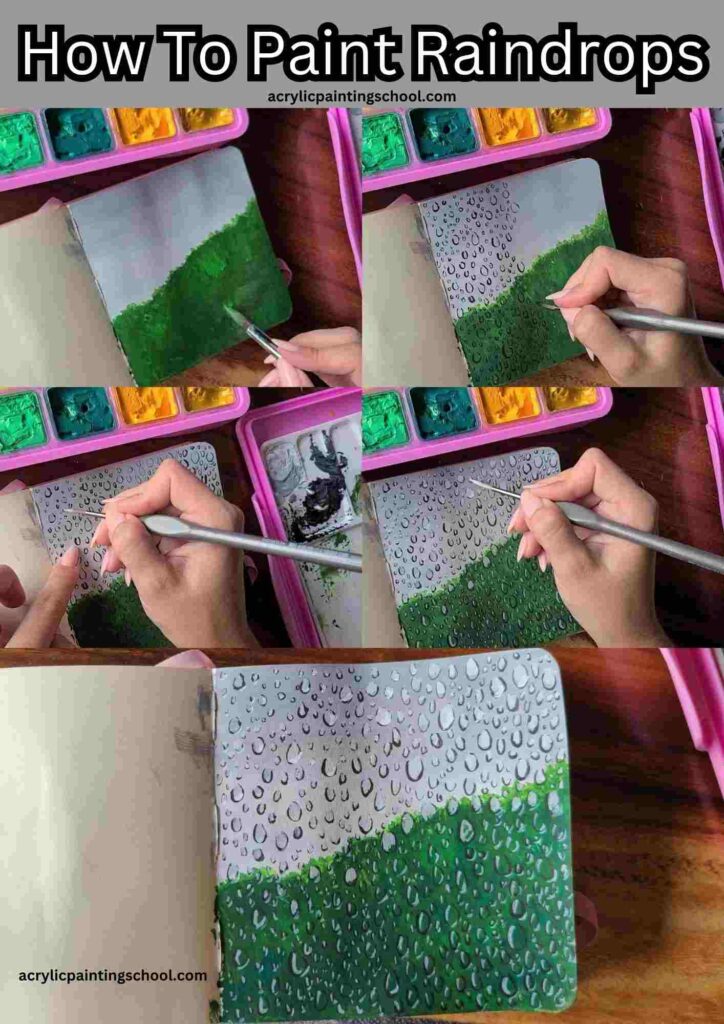
How I Paint Raindrops with Gouache (or Acrylic)
Painting or Drawing Raindrops is a tedious task but with very little effort you can get very realistic raindrops.
Total Time: 55 minutes
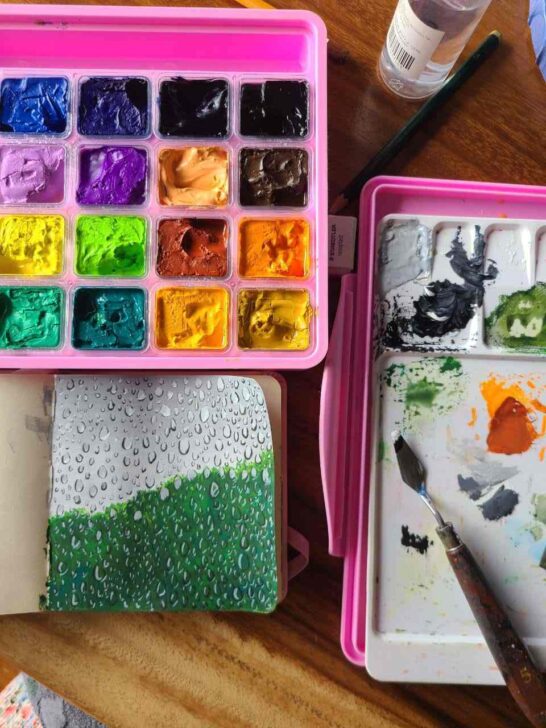
Step 1 – Paint the background

You can use sky, and horizon with trees or bushes as background. It will not be very detailed as it is supposedly behind the glass and the heavy rain. Blend the colors well.
Step 2 – Draw the raindrops
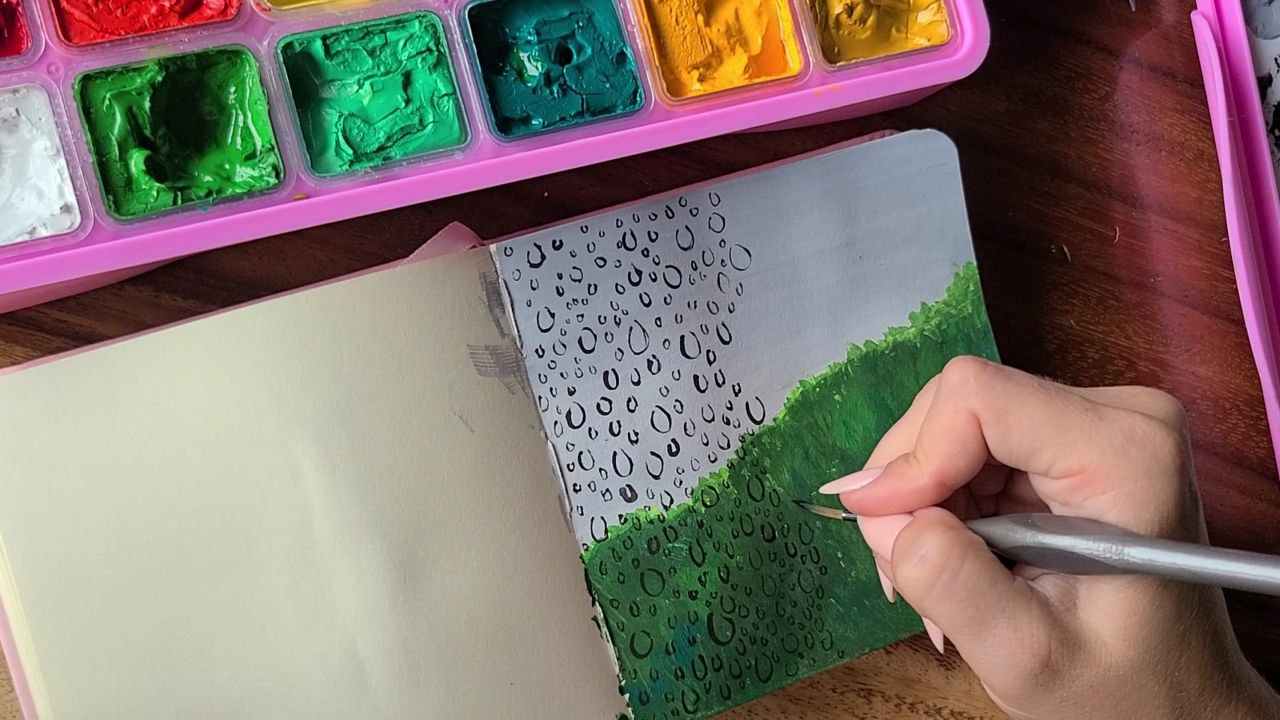
Using a detailed brush loaded with black color, randomly draw raindrops. It should not be a perfect circle oval. They have irregular shapes and they are not closed, so leave a little opening on the top.
You don’t have to draw as many as I did.
Step 3 – Add grey
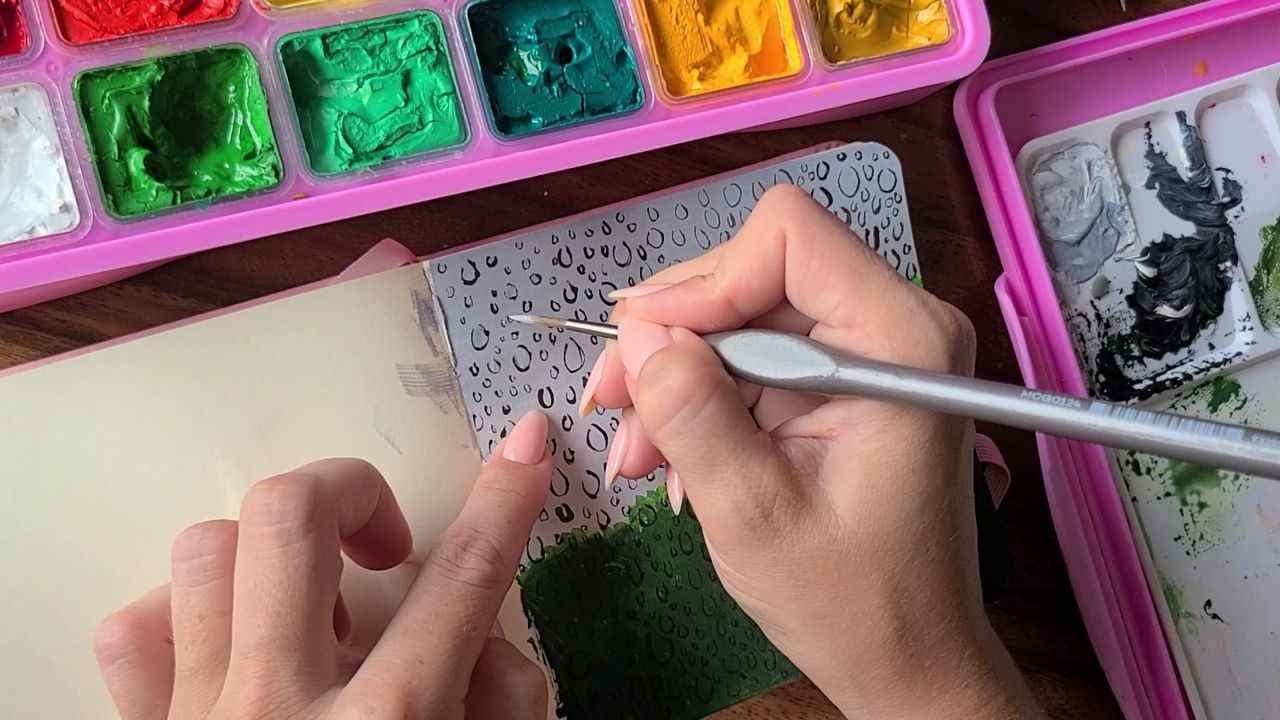
Load your small brush with grey and line the grey up the top of each raindrop.
Step 4 – Add white

Load your detailed round brush with white and add accents under some big raindrops and put some white at the bottom of each drop.
Done!
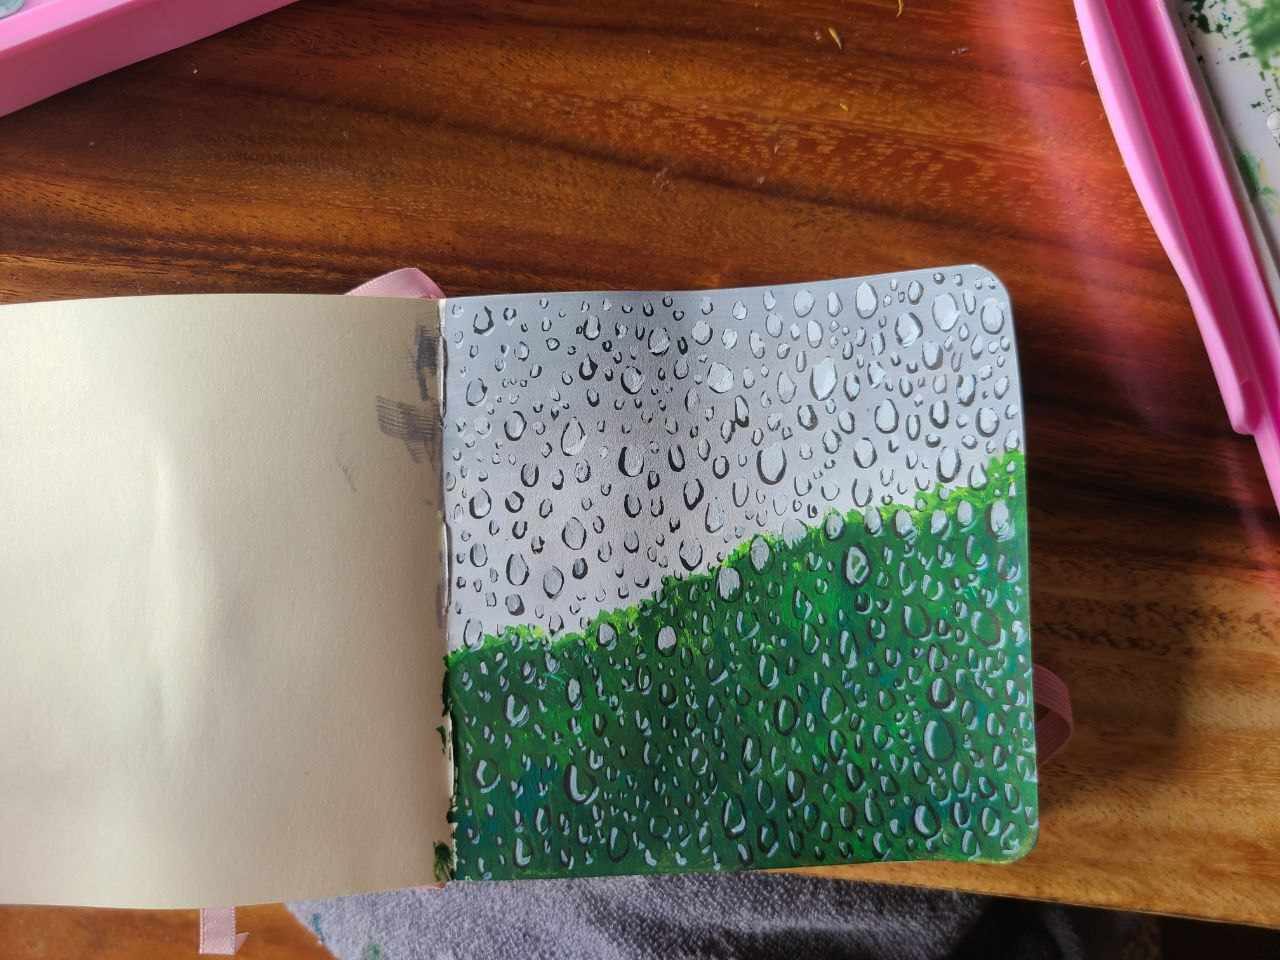
The final piece looks cute!
Here are 15 more easy ideas on how to draw raindrops or paint them with any medium from other talented crafters.
Easy Raindrops Drawing
Medium: Markers
Level: Beginner
If you’re not looking for a realistic look, this tutorial will show you how to draw simple raindrops in different sizes, shapes, and widths.
The raindrops are drawn using simple lines and shapes, which can be a good start for beginners.
Main supplies:
- Markers
- Sketchbook (or other painting surfaces like glass, wood or rocks)
Clouds with Raindrops Drawing

Medium: Markers/ pencils
Level: Beginner
Of course, a “how-to” for drawing raindrops won’t be complete without clouds.
This tutorial shows another way to draw clouds using a cloud-shaped pattern, shading the upper corners with your pencil, and using the shaded side to create a cloud shape.
The results are amazing, and adding the raindrops is easy — you need to add some strokes, and your clouds with raindrops drawing is complete.
Main supplies:
- Pencil
- White paper
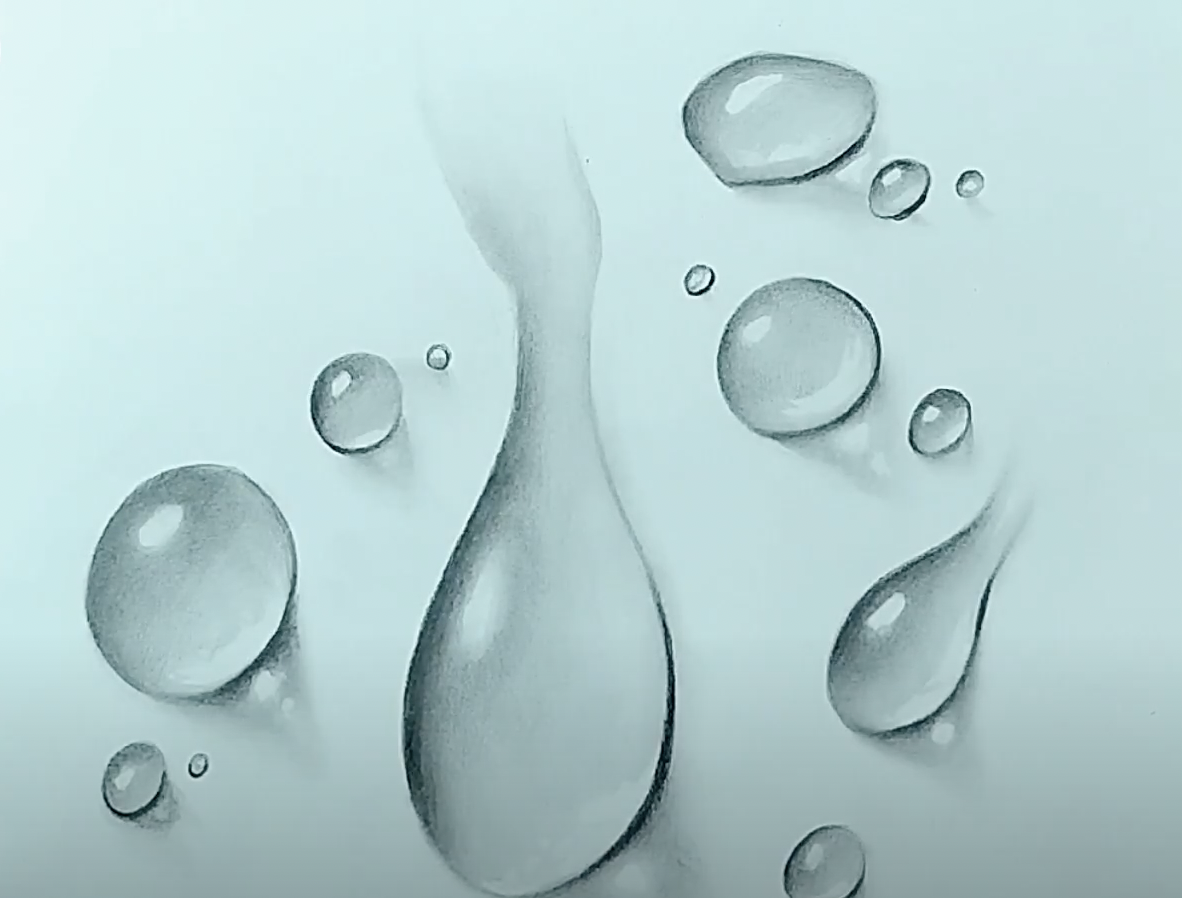
How to Draw Realistic Raindrops

Medium: Graphite pencils
Level: Intermediate
If you’re planning to add realistic water drops to your artwork, knowing how to draw them in different styles is essential. This tutorial shows you how to draw a mix of water drops and raindrops using a pencil.
Of course, to make the reflection of the drops stand out more, you need to shade your background first.
The artist used a 4B pencil to draw the darker shades. He teaches how to draw a still water drop and a raindrop that looks like it’s about to move soon.
Use different art pencils to add the right depth to the shading for better results.
Main supplies:
- Graphite pencils
- White paper
How to Draw Raindrops with Pencil

Medium: Graphite pencils
Level: Beginner
There are four ways the artist showed how to draw raindrops. Here, he used 2B, B, 4B pencils for the shadow and highlights.
This lesson is great for those just starting out and for more experienced artists who want to warm up.
However, these are only rough drafts and are not meant to be considered final works of art. You can finish the work by blending and shading more.
Main supplies:
- Pencil
- White paper
How to Draw Water Drops on White Paper
Medium: Graphite pencils
Level: Beginner
Drawing with a pencil may be easy, and this drawing concept is perfect for beginners. Using just one pencil and some white paper, it demonstrates how to draw realistic water drops.
Remember, using an eraser to remove dark areas is another way to add additional highlights to a drawing. Experiment with different water drop forms using the technique shown in this tutorial.
Main supplies:
- Graphite pencils
- White paper
How to Draw Water Drops on Black Paper
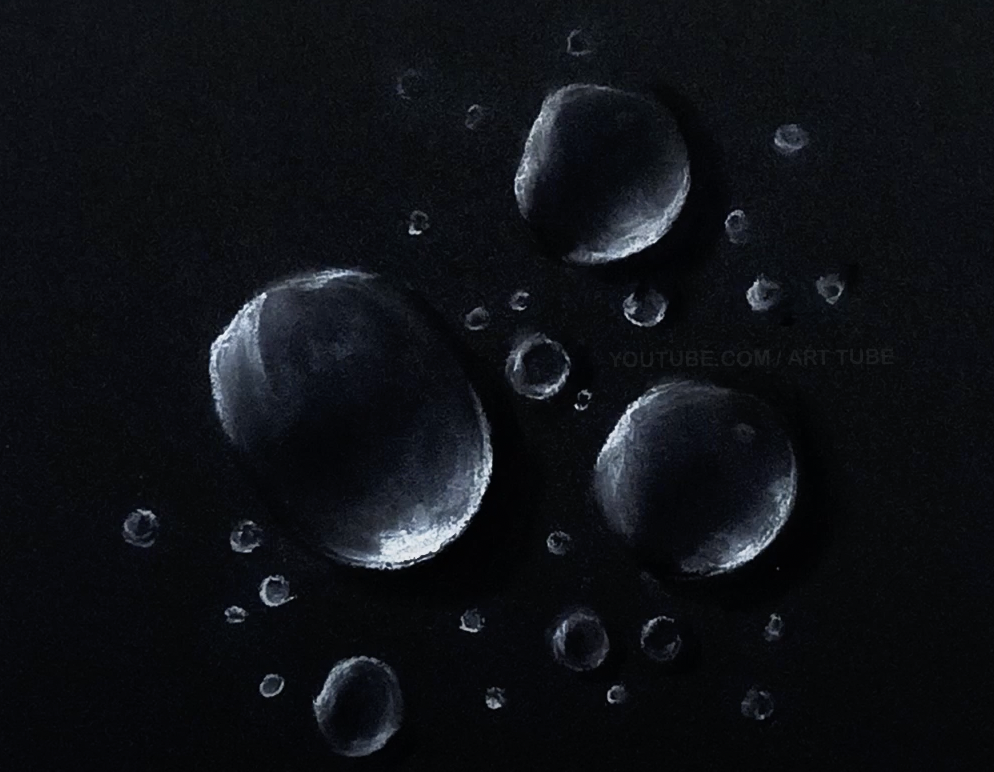
Medium: White charcoal pencil
Level: Beginner
If you want to practice sketching raindrops, why not do this on black paper? Aside from switching to a white pencil and black paper, the process for sketching the water drops is very identical on white paper.
However, since water drops appear differently on dark backgrounds, we’ll put greater emphasis on bringing out their details by darkening their edges and slightly shading their interior sides. Then, for the highlights, a white color should be added.
Take note of the realistic shadows added by the artist with black charcoal pencils, so be sure to blend them well.
Making little circles with the white pencil (and smudging them a bit later) is also an effective approach to creating more tiny raindrops on black paper.
Main supplies:
- Graphite pencils
- White charcoal pencil
- Black paper
Raindrops on Window Drawing
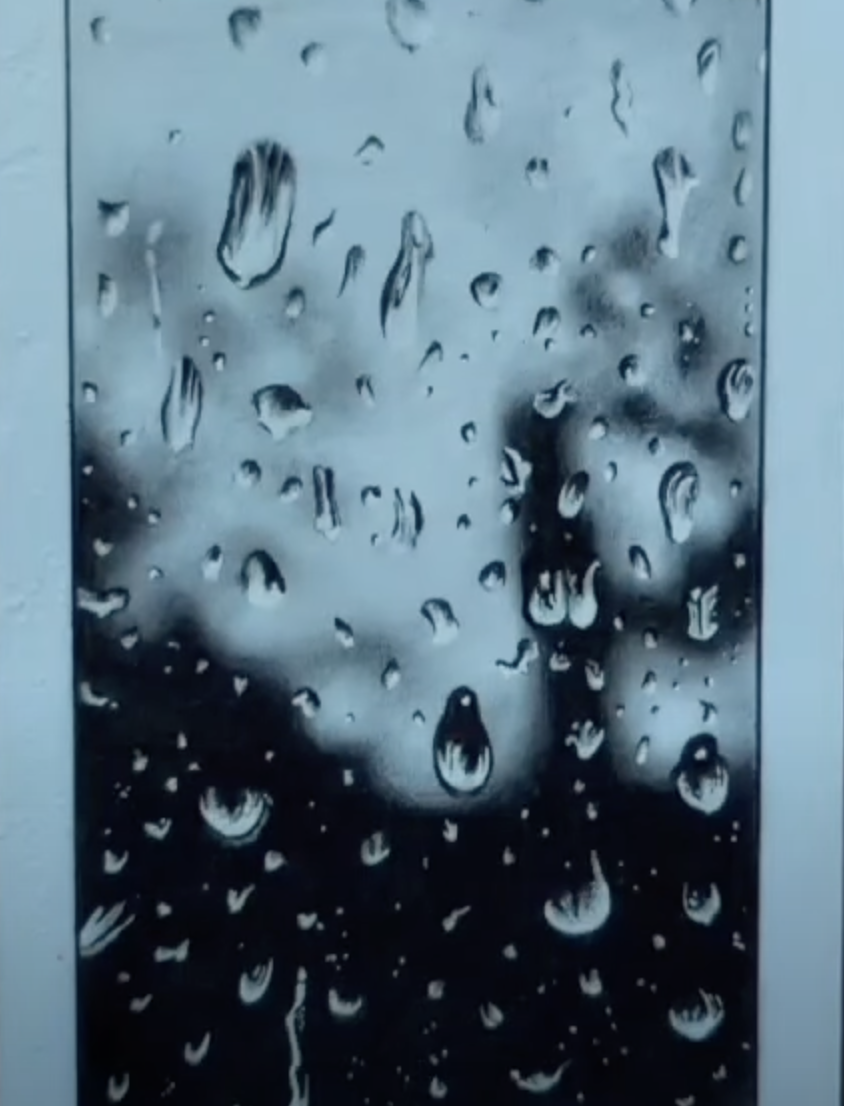
Medium: Graphite pencils
Level: Intermediate to Advanced
Drawing raindrops on a window uses a different technique. You need to prepare the background first before adding the water droplets.
You can achieve darker shades by using graphite pencils and highlighting the dark areas using a white pen.
Remember to blend. Once the background is done, have fun creating water droplets of different sizes and shapes.
Main supplies:
- Graphite pencils
- Blending stump
- Black paper
- Kneaded eraser
Umbrella with Raindrops Drawing

Medium: Graphite pencils
Level: Advanced
Another realistic drawing, this one teaches how to draw an umbrella, complete with rain dripping from the rim.
This will require a lot of shading, and you may need more than one graphite pencil to complete it. Plus, you only need a kneaded eraser — and masking tape for the highlights.
Main supplies:
- Graphite pencils
- White paper
Raindrops on Leaf Drawing
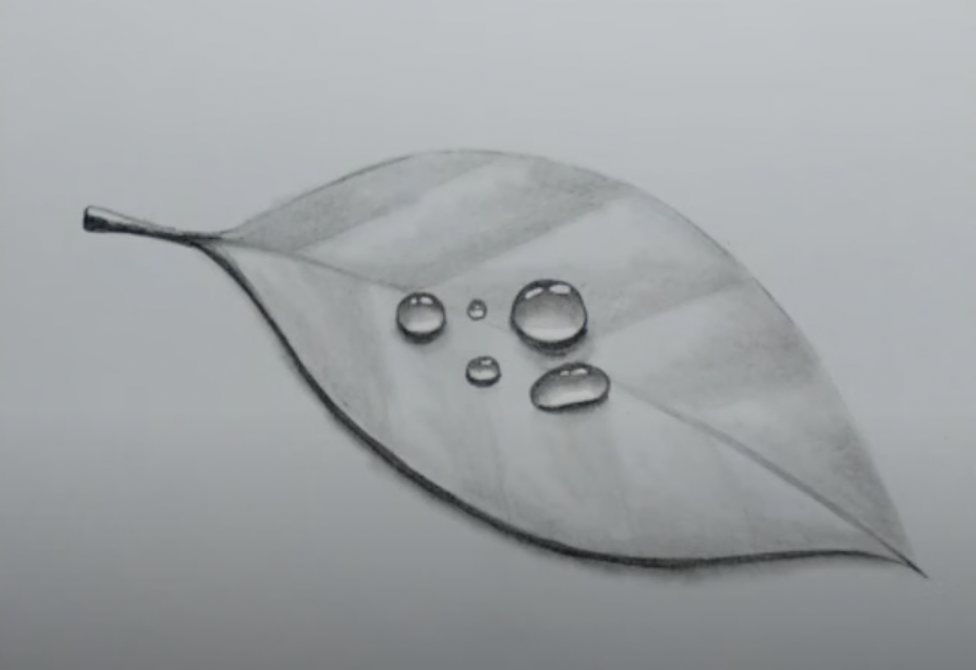
Medium: Graphite pencils
Level: Beginner
Using the previous techniques in drawing realistic water drops, you can create a drawing of raindrops on a leaf.
Main supplies:
- Graphite pencils
- White paper
Raindrops on Roses Drawing

Medium: Graphite and charcoal
Level: Beginner to Intermediate
If you like roses, you can also practice drawing raindrops on them. After drawing the rose, you can add raindrops to the petals.
Shading, highlighting, and blending are key to making them look realistic.
Main supplies:
- Graphite pencils
- White paper
- Blending stump
How to Draw Water Drops Using Colored Pencils

Medium: Colored pencils
Level: Advanced
Why not try drawing a colored water drop? You can draw a realistic cone using different shades of your desired color.
Here, it teaches you to color and blend slowly for each color introduced in the artwork. It may take some time, but coloring with colored pencils is fun and produces beautiful results.
Main supplies:
- Colored pencils
- White paper
Tutorial LINK
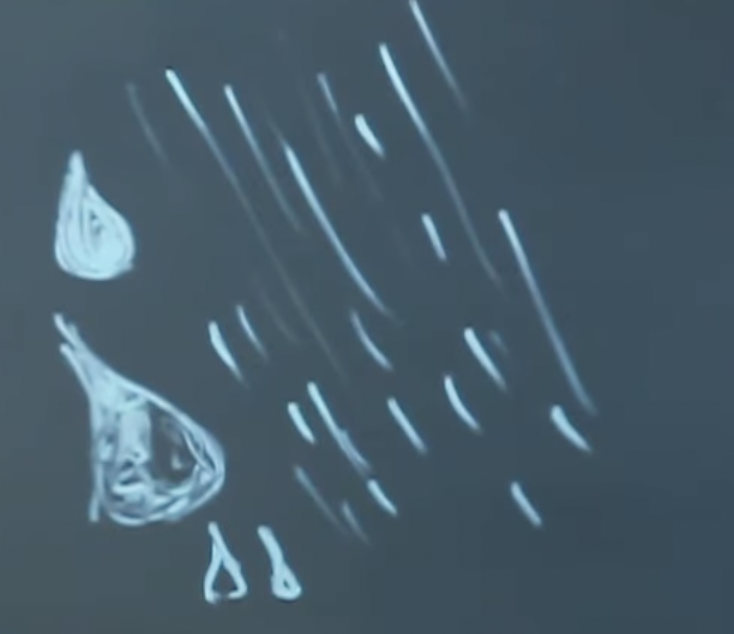
Drawing Falling Raindrops

Medium: Oil pastels and acrylic paint
Level: Intermediate to advanced
Create a picture of rainy weather by painting falling raindrops on your work. Oil pastels may look messy when first applied, but after you blend the colors, they give a realistic look.
After drawing the background, the falling rain effect is achieved by painting vertical strokes of white acrylic paint.
Main supplies:
- Oil pastels
- White paper
- White acrylic paint
How to Draw Rain Drops on Bulb Using Oil Pastel

Medium: Oil pastels
Level: Advanced
Using a bulb stencil to make a realistic bulb with raindrops drawing is a great way to add it to a colored background. The process is simple, yet the results are stunning.
Main supplies:
- Oil pastels
- Colored pencils
- White paper
How to Paint Raindrops in Acrylic

Medium: Acrylic
Level: Advanced
Painting a landscape with raindrops is never a bad idea. It may look like a mess and an abstract painting afterward. But after painting the raindrops, you’ll get a beautiful painting of what seems to be a rainy scenario in a busy city.
Main supplies:
- Acrylic paint
- Acrylic painting paper
- Paintbrush
How to Paint Water Drops Using Watercolor

Medium: Watercolor
Level: Beginner
Start by drawing a rough outline of the water drop, then paint it with a watercolor of your choice.
This tutorial may only teach you how to paint a water drop with one color, but you can use the same method to paint water drops in whatever color you choose!
Main supplies:
- Watercolor paint
- Watercolor paper
- Paintbrush
Drawing Raindrops FAQ
How do you draw easy water drops?
An easy way to draw water drops is to start with an oval or egg shape. Then, you can add small circles of different sizes outside the first one.
Once you have your basic shape, you can start to add details. You can also add texture to the raindrop by making small lines around it. Finally, to finish off your raindrop, add a few highlights.
How do you shade a droplet?
To shade a droplet, start by adding a few lines around it. Next, add some shadow to the top and bottom of the raindrop. Finally, add a few highlights to give it a realistic look.
How do you draw rain fast?
The best way to draw rain fast is to draw vertical or diagonal strokes with your pencil. Start from the top and work your way down, creating a slight curve in each line.
This will give you the raindrop effect you are looking for. If you have a steady hand and time to spare, try creating smaller raindrops by making even finer strokes.
How do you draw a realistic drop of water?
The first step to creating a realistic raindrop is to draw its main shape. Start by making a round or oval shape.
Once you have your main shape, it is time to move on to the details. Raindrops don’t always look the same, so feel free to add additional elements, like curved lines or tiny circles.
Next, use your pencil and highlighters to make the raindrop look wet and shiny. To do so, draw several curved lines within the shape of the raindrop. This will give it an iridescent effect that looks like it is raining.
Finally, add rain to your drawing. Rain appears in a few different ways when it is falling, and each can create a unique, beautiful look.
Depending on the effect you are going for, you can draw large raindrops, small ones, or medium-sized ones.
Wrap Up
Drawing raindrops may seem intimidating, but with a few simple steps and some practice, you can make your own version of these beautiful depictions of nature.
Now that you know how to draw raindrops go out and try it for yourself! You might be surprised at how therapeutic and relaxing it can be. Who knows, you might even find your new favorite hobby.

Masha Eretnova, born in 1991, is a Chiang Mai-based certified teacher, artist, and blogger with 20+ years of personal painting journey.
She started painting and drawing very early and is now an international abstract artist and educator passionate about acrylic painting, gouache, and crafts.
Her works are part of international exhibitions and contests, including ArtlyMix (Brazil), Al-Tiba 9 (Spain), Exhibizone (Canada), Italy, and many more.
Besides her artistic pursuits, Masha holds a post-grad diploma in Teaching Film Photography and 2 music school diplomas: piano and opera singing.