Last Updated on June 19, 2026 by Masha Eretnova
The best Halloween craft ideas for kids are the ones that don’t require a trip to the craft store or at least no more than 5-10 dollars.
This list is full of them. You’ll find projects that work for toddlers, preschoolers, and older kids, or even teens, most made from paper, felt, yarn, or whatever is already in the recycling bin.
Pick one for a quiet afternoon or set up a few as a Halloween party activity, either way, kids will be happy with these cute and spooky ideas.
Paper Cup Bat Craft
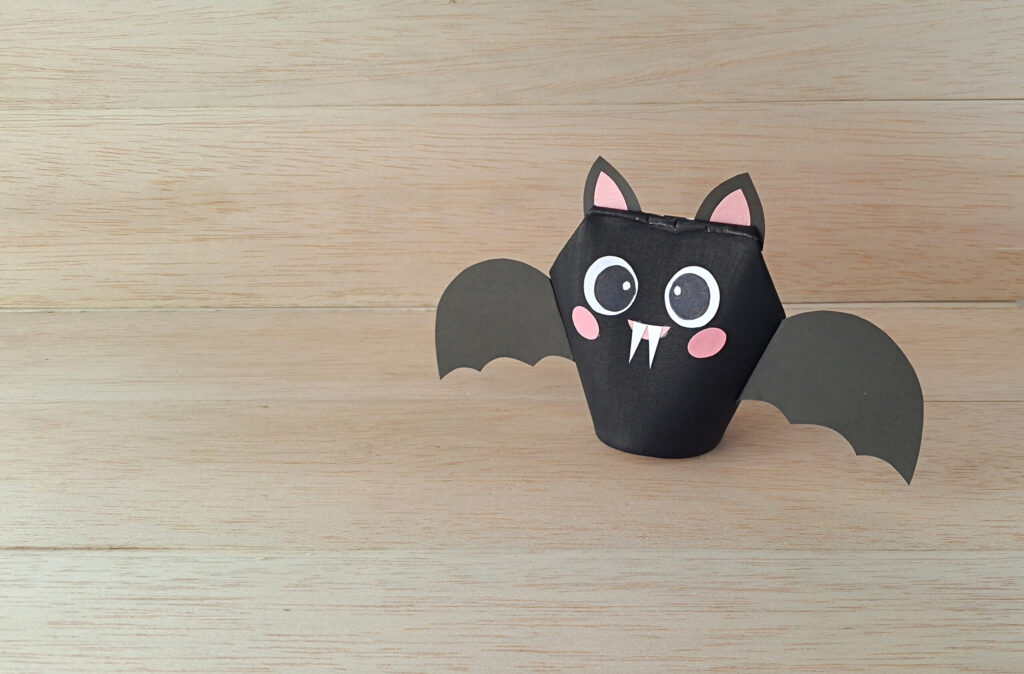
This paper cup bat turns one plain disposable cup into a chubby, fang-toothed bat with cat-like ears and rosy cheeks.
You need a paper cup, black acrylic paint, colored craft paper in black, pink, and white, scissors, and craft glue. Very simple project for Summerween and Halloween.
Handprint Dracula Puppet
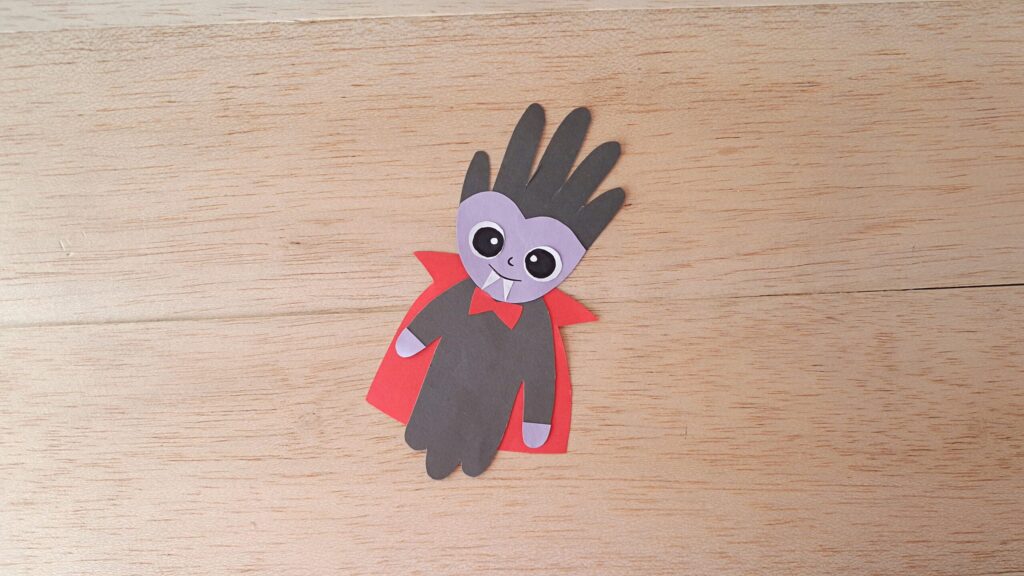
This handprint vampire puppet uses two traced handprints to build a full Dracula figure with a red cape, bow tie, and tiny fangs.
You need black, purple, red, and white craft paper, a pencil, scissors, craft glue, and a black marker. Great for ages 3 to 9 and can be used as a keepsake.
Egg Carton Monsters
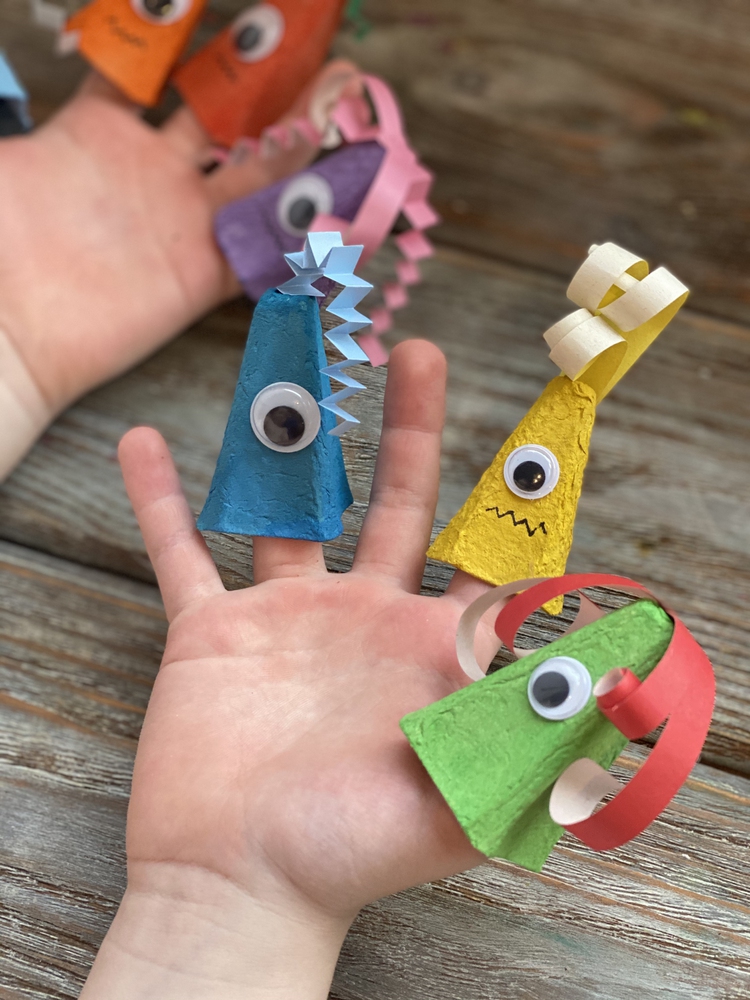
Don’t throw away empty egg carton just yet, when you can actually use it to make cheap Halloween craft by imagining colorful monsters with your kids.
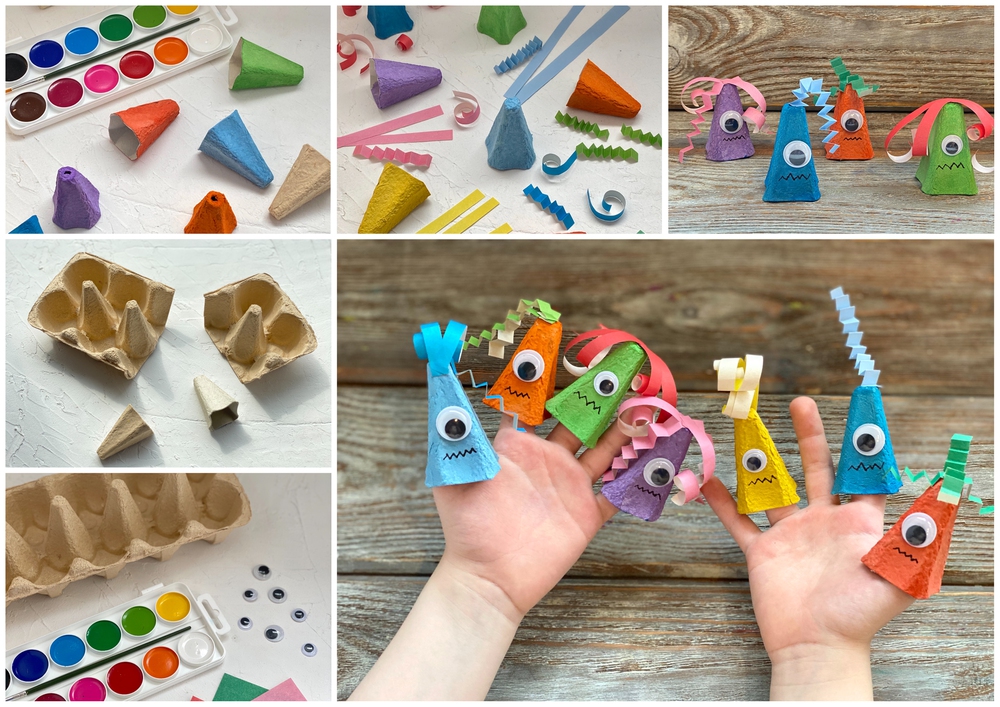
You will need paint or markers, colored paper, scissors, googly eyes and glue. Cut out each egg well and let kids go wild with decorating it. Paper strips, stickers, one or 5 eyes – anything goes.
Toilet Paper Roll Halloween Characters
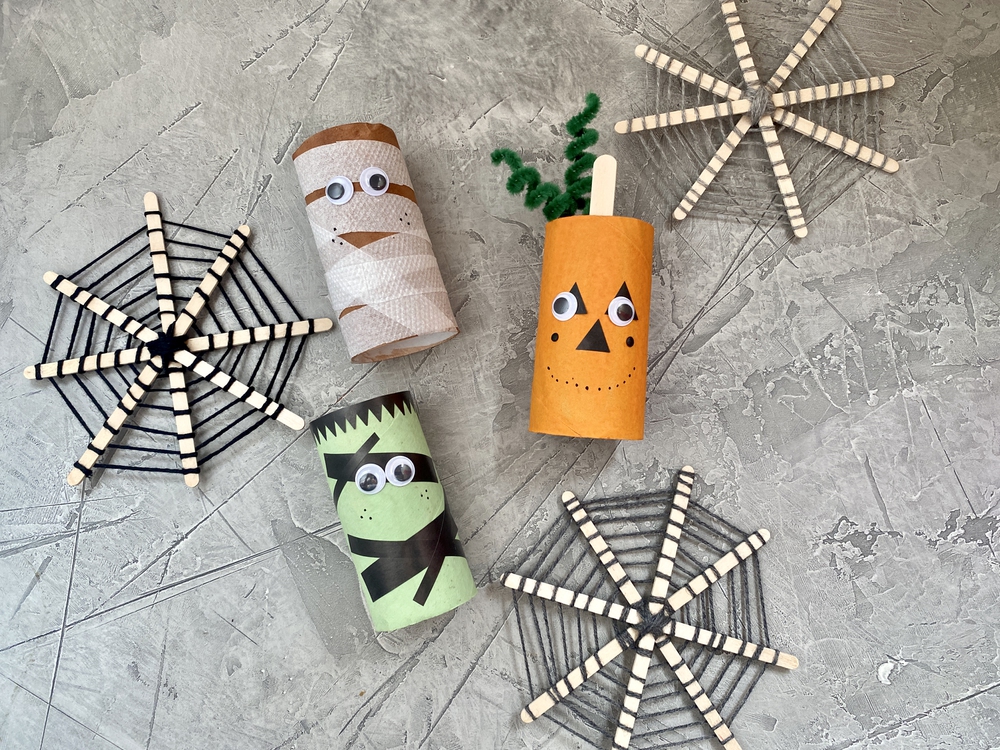
These toilet paper roll characters include a mummy wrapped in gauze aka toilet paper or tissue strips, an orange pumpkin with green pipe cleaner stems, and a green Frankenstein.
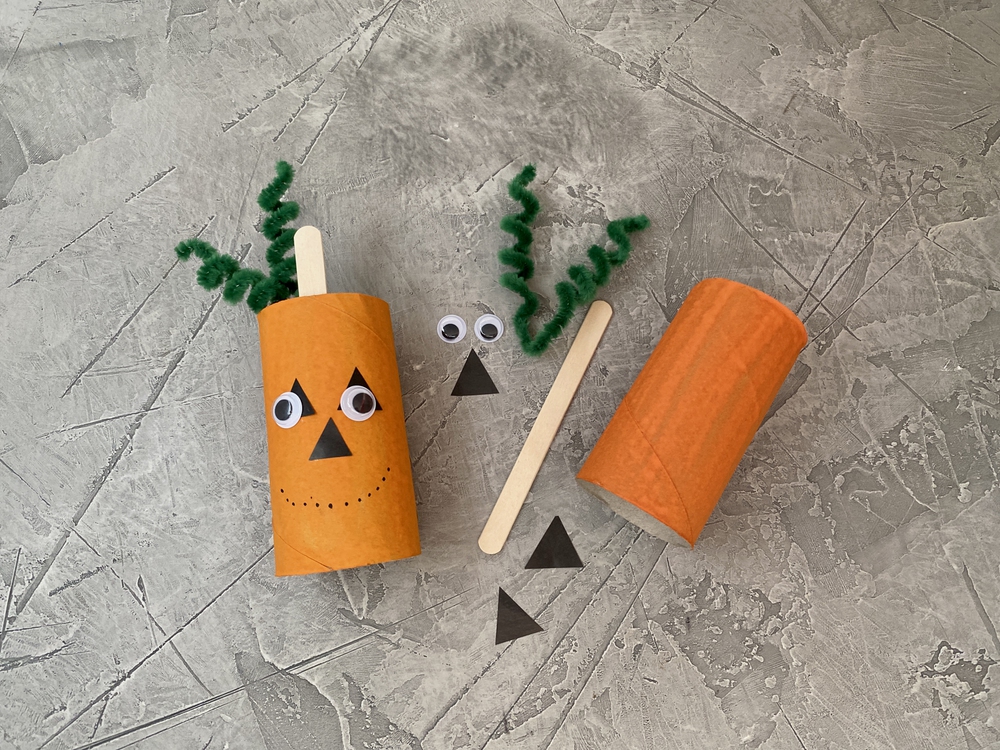
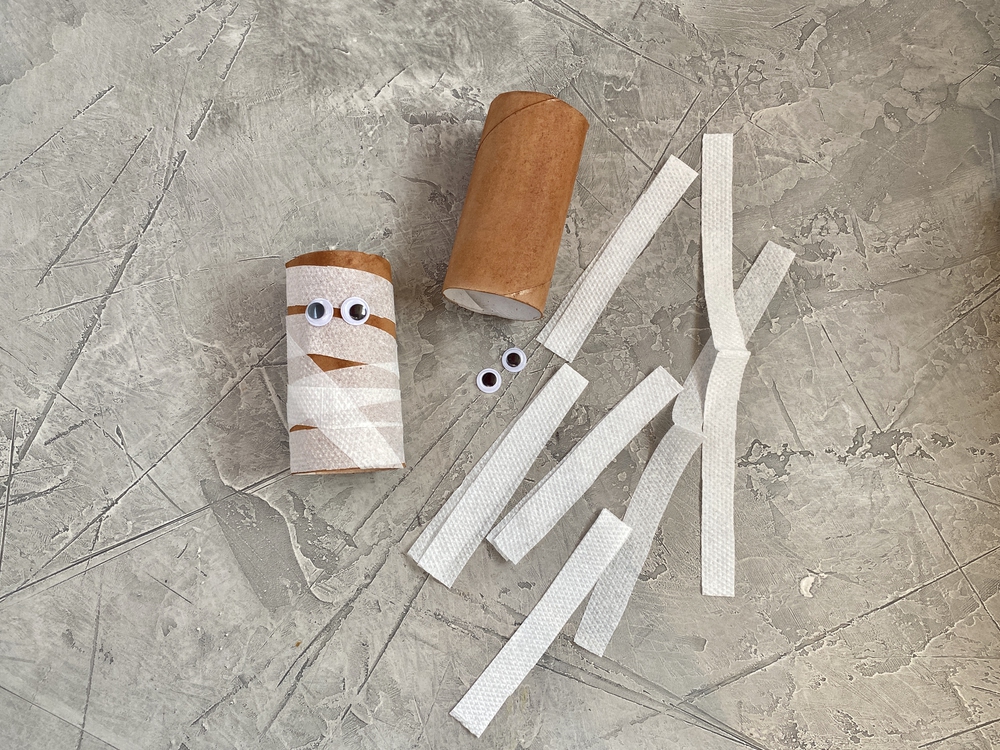
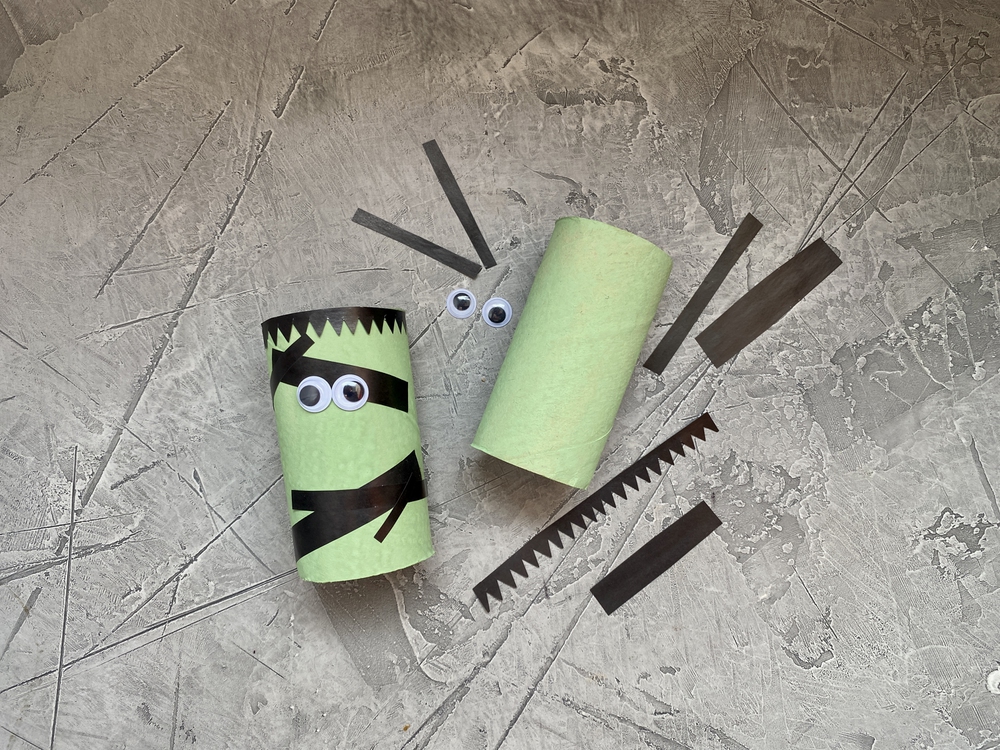
You need toilet paper or paper towel rolls. Glue green and orange colored paper around the rolls or let kids paint them, add strips of paper and googly eyes, twisted green pipe cleaners for the pumpkin, and glue a few strips of toilet paper onto the mummy roll.
Super simple and quick project even for preschoolers.
Button Spider Halloween Card
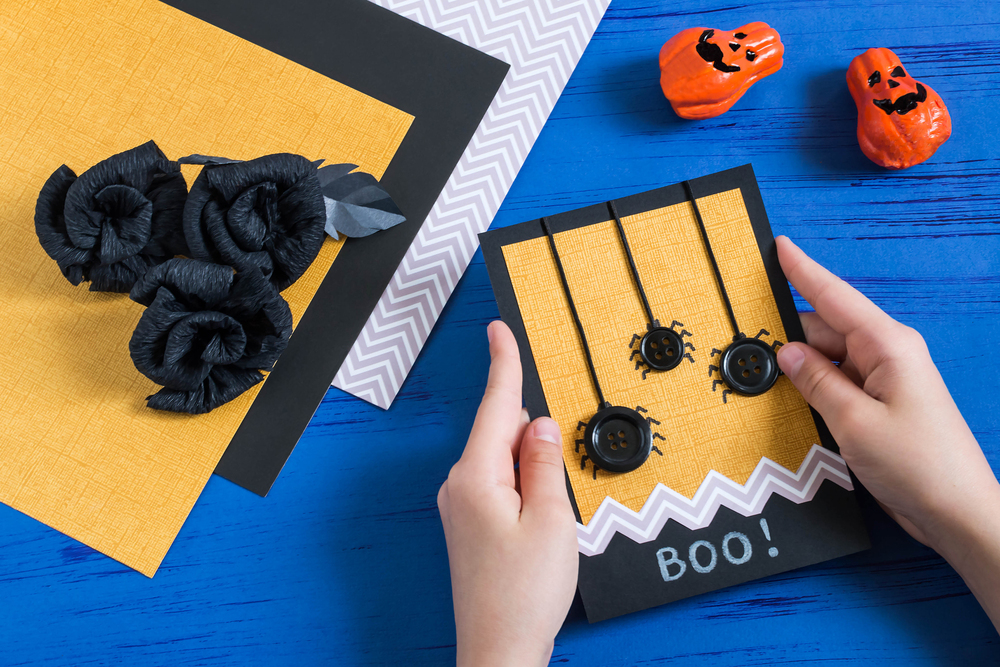
This Halloween card uses regular black buttons to make spiders dangling from strings on a cute Halloween card.
You need orange and black cardstock, black buttons, thin black string or thread, a black marker, scissors, and craft glue.
Cut the black card base and orange inserts smaller in size. Glue orange part on the black card. Then cut three black strings at different lenghts and glue the strings vertically from the top edge, attach a button to the bottom of each string, draw eight legs (four on each side) and a little spider head.
You can add a spooky message at the bottom and more decorations (glitter, Halloween stickers, more spiders). This Halloween craft is easy for kindergarten and preschool with a bit of help.
Halloween Paper Garland
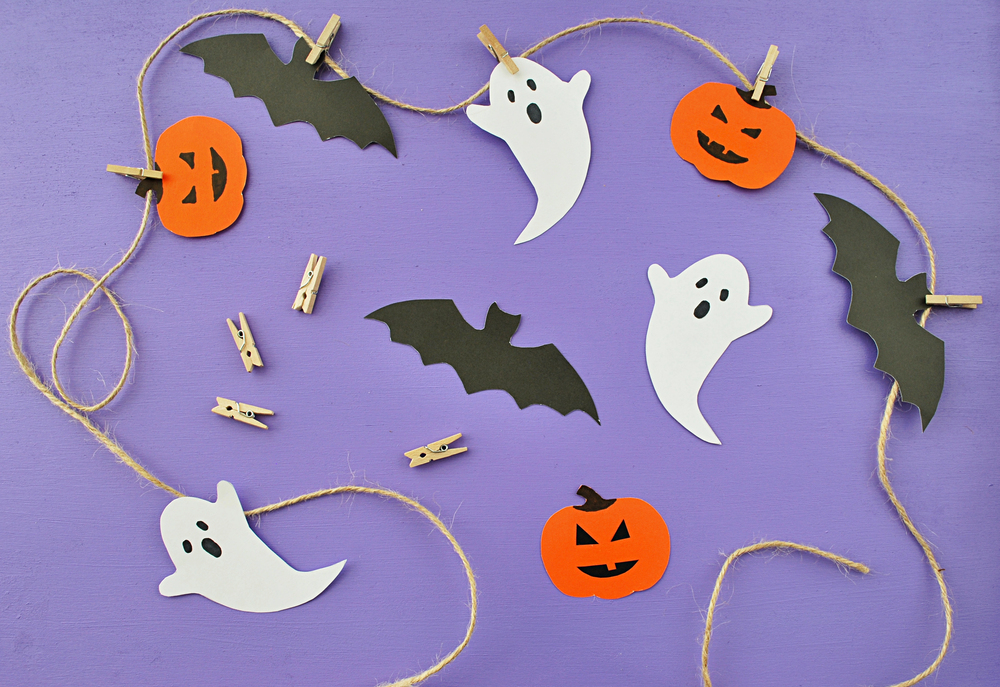
This paper garland strings together cut paper bats, ghosts, and jack-o-lanterns clipped to jute twine with small wooden clothespins for easy hanging home decoration for Halloween party.
You need orange, black, and white cardstock or construction paper, jute twine, mini wooden clothespins, scissors, and a black marker.
Draw and cut out bat, ghost, and pumpkin shapes, draw faces on each with the marker, then clip them along the twine in a repeating pattern and hang across a mantle, window, or doorway.
Felt Witch
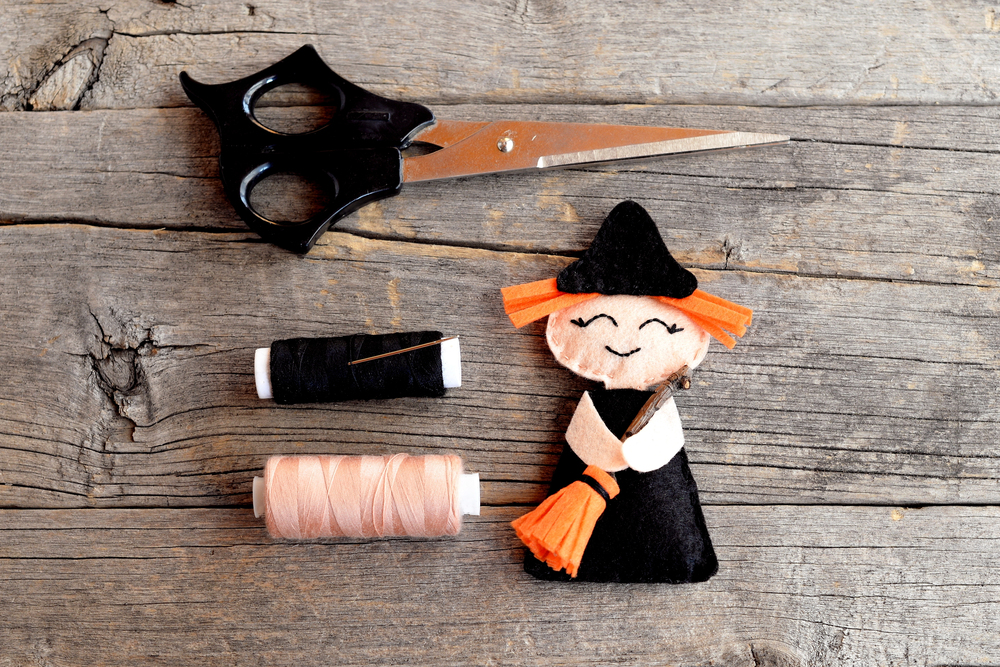
This cutest felt witch figure has a black dress and hat, orange fringe hair, a peach face with embroidered smile, and a small orange broom. She looks like she flew in right from Hogwarts!
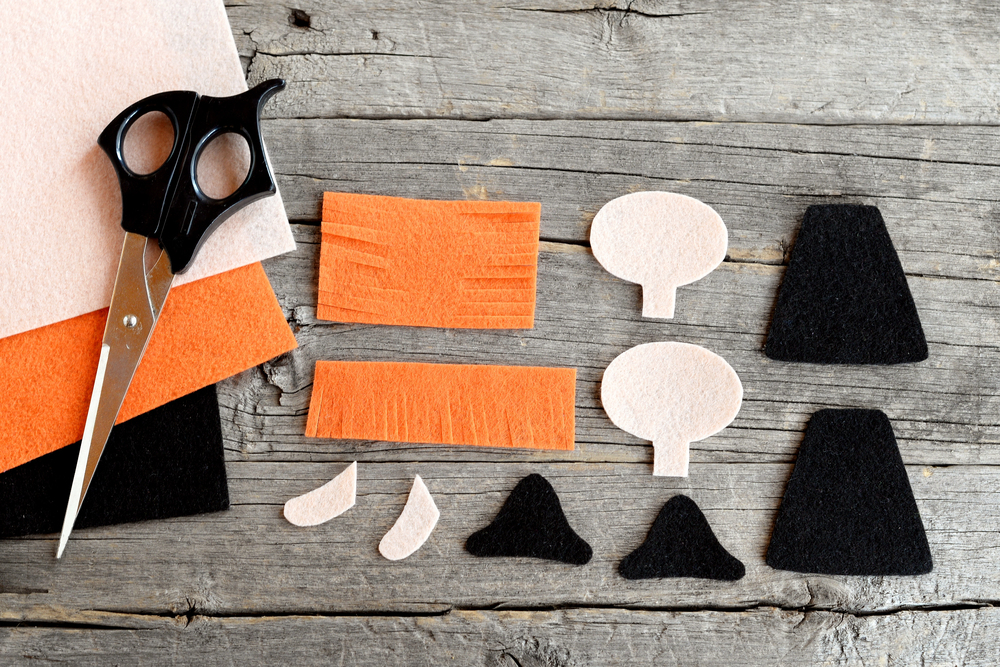
You need black, orange, and peach/tan felt, black and peach/tan thread, a needle, scissors, and a marker or embroidery floss for the face.
Cut the body, hat, face, and broom pieces from felt, sew or glue the layers together, fringe-cut the orange felt for hair and the broom bristles, then stitch or draw the face details.
This Halloween craft is best for teens and older kids who already love sewing and working with fabric. Adults are welcome to try it, too!
Felt Stuffed Spider
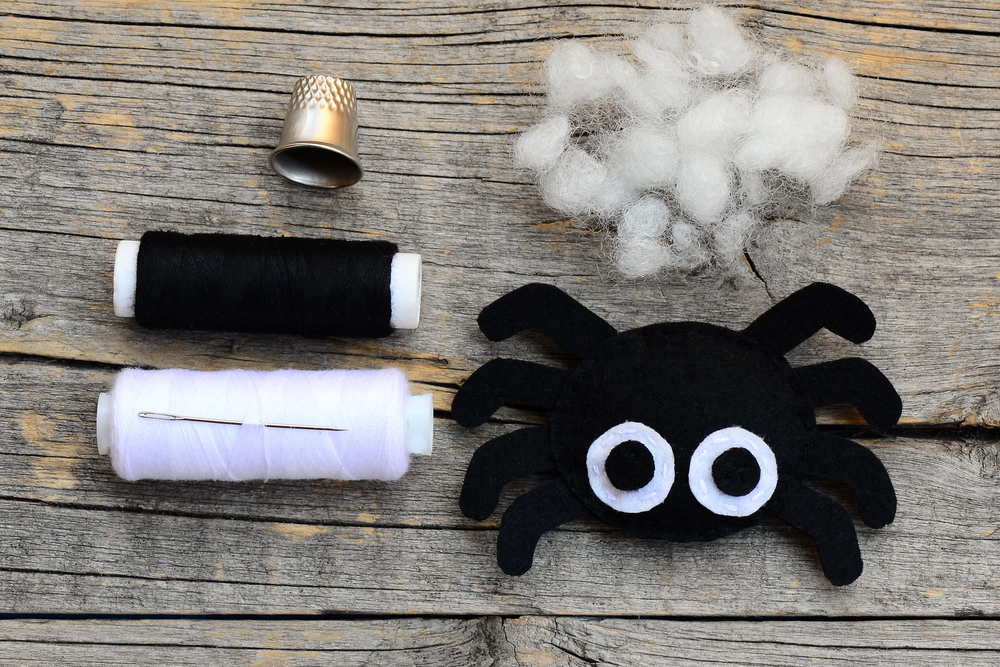
This is a little felt spider with stuffed body and curved legs and it is not scary at all!!
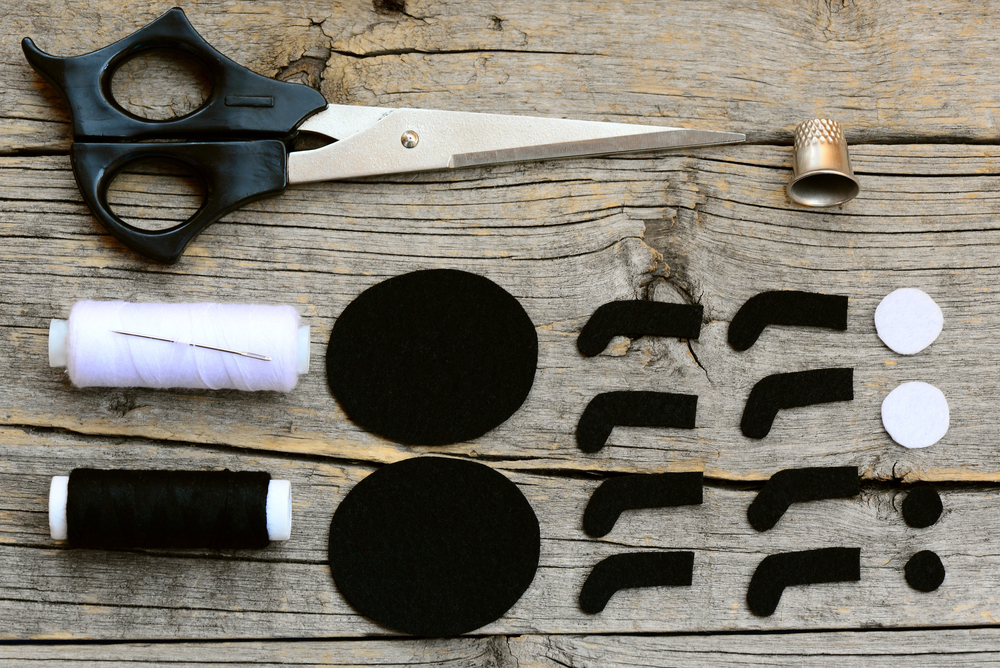
You need black and white felt (a tiny piece), black and white thread, a needle, scissors, a thimble, and a small amount of polyfill or cotton stuffing.
Cut two matching oval body pieces and eight curved leg pieces from black felt (you can make one and measure others to it, but they do not have to be perfect), cut small eye circles from white felt and even smaller ones from black felt, sew the legs between the body layers, stuff lightly, then stitch closed and add the eyes.
Cheesecloth Ghost
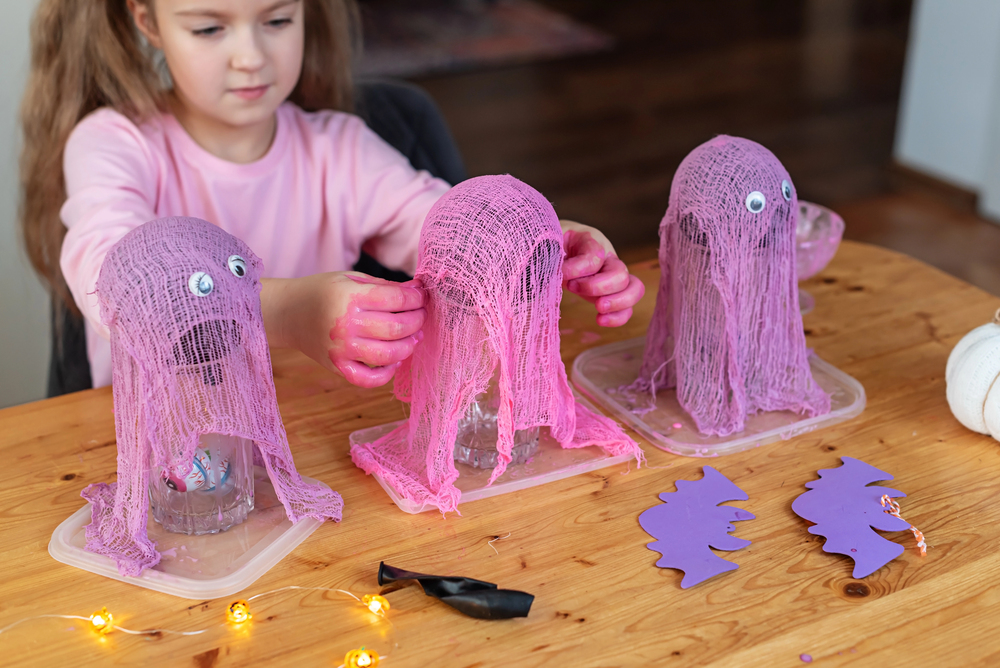
This craft makes fun floating ghosts you can use to decorate the house for Summerween or Halloween!
The effect is easier to make than you think! You just need a few baloons, cheesecloth in liquid starch, paint, and googly eyes.
You need cheesecloth, liquid starch, balloons or jars as molds, googly eyes, craft glue, and a tray (container lid) to catch drips.
Mix or pour the liquid starch in a container, add some colors, soak the cheesecloth until saturated, wring it out slightly, drape it over the mold, shape the edges into a flowing hem, let it dry completely (several hours), remove the mold, then glue on the eyes. That’s it!
Kids of any age can help making these ghosts.
Yarn Ghost
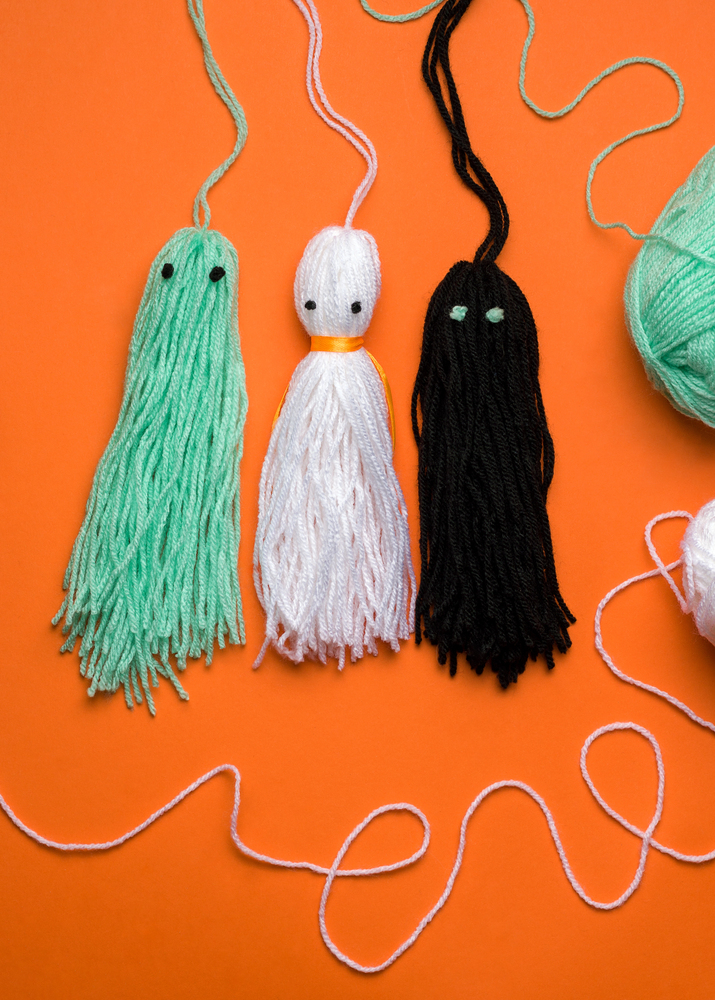
These yarn ghosts are made as tassels with a gathered head tied off with ribbon or string and simple embroidered or glued dot eyes in green, white, and black (or any color you want!).
You need yarn in white, green, or black, scissors, a small piece of ribbon or matching yarn for the neck tie, and either black embroidery floss or small felt dots for eyes (cuttings of yarn work, too), and craft glue.
Cut a bundle of yarn strands to the same length (double the size of how big your ghost you want to be), fold the bundle in half and tie a longer yarn thread to be able to hand the ghosts, tie a knot near the fold to form the head (or skip this step), trim the ends even, then add the eyes.
Monster Drawing
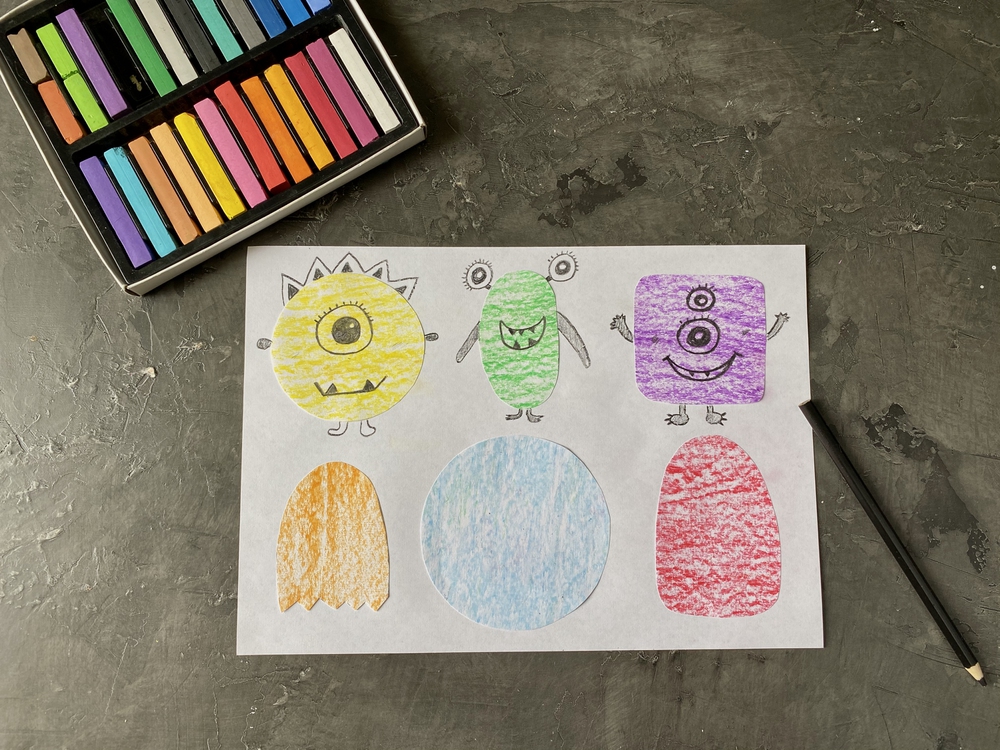
This is a open-ended creative activity for kids where you cut out a few colored shapes (you can ask kids to color them, too), glue them onto paper and invite children to imagine all kinds of funny monsters.
It is a great craft idea for school as everyone can draw different creatures, complete creative freedom.
Explain that they can add eyes, legs, scars, any details they like. Great for preschool and kindergarten.
Candy Ghosts
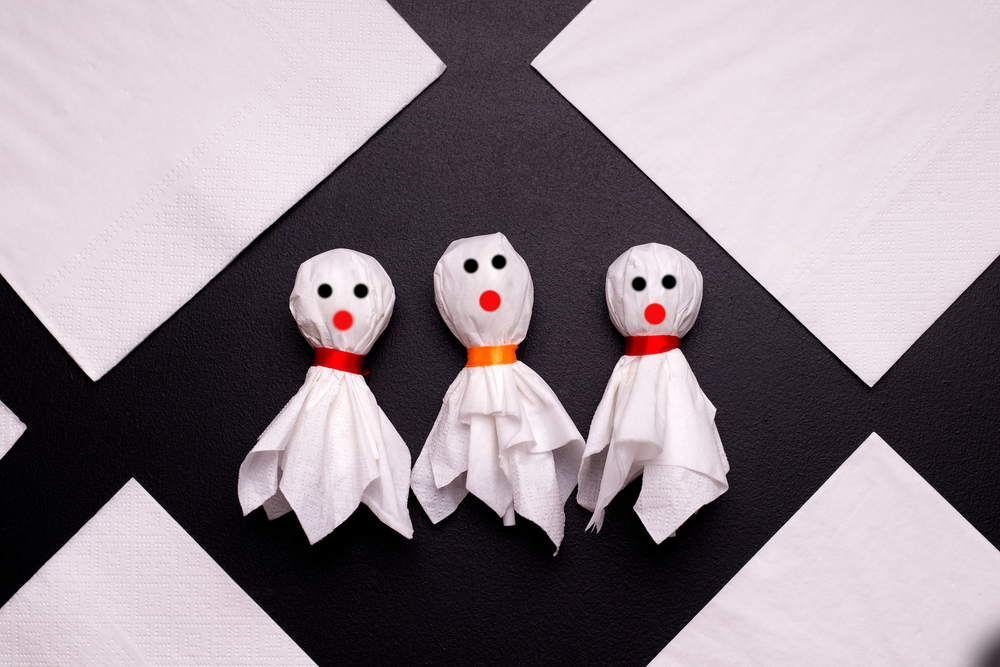
These ghosts are made by bunching a tissue or paper napkin over a candy or lolipop and are GREAT for trick or treating and setting up the table. Super easy to make with young kids, too.
You need white tissues or paper napkins, candy or cotton ball for the head, narrow ribbon in red or orange (can be one with sticky lining), a black marker for eyes, and a red marker or small red sticker for the mouth (you can also use sticker paper to make eyes and mouths).
Place the candy in the center of the tissue, gather the tissue around it, tie the ribbon tightly around the neck, then draw on the face. How simple is that?!
Twigs Cobweb
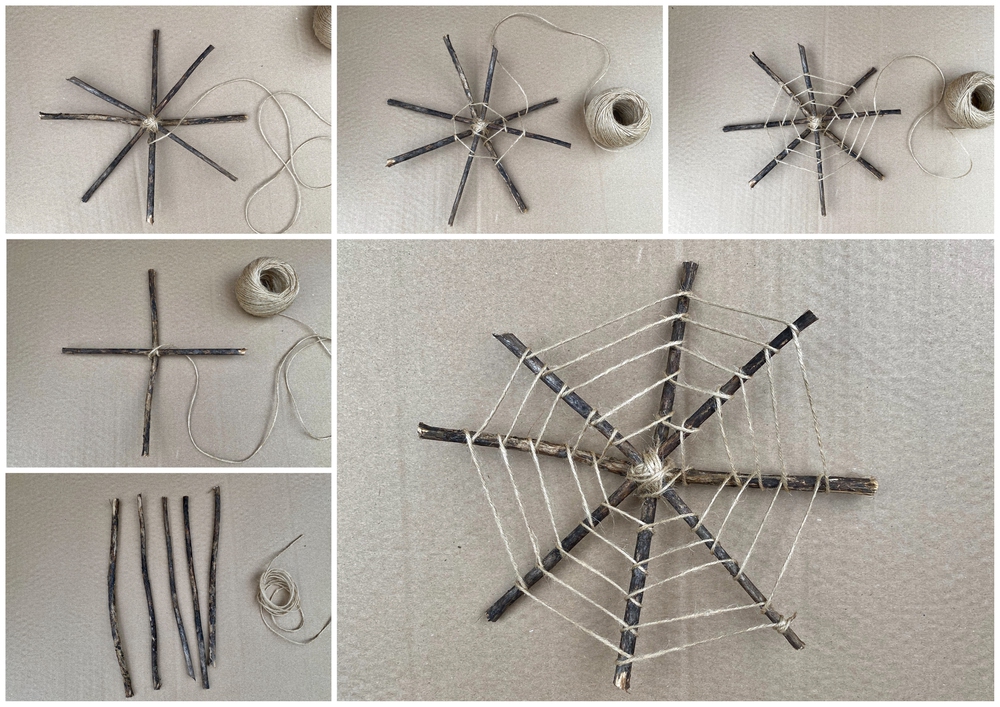
Follow steps on this collage to to make a DIY web from sticks and thread for halloween holiday without spending much!
It can be a great decoration or a setting for spider crafts your kids will make.
Best for older kids as it takes some patience.
Halloween Toilet Paper Rolls
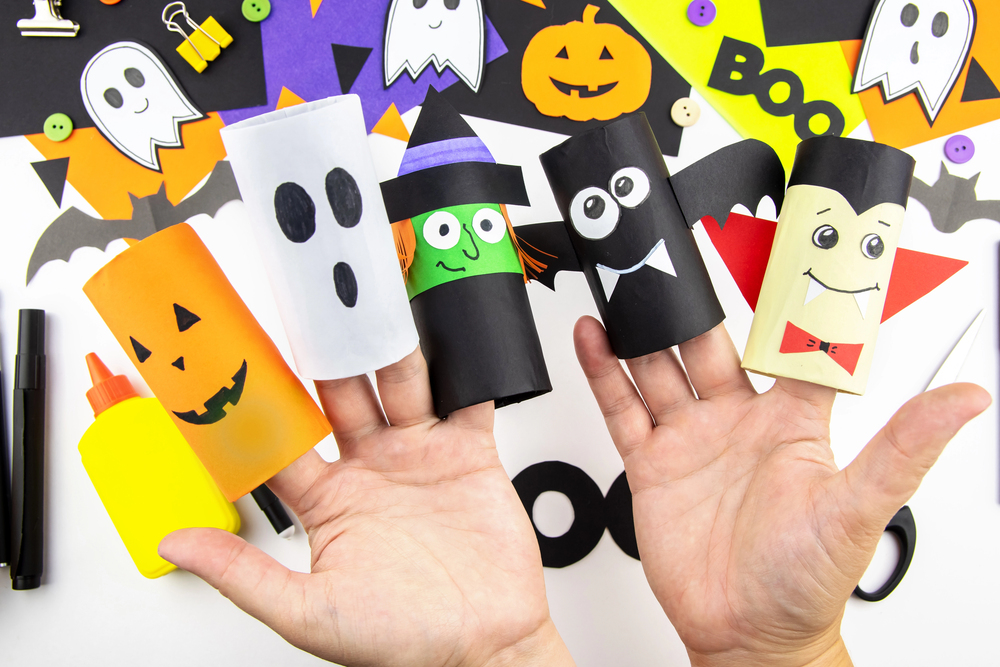
This set of toilet paper roll Halloween characters can be used as finger puppets (for two fingers) and for play. You can make: jack-o-lantern, ghost, witch, bat, and Dracula.
You need toilet paper rolls, colored paper or paint in orange, white, black, and green, googly eyes, craft glue, scissors, and a marker. Cover each roll with colored paper or paint to match each character, then add paper or drawn facial features and any extra details like a witch hat or bat wings.
Ghost is the easiest to make with youngest kids.
Paper Spider and Web
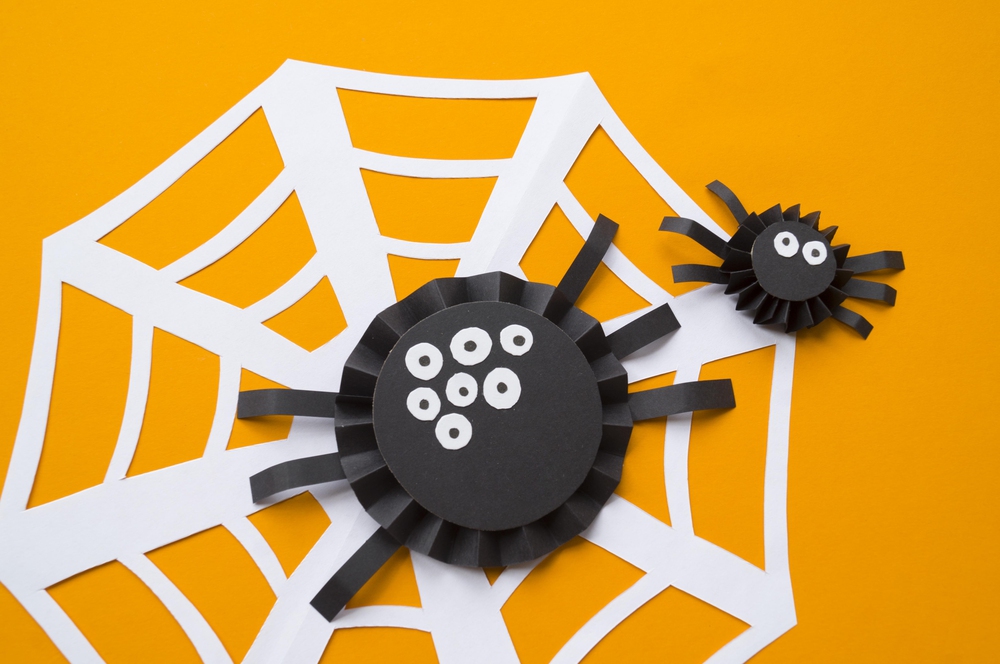
This paper spider craft make cute round spiders sitting on a cobweb that can make a simple Halloween decoration for doors and cabinets.
You will need just black and white paper, scissors, and glue stick to complete this porject. Great for elementary school.
Frankenstein Gift Box
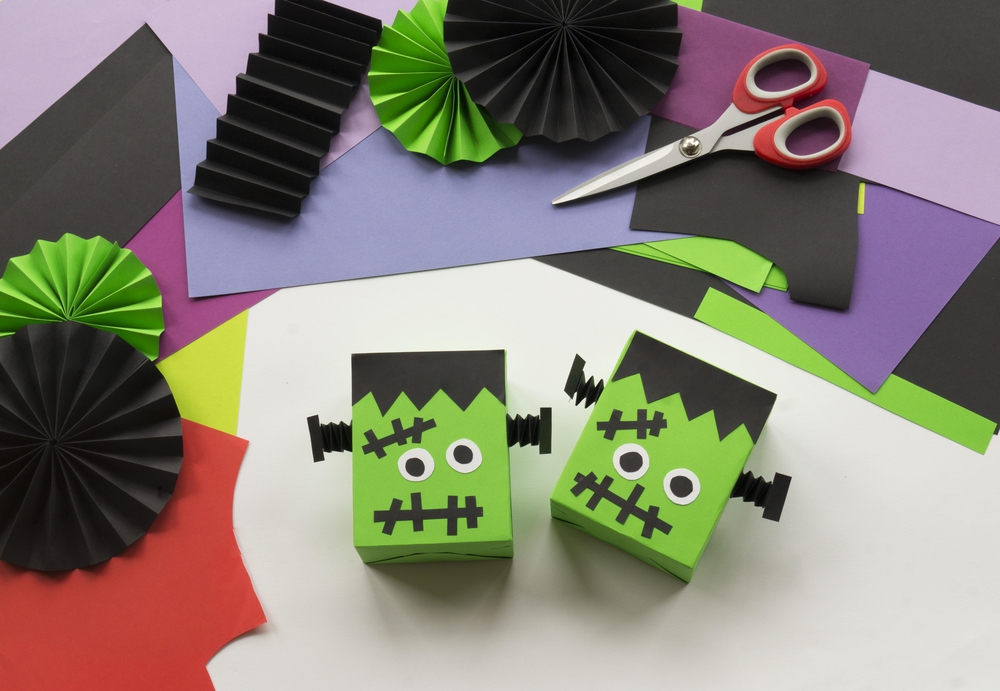
This Frankenstein craft makes a spooky gift box with stitched mouth, and accordion-folded black paper bolts on the sides.
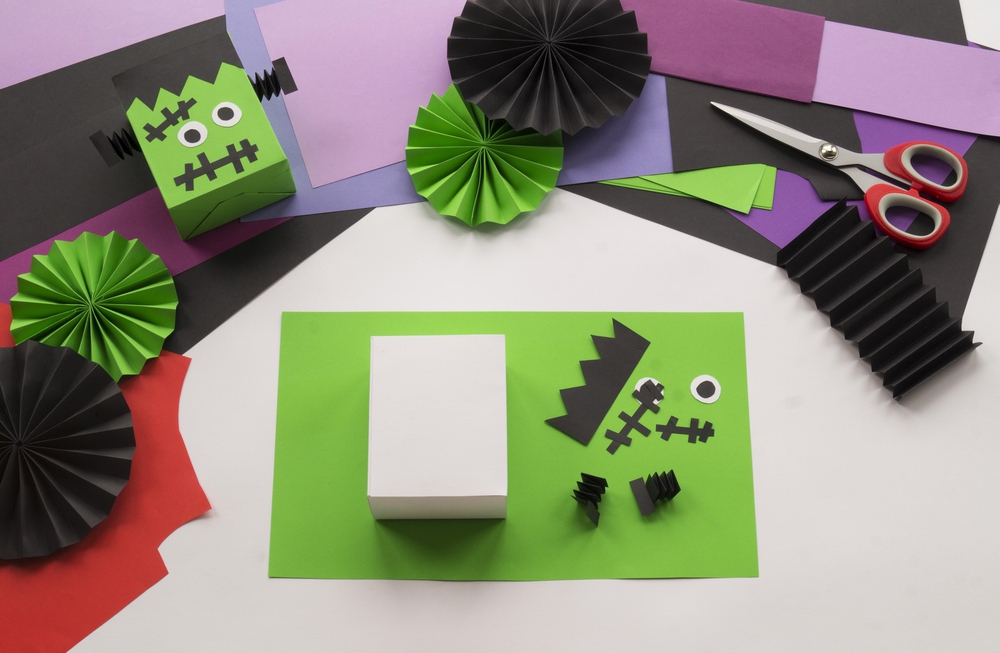
You need a small cardboard box (can be from anything even cereal), green and black paper, googly eyes, a black marker (optional), scissors, and craft glue.
Cover the box in green paper, cut and glue a black strip across the top for the hair with a jagged cut edge, draw or cut and paste the stitched scar and mouth with the marker, fold small strips of black paper into zigzag bolts, then glue one bolt to each side of the box.
Bat Gift Box
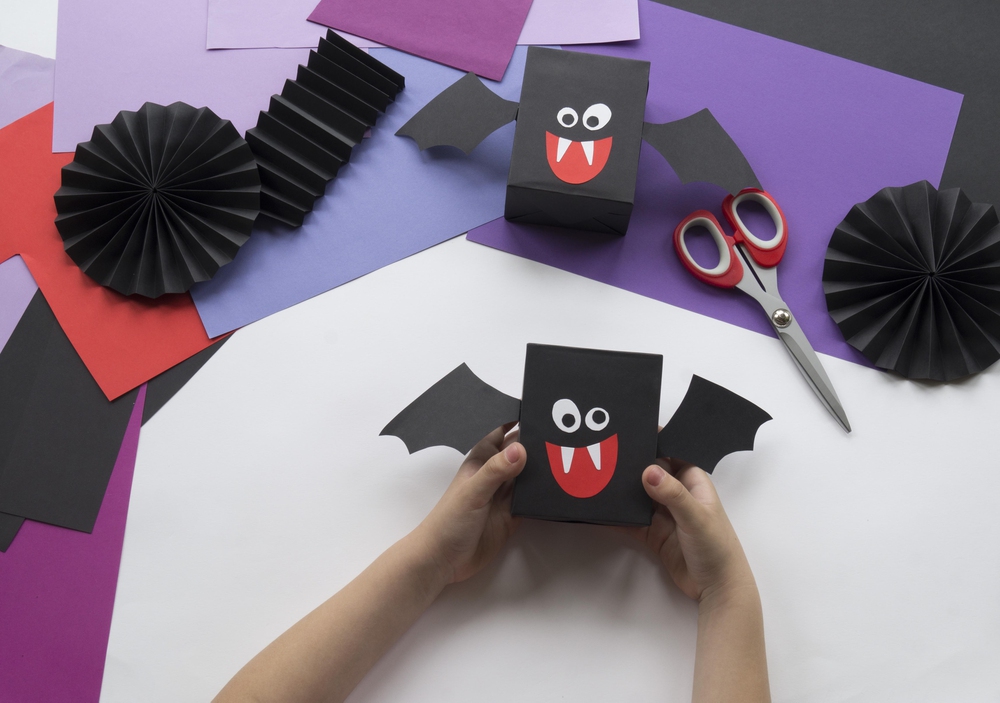
You can make a simial gift box but designed into a fun bat with white fangs, and two wings.
You need a small cardboard box, black, white, and red paper, googly eyes (pre-made or cut them from paper), scissors, and craft glue.
Cover the box in black paper, cut two bat wing shapes and glue one to each side, cut a red tongue shape and trim two small white triangles for fangs, glue the tongue with fangs below the eyes on the front of the box.
Halloween Origami
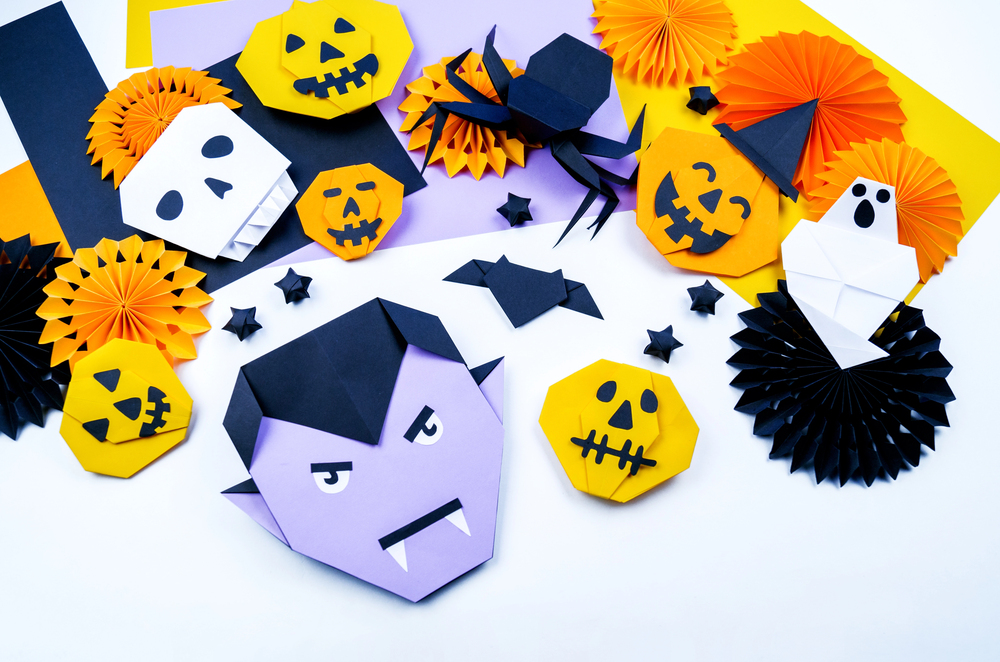
If you love origami you can create a whole collection of Halloween characters: paper pumpkins, Dracula, ghosts, bats, spiders, all made just by folding some paper!
You can use markers to add details.
Felt Skull Brooches
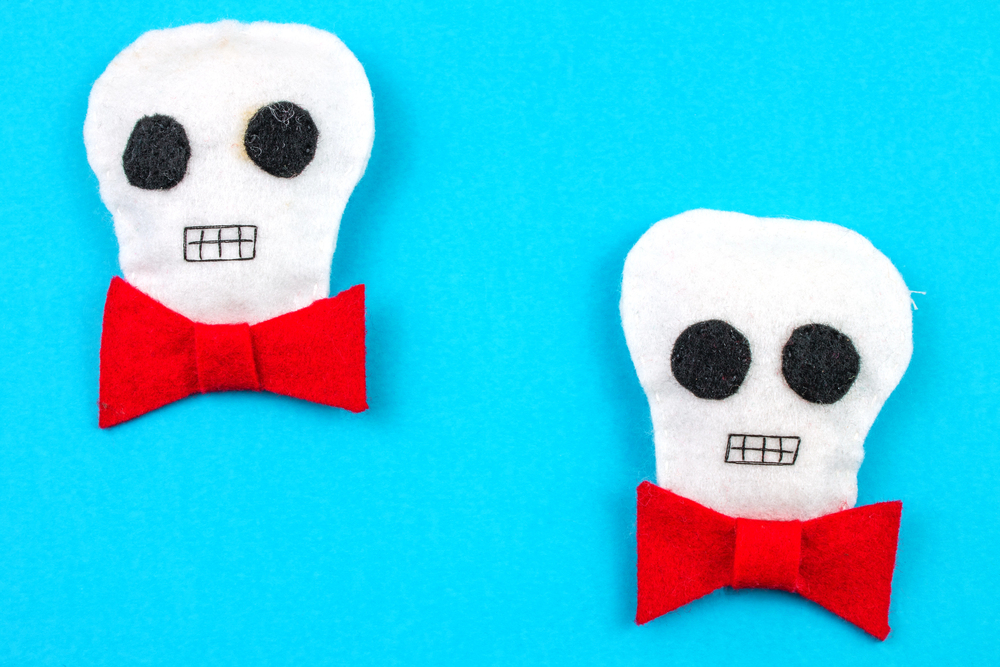
These felt skull brooches are adorable and very simple to sew even if you are a
You need white and red felt, black felt or black marker for eyes, black thread or a fine marker for the teeth grid, scissors, craft glue or needle and thread, and a pin back.
Cut two matching skull shapes from white felt, cut eye circles from black felt and a bow tie from red felt, draw or stitch the tooth grid on the face, glue or sew all layers together, then attach a pin back to the reverse.
3D Paper Strip Pumpkin
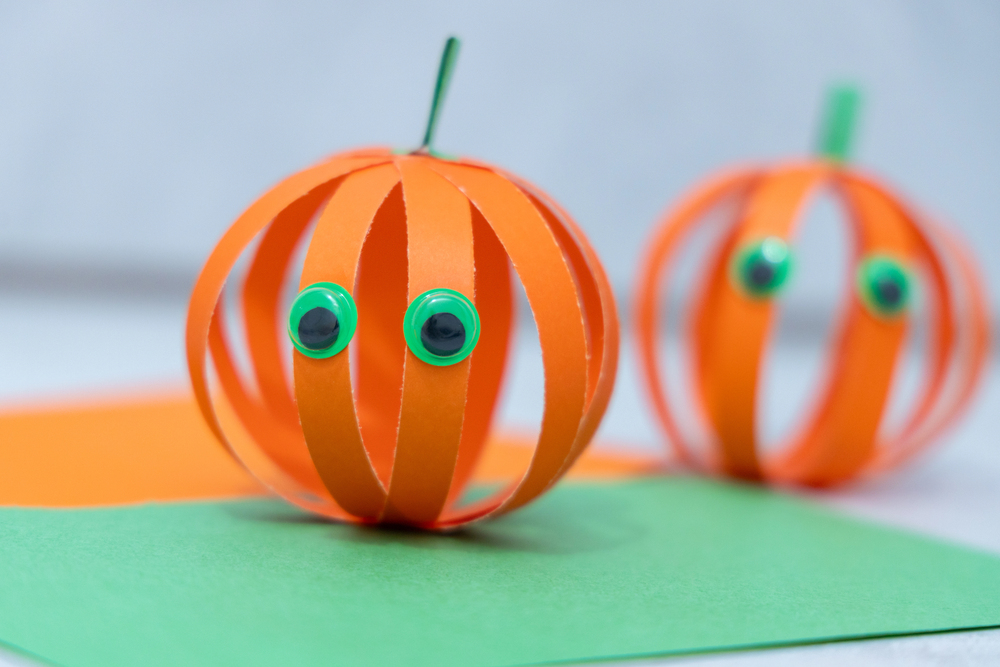
This pumpkin craft is one of the easiest ways to make a pumpkin with paper and minimal supplies for preschoolers to elementary school kids.
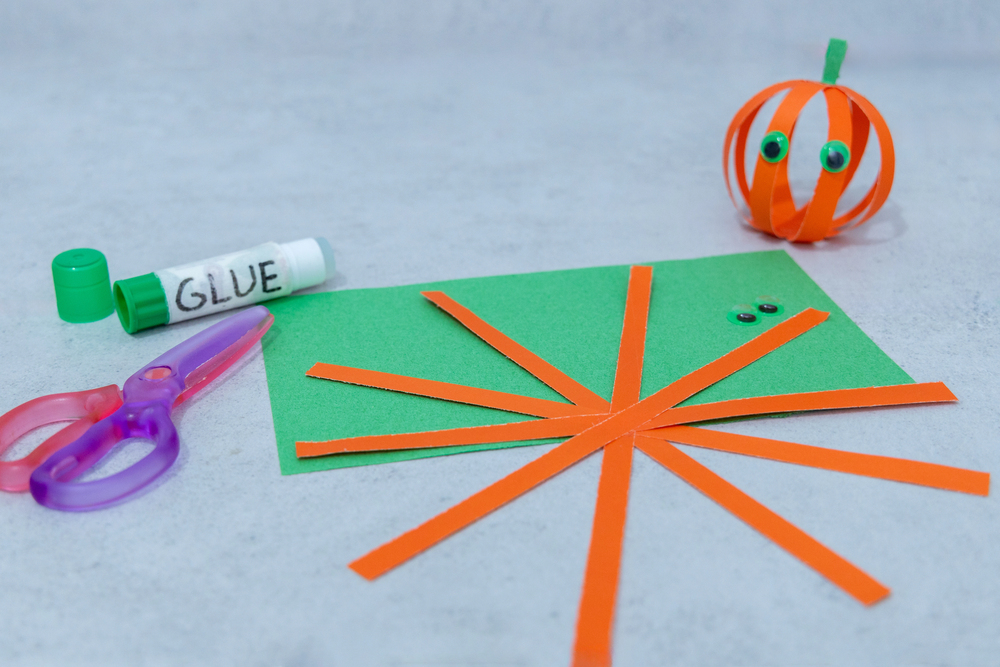
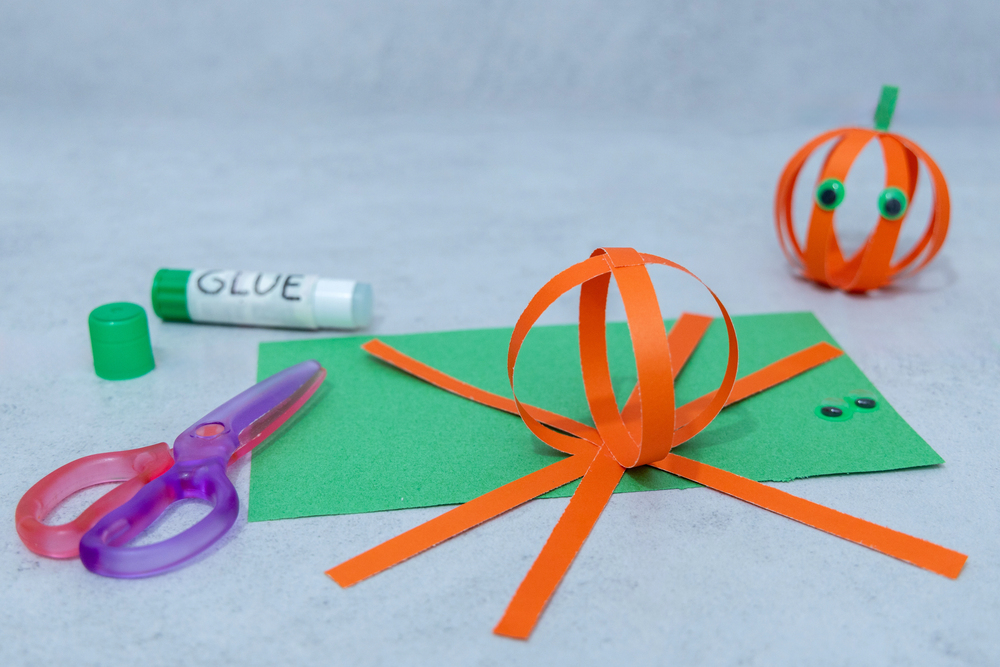
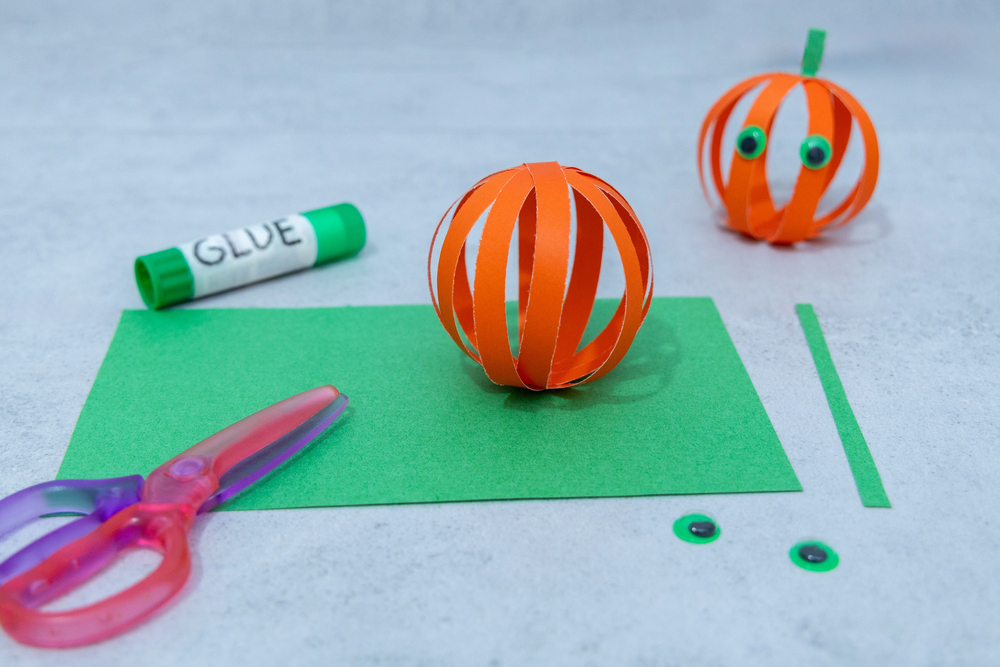
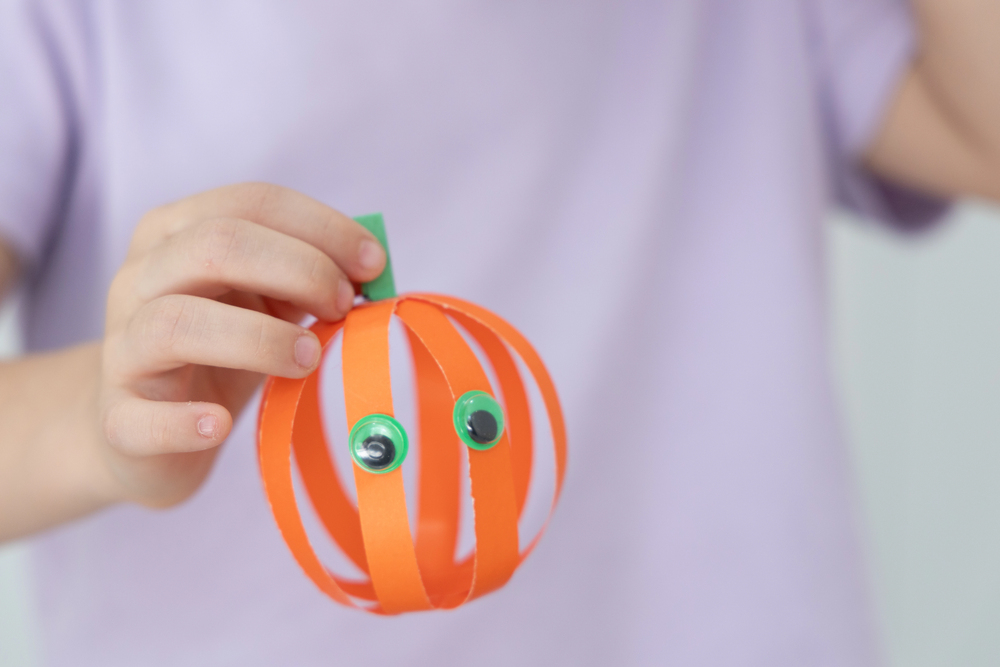
You need orange cardstock or construction paper, green paper, googly eyes, glue, and child-safe scissors.
Cut five long somewhat equal strips of orange paper, lay them out like a flower with crossing each one in the center, glue the center. Then start bringing up two ends of each strip up to form a ball and glue them on the top. Cover the top part with a little green stem and glue googly eyes to two neighboring strips.
Bloody Candle
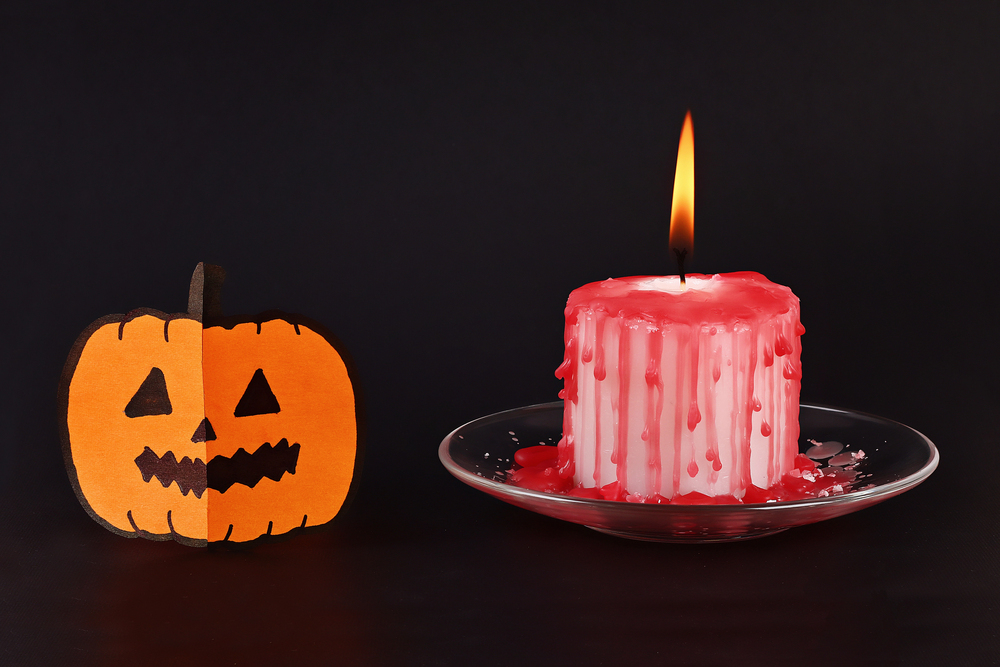
Super easy Halloween craft aka home decor for a dinner setting.
You need white and red candles. Light up red candle and let the wax drip over the white candle. Let it drip down and form little pools at the bottom of the candle. Do so until you like the effect – that is literally it!
For teens only or young adults.
Halloween-Themed Rock Painting
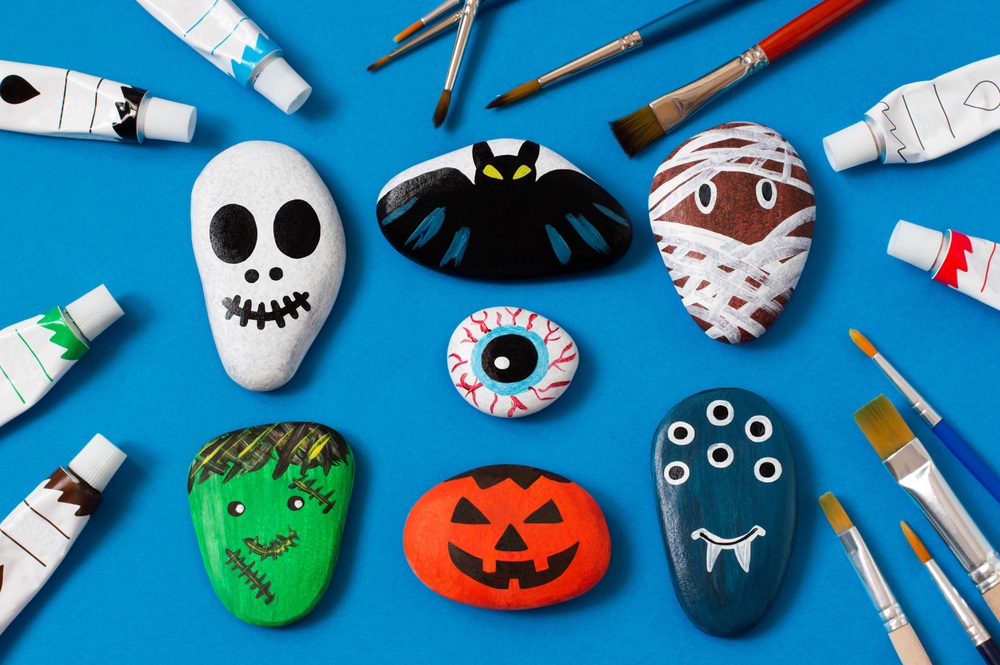
If your kids picked up some rocks during the walk, use them for a painting activity!
Depending on the shape of the rock, it can become a Halloween pumpkin, a monster, mummy, Frankenstein, bat, cat, ghost, spooky eye, or just a Boo! message.
You wiil need some acrylic or poster paint and a brush or acrylic paint markers (these ones are AMAZING for rocks)
If you want to make it last long, pre sand the rocks for kids a bit, and when the paint has dried, apply a layer of Mod Podge.
Toilet Paper Roll Mummy
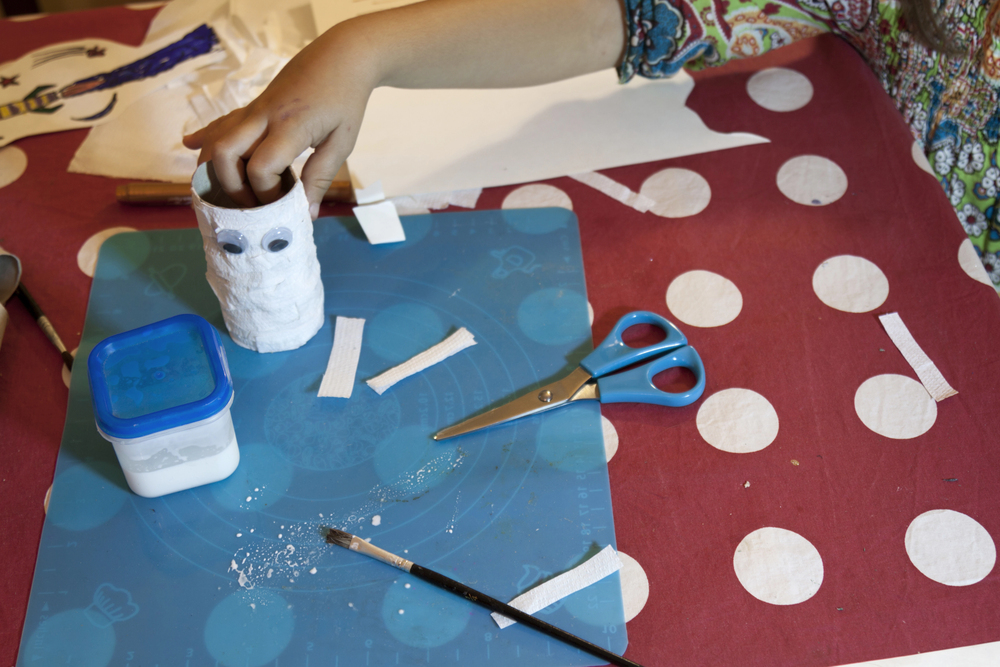
This mummy craft is super budget-friendly, you just need a toilet paper roll, some tissue, google eyes, and white school glue. Scissors and a brush, too.
Simply cut out lots of strips of tissue, cover the whole TP roll in glue using a brush, and start applying strips layer by layer until you are satisfied with the look.
Then glue on a pair of eyes (or draw them!). That’s it!
Flying Bats Window Silhouettes
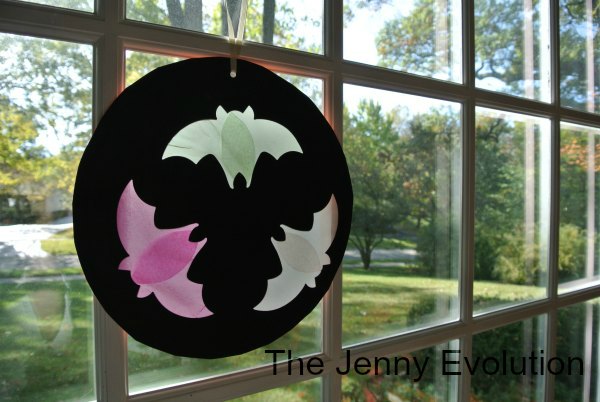
This window silhouette craft makes a hanging bat decoration that uses natural day light to create spooky glow. And it comes together with just a few simplest materials.
Very fun project for kids of any age that you can reuse for many years!
Halloween Ghost Paper Plate Craft
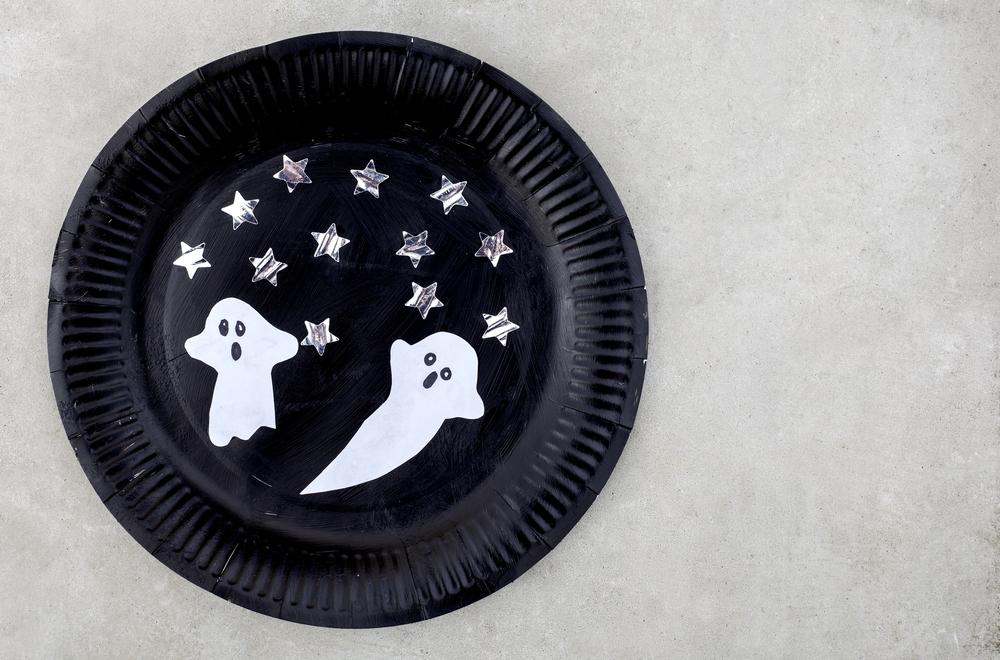
Another affordable Halloween craft for kids of young age is to use a paper plate to create a dark night scene with ghosts!
No template needed, let kids draw different ghosts, cut them out and glue onto a paper plate painted black. You can draw stars or simply use stickers!
Very fun project for small hands.
Cupcake Liner Ghosts
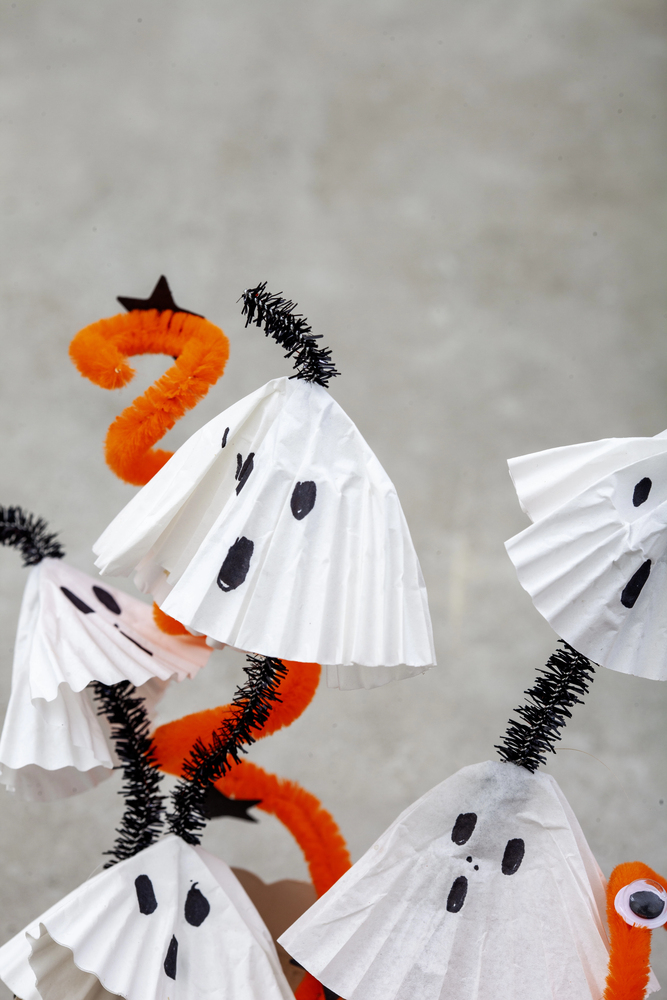
With just cupcake liners, pipe cleaners, and black marker you can make these cute little floating ghosts for table decor or kids’ play.
For under 10 USD you can make a LOT of these ghosts! Simply make a whole in the center of each liner and add a few onto each pipe cleaner! To make them stand use a little jar or a tin can filled with sand/small rocks.
Mummy Craft
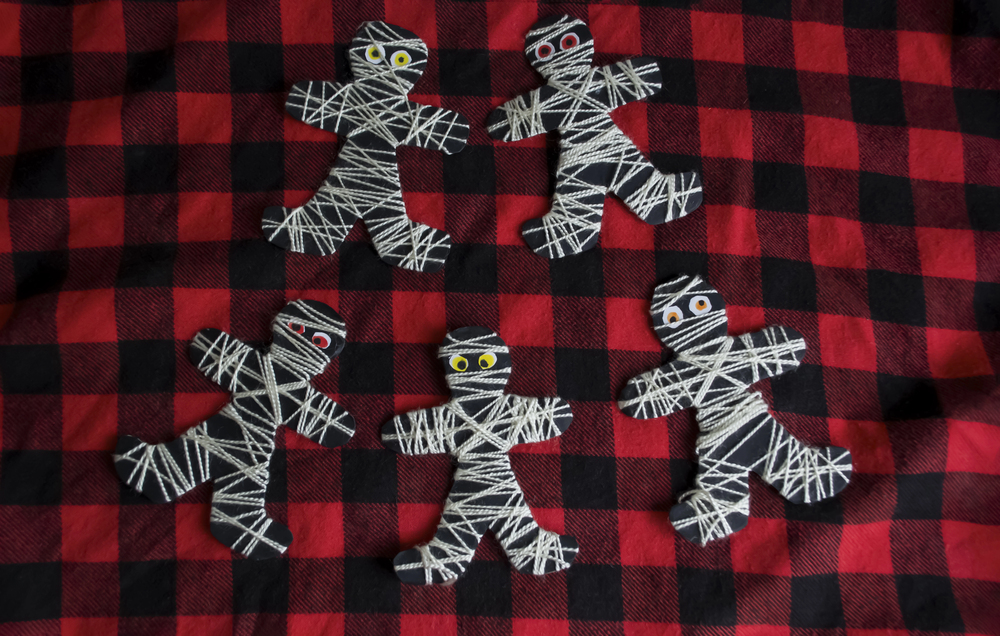
This mummy craft turn a gingerbread-person shaped cardboard cutout into a Halloween mummy!
You will need thin white yarn to create bandaged figures, googly eyes (or can DIY them with paper), black cardboard or foam sheets, scissors, and craft glue.
Draw one gingerbread man and cut the body shape from cardboard, apply a line of glue and begin wrapping white yarn around the entire figure in random crossing directions, press googly eyes near the top of the head.
Halloween Paintings On Fall Leaves
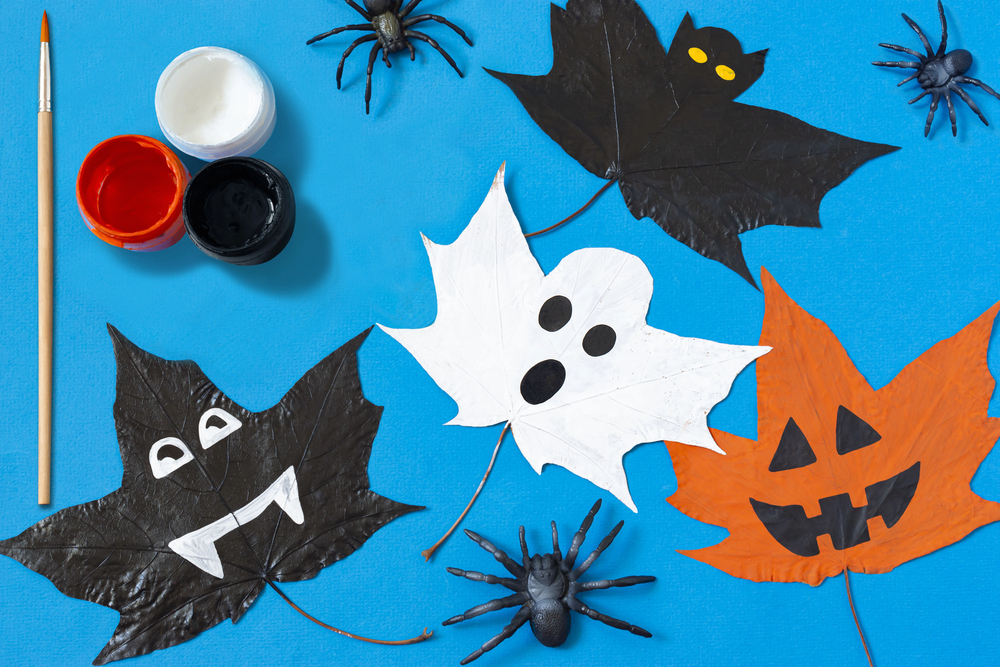
Pick up some fallen leaves on your walk and let kids paint them in Halloween colors + add some characters’ elements like Jack-o-Lantern mouth, fangs, ghosty spooky eyes, and so on!
Very simple idea for kids who love painting.
Toothy Paper Crafts
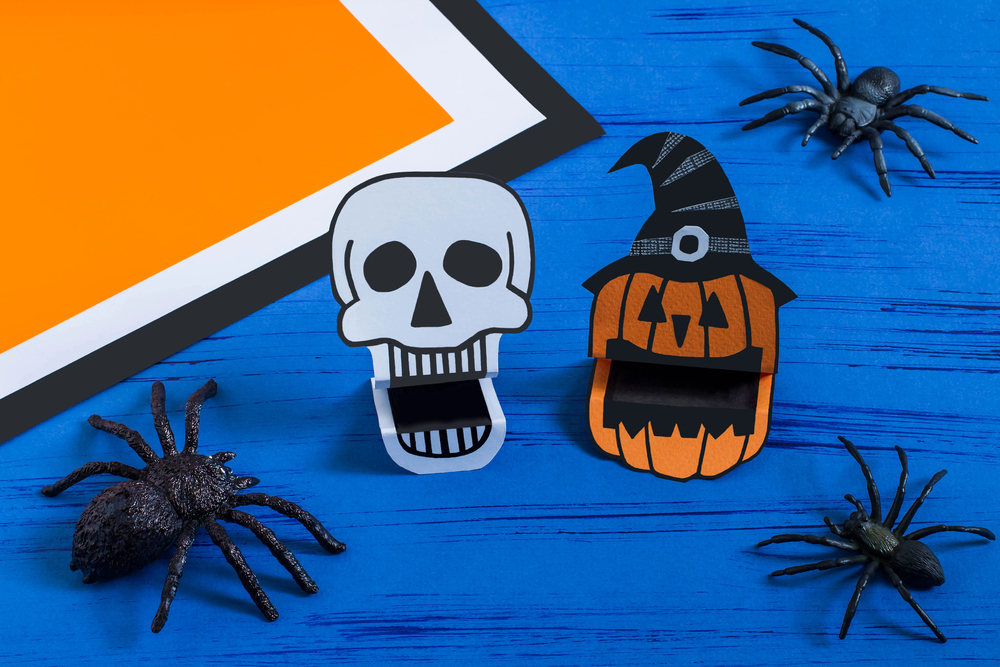
Fun and interactive Halloween craft you can make with cheapest supplies: paper, black marker, scissors, glue, and a ruler.
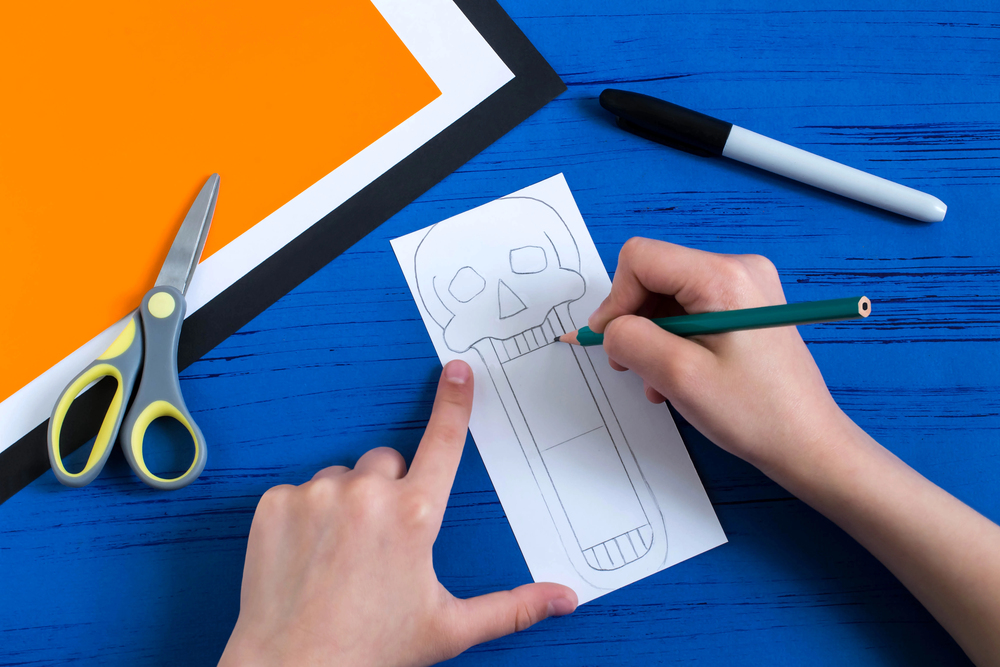
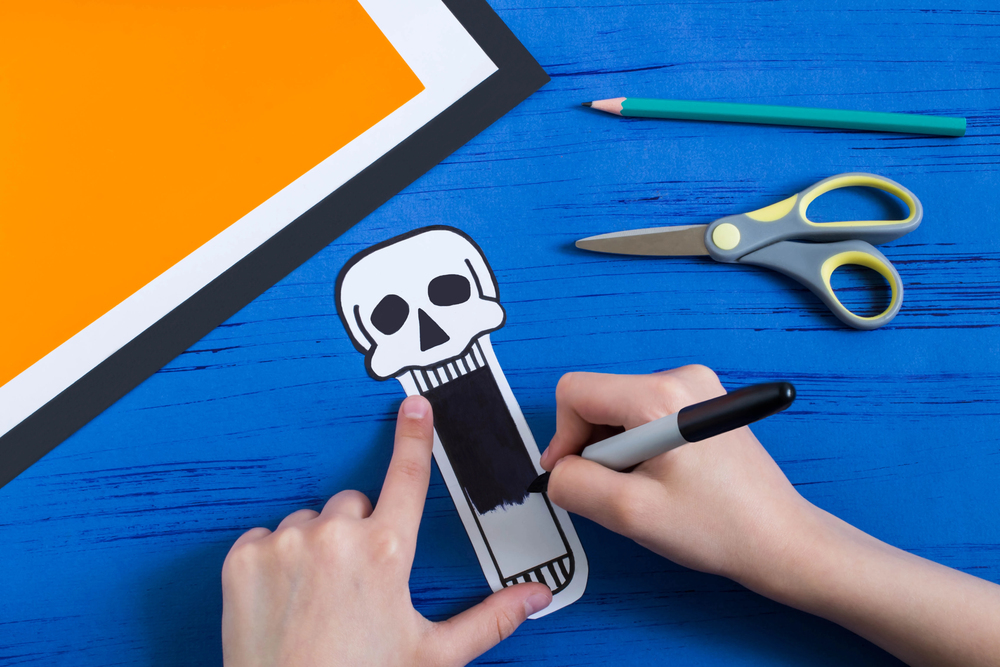
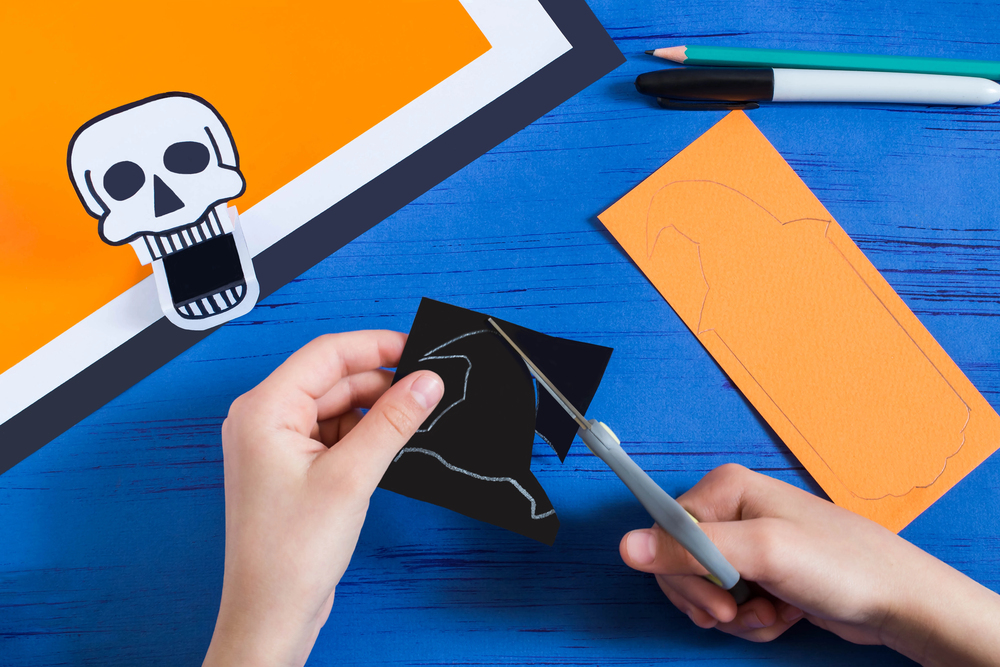
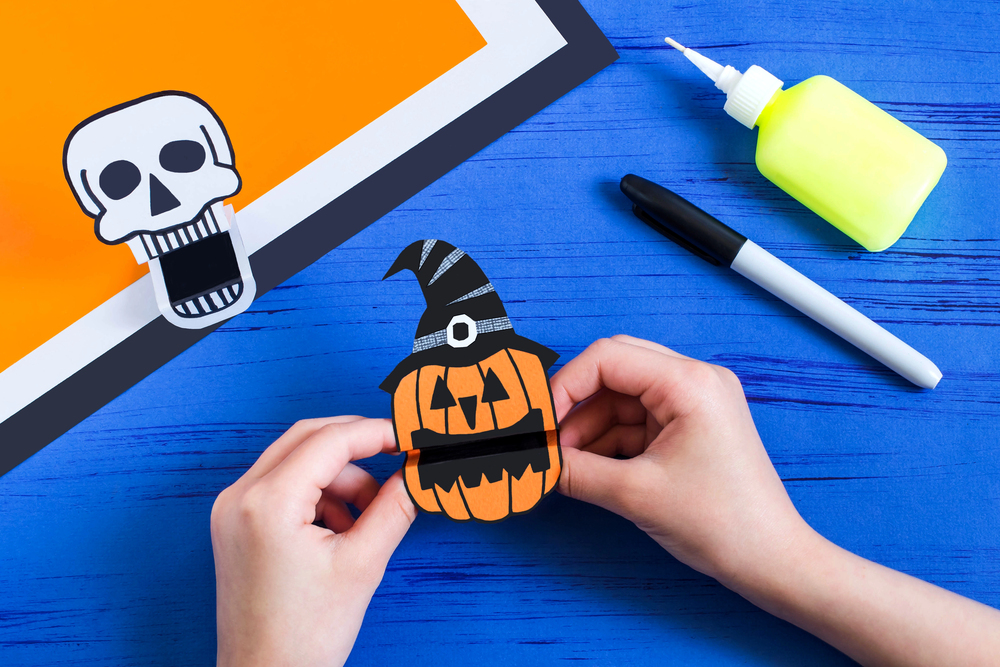
On white and orange paper draw pumpkin and skull leaving between top and bottom parts of the mouth a long (about 9 cm/ 3.5 in) rectangle.
Cut it out and color the rectangle part black, make a black outline so the designs pops out. For pumpkin, draw and cut out the hat, glue or draw the strips on the hat, and glue the hat on the pumpkin head.
Now fold the rectangle part in half and you half a spooky-toothy Halloween paper toy.
Halloween Envelopes
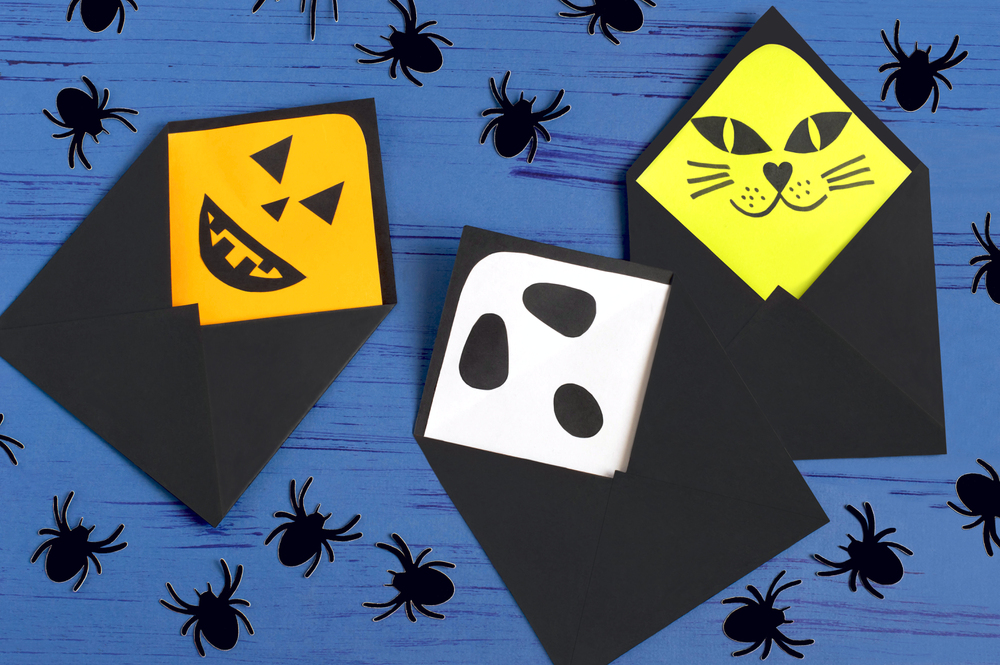
Make original envelopes for Halloween greetings this year byt DIYing the inserts.
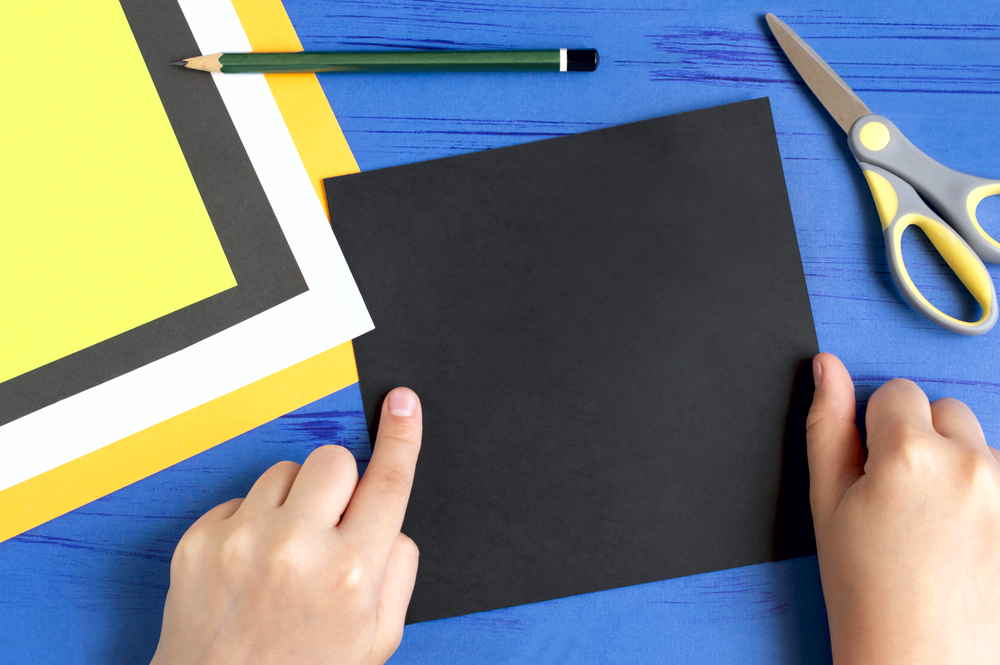
Cut out squares of black paper for envelopes and slightly smaller size colored (purple, yellow, orange, green, white) for inserts.
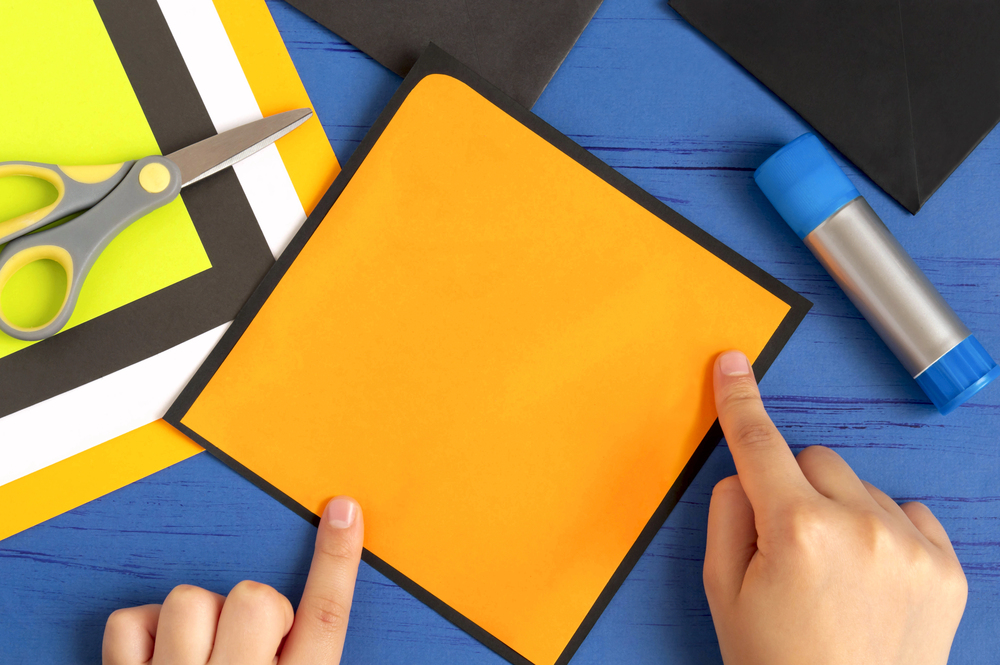
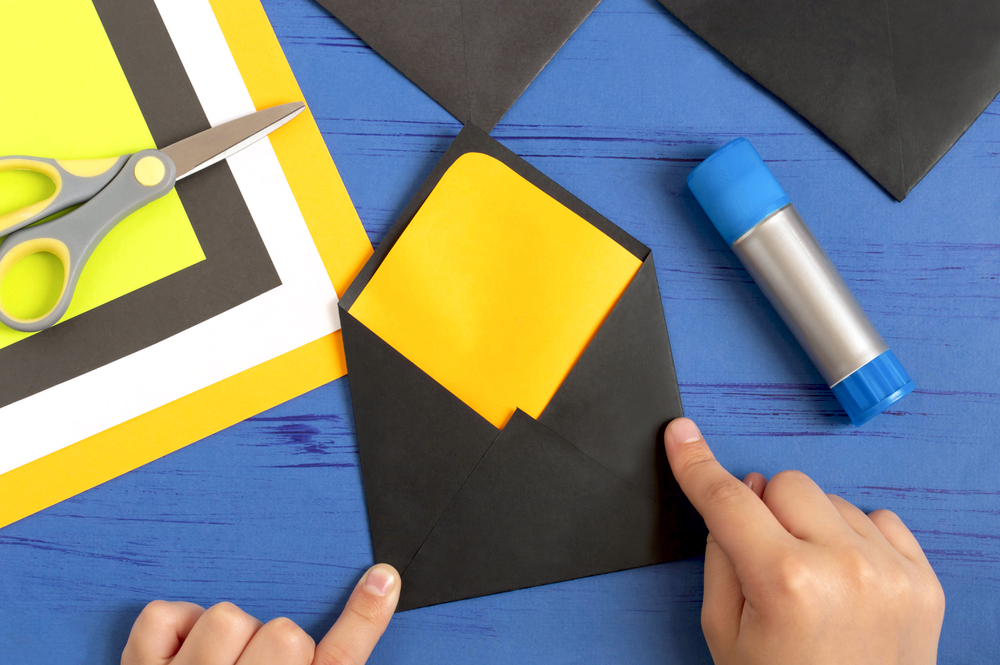
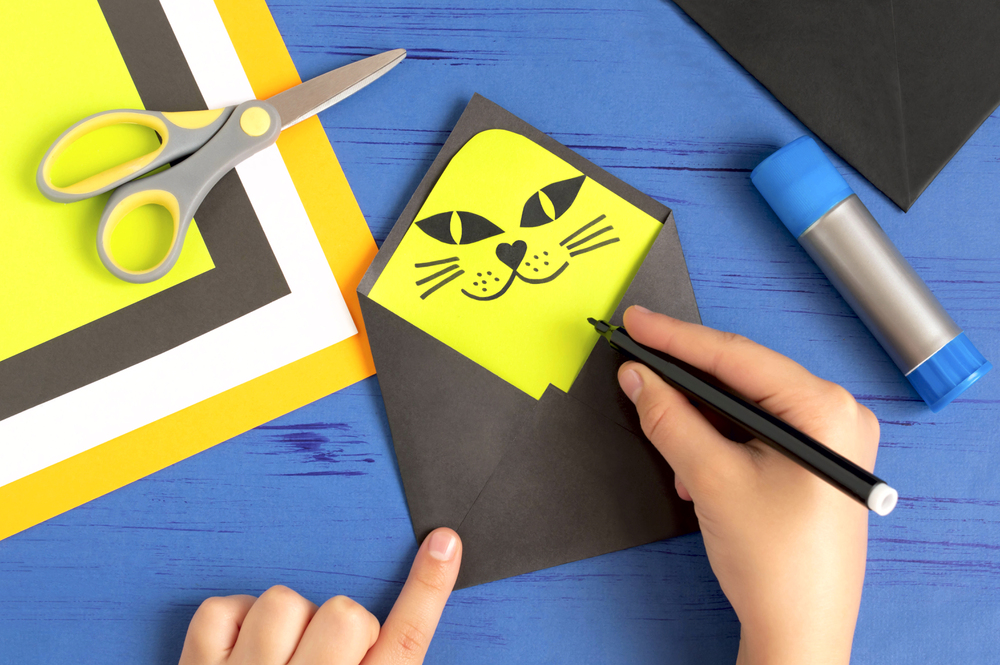
Glue the insert square onto the black envelop square. Place it like a romb with one corner looking up. Fold left and right corner inside, then fold the botton corner up and glue the three between each other without gluing them to the insert.
Your envelope is ready! Now you can decorate the visible part of the colorful insert with markers.
Halloween Witch Wreath
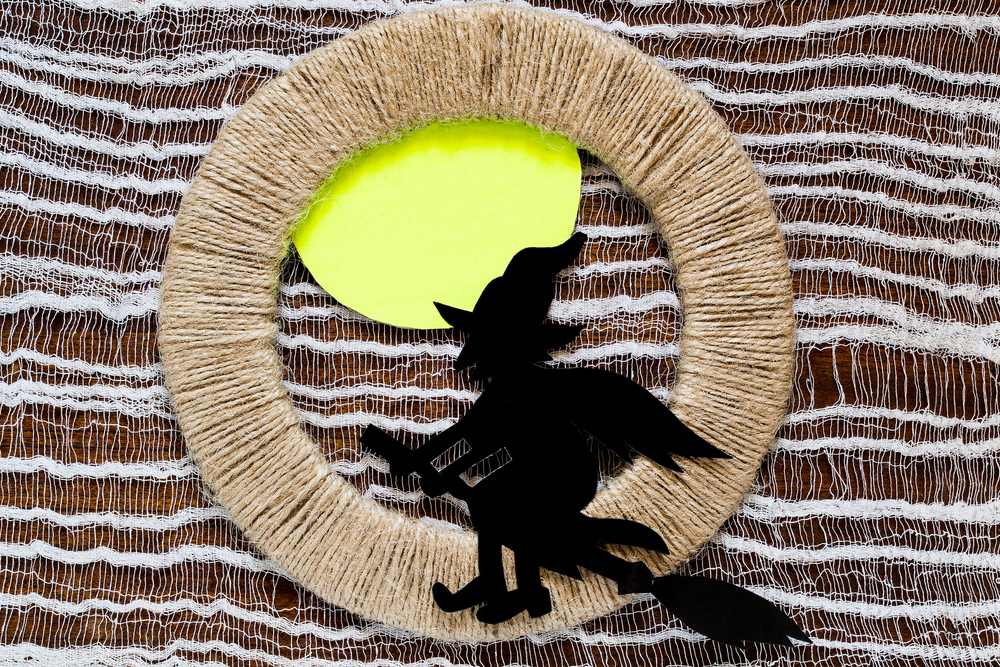
You can make simple Halloween wreath with kids using yellow and black paper and jute.
Draw and cut out circular moon and black silhouette of a witch and glue them to a store-bought jute ring (you can make one too, but you will need some wire or somehing to hold the shape).
Juice Boxes Haunted Houses
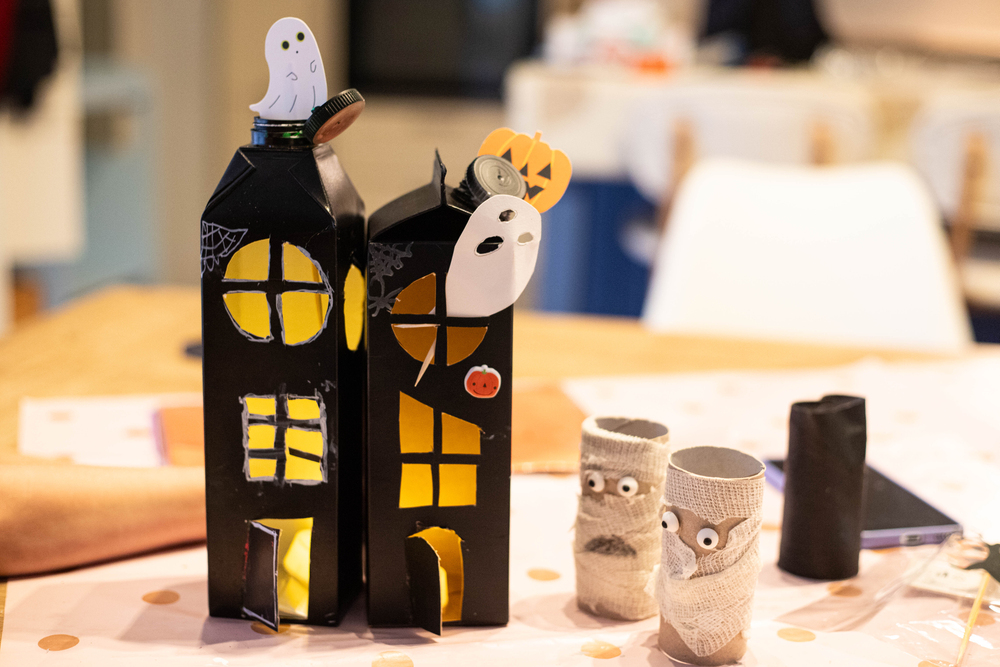
This is MY FAV idea on this list: you can reuse empty juice or milk carton boxes to make Halloween-themed haunted houses.
Wash and dry them, color them black using acrylic or poster colors. Use a box cutter to make crooked windows and opening door and place an electic candle (NOT real one) inside to make the house light up!
You can add any spiders, ghosts, pumpkins as decor.
Paper Plate Black Cat
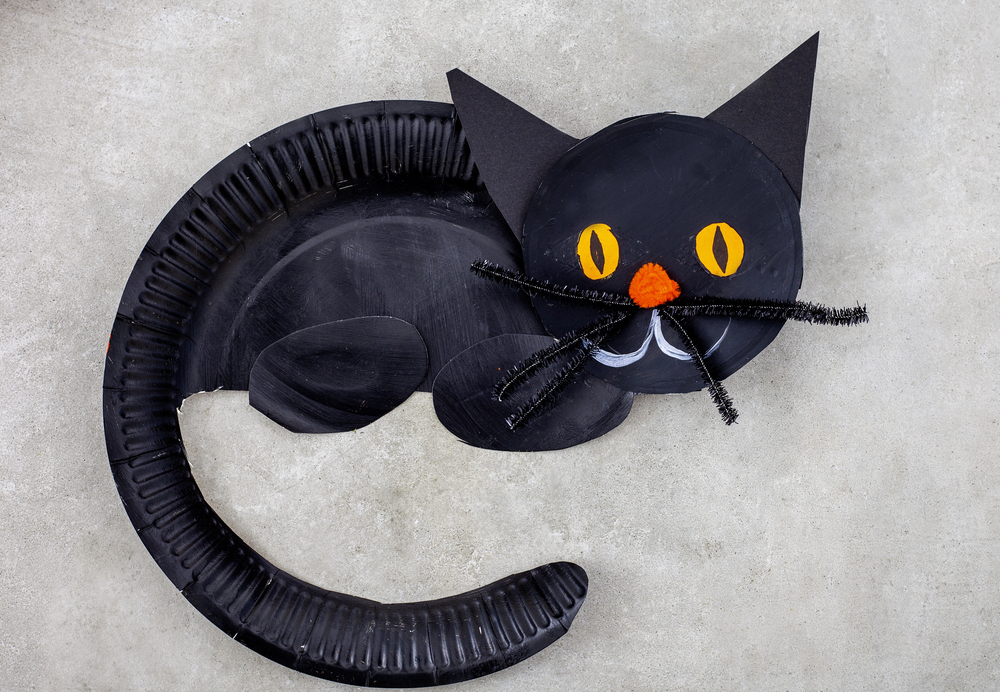
Paper plate is a perfect shape to make a cute black cat!
You will need to cut out half of the inner side of the plate, leaving a part of the rim as a tail, then use that cut-out part to cut a round head, glue ears and pipe cleaner whiskers onto it, draw yellow eyes, nose, and mouth, and add legs cut out from black construction paper!
Halloween Spooky Wreath
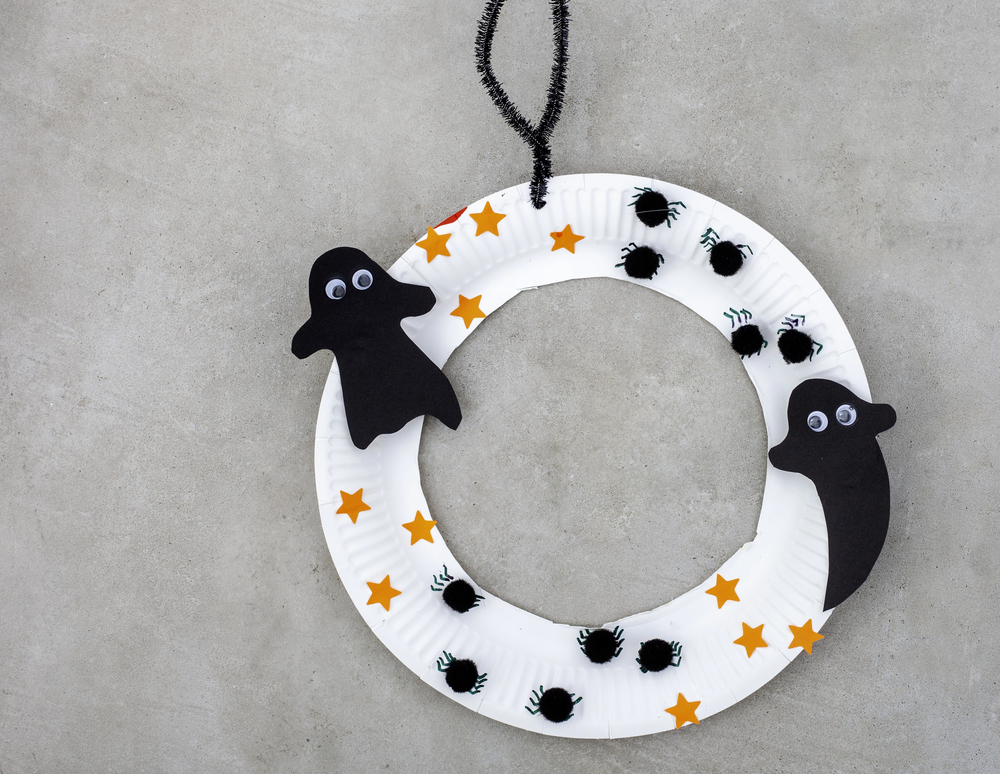
Got a paper plate? Paint it white, cut out the center and here you have a blank template for a Halloween wreath preschoolers and young kids can decorate.
Use simple shapes like pumpkins and ghosts from kids drawings as decoration. To add spiders simply cut out circles (black or colored paper, or pom poms) and draw four legs on each side.
Stars, googly eyes, and stickers are fun to add, too, but require extra budget 🙂
DIY Halloween Pumpkin Lantern Garland
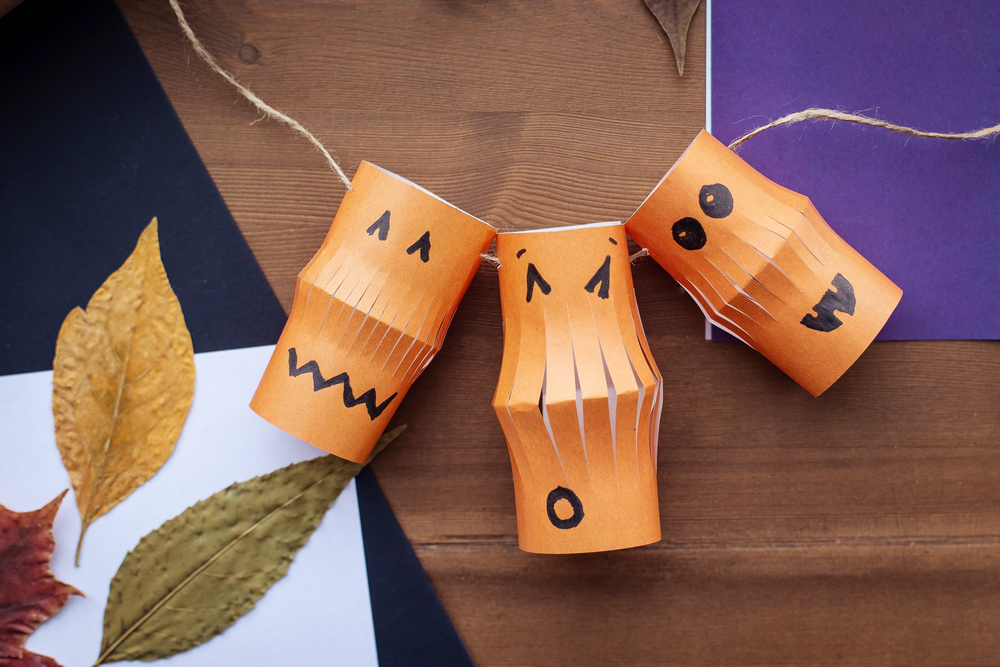
Fun DIY garland to decorate the living room for the party.
You need orange craft paper, a black marker, scissors, and jute twine or some sort of string. You will need something to make little hole for the twine, can be an awl or even a thick needle.
Cut as many orange rectangules as you want and as big as you want (WIDTH of the paper rectangle is how big your lantern will be). Then lightly fold the rectangle horizontally in half and make short cuts.
Roll each sheet of orange paper into a cylinder and glue up. Finally, draw the jack-o-lantern faces, secure the seam, make two whole on each side of the top of the lanterns, then thread twine through the top to hang!
Popsicle Spiders
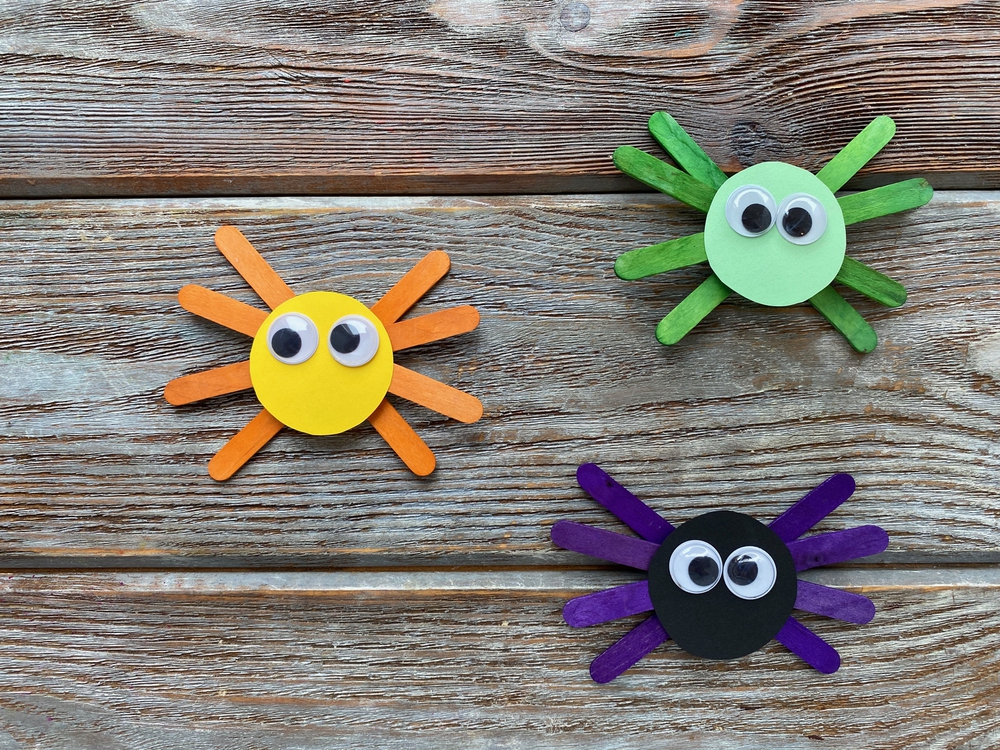
Not everything has to scare you at Halloween: these spiders are the cutest and they do no harm!
You can make them with dollar tree supplies: some popsicle sticks, paper circles and googly eyes. Complete freedom in terms of colors, no drawin skills required at all so it will be great for preschoolers.
Masha Eretnova, born in 1991, is a Chiang Mai-based certified teacher, artist, and blogger with 20+ years of personal painting journey.
She started painting and drawing very early and is now an international abstract artist and educator passionate about acrylic painting, gouache, and crafts.
Her works are part of international exhibitions and contests, including ArtlyMix (Brazil), Al-Tiba 9 (Spain), Exhibizone (Canada), Italy, and many more.
Besides her artistic pursuits, Masha holds a post-grad diploma in Teaching Film Photography and 2 music school diplomas: piano and opera singing.