Last Updated on March 15, 2024 by Masha Eretnova
Are you curious about painting your leather sneakers, jacket, or even a bag? Why not! Painting leather with acrylics is absolutely fun and allows you to personalize and customize your outfit as much as you want!
In fact, you can use acrylic paint on the leather without being afraid it will crack or peel off, or even ruin the leather.
Clean and degrease your leather. Paint the design using acrylic leather paint and once dry, seal it with liquid or spray waterproofing. Done!
But let’s talk about it in detail.
In this article I will share with you specifically what paint to use, what sealer to use, how to paint your leather, and even how to fix mistakes! Let’s do it 🙂
Table of Contents
This post contains affiliate links to products I recommend. This means no extra cost for you but tiny commission for me to support my blog.
Can you use acrylic paint on leather?
Yes, acrylic paint can be used on faux or real leather – it is a soft and flexible, and absorbent surface – ideal for acrylics. In fact, leather paint is mostly acrylic-based!
However, the key to painting leather with acrylic is a good surface preparation – without it, your paint may crack, peel and look simply unpleasant.
The next important thing is to use good paint.
Yes, craft acrylic paint can work, but if you are planning to wear your leather it is better to use acrylic-based leather paint and a protective finish to make sure the paint will stay on your shoes or jacket for a long time. Remember that painting leather is more like staining than painting.
I have a separate guide for painting fabric, if you would like to upcycle your shirts or other clothes, feel free to check it!
Some paints, like Angelus, also work on eva foam for creating cosplay props and costumes.
TOP Acrylic Paint on Leather
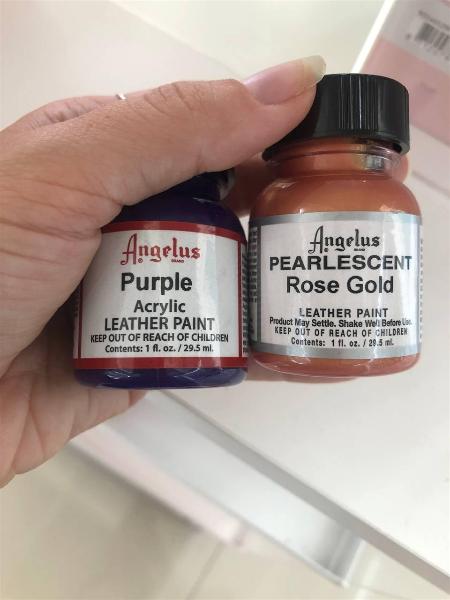
- 👑 Angelus Leather Paint Set of 12 – an absolute favorite among leather painters. It is the best acrylic paint on leather.
No products found.
If you want a better choice shop directly on Angelus’s website in Paint collection, where they have both sets and all colors individually.
Need an alternative? I’ve got 10: 12 Best Acrylic Paints for Leather & Suede
PAINTING LEATHER WITH ACRYLICS IN 3 STEPS
To paint leather with acrylic paint you don’t need expensive tools or supplies, you also don’t need years of experience – it is an easy process including only 3 steps:
- Clean and prepare the leather
- Paint in thin layers
- Seal and waterproof the painted area
Preparation is the most important part.
If you don’t do it right, the paint will peel and crack and the whole project can be ruined. If the preparation was not proper even a good sealant won’t help. I can’t stress enough how important is the prep work.
Supplies you need to paint on leather with acrylics
- Acrylic paint on leather
- Isopropyl alcohol to de-gloss the leather
- A de-glazer: Fiebing’s Deglazer for leather, or Angelus universal Preparer and De-greaser. Some DIY enthusiasts use a solution of bleach and water 1:10 for degreasing, but I can’t recommend it.
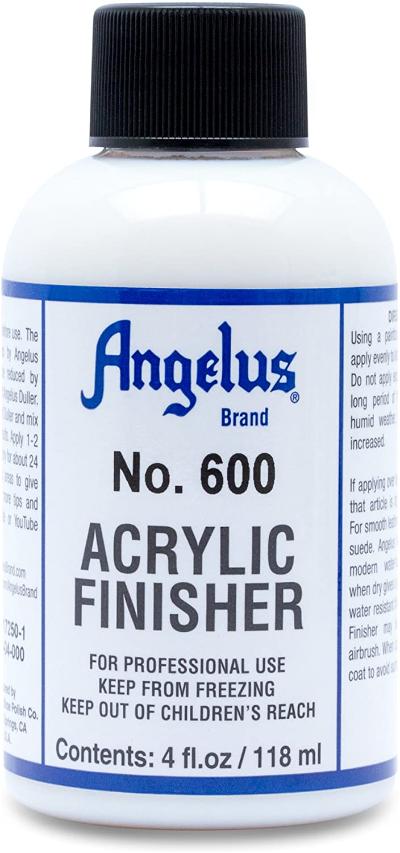
- Leather paint sealer: Angelus paint finisher or Leather Max Finish and Restorer
- Paintbrushes – if the area is big, use a large flat brush. For details use miniature brushes size #0 to #2.
- *If you’re not painting to customize but to restore leather: a leather restoration kit Furniture Clinic or any alternative.
- *Leather conditioner to soften dried leather – Leather Honey Leather Conditioner or alternatives.
Step 1 – Prepare the leather for painting
Your first step is to clean, remove all grease, and gloss from the leather, and prepare it to soak some paint. If we leave any coat or grease on our leather surface, the acrylic paint will peel and crack, no matter what we do!
Don’t worry, I’ll guide you step by step through the preparation of your leather.
Before painting:
- Is your leather real or faux? If you’re painting faux leather, keep in mind that it needs extra attention – it is often coated with silicone or wax. Use degreaser carefully until you remove all coating.
- Is your leather soft or hard (dried)? If we have a dried leather item, we may need to soften it with Leather conditioner.
- Are you painting something or just restoring it? If you’re restoring, get a restoration kit! However, the process for painting and restoration is pretty much the same, except for painting you will use a lot of colors and create a pattern or an image.
- Set the right environment. Acrylic drying time depends a lot on the temperature and humidity. Choose a well-aired space with no direct sunlight, not too cold or warm, just normal temperature.
How to prepare leather for acrylic paint?

- Cover your workspace, clean the leather item, and let it dry to make sure there is no dust or dirt on it.
- Using cotton pads and Isopropyl alcohol degloss the surface – it will lose its shiness but don’t worry, we will restore it once we finish painting with a special sealer. The alcohol may not be enough, in this case,
- Use a small amount of Angelus universal Preparer and De-greaser to thoroughly wipe the surface. Move in rounds, gently. It may be the case that you will do it several times, especially with faux leather.
- *If you feel like there is still some coating left, use a fine sandpaper and sand the leather very carefully – do not damage it or press too hard against the sandpaper! It is an extreme measure, normally, a degreaser will be enough.
- *If the leather is hard, apply the leather conditioner now, not after you paint it.
NEVER SOAK THE LEATHER! Leather is very absorbent, especially if we remove all protective coatings. A soaked leather will take forever to dry (and you should not use any heat sources, including the direct sun) and we need a fully dried and clean surface to paint.
Step 2 – Painting leather with acrylics – 9 Practical Tips
If you will remember only one thing from my post, remember this: always paint leather with acrylics in thin layers, letting them dry completely in between. This way the paint will have enough time to dry, will not crack, and will adhere much better to the leather.
- Do a test painting. Scared to start painting? I feel you. That’s why I always recommend testing paint on a small area that will be invisible. You will immediately see, how the color looks, if it sticks or peels. If the paint doesn’t stick, you need to step back and degrease it better!
- Only thin layers to avoid cracking. Thick layers of paint are more likely to crack and peel, as they will have uneven drying time. This rule applies to ALL surfaces and acrylics. Plus, if you’re painting in a cold room, the paint layer may crack.
- First layer is the most important. The first coat should also be thin, you can thin the paint with water a little bit, then let it dry completely, so the leather will soak the paint and get the stain. The general rule is to wait about 2 hours between layers. Once the first layer is dried, keep adding thin layers of undiluted acrylic paint!
- Use appropriate water-based paint. I recommend using one of the Leather acrylic paints, I pre-selected above, yet, if you’re using regular acrylic paint, like Golden Acrylics, the brand has done a large testing and come up with the following:
- Undyed, unconditioned, untreated leather – use fluid acrylic paint mixed with fabric medium, for example, the Fluid Acrylics mixed with GAC 900 Fabric medium in a 1:1 ratio. Heat set once dried.
- Treated and dyed leather – use the Golden High Flow acrylics or any other high-flow acrylic paint
- Mark the edges of the painting. Probably, you are not painting the whole surface. If you’re painting only on a piece of leather (back of the jacket, part of sneakers, front of the purse, etc), use special artist tape to marke the borders and protect the rest of the leather surface.
- Paint in the direction of leather flexing. Before painting, flex the leather in your hands, to see how it is flexible, how it bends. The better you will understand it and follow this pattern, the less likely you will have a crack! This method will also allow the painted leathe to look very natural.
- Bend the leather again after every layer. This way we help leather adjust, not harden with paint, and prevent cracking. The paint will penetrate everywhere which means better colors. Don’t let the leather sit still and become stiff.
- Use brushes. To cover large areas use regular large paintbrushes. If you have details and lines, use liners or miniature, detailed, brushes. To be honest, you can also use a sponge or a foam brush to paint leather with acrylics, but be careful: both sponges and foam brushes have a big paint load, so don’t dip them or soak them in paint, only use a small amount of paint. Remember, that we need thin layers!
- Keep the room well aired, not freezing cold, not humid. No direct sunlight or heat next to the painted leather.
What if I accidentally spill the paint? How to remove paint from leather?
Accidents and mistakes are normal and there are a lot of simple solutions to remove acrylic paint from the leather.
- The easiest solutions is warm soapy water. Using a brush try to wipe the paint off the leather. Remove the excess of water and paint with a soft towel.
- Rub cooking oil, olive oil or baby oil onto the painted area few times, then using a knife carefully remove the paint. Don’t forget to degrease the leather once done.
- Nail polish remover
- Rubbing alcohol
- Acetone
- Mechanically – using a scraper or a knife. Be very gentle and do not damage the leather!
How to Seal acrylic paint on leather so it won’t peel or crack
The last step of painting leather with acrylics is sealing and waterproofing. We need to make sure our sneakers, jacket or purse will last long without cracking, yellowing or fading, and will be wearable and easy to clean. To make it real we only need two products:
- ANGELUS ACRYLIC LEATHER FINISHER – the best leather sealer hands down. Helps you seal the surface and give it back a shiny brand new look. This finisher protect the paint from fading or cracking, and allows you to clean the leather later with a wet cloth. Basically, if you’re not planning on wear your leathe item, you can use only this finisher. It comes in 4 formats from matte to high gloss.
- Pebeo Waterproofing Leather Spray to make leather moisture resistant.
- Craft way to seal leather of flat surfaces is to use either Mod Podge or hairspray. But as neither were designed for leather, this can be risky and not durable.
- RTC Leather Finisher – beeswax-based protective coating for leather
- Regular beeswax to rub
- Silicone water-repellent spray (needs to be rewed every season)
Step-by-Step: How to seal acrylic paint on leather
- Make sure the painted area is fully dried and clean – no dust or dirt allowed 🙂 Work only in well aired room!
- Use Angelus acrylic leather finisher or any other finisher in the ratio 1 oz. of acrylic paint finisher to 1 pt. of water. Apply first thin layer using wool dauber or a brush, or a spray. Again, no soaking!
- Let it settle for 5 minutes.
- Apply around 20 coats of sealer to ensure high protection and color vibrancy. Let it dry.
- To enhance the durability you can apply waterproofing spray – Pebeo Waterproofing Leather Spray. It will provide additional durability, protection and moist resistance. I would recommend it for anything wearable. Keep the spray 6 inches from the surface and apply in thin even layer.
- Do not move the item. Let it dry for at least 24 hours. Done! Your leather painting project is looking brand new and well protected!
However, I’d like to add that according to Angelus’s official guideline sealer and waterproofing is optional. Some customizers leave it like that with a matte finish. Again, if you’re not planning on using or wearing this leather – you can skip the step and save some time and money on sealing 🙂
Need some alternatives? If you don’t want or can’t buy Angelus Finisher, you can try Leather Max Finisher or any acrylic paint spray sealer. Do not use hairspray to seal the acrylic paint on the leather!
Read also: How to Paint & Seal Acrylics on Leather Shoes
Can You Paint A Leather Jacket Using Acrylic Paint?
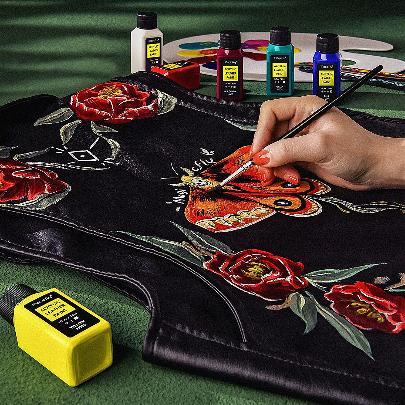
Absolutely! Custom jackets sound fun! You can easily personalize the back of your leather jacket, pocket, or sleeves using acrylic paint. In fact, acrylic-based paint is the most popular choice for custom leather clothes.
- Clean off all dust and dirt with a gentle brush or cloth and soapy water. Don’t soak your leather jacket. Let it fully dry.
- Degrease with Isopropyl alcohol or any special degreaser. This is a very important step, make sure you go in all cracks and degloss all shiness and protective coating. Only that way the paint will stick. Otherwise you will find paint peeling off. Let the jacket dry.
- Place a pillow inside the jacket to make sure it’s soft, flexible and you can paint it thoroughly.
- Use Angelus Leather Paint or any other leather water-based paint. Apply only in thin layers, making long strokes. Make several layers until you like the colors.
- To protect your jacket and make it wearable again, apply finishing and waterproofing coating. Use Angelus acrylic leather finisher and Pebeo Waterproofing Leather Spray. It is another important step, as you are protecting the jacket from moisture, cracking, fading and save it for long years 🙂
Can You Use Acrylic Paint on a Leather Wallet?
Leather wallets, both faux and real leather can be easily painted with acrylic paint, precisely leather acrylic paint. The great thing about painting leather wallet is that it is small – less paint to use, faster results, and easy process.
The whole painting depends on prep work: make sure to degrease your wallet with a special degreaser or Isopropyl alcohol before you paint.
A customized leather wallet should be sealed with a special leather paint finisher as you will use it a lot and we need to protect its durability. Angelus has a universal finisher that works for wallets too.
Can You Use Acrylic Paint on a Leather Bag?
Yes, any leather purse can be painted with acrylics and it is an easy way to personalize your purse or to create a very thoughtful and unique gift. Make sure to properly clean the purse before you paint and seal the painted areas once you are done to protect it from cracking and damage.
The painting leather purse process follows the same steps I described here.
How do you keep acrylic paint from chipping on leather?
A proper preparation, including thorough, degrease, and degloss process is the number one method to protect acrylic paint from cracking on leather.
Use Isopropyl alcohol or Angelus degreaser to clean your leather item and prepare it for painting. There are a few more tricks you can use to prevent leather paint from cracks and peeling:
- Use only thin layers of paint, letting them dry in between. But never use heat to dry the leather.
- Always bend leather before, during and after painting to make sure it keeps its flexibility. Otherwise, the paint will dry on the leather, it will become stiff and once you move or flex it later on – the paint will crack.
- Do not mix different paint brands and mediums
- Protect the painted area of leather with a Finisher to seal and waterproof it.
Does acrylic paint ruin leather?
Acrylic paints or leather paint can not ruin leather, in fact, they are the paint of choice when painting leather.
However, if you don’t prepare and degrease your leather properly, the paint will chip and crack, or even not stick to the surface at all! But even in that case, it will be paint itself cracking or peeling, not the leather.
Curious to paint other surfaces? Check my easy guides and FAQs:
- Painting skin [face and body]
- Fabric
- Rocks
- Wood
Painting leather should not be intimidating as all the materials and the process are quite straightforward. And as acrylic paint can not ruin leather, you can always correct a mistake if it happens.
Have you sucessfully customized any leather garment with leather?

Masha Eretnova, born in 1991, is a Chiang Mai-based certified teacher, artist, and blogger with 20+ years of personal painting journey.
She started painting and drawing very early and is now an international abstract artist and educator passionate about acrylic painting, gouache, and crafts.
Her works are part of international exhibitions and contests, including ArtlyMix (Brazil), Al-Tiba 9 (Spain), Exhibizone (Canada), Italy, and many more.
Besides her artistic pursuits, Masha holds a post-grad diploma in Teaching Film Photography and 2 music school diplomas: piano and opera singing.
Last update on 2026-07-21 / Affiliate links / Images from Amazon Product Advertising API