Last Updated on December 1, 2023 by Masha Eretnova
Art on wood was one of the earilest form, along with art on stone, but with modern paints we have different pigments and “stickiness” of paint.
Acrylics work great not only on canvas but on wood, as wood is a porous surface, it can help you with your creative process or paint wood furniture.
You can use acrylic paint on both treated and untreated wood surfaces, including wooden panels, MDF, boards, masonite, wooden furniture.
To paint acrylic paint on the wood you need to prime wood surface, and paint and seal the painted surface to make sure your art will last years.
As a crafter I work a lot with paper, canvas and wooden panels. In this article I will share with you the painting acrylic on the wood process, as well as painting on wood ideas and tips, such as how to paint on wood without brush strokes or which paint is the best.
In this article:
- Can I paint wood with acrylic paint?
- What wood or wooden panel to choose for acrylic painting?
- How to prepare wood for acrylic painting
- Best acrylic paint to use on wood: 7 brands
- How to protect acrylic painting on wood + 6 best sealers
- How to paint furniture and wood without brushstrokes
- Painting acrylic on wood ideas
This article can contain affiliate links. It means no extra cost for you, but tiny commissions for me to support my blog. Thank you!
Can You Use Acrylic Paint on Wood?
Yes, wood is one of the painting surfaces for acrylics. Painting on wood is the most sturdy and substantial surface available.
You can use acrylic paint on natural wood or composite boards but remember to prime your wooden surface beforehand to ensure that any natural elements in the wood, as well as contaminants, do not ruin your painting.
Masonite, HDFB high-density fiber board, and MDFB medium-density fiber board are examples of composites. The fact that they don’t have natural elements in them is one of their key advantages.
But it also means that they are smoother and don’t offer natural wooden texture.
The biggest disadvantage of wooden panels is the possibility of swelling or molding if adequate priming and preparation are not followed.
Not to mention the weight — wood is far heavier than paper or canvas.
Is it possible to paint acrylic directly on wood?
In a word, yes and no.
You can paint directly on wood, but unprimed wood absorbs too much paint, requiring more paint, drying faster, and allowing natural wood elements to affect the painting afterward.
It is preferable to prime the wood.
We will talk about wood priming below, but I also wrote a whole separate article about it: How to Prime Wood for Acrylic Painting.
How to paint with acrylic on wood – steps
- Choose the wood
- Sand and Prime the wood for painting
- Pick acrylic paint colors for your painting project
- Sketch and Paint
- Let the fresh coat of acrylic paint dry and seal it
Below I will walk you through each step and suggest good supplies (and affordable too) you can use for painting your wood items.
Step 1 – What wood or wooden panel to choose?
Let’s see some details about what exactly we can paint on when we talk wood. Choosing natural wood, we will go for hardwood and I’ll quickly explain why.
Acrylic on wood panel works amazingly as well and I will list wooden panels that we can use too. Keep reading.
TAKEAWAY: If it is your first try pick wooden panels: masonite is the most used and great option Ampersand Gessobord (pack of 4). Another low-cost option is MDF: 30 6′′ MDF boards. If you want to paint on natural wood, paint on mahogany, birch, or maple. No matter what you choose always prime the surface.
Hardwood (Natural wood)
Because it will be a heavy object, painting on hardwood requires adequate priming, some room, and some strength. However, you have the option of selecting the size, thickness, and type of wood.
Mahogany, birch, and maple are three common varieties of wood that perform well for acrylic painting.
Mahogany is the best choice because it is rot-resistant, but birch or maple will also work well with careful priming and indoor storage.
Softwoods are not used for painting since they are prone to warping.
Wooden panels
Plywood, hardboard, masonite, MDF, and other types of wood panels are available. They usually arrive unprimed and with the option of being cradled.
Acrylics are most commonly displayed on plywood panels, which are typically constructed of Baltic birch or maple wood. They have a flat surface and are usually unprimed, which means you will need to sand them and prime them with gesso if you’d like a smoother surface.
Some artists claim it will warp, and I don’t use plywood myself.
Oak, birch, mahogany, and walnut are common hardwoods for panels. They’re long-lasting and a wonderful alternative to canvas.
However, they may be excessively heavy and pricey for acrylic painting.
- Masonite
Masonite or hardboard panels are extremely sturdy, inexpensive, and easy to paint on. It can be tempered and untempered. For acrylic painting, we need untempered masonite as it is more absorbent.
To paint on a highly smooth and absorbent surface, sand the masonite before priming or use a pre-primed masonite.
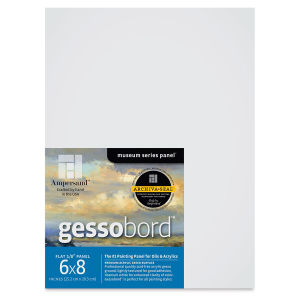
The most popular hardboard is Ampersand Gessobord – an affordable, high-quality pre-primed, and archival wooden panel. On Blick store pack of 4 boards, 4×4, will cost you only around $6 (I like Blick as it is often cheaper than Amazon).
- Medium-Density Fibreboard (MDF)
MDF (Medium-Density Fibreboard) is a low-cost, smooth, robust, and dense acrylic painting surface.
Unprimed MDF is not only unsuitable for painting since it is not water-resistant, but it will also soak up more paint than a primed surface. To avoid this, ensure that the surface is well-primed before painting and that the artwork is properly sealed afterward. I’ll say it again: prime all sides of MDF and use a respirator whenever you sand or cut it. For $14 on Amazon, you can get 30 6′′ MDF boards.
Step 2 – How do you prepare wood for acrylic paint?
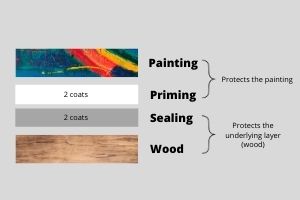
The best-recommended way to get the wood ready for acrylic painting is to sand the surface, apply at least 2 coats of sealing, and 2 coats of priming.
Sometimes you can skip sealing and seal the painting when it is done to protect it.
The easiest way is to buy pre-primed wooden panels. But you may still want to sand them using a fine-grit sandpaper to get a smoother surface.
Here is the full step-by-step wood priming process I made a separate article about, but here I will guide you briefly through it.
How do you prime wood before acrylic painting? 3 steps to prime wood
If you have an unprimed wooden panel or you want an extra smoothness to your primed board, make sure the wood is clean and dry before you will start priming it. For easy cleaning use a lint-free cloth that has been moistened slightly with water.
Elevating the wooden panel on jars may be a good idea as this way you will be able to prime all sides evenly.
Consider using a few wood strips to reinforce the back of a large piece of wood. It’ll prevent it from distorting. (Clamped in place using glue)
Now you are ready to prime the wood!
Supplies you need to prepare the wood for acrylic paint
- Sealant, for ex GOLDEN’s GAC100
- Gesso (Liquitex or Golden or cheaper option you use)
- 140 to 280-grit sandpaper and a face mask (if the surface is really rough, buy 200+ grit, if the surface is already quite smooth, 140-180is enough)
- A wide brush (preferably use a separate one for sealents)
- Paper towel to wipe any excess.
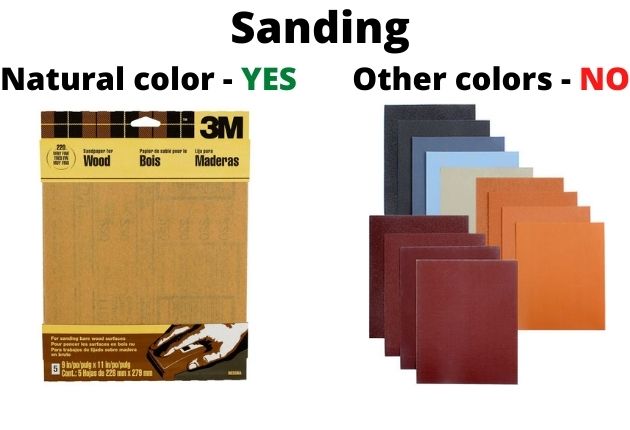
Step 1: Sanding
If you want a smooth finish, use a 140 to 280-grit sandpaper or a sanding sponge and sand following the grain of the wood.
When you are satisfied with the smoothness, clean the surface again. You will easily find it in your nearest local hardware store.
Step 2: Sealing (Optional)
Next step in preping wood for painting is sealing. The main goal of sealing is to hold natural wood components from destroying the painting.
Sealing is absolutely mandatory for natural wood, but you can skip this step if you have a gessoboard or any other wooden panel.
Working with natural wood, you need 2 coats of sealing. If you have knots, you may need a special knot sealer.
Seal only clean and dry wood, and don’t forget to seal ALL sides.
GOLDEN’s GAC100 or GOLDEN Acrylic Gloss Medium are both high-quality brush on sealers. A cheap DIY option is to apply glue.
Do I NEED to seal wood before painting with acrylic paint?
While for crafts sealing wood before painting may be optional, for serious paint job on natural wood and for best results you need to properly seal wood before painting it with arylics using a brush-on or spray sealer.
Step 3: Priming wood
Priming is necessary for any unprimed wood, no matter natural or composite.
Using a roller, brush or spray primer, apply 1-2 coats of priming. Start from the front and sides, then prime the back of the panel too.
Best primer for acrylics on wood? Liquitex White Acrylic Gesso is a good and affordable primer for wood.
I know that some painters apply a basecoat of white acrylic paint as well.
More details on priming, sealing and recommended products here: How to Prime Wood for Acrylic Painting.
Step 3 – Choose the Best Acrylic Paints for Wood

You can use any type of acrylic paint for wood, even inexpensive craft, and student grade paint, if you’re considering painting as a pastime, or if you’ll be painting with your children, or if you’re just a newbie who has to try everything.
If your professional art for sale is a painting on wood, I would use only artist-grade acrylic paint.
The best acrylic paint on wood for beginners is Liquitex Basics if you want to display, sell or gift it. While Apple Barrel is probably the best acrylic paint for wood crafts and it is much cheaper than Liquitex.
As professionals normally follow their own way to do things, I will give the list of paint any beginner or family can use to still make a very good painting.
- Acrylic Craft Paint Arteza
- Apple Barrel (Set of 18) – one of the best crafts paint.
- Liquitex Basics Set of 24
- Hippie Crafter Acrylics (one of my personal favorites overall)
- Handy Art 8 Color
- Blick Studio Acrylic Paint Set of 24
Basically, any good-quality acrylics may be used on wood.
Read full article: Best Acrylic Paint for Wood Crafts & Furniture: Ultimate Guide
If you’d like to learn more about acrylic paint in general, I suggest you read my big research about 21 Best Acrylic Paint Brands for Beginners and Professional Artists.
Step 4 – Tips for Painting With Acrylics on Wood
Acrylic paint is geat for art on wood blocks and panels, but you can also use it (as well as chalk, milk, latex type of paint) for upgrading your piece of furniture.
If choosing acrylics, you can use both paint from tubes and acrylic markers.
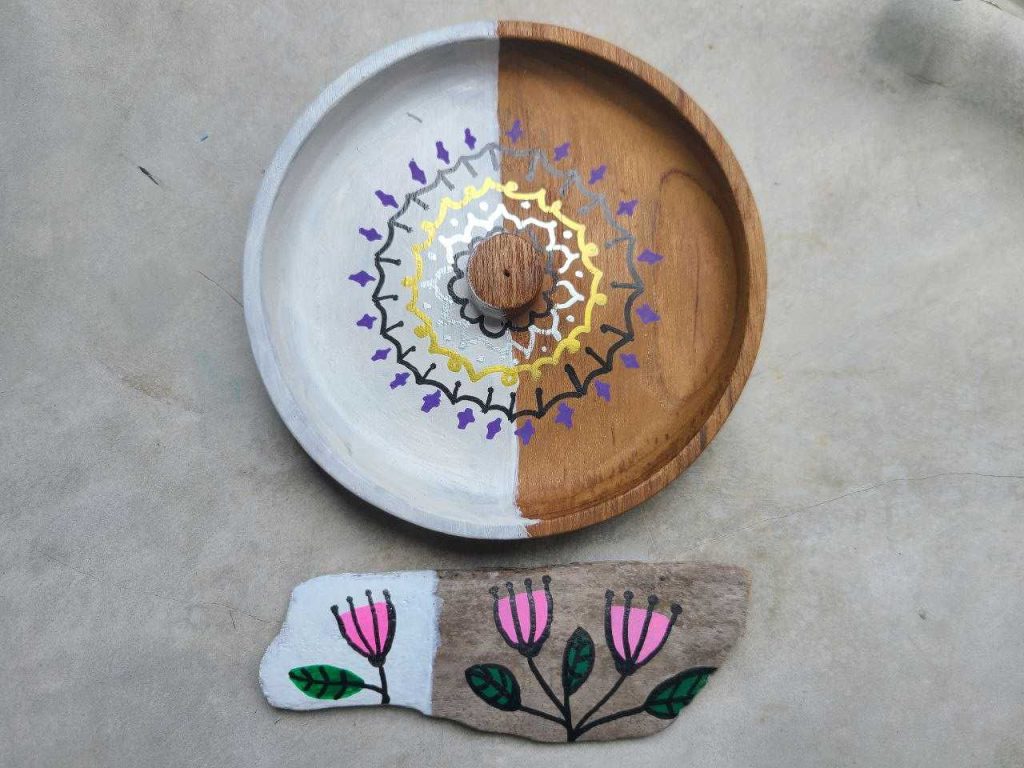
This paint covers wood amazingly even if there are larger surfaces or detail work. For detail work I use markers as it is simply much easier to draw lines with a pen (for a mandala for example) and I use 1-2 layers of gesso once the wood is prepped.
Because the drying time of acrylic paint is so quick (between 5 and 30 min) you don’t have to wait too long between the coats of paint.
But keep in mind that acrylics tend to dry darker.
If you are not comfortable painting on wood your best bet is to use masking tape or sticky stencils to make sure all lines and edges are clean and nice.
How to paint furniture With Acrylic Paints and wood without brushstrokes
I just published a couple of months ago a big material about painting without brushstrokes: 27 Tips How to Paint Without Brush Strokes or Marks.
Here is the summary of it, if you don’t have time to read it (bookmark it and read later):
- Don’t save money on brushes. Brushes should not bend, lose bristles, and be durable. Cheap brushes lose shape and shed. For acrylic paint, we choose synthetic brushes. If you’re completely lost in brushes, read this: The Best Brush for Acrylic Paint – it is a comprehensive guide on how to pick a brush and some recommended brands.
- Use good paint, if you’re a beginner, thin it, to make sure thick consistency will not alter the brushstrokes.
- Always keep sandpaper next to you to quickly fix a dried brushstroke.
- Always apply acrylic paint in thin layer. The thicker layer of the paint is, the more likely you will have a stroke.
- The easiest way to avoid brush strokes and brush hairs stuck in the paint is to use a roller. Smooth and even surface. But be careful, the roller may have more load capacity than a brush!
- Try to paint in one direction and not go over just the painted area (it can be still wet).
- If you’re painting the furniture, apply at least 2 paint coats.
These are the most common recommendations, as I said, you can read a full article once you have time or.. a brushstroke 🙂
Step 5 – How to protect acrylic painting on wood
Protection of an acrylic painting starts even before we paint: the surface should be clean and well-primed. Priming is one of the major protective factors, as it keeps wood from molding, shrinking, soaking extra paint.
All of it affects how long our painted wood piece will last.
But once the painting on wood is ready, we should also protect the paint from sunlight, time, dust, and moisture.
The best way to protect an acrylic painting on wood is to seal it with a clear coat of sealer – acrylic varnish, protective finish, or spray coating.
The painting should be fully cured (the paint is not only dry to touch but it is dried completely).
In general, it will take 24 hours for acrylic paint to fully dry. Read the label or check my research on acrylic drying time and factors.
How to seal acrylic paint on wood
Sealing acrylic paint on wood is the right way to protect a painting from environmental factors (humidity, UV rays from direct sunlight) and internal wooden alterations.
Aesthetically though, sealers also allow you to play with sheen as there is a range of finishes on the market – glossy finish is the most durable one, but matte and satin one are softer looking, modern and hide imperfections better.
To seal acrylic paint on wood use 1-3 thin layers of a recommended sealer. Minwax Polycrylic finish is one of the best.
- Make sure the painting is dry.
- Clean it (wipe with a cloth) to make sure there is no dust.
- Depending on what sealing product you use, follow the instructions (the common recommendation is to make an even, not too thick, coat of protective finish in a dust-free room). 1-3 thin coats.
- Let it dry up to 24hrs. If it is too hot or humid it may take some extra time to fully dry.
What you can use to seal acrylic painting on wood:
I recommend using Minwax Polycrylic finish to properly seal the acrylic painting on wood or Mod Podge as a craft cheap option.

- Liquitex Basic Varnish – popular, good brand, easy to use. However, lately, varnishes are less popular, as you need to replace them in 20-50 years and they can yellow, but this one you CAN’T replace, it is non-removable.
- Mod Podge – is a sort of old-fashioned glue-based sealant. Needs 2-3 coat. It is milky but should fry clear.
 Minwax Polycrylic finish – modern “varnish”. No need to replace, easy to use. Gain more and more adepts now. I recommend it! Both for wooden panels and furniture.
- Mr. Super Clear protective finish – UV protective spray sealant with a matte finish.
- Krylon crystal clear acrylic coating – spray. Some artists get used to spraying as they think it gives more even coats. I would say it is not for a beginner, as I’m personally very bad at holding the same pressure while spraying.
- Aleene’s Spray Varnish – is another popular spray option. Clear and non-yellowing.
You can know this process as varnishing (for canvas), so it is basically the same process and products.
Acrylic Painting on wood ideas
You can paint on a gesso board or renew a furniture piece. Don’t be shy – be creative. Here are some ideas to inspire you.
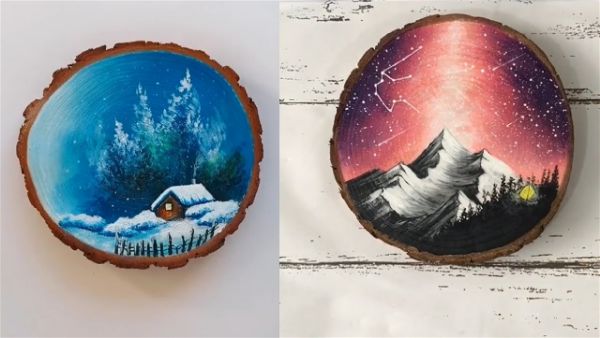
- acrylic painting on wooden cut
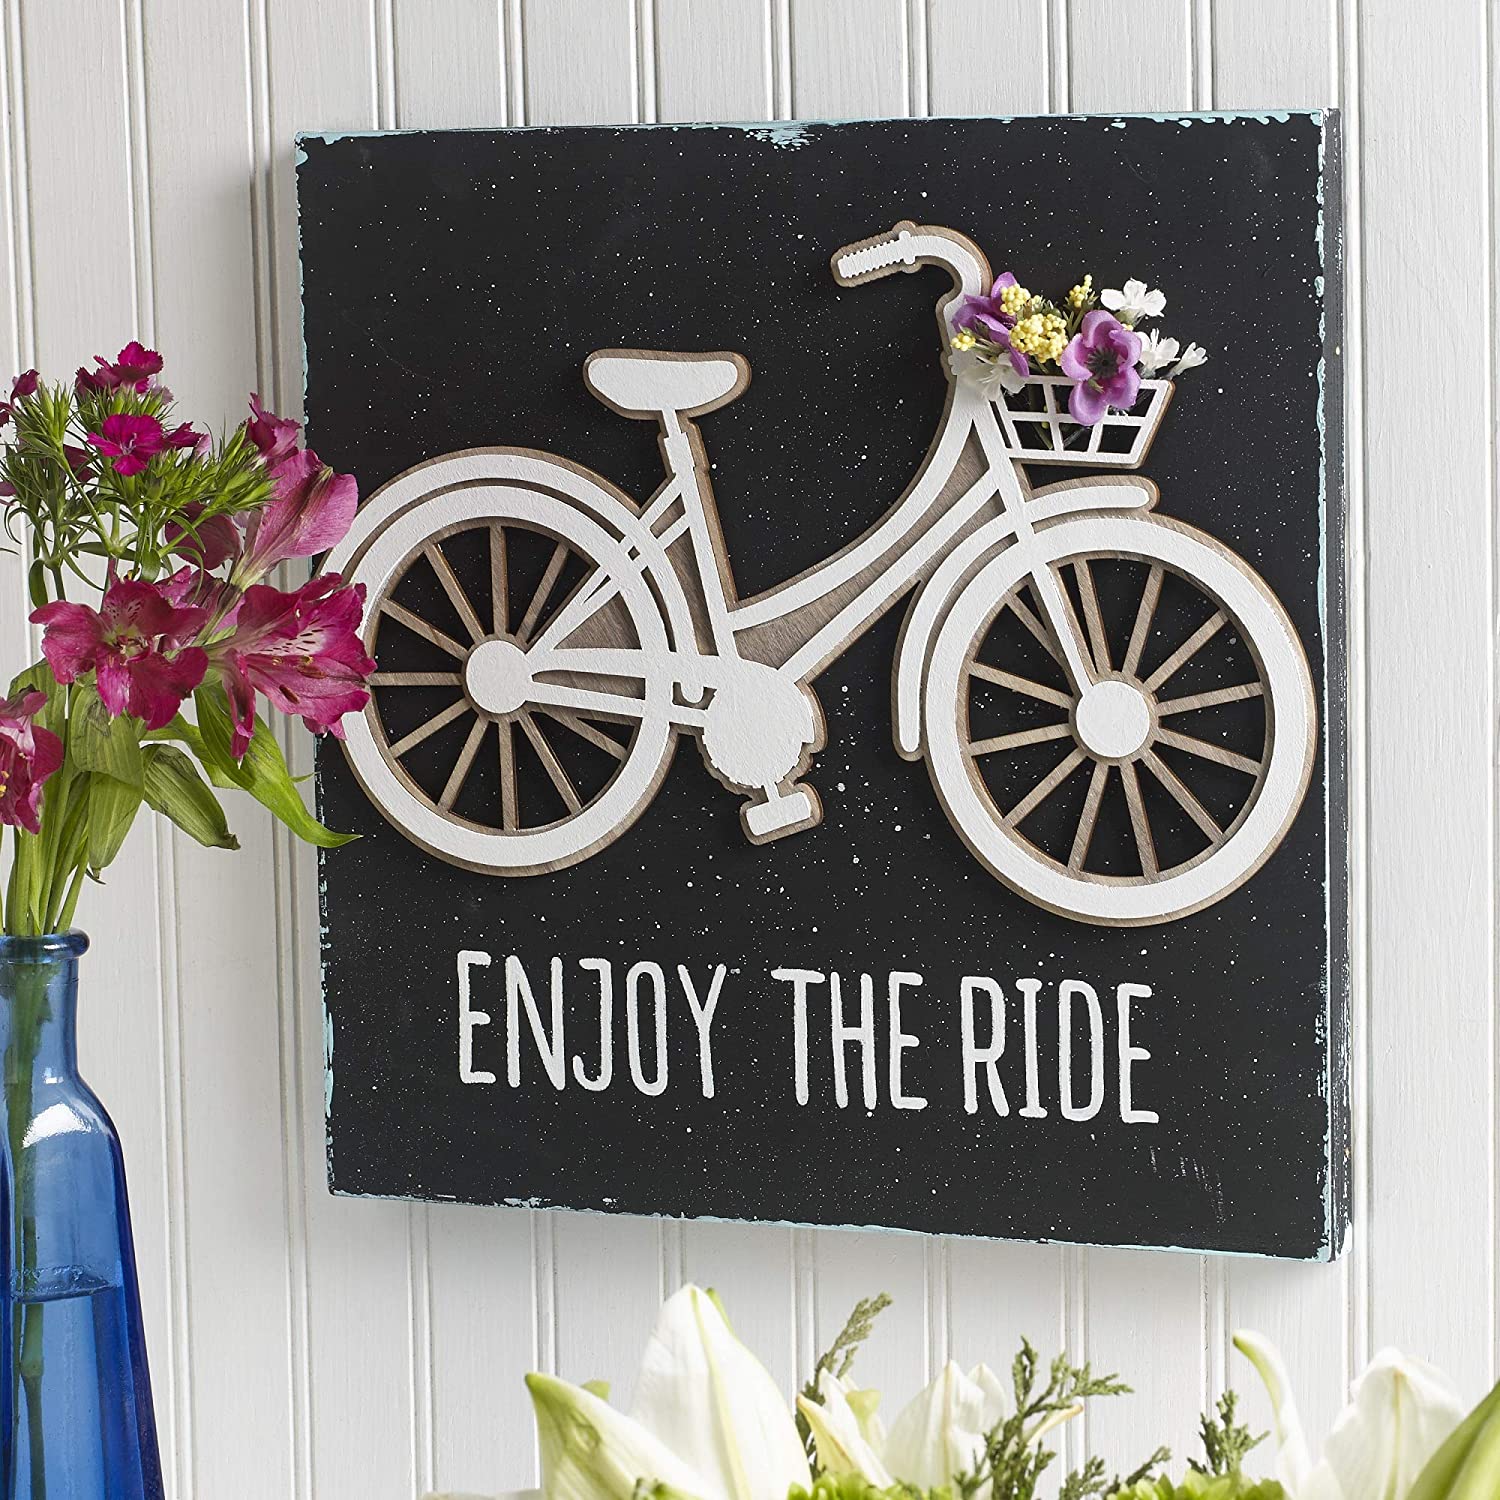
- painting signs, letters, quotes on wood

- Christmas, Easter, or any other holiday decorations

- paint and assemble dry branches
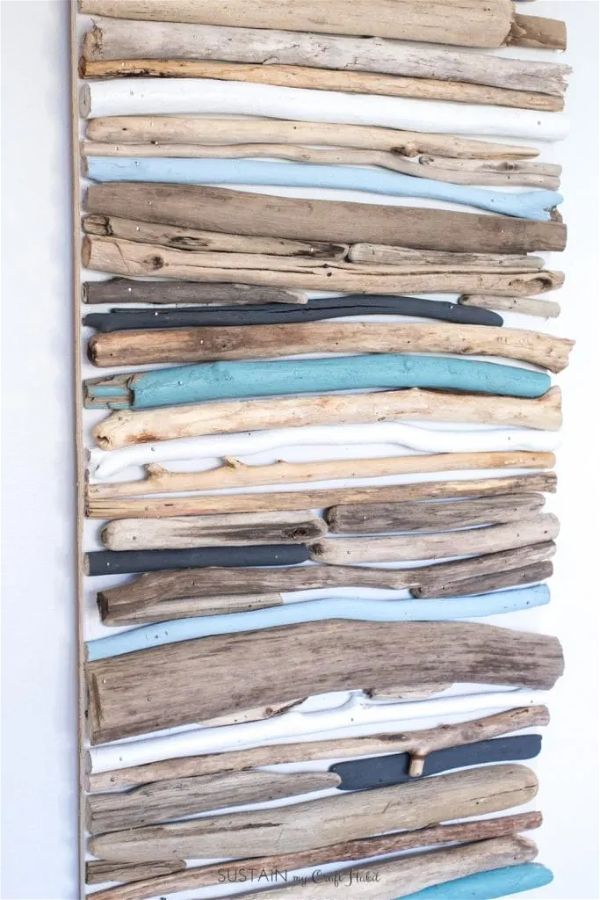
Ocean views, especially if you will combine it with acrylic pouring, look fantastic on round wooden panels or tables.
For more ideas please check my other posts:
- 101 Easy Acrylic Painting Ideas for Beginners
- 55+ Easy Christmas & Winter Canvas Painting Ideas For Beginners
- 55+ Easy Star Wars Painting Ideas & Crafts for Star Wars Day
Acrylic Paint on Wood FAQ
Can you varnish over acrylic paint on wood?
Yes, you can seal acrylic paint on wood using water-based varnish or Minwax Polycrylic protective finish that was created specifically for protecting wooden surfaces.
Can I use acrylic paint on wood furniture?
Acrylic paint sticks to wood and is perfect for painting wood furniture. You can do some art on wooden tables, drawers and doors, or use acrylic latex paint if you are looking for freshen up kitchen cabinets and need larger volume paint cans.
Can I use acrylic paint on wood outside?
You can use acrylic paint and latex acrylic types of paint outside for painting wood, especially outdoor use furniture, as long as you prime and properly protect the painted wood to avoid peeling and fading from the sun.
Look for labels “outdoors” if you are not sure about the paint.
Is acrylic paint good for wood?
Any acrylic paint will work for wood and it is a good and beginner-friendly medium for wood! It doesn’t harm wood, adheres to it well and covers wooden texture.
Does acrylic paint stay on wood?
Yes, if you prime the wood before painting it with acrylics and seal painted wood with clear coat when it is done, the painted with acrylic wood will last long and the paint will stay on wood without peeling.
How do you prepare wood for acrylic paint?
To prepare wood for acrylic paints, you sand it with fine grit sandpaper until it is smooth and prime it to make sure the paint will adhere and stay but won’t be just soaked by wood.
Sanding process is important if you want to get even smooth surface, but if you prefer visible (and tangible) wood grain, sand just a little bit to help the paint adhere and cover it better. The rougher the surface is, the more paint you will have to use and the worse coverage can be.
How do you make acrylic paint permanent on wood?
Dried acrylic paint is water-resistant on wood but not waterproof. Choose waterproof clear coat or varnish to make it permanent.
Do I need to sand wood before acrylic painting?
You need to sand wood before acrylic painting if it has any unevenor rough areas. If you work with gessoboard, and you are satisfied with how smooth it is, you can skip sanding.
How do you get acrylic paint to stay on wood?
Acrylic paint will stay permanently on wood once you sealed it. To make sure acrylic paint stick to the wood, you need to prime the wooden surfaces so the paint doesn’t soak in but stay well on the surface. Sanding also helps to make acrylic paint stay better on wood.
Do I need to seal acrylic paint on wood?
After your acrylic painting on wood is done, you need to wait 24 hours and then seal painting area with cheap Mod Podge or proper protective finish like Minwax to protect the paint from dust, UV, and peeling off.
What is the advantage of acrylic paint on wood?
Acrylic paint is one of the best paints to use on wood as it sticks to wood very well, cover it perfectly and keeps vibrant colors even on highly porous surfaces like wood. Some of the advantages of acrylic paint on wood is that it is fast-drying and water-resistand once dry.
Whatis the best clear coat for acrylic paint on wood?
Minwax protective finish and epoxy are best clear coats for acrylic paint on wood. Epoxy will add extra gloss and thicker clear coat laeyr. But there is a cheaper option like Mod Podge that will be milky while wet but will dry to a satin or matter clear coat.
Can you use acrylic paint on wood furniture?
Acrylic paint and latex acrylic paint work great on wood furniture and trims you want to freshen up. Some people yet prefer milk or chalk paint for cabinets and doors as it gives more matte look.
What is the best paint for wood?
Acrylic paint, latex acrylic paint as well as milk and chalk paint are some of the most popular paint choices for wood. Acrylic and latex acrylic paint are the best paint for wood as they are more durable and damage-resistant than chalk and milk paints.
However, some home improvement specialists recommend alkyd-based oil paints for wooden furniture that you use every day.
Final thoughts
As you can see you can paint wood with acrylics and get amazing results both for crafts projects and wood furniture at your house.
Acrylics are truly versatile and flexible, dry quickly, and allow you to achieve a smooth matte or glossy look within a few minutes. They dry completely within 24 hours and you will be able to put a protective finish and enjoy your new craft project 🙂

Masha Eretnova, born in 1991, is a Chiang Mai-based certified teacher, artist, and blogger with 20+ years of personal painting journey.
She started painting and drawing very early and is now an international abstract artist and educator passionate about acrylic painting, gouache, and crafts.
Her works are part of international exhibitions and contests, including ArtlyMix (Brazil), Al-Tiba 9 (Spain), Exhibizone (Canada), Italy, and many more.
Besides her artistic pursuits, Masha holds a post-grad diploma in Teaching Film Photography and 2 music school diplomas: piano and opera singing.
Last update on 2026-07-21 / Affiliate links / Images from Amazon Product Advertising API