Last Updated on May 29, 2026 by Masha Eretnova
Looking for a colorful statement that you can DIY in an afternoon? This rainbow flower wreath is a perfect wall art, table centerpiece, or a massive home decor piece that is perfect for Mother’s Day, summer, and birthday parties!
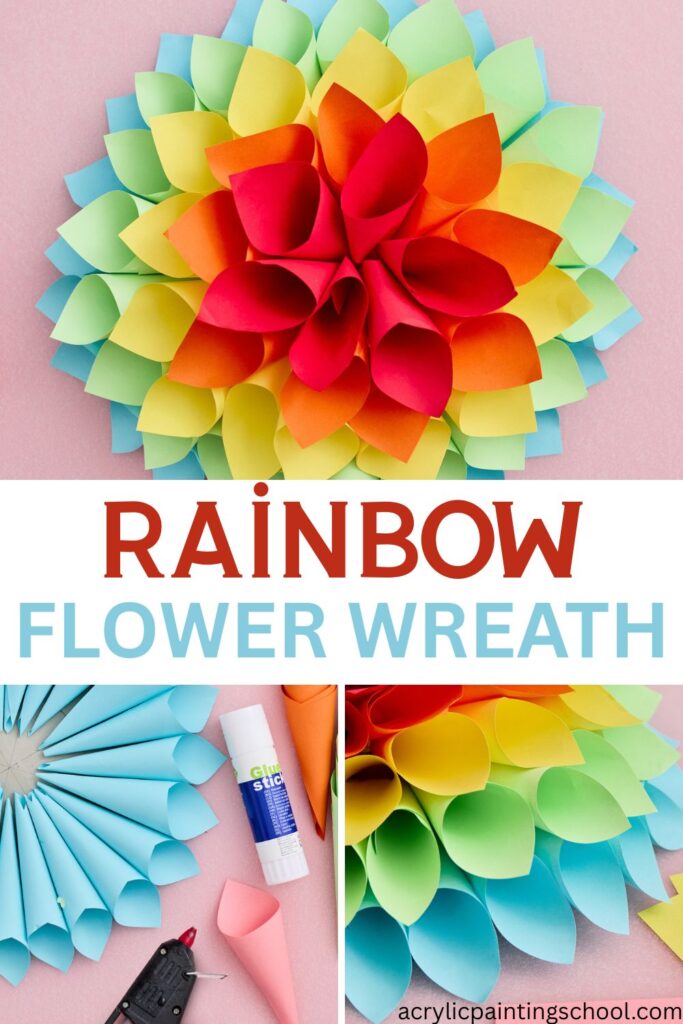
Table of Contents
Supplies Needed
Supplies are minimal and budget-friendly, and if you are a crafter, you probably have all you need in your drawers somewhere.
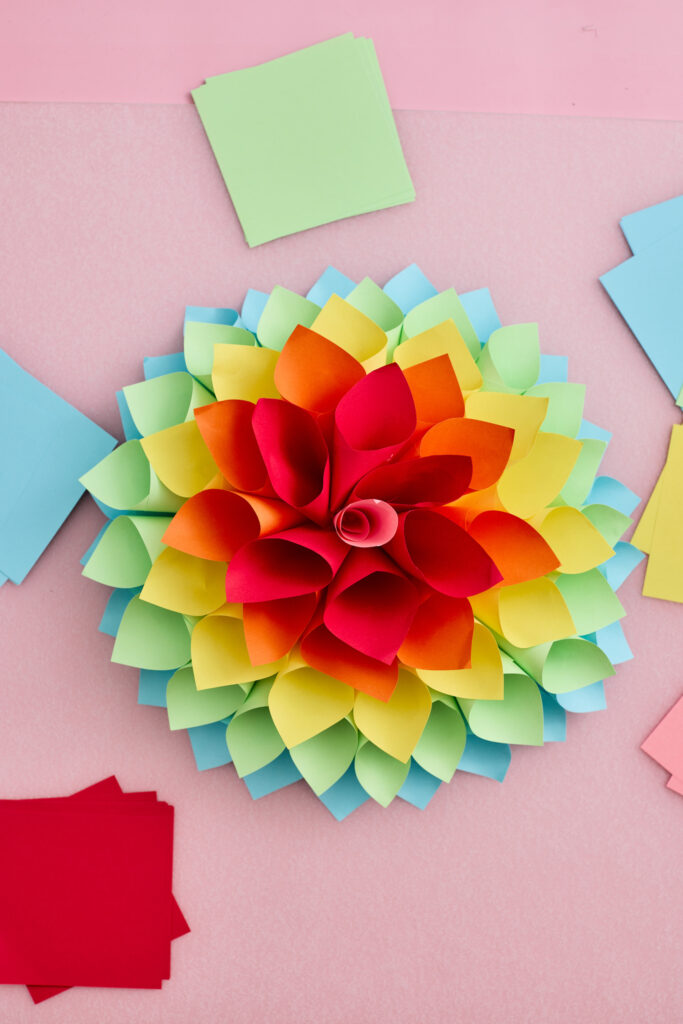
Colors are merely a suggestion to follow the rainbow pattern. Feel free to choose your own color combination or even make it monochromatic.
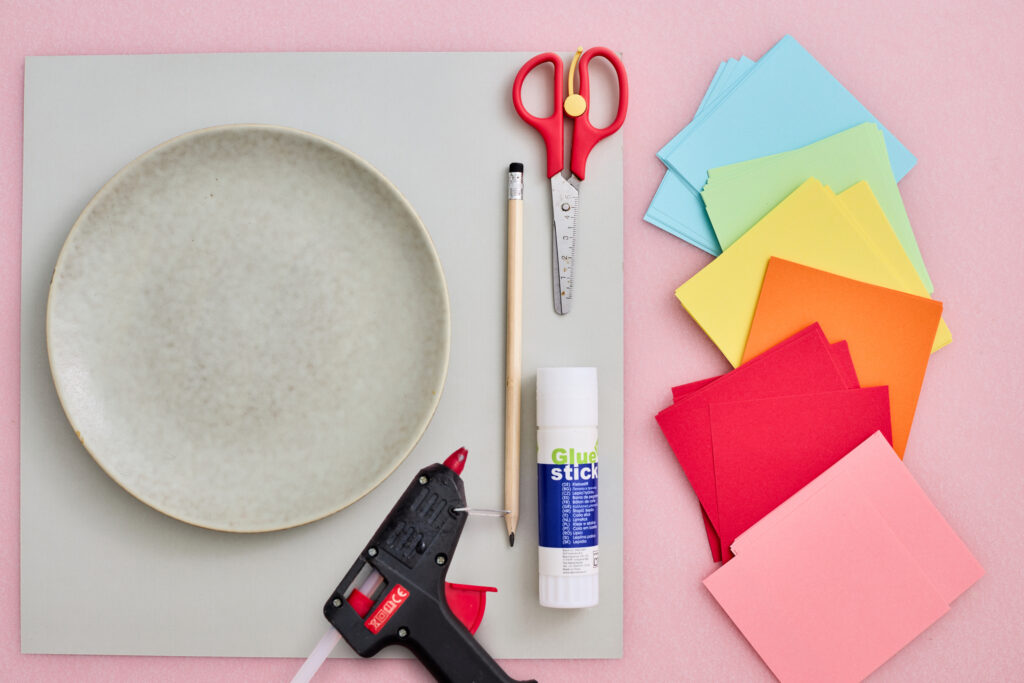
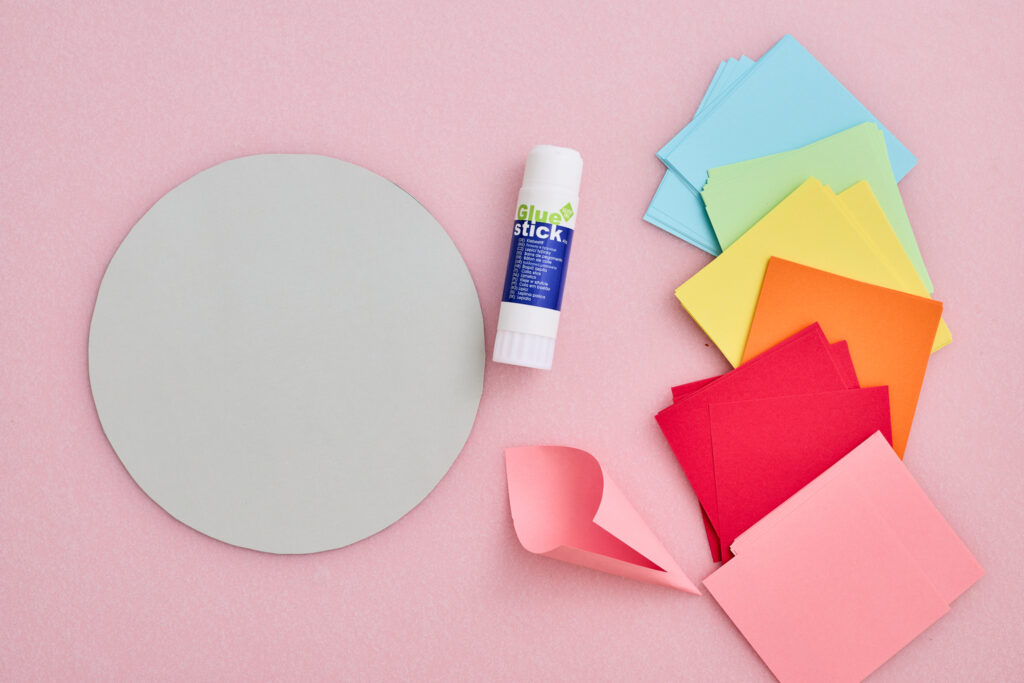
- Cardboard (For the sturdy wreath base)
- Origami Colored Paper (Blue, green, yellow, orange, red, and pink)
- Plate (for tracing),
- Pencil,
- Scissors,
- Glue stick, and
- Hot glue gun
Instructions
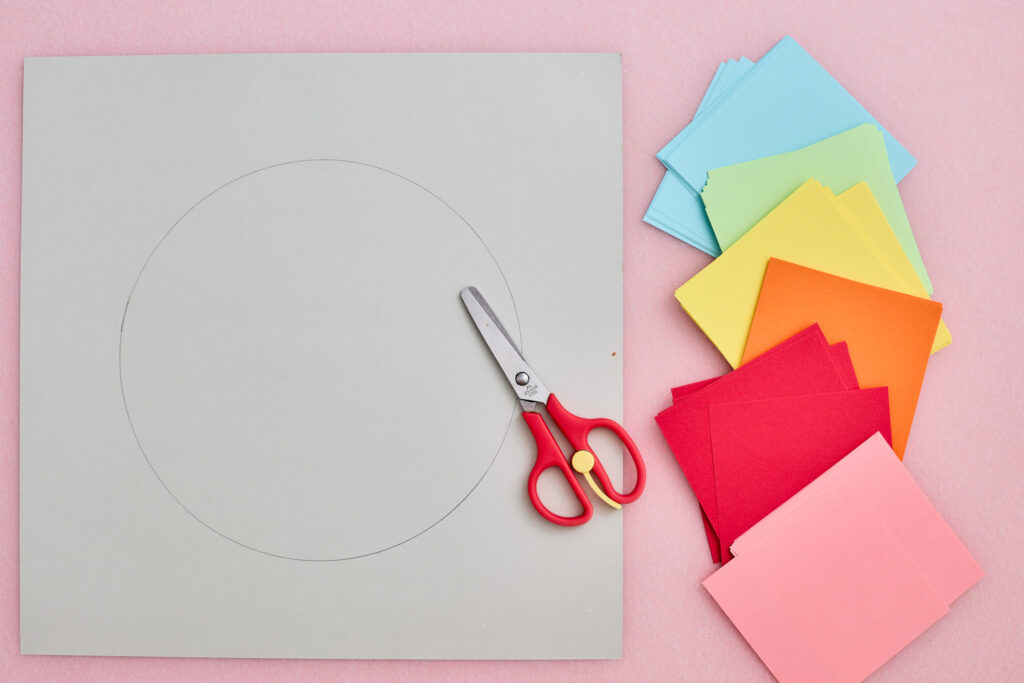
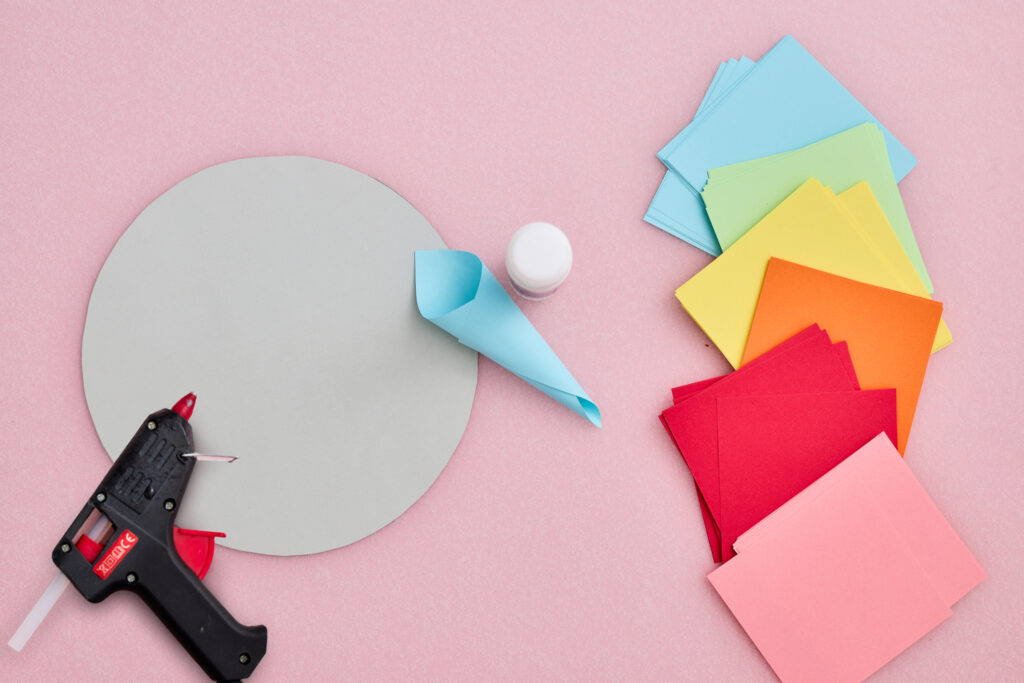
Create the Base: Trace a circle onto your cardboard using a plate as a guide, then cut it out. Cut out the center of that circle to form your wreath base.
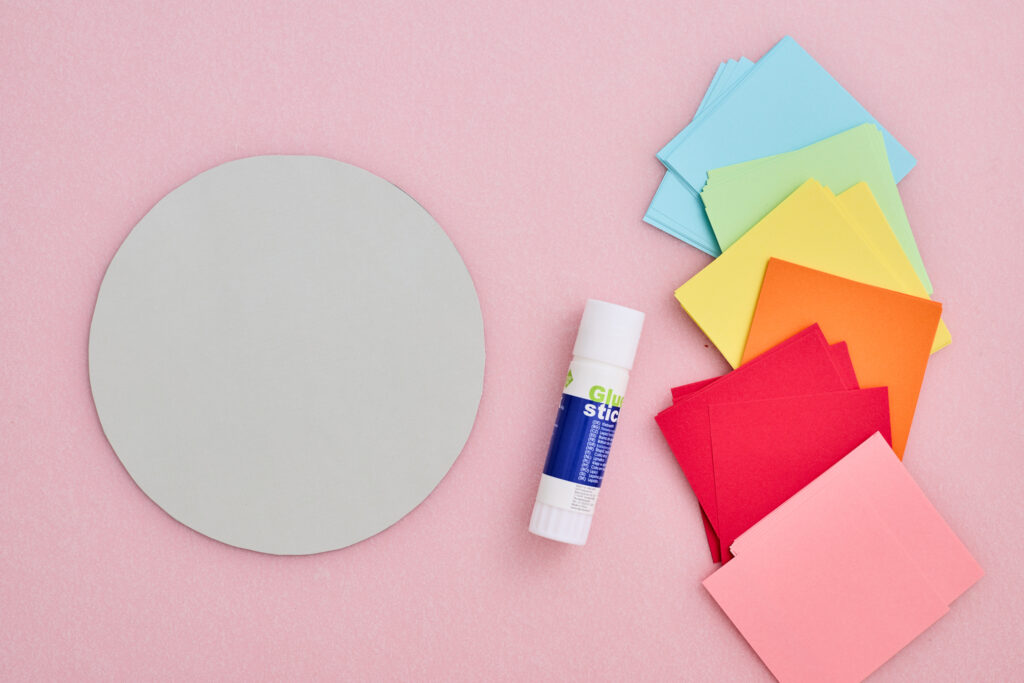
You will get a circle base like this:
Form the Petals: Roll your colored origami paper into individual cone-shaped petals. You don’t have to cut anything! Just roll!
Secure the edges with a glue stick.
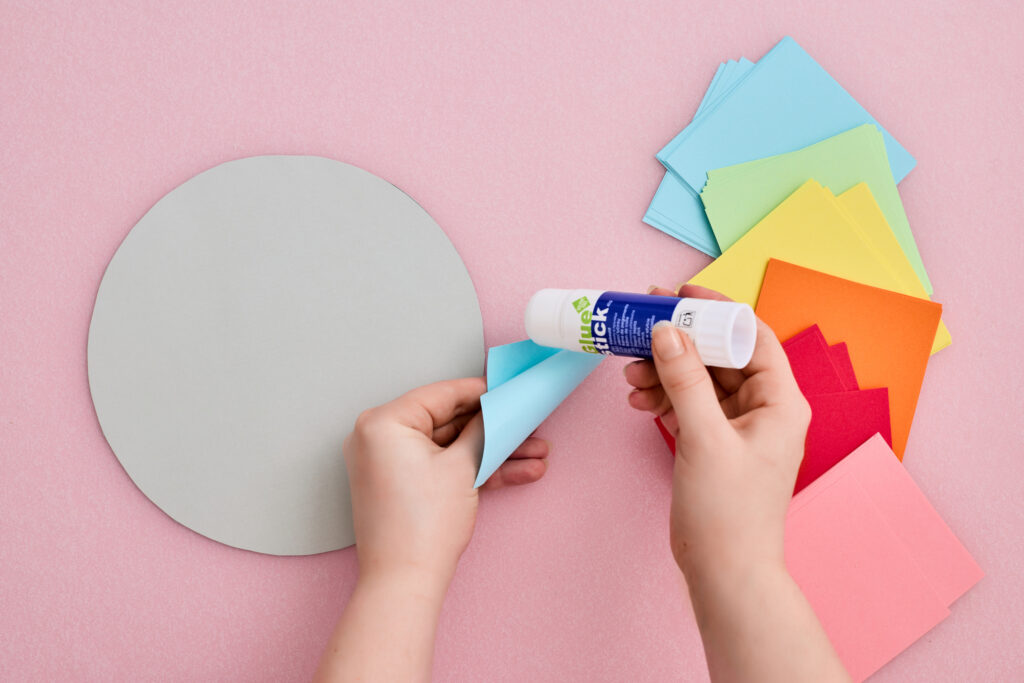
You will have a little cone looking like this:
Now, make a bunch of them for each layer (and color). Prepare enough petals to cover the circumference for the first layer.
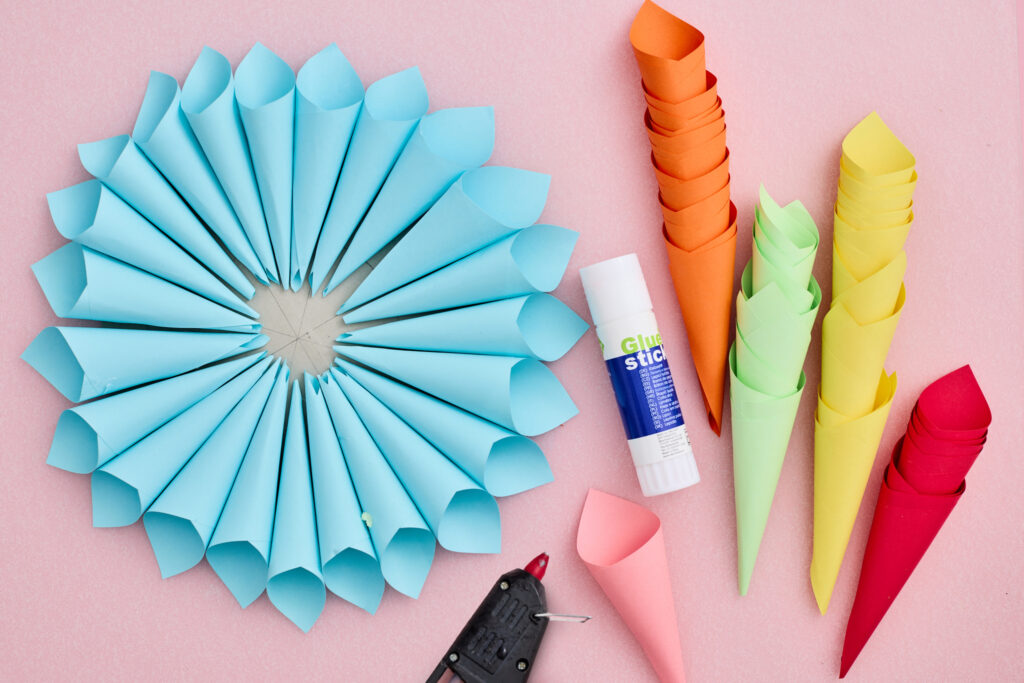
Using a hot glue gun, attach the first layer of petals to the cardboard base, positioning them slightly away from the center hole.
For the second and following layers, to create a full look, reduce the number of petals used with each inner layer.
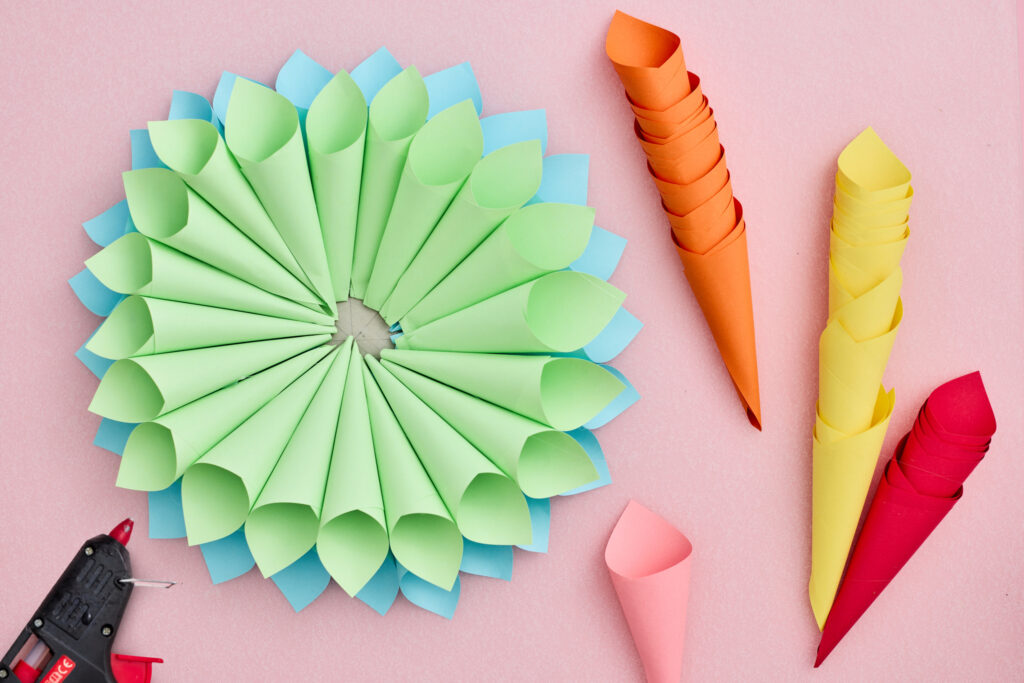
Repeat the process with additional layers of petals.
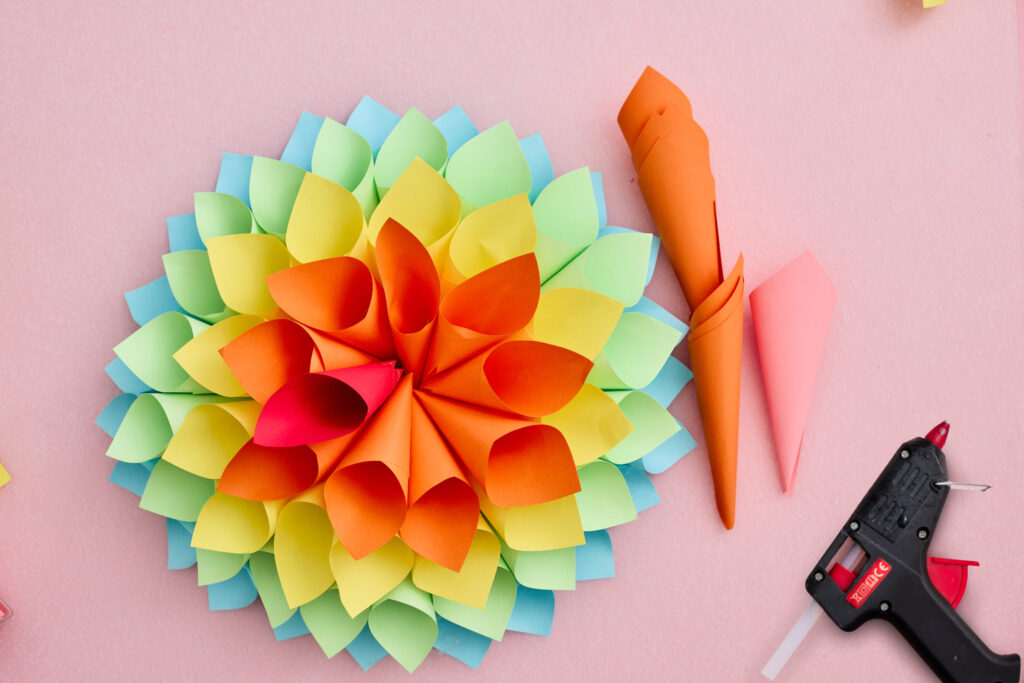
Shape and Fill: If needed, slightly press the base of the petals to help them sit correctly as you work.
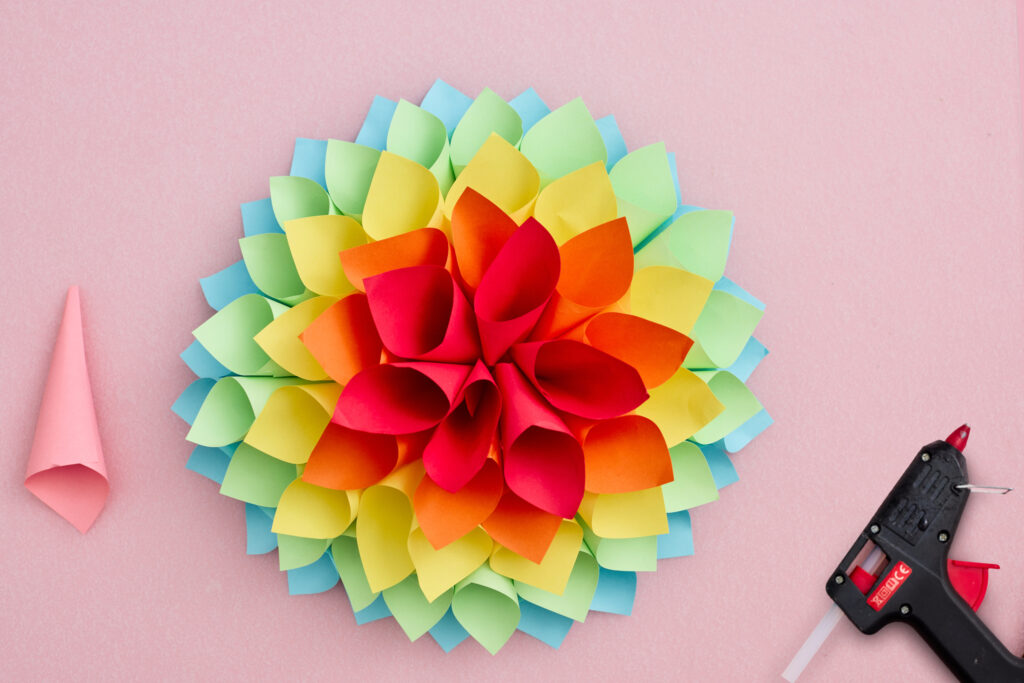
Continue adding layers until the wreath looks lush and full.
Let the hot glue dry completely before hanging or displaying your colorful wreath.
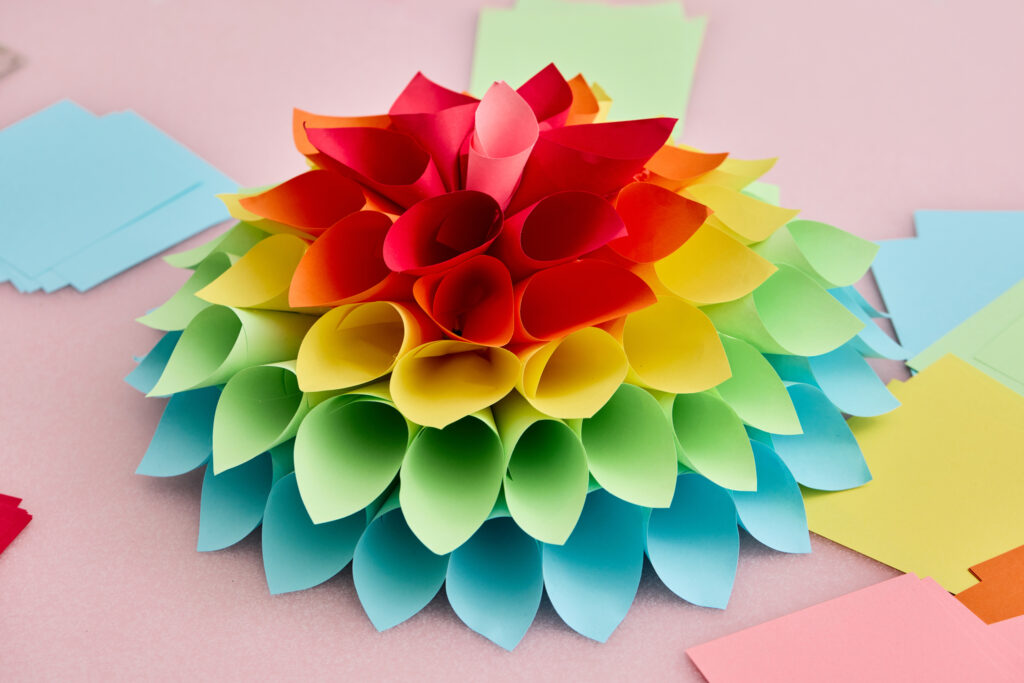
And voila!

Masha Eretnova, born in 1991, is a Chiang Mai-based certified teacher, artist, and blogger with 20+ years of personal painting journey.
She started painting and drawing very early and is now an international abstract artist and educator passionate about acrylic painting, gouache, and crafts.
Her works are part of international exhibitions and contests, including ArtlyMix (Brazil), Al-Tiba 9 (Spain), Exhibizone (Canada), Italy, and many more.
Besides her artistic pursuits, Masha holds a post-grad diploma in Teaching Film Photography and 2 music school diplomas: piano and opera singing.