
Last Updated on March 18, 2024 by Masha Eretnova
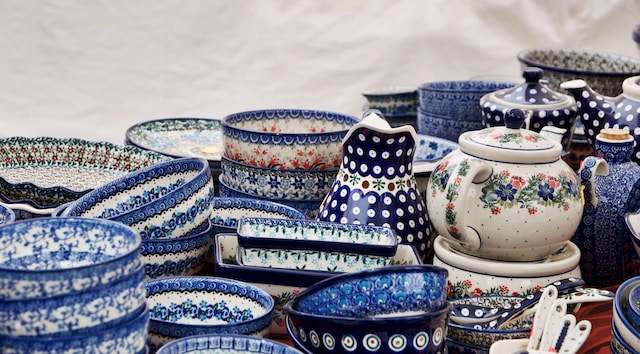
It is lots of fun to paint on ceramic plates, pour on tiles, or simply completely paint some mugs.
You only need the right paint that works and sticks to porcelain or ceramics. So what are the best paints for porcelain?
Regular acrylic paints work best on greenware and unglazed ceramics (including bisque-fired clay), while special acrylic paint for ceramics is your choice for glazed ceramic items.
You can use acrylic paint on:
- ceramic vase
- bathroom tiles
- porcelain plates
- tea pots and cups
- unglazed ceramics / glazed ceramic
- figurines
No matter what, acrylic paint are not food-safe and cannot be applied on surface you use to drink or eat.
Table of Contents
This article contains affiliate links. It means no extra cost for you but a little commission (2-3%) for me to support my hobby and blog. Thank you!

What kind of paint to use for porcelain and ceramics?
The trick with choosing the right paint for ceramics or porcelain is to have a paint that can withstand higher temperatures, as normally you need to bake or seal a painted ceramic item in a kiln.
It is safe to use these types of paints on porcelain or ceramics:
- regular acrylic paint
- acrylic paint for ceramics/glass or multi-surface acrylic paint
- enamel paint
- ceramic paint
- bake-on markers
- alkyd paints for tiles
- latex paint
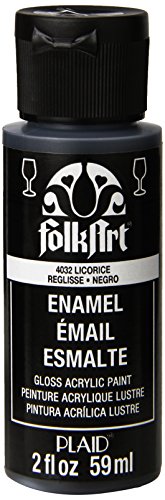
Enamel paint
Enamel paint is usually oil-based and it has glossy finish once dry.
It is known to be very durable.
Acrylic paint
Acrylic paints can be regular – for painting mainly on canvas or paper or special paints that have additives to make them stick better to a specific surface, for example, acrylic paints for glass, fabric, or in our case – ceramics.
I should mention though that even regular acrylics are the most versatile paints, the special paints just got an extra kick. Additives help with better adhesion of the paint and add durability.
Ceramic painting with acrylic is one of the easiest ways to start as acrylics are widely available and can be pretty cheap.
One of the major advantages of acrylics is a wide variety of colors to choose from.
Ceramic and porcelain paints
Craft ceramic paints are sometimes water-based paints, similar to acrylic paint.
Porcelain paints can be air-dried or baked to set the design permanently.
Glass paints
Glass paints can sometimes be used on porcelain and ceramics with good results, especially if they are compatible with heat setting and you’re working on small items.
These paints are specifically designed for glass but can adhere to other smooth surfaces, including porcelain.
Read also: Can You Use Acrylic Paint on Glass
Do I need to use primer on ceramics?
Priming ceramic surfaces before painting is generally a good idea as it can enhance the adhesion of the paint and create a smoother, more even surface for your work.
If you painting on a tile you can sand it and use gesso, but for floor tiles, you need to use a proper universal primer like Zinsser.
Once you applied priming coating, do an adhesion test to see if the paint sticks well and doesn’t peel off.
Priming can be completely optional for small items but if you work with porcelain tiles, you should really do a coat of primer for best results.
Top-10 Best Paints for Porcelain & Ceramics
- Highly pigmented for opaque coverage
- Durable, scratch-resistant finish
- Top-shelf, dishwasher safe
- Air-dry or bake to cure
- Waterbased-non-toxic
- Acrylic paint
- AutoAir acrylics
- FolkArt
- MontMarte ceramic paints
- PEBEO Porcelaine
- PEBEO Ceramic
- Ratel Porcelain paint for ceramics (UK)
- Decola glass and ceramic paint
- Ceramic paint pens Artistro ( I personally use them and LOVE them)
- Baker Ross pastel porcelain paint pots (UK)
- soto touch up
- Kreul
Note on FolkArt
You can actually use 4 paints from FolkArt to paint on ceramics or porcelain:
- FolkArt multi-surface
- FolkArt enamel paint for glass
- FolkArt ceramic paint (enamel)
- FolkArt Terracota
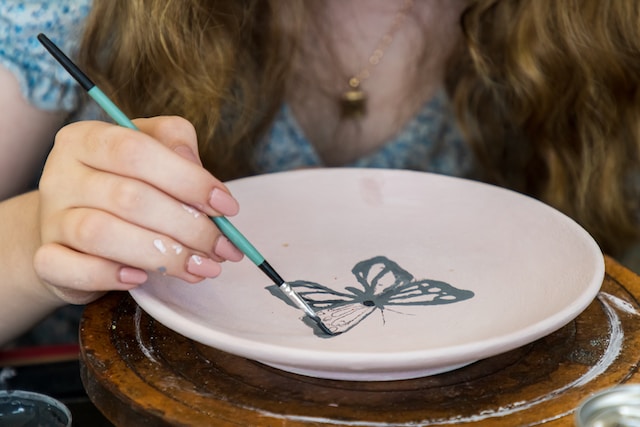
Painting ceramics Steps
Materials Needed:
- Clean, dry porcelain ceramic surface
- Porcelain paint or ceramic paint
- Porcelain primer (optional, but recommended)
- Paintbrushes suitable for detailed work
- Water (for cleaning brushes if using water-based paint)
- Lint-free cloth or paper towels
- Oven (for heat-setting, if required)
- Clear sealant (optional, for added protection)
Steps:
- Clean the Surface:
- Wash the ceramic piece with warm, soapy water to remove any dust, dirt, or grease.
- Rinse thoroughly and dry it completely with a lint-free cloth or paper towel.
- Apply Primer (Optional but Recommended):
- If you choose to use a porcelain primer, apply a thin, even coat over the surface of the ceramic.
- Follow the manufacturer’s instructions for drying time.
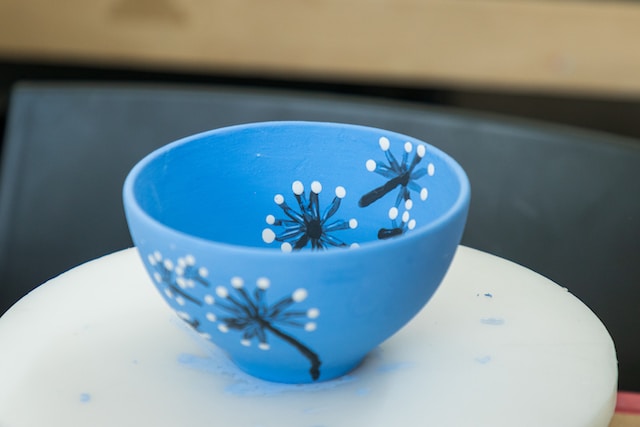
- Painting:
- Use high-quality porcelain paint or ceramic paint. These paints are specifically formulated for smooth, non-porous surfaces and are available in various colors.
- Stir the paint well to ensure an even consistency.
- Apply the paint using fine brushes for detailed work. If you’re not satisfied with your first attempt, you can wipe the paint off with a damp cloth while it’s still wet and start again.
- Allow the paint to dry completely between layers, following the recommended drying times provided by the paint manufacturer.
- Additional Layers and Details:
- Layer your colors, allowing each layer to dry before applying the next to avoid smudging or mixing colors unintentionally.
- Add finer details with smaller brushes, taking your time to ensure precision.
- Setting the Paint:
- Some porcelain and ceramic paints require heat-setting to become permanent and durable. Read the instructions on your paint carefully to determine if heat-setting is necessary.
- If heat-setting is required, place the painted ceramic piece in a cold oven. Heat the oven to the temperature specified in the paint’s instructions and bake the piece for the recommended duration. Usually, you need to bake it at 350 degrees Fahrenheit (180C).
- After baking, allow the piece to cool completely inside the oven before removing it.
- Sealing (Optional):
- If you want extra protection for your artwork, you can apply a clear sealant after the paint has dried and been heat-set. This can add a layer of protection against wear and tear.
Read also: Bakeable Acrylic Paint Guide for Ceramics and Glass & 4 Best Bakeable Paints
painting ceramic tiles
With the right type of paint you can make a custom coaster from an old tile, upgrade your bathroom floor tiles and add some patterns or simply refresh old paint.
Choose what is your goal:
Pouring or painting on a single tile
Poruing over tiles to make beautiful coasters or painting comic lines and full landscapes is very popular and satisfying.
Acrylic pouring on tiles can create stunning, vibrant designs.
Materials Needed:
- Tiles
- Acrylic paint in various colors (can use premixed)
- Pouring medium* (don’t need if using premixed pouring paints)
- Mixing cups and sticks
- Plastic sheets or drop cloths
- Disposable gloves
- torch or heat gun (optional, for removing air bubbles)
- Sealant (optional, for protecting the finished artwork)
- Hair dryer (optional, to make bloom technique)
Steps:
- Prepare Your Workspace:
- Cover your workspace with plastic sheets or drop cloths to catch drips and spills. Wear disposable gloves to keep your hands clean.
- You can also place your tile in a large plastic container that will collect all drips.
- Mix Your Pouring Medium:
- If you are using regular acrylics (I suggest Amsterdan or Liquitex for pouring) mix acrylic paint with pouring medium in separate cups. Use a 1:1 ratio of paint to pouring medium or the ratio specified on the bottle (sometimes 1:2 or 1:3). Stir until the mixture is smooth and free of lumps.
- You can skip this step if you bought premixed pouring paint.
- Create Your Pouring Colors:
- Create different colored mixes for your pour by adding various acrylic paint colors to separate cups of pouring medium. Mix each color well.
- This step depends on what technique you want to use. Flip and dirty cup are the easiest.
- Prepare the Tile:
- Clean the tile thoroughly and place it on small cups or containers to elevate it slightly above the surface. This allows the excess paint to drip off and the dried paint won’t harden on edges.
- Pour the Colors:
- Pour the colored mixtures onto the tile. You can pour the paint from a central point or create intricate designs by pouring from different heights and angles.
- Manipulate the Paint:
- Tilt the tile gently to spread the paint, creating interesting patterns. You can also use a palette knife or a straw or a hairdryer to manipulate the paint and create additional textures.
- Remove Air Bubbles (Optional):
- Use a blowtorch or heat gun to carefully pass over the surface of the poured paint to remove air bubbles. Keep the heat source moving to avoid scorching the paint.
- Let It Dry:
- Allow the tile to dry completely. This may take 24 to 48 hours, depending on the thickness of the paint layers and the humidity in your environment.
- Seal the Artwork (Optional):
- Once the paint is thoroughly dry, you can apply a clear sealant or varnish to protect the finished artwork and add a glossy finish.
Remember, acrylic pouring can be a messy process, so make sure to protect your surroundings adequately.
Experiment with different color combinations and pouring techniques to create unique and visually striking tile artworks.
Read also: 33 Easy & Unusual Acrylic Pouring Techniques for Beginners and Advanced Artists
I believe acrylics are so versatile that we don’t fully appreciate it.
Just having one set of paints allows you to customize your glasses, mugs, paint, and enjoy the process. Connect with family through painting. Relax and switch off from work.
I love pottery and making ceramics, and I Love painting, I chose acrylic paint because it can work on ceramics as well.
Have you tried painting ceramics with acrylics?

Masha Eretnova, born in 1991, is a Chiang Mai-based certified teacher, artist, and blogger with 20+ years of personal painting journey.
She started painting and drawing very early and is now an international abstract artist and educator passionate about acrylic painting, gouache, and crafts.
Her works are part of international exhibitions and contests, including ArtlyMix (Brazil), Al-Tiba 9 (Spain), Exhibizone (Canada), Italy, and many more.
Besides her artistic pursuits, Masha holds a post-grad diploma in Teaching Film Photography and 2 music school diplomas: piano and opera singing.
Last update on 2026-07-16 / Affiliate links / Images from Amazon Product Advertising API