Last Updated on November 27, 2025 by Masha Eretnova
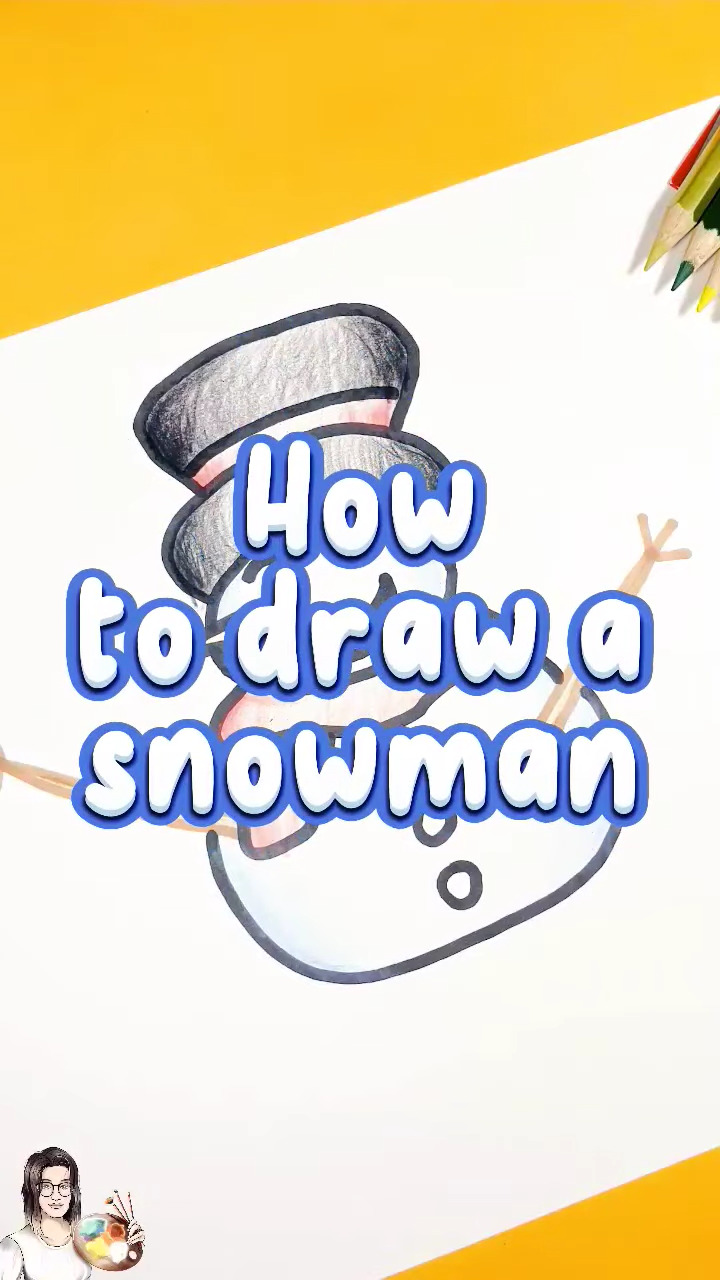
This time, we’re drawing a super cute snowman with a scarf, a carrot nose, and a tall top hat.
The steps are very simple, so it’s perfect for kids, beginners, or anyone who wants a quick and cozy winter art activity.
We’ll build the snowman one piece at a time using basic shapes.
When you’re done, you’ll have an adorable winter snowman that’s ready for coloring and decorating!
This tutorial comes with a free printable coloring page, too!

This article contains affiliate links. It means no extra cost for you but a little commission (2-3%) for me to support my hobby and blog. Thank you!
Supplies You Need:
- Paper. Print paper is ok for learning
- Black and brown paint pens or markers
- Colored pencils: black, brown, yellow (or orange), red, and blue
More Drawing Ideas:
- How To Draw A Snowflake
- How to Draw A Christmas Bell
- How to Draw a Candy Cane
- 55+ Easy Winter Canvas Painting Ideas For Beginners
Step-By-Step Tutorial
Here is a fun and easy step-by-step tutorial that shows kids how to draw and color a cute snowman.
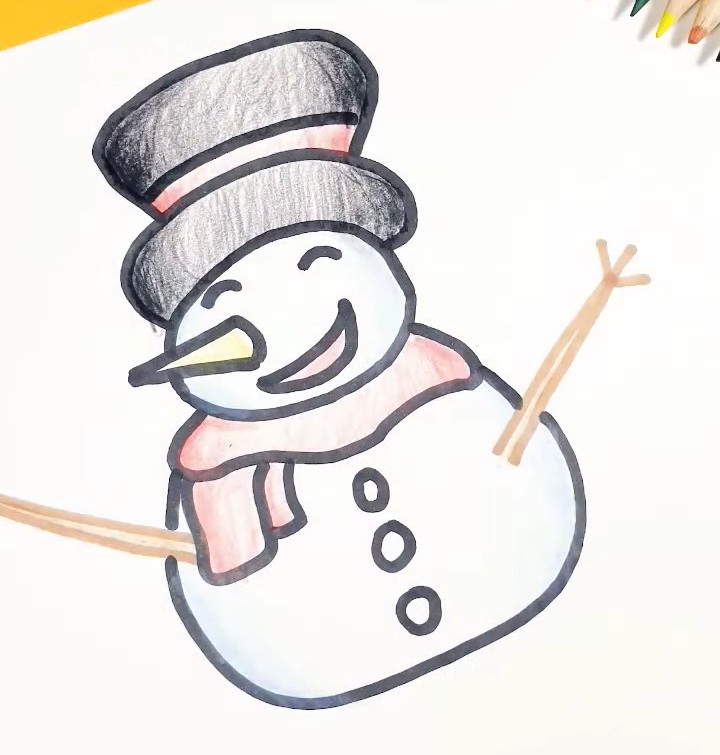
Step 1: Draw the Head, Nose and Mouth

Start by drawing a long triangle for the carrot nose on the left. Make the inside line of the nose a little curved so it looks cute.
Then, make a round shape for the snowman’s head on the right starting from almost the tip of the nose.
Then draw a big curved smile right under the nose.
Step 2: Draw the Hat

First draw a big curved line above the snowman’s head. Like a flat oval pita but without the bottom side. This curve will look like a rounded oval sitting on top of the head.
On top of that first curve, draw another curved shape that is tall, like a tall hat.
This will be the main part of the snowman’s hat.
Step 3: Draw the Scarf
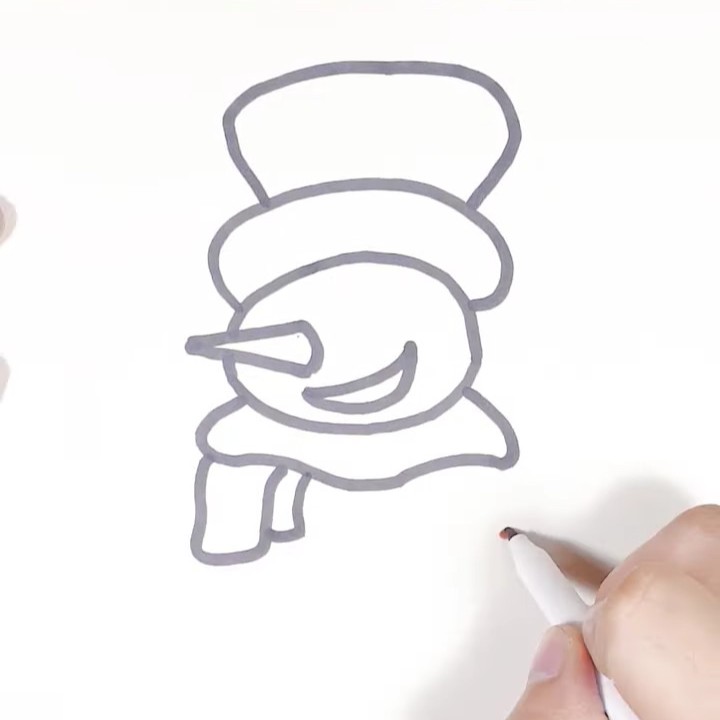
Under the head, draw a wide wavy line that wraps around the neck.
This is the top part of the scarf.
On the left side, draw the hanging part of the scarf.
Make it like a soft rectangle with a curved bottom.
On the right of this rectangle, add smaller one, as an end of the scarf.
Step 4: Draw the Arms and Body

On each side of the snowman, using brown marker, draw two lines going outward to make the arms.
At the ends, draw three tiny branch fingers.
Do not worry if they look a bit uneven.
Stick arms are always different and that makes them cute.
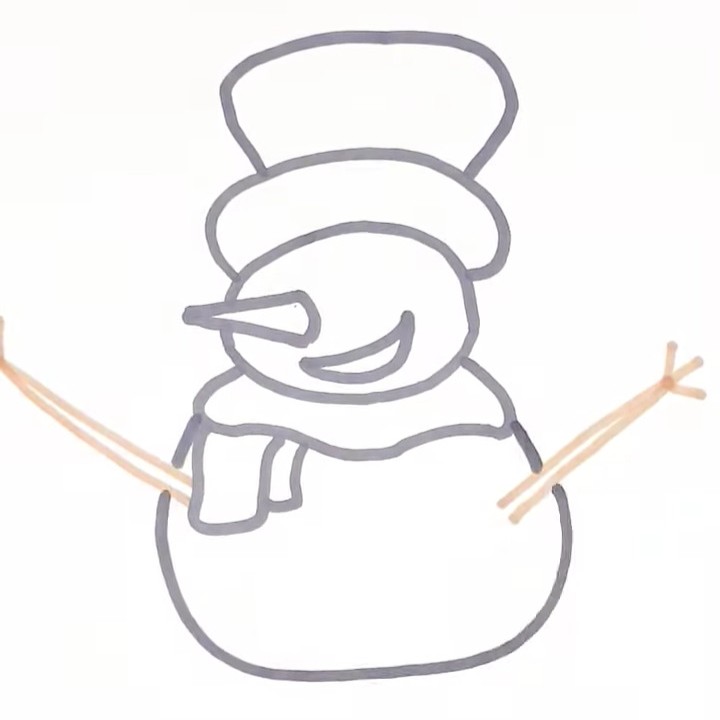
After the arms, draw a big round snowball under the scarf.
This will be the snowman’s body.
Make it nice and wide so the snowman looks soft and chubby.
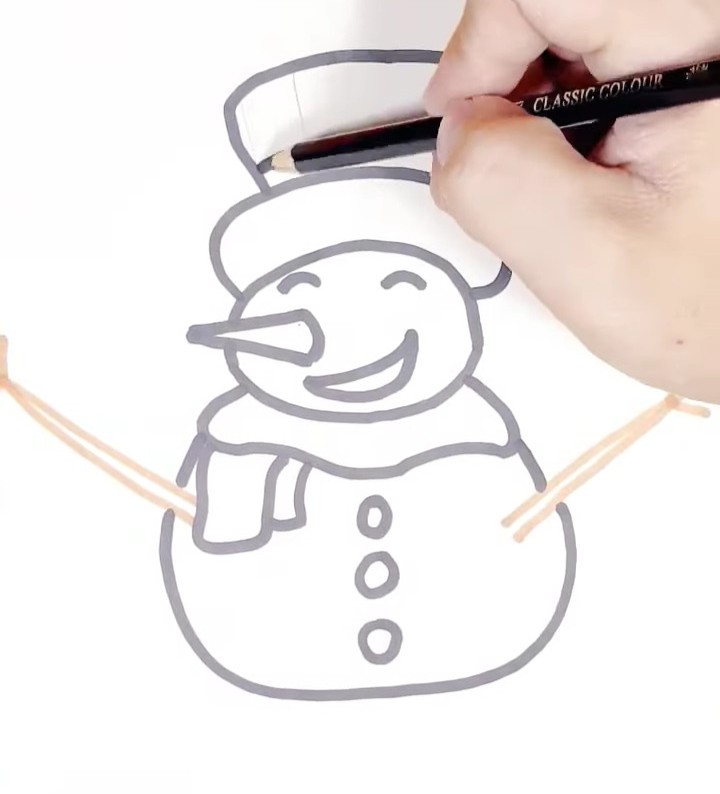
Step 5: Add the Buttons

Draw three small circles in the middle of the body.
These are the snowman’s buttons.
Step 6: Draw the Eyes

Above the smile, draw two small curved lines for the eyes.
They look like tiny rainbows turned sideways. These simple lines make the snowman look happy and it also make it easier for us, as we don’t hae to draw the whole eye!
Step 7: Color the Hat
Use gray or black to color the space inside the hat.
Shade lightly in the middle and darker around the edges.
Color the hat band with red or orange.
Step 8: Color the Head and Body

Now add color to the snowman’s head and body.
Use a light blue pencil and gently shade around the edges.
Do not press too hard.
This soft blue makes the snowman look round and snowy while still staying white in the middle.
Step 9: Color the Scarf, Nose and Arms

Color the scarf with red.
Start with a light layer, then make the edges a little darker.

Color the carrot nose with yellow or orange.

Color the stick arms with brown.
Your Snowman is Ready!
Take another look at your snowman and add a little more color to make him stand out.
You can go around the edges of the hat scarf and body with slightly darker shades.
This gives your snowman more depth and makes him look rounder and more real.
Snowman Coloring Page

You can print this page as many times to trace it, continue practicing, or simply color and then cut your snowman for another project!
Video Tutorial To Follow Along
If you want to draw along with a video, I also have a snowman drawing tutorial you can watch. You can slow it down so you can follow each step easily.

Masha Eretnova, born in 1991, is a Chiang Mai-based certified teacher, artist, and blogger with 20+ years of personal painting journey.
She started painting and drawing very early and is now an international abstract artist and educator passionate about acrylic painting, gouache, and crafts.
Her works are part of international exhibitions and contests, including ArtlyMix (Brazil), Al-Tiba 9 (Spain), Exhibizone (Canada), Italy, and many more.
Besides her artistic pursuits, Masha holds a post-grad diploma in Teaching Film Photography and 2 music school diplomas: piano and opera singing.