Last Updated on March 20, 2024 by Masha Eretnova
The varnish is the final step for painting. It protects acrylic painting for years from all negative factors and makes it just even more beautiful. But most beginners do not know tricks on how to varnish an acrylic painting without ruining it.
I’m going to share the exact varnishing process and varnishes I have used for the past 3 years for my acrylic paintings in this post.
As I said, the process is quite simple, but there are still some precautions.
And before you ask. Yes, you do need to varnish acrylic paintings and here are at least 8 reasons why you should always apply varnish.
Table of Contents
This article contains affiliate links. It means no extra cost for you but a little commission (2-3%) for me to support my hobby and blog. Thank you!
What is varnishing?

A varnish – is a clear transparent protective coat for applying on diverse surfaces to form a hard, clear, shiny surface when dry.
Varnishing an acrylic painting means covering a finished and completely dried ( ±24 hrs.) painting with a special varnish (liquid resin) to protect your acrylic painting.
Any surface like canvas, paper, metal, plexiglass, or wood can be varnished.
I can recommend you My Favorite Varnishes For Acrylic Painting On Canvas & Paper
How to varnish an acrylic painting
In general, I use a separate flat soft brush for varnishing. But sometimes I create a textured surface that is very difficult to evenly cover with a brush. In this case, I use spray varnish.
With spraying, it is also easier to avoid brush strokes and bubbles.
Pro tip: If you need a photo of your painting, make it before varnishing!
Varnishing can have unexpected results such as a cloudy finish if you use too much varnish, or the wrong varnish or it can lift your paint if you don’t let it dry.
- Once you finish your painting, wait 1-2 days until it is fully dried. Apply an isolation coat. Wait for 24 hrs. and move on to varnishing.
- If you are using the impasto technique, it’s recommended to wait 1-2 weeks before applying the isolating coat or varnishing.
Step 1- Check that you’ve applied the isolation coat and it is fully dried
If not, go for it now, here is the full process. 1 isolation coat will be enough to protect acrylic layers from interacting with varnish.
Do not varnish over wet paint. Allow the acrylic paint to dry for a full 24 to 48 hours, yet Amsterdam brand recommends waiting up to 5 days.
As a quick note – you can mix 2:1 Golden soft gel gloss medium with water and use it as an isolation coat.
This step is particularly important if you decide to use a varnish with mineral spirits!
Wipe the painting with a lint-free cloth. You can also use the lint roller – works like magic.
Step 2 – Prepare the workplace
Choose a dust-free room. The painting should be horizontal so pick a flat surface. While we can do painting vertically, a vertical varnish application can lead to drips and uneven coverage.
Place it on cups or wooden sticks to make sure it will not stick to the table or floor. This way you can reach all sides. You need to have easy access to the entire surface of your canvas including the edges.
If you are using a varnish with spirits, cover the floor underneath and wear gloves and maybe a mask as the smell can be really strong.
Step 3 – Prep the brush and container
It should be a separate brush that you use ONLY for varnishing. I prefer a wider brush. There are some special varnish brushes too, but you can just pick any smooth, good-quality wide brush.
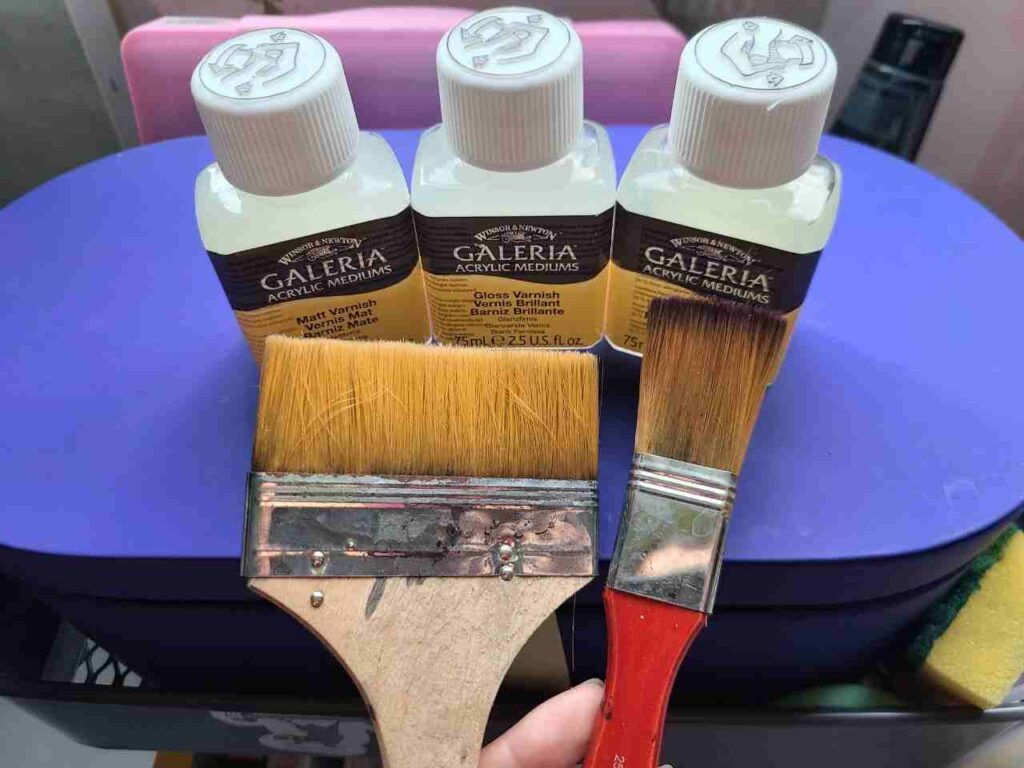
Best brush for varnishing acrylic paintings – soft wide flat brush preferably with split bristles.
Poor varnish in a container.
If you mix your varnish before application (like Golden polymer varnish requires thinning 3:1), mix a bit more to make sure you have enough.
Unused varnish can be good for another couple of days, after that, you will find it cloudy.
Do not shake the bottle with varnish to avoid air bubbles.
Step 4 – Apply Your Varnish
Apply a first thin coat. Work quickly with no extra pressure (to avoid foaming), move the brush at an angle from the top to the bottom Try to apply in even strokes. You can slightly overlap each stroke.
Let it dry for 4-5 hours.
Don’t forget the edges!
Don’t freak out if it looks milky white. Most varnishes are like that while wet, but they will dry to a clear coat.
DO NOT go back over areas you’ve just gone over.
Then apply the second layer now moving the brush from side to side. The general rule is to apply every new varnish layer in strokes that are perpendicular to the previous coat.
Let it dry for a minimum of 4-5 hours or overnight.
Applying the third coat check that there are no hairs, insects, or anything else in a fresh coat. If found something, carefully remove it with tweezers, not with fingers!
2-3 thin coats are enough.
Step 5 – Let it Dry and Clean The Tools
Make sure there is no dust. Check the surface from an angle to make sure there are no uncovered areas or you didn’t create bubbles.
Lay the painting flat for the whole drying period, you can also cover it (not with plastic!) to prevent dust collection.
The varnish dries to touch in 30 minutes but it will be fully cured in 24 hours.
Clean up immediately any drips and your brush. If you leave the brush dry with varnish on it you can toss it.
Varnishing with a spray
Spraying helps to avoid brushstrokes and foaming
- Check that you’ve applied an isolation coat and it is fully dried and clean (wipe the painting with a lint-free cloth.)
- Wipe the painting with a lint-free cloth.
- Choose a dust-free room. The painting should be vertical (contrary to the brush application!).
- Shake the spray very well, it affects how even the finish will be. Check the nozzle, it should be clean
- Apply the spray at least 30 cm away from the surface. While spraying, often check the nozzle. The distance is important as if you get too close you will spray too much varnish and create blobs and uneven surfaces, that can create bubbles while drying.
- Spray the sides.
- Let it dry. Make sure there is no dust. You can place the painting against the wall or cover it (not with plastic!) to prevent dust collection. The varnish dries to touch in 30 minutes. If you need another coat of varnish, wait at least 24 hours and apply it.
Personally, I use spray varnish only as a temporary solution as it feels like it doesn’t give that strong protection over acrylic paint and it doesn’t make it look shinier.
With spray it is also less even surface as liquid varnishes, especially mineral spirits are self-levelling like epoxy so they do create an extra smooth hard clear top coat, and sprays don’t.
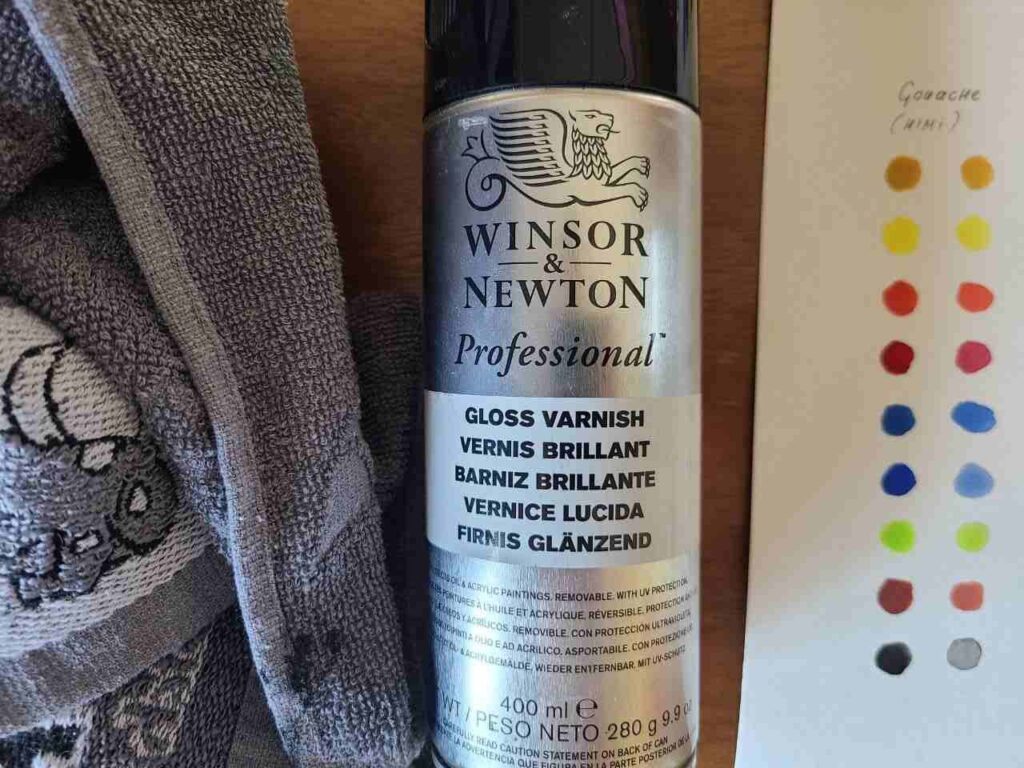
As my temporary quick solution and also for works on paper I use Winsor & Newton spray varnish (not fixative, varnish) as it is light and dries super quickly.
Troubleshooting
You should always wait at least 24 hours for your acrylic painting to fully dry before varnishing acrylic paintings. If you use slow-drying acrylics, this time can extend to a week.
The majority of issues while varnishing happen because we are impatient.
Varnish ruined my painting, what can I do?
If you used removable varnish over an isolation coat you can safely remove the bad varnish from your painting.
If you did not use an isolation coat or the varnish seems to be non-removable there is little we can do.
If you have white wet varnish – it is ok, it will dry to clear finish.
If you have foggy dry varnish, splotches, blotchy varnish, colors lifting, foaming or peeling, the application and the varnish were not right for your painting, but you can try to use varnish remover, turpentine for solvent-based varnishes or ammonia for water-based varnishes.
My varnish on acrylic painting is cloudy
If you have a small cloudy area of varnish you can try olive oil or if the cloudy area is rather large, I would suggest removing the varnish and reapplying it.
Some crafters removed cloudy varnish spots from furniture with lemon oil or petroleum jelly but I’ve never tried that on painting.
You can also try to lightly sand the area and reapply the varnish on it.
Note that cloudy finish often happens with matte varnish.
I Want To remove varnish from an acrylic painting
To protect your painting and remove eventual dust and yellowing you will need to remove the varnish and reapply it.
You will absolutely need an isolation coat for this and if you skipped it before, varnish removal can significantly damage the paint.
Step-by-step varnish removal:
- Get ammonia. It is the most common varnish removal but double-check your varnish brand instructions. Mineral spirit varnishes can be removed with Turpentine (yes, the one for oil paintings)
- Work in a dust-free, well-aired area.
- Wear latex gloves, a dual filter respirator, and splash goggles.
- Place your painting horizontally.
- Get a lint-free, soft, white cloth and saturate it with ammonia.
- Test the solvent on a small area of the painting.
- Put the cloth over the entire area of the painting. Cover the area with a plastic sheet to reduce evaporation. Leave it for 2-5 min.
- Rub the cloth gently until the varnish starts to dissolve.
- Repeat until the entire area is cleaned. Check from angles and do not forget the edges!
- Let the painting dry overnight.
- Apply the new varnish.
If you see any paint color on the cloth, stop right away and allow the surface to dry!
Conclusion
While varnishing acrylic paintings’ surfaces can help protect the paint from UV rays, moisture, dust, and smooth uneven surfaces, and gives our oil and acrylic paintings a nice sheen, varnishing is a skill that requires some time and patience to master.
As I emphasized applying an isolation coat should be on your list as well before applying varnish.
The varnished painting looks very nice and even though some artists from the past didn’t seal their paintings, I really love how paint colors pop once you add even the first coat of varnish.

Masha Eretnova, born in 1991, is a Chiang Mai-based certified teacher, artist, and blogger with 20+ years of personal painting journey.
She started painting and drawing very early and is now an international abstract artist and educator passionate about acrylic painting, gouache, and crafts.
Her works are part of international exhibitions and contests, including ArtlyMix (Brazil), Al-Tiba 9 (Spain), Exhibizone (Canada), Italy, and many more.
Besides her artistic pursuits, Masha holds a post-grad diploma in Teaching Film Photography and 2 music school diplomas: piano and opera singing.