Last Updated on April 15, 2025 by Masha Eretnova
Did you tear up watching Up movie?
Oh boy, I did! It is such a beautiful story that became a good staple in cartoons since Pixar and Disney made it in 2009.
And no wonder Up House drawing is one of the most popular choices to learn how to draw both for kids and adults, and I am no exception.

I am no gifted painter, so I will do an easy drawing that anyone can repeat! I will share a free downloadable pdf coloring page below.
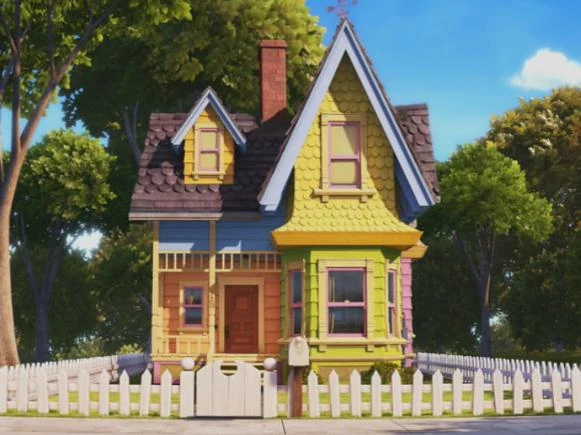
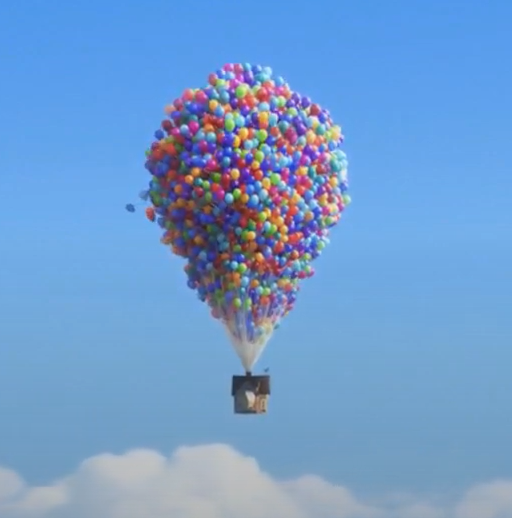
Let’s paint Carl’s house from the cartoon then! Get paper, a pencil or black marker for outlines, an eraser, and markers or paint you will want to color it with. Here is our reference:
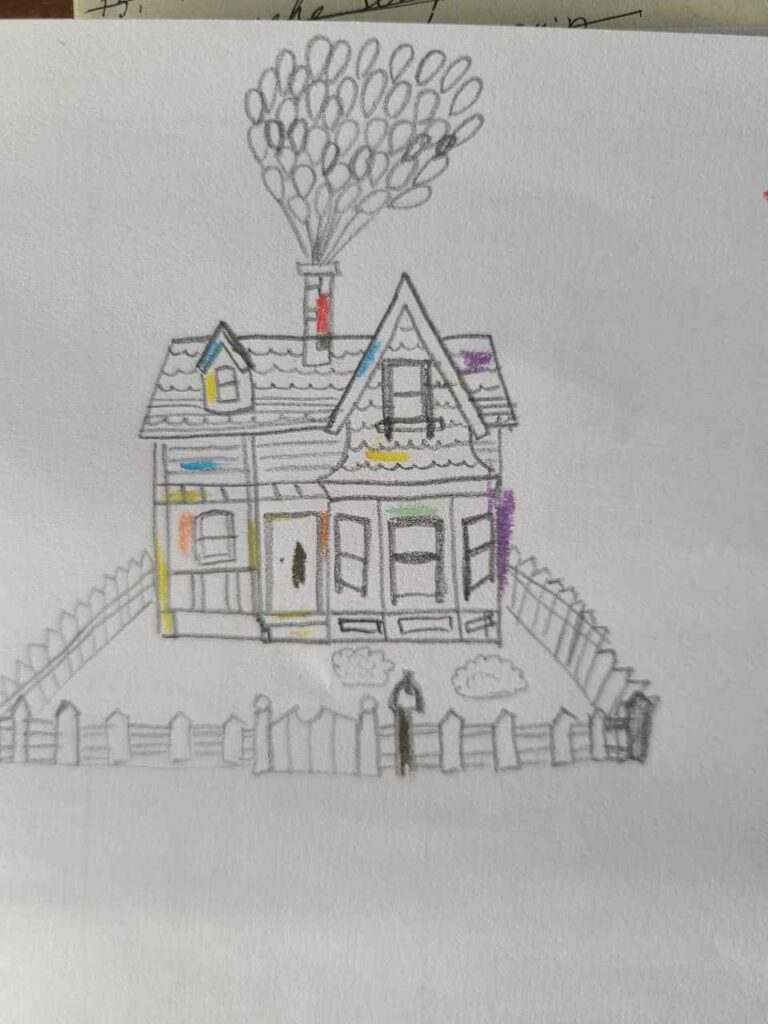
Note: I had a tiny little reference that I sketched and marked the colors next to me, it looked like this:
I used to draw Up House:
- Derwent pastel pencils (12-color pack was amazing and more than enough)
- regular print paper
- pencil and erased to sketch
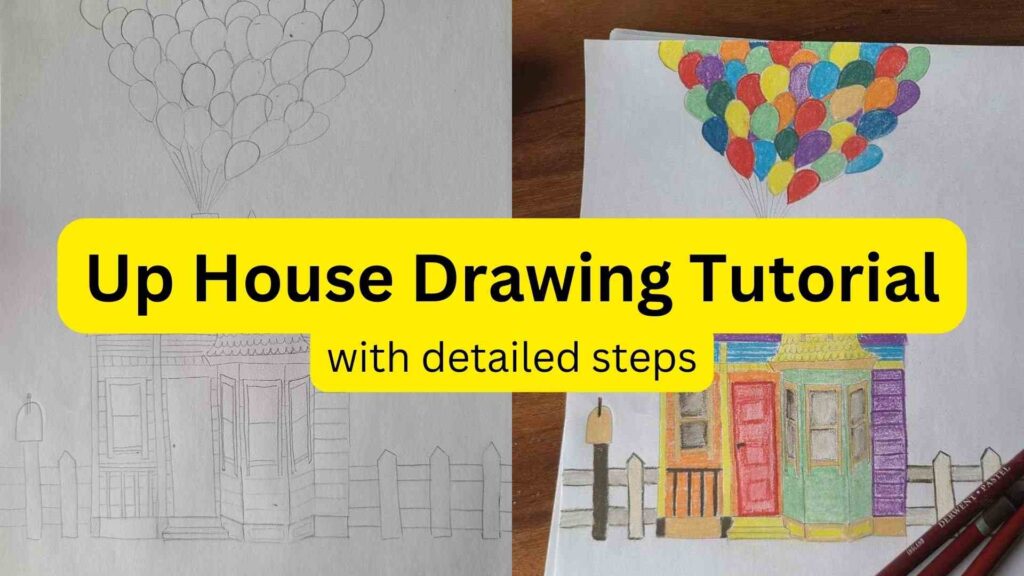
The step-by-step process to make a quite realistic yet simple and cute Up House drawing:
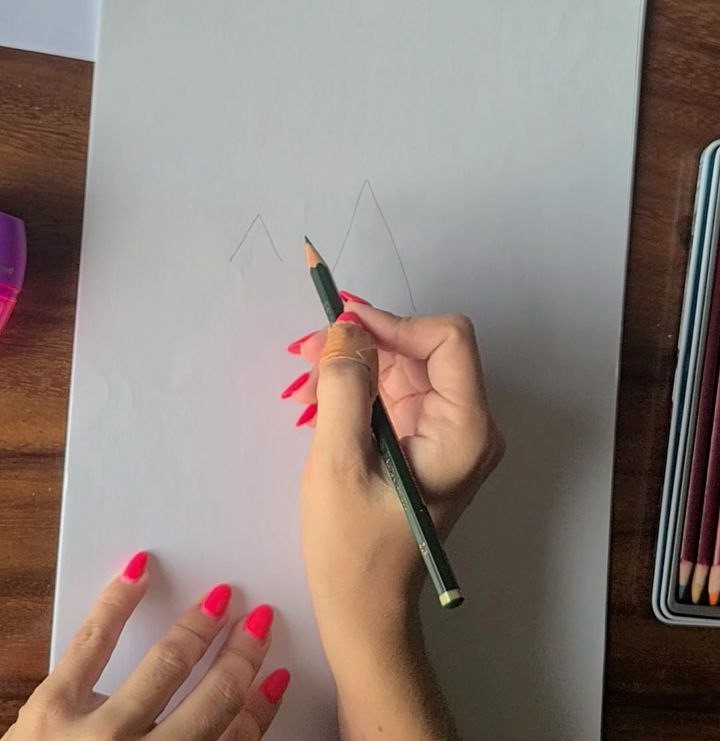
Step 1 – Draw the outline of the roof
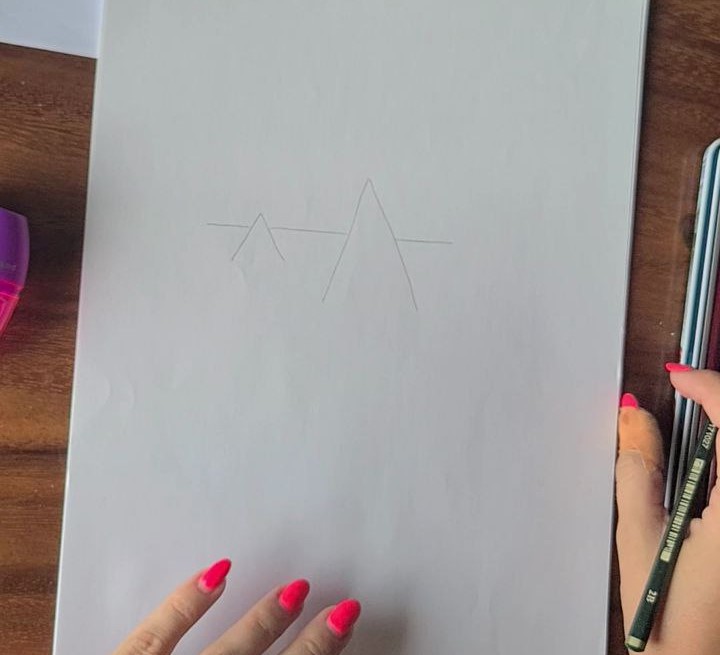
I start with 2 cones
Then draw the horizontal line marking the roof
Adding frame to the “cones”
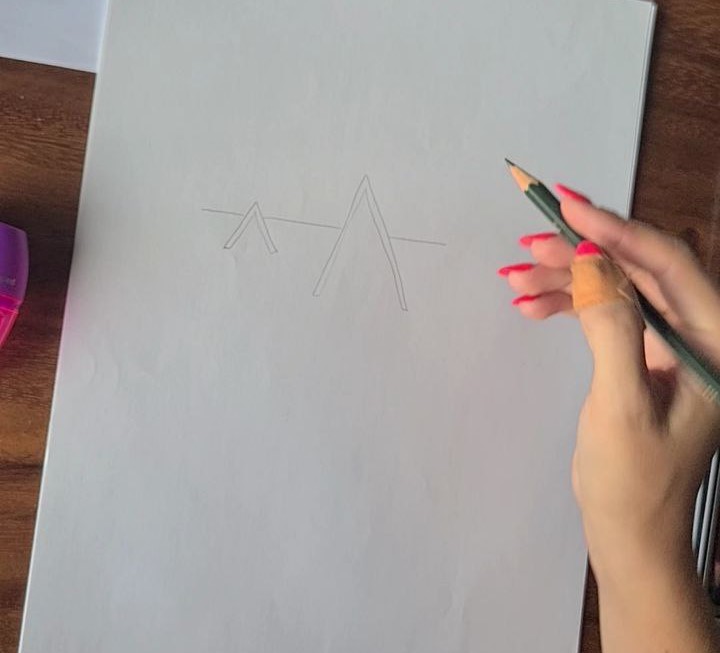
Drawing the whole roof shape without closing it under the big cone.
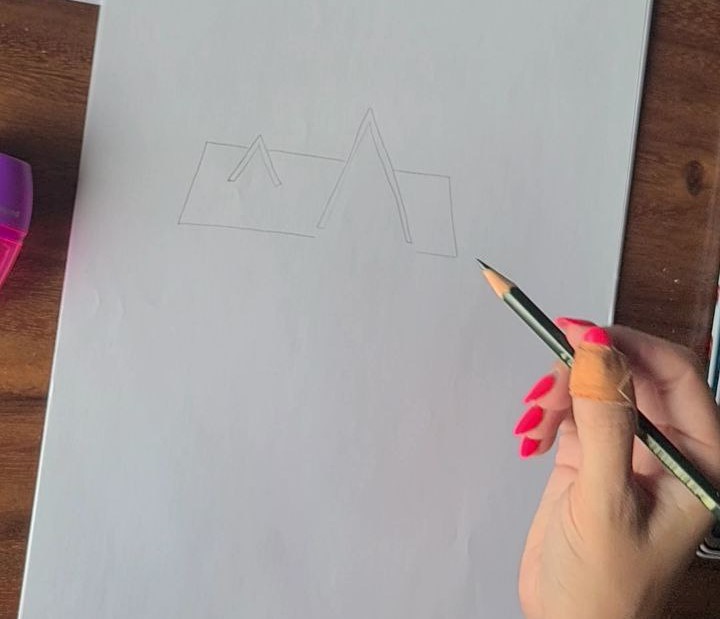
I then draw the shape of the balcony, it goes like a skirt and has a bottom part.
Then I draw the square that will be the small balcony wall.
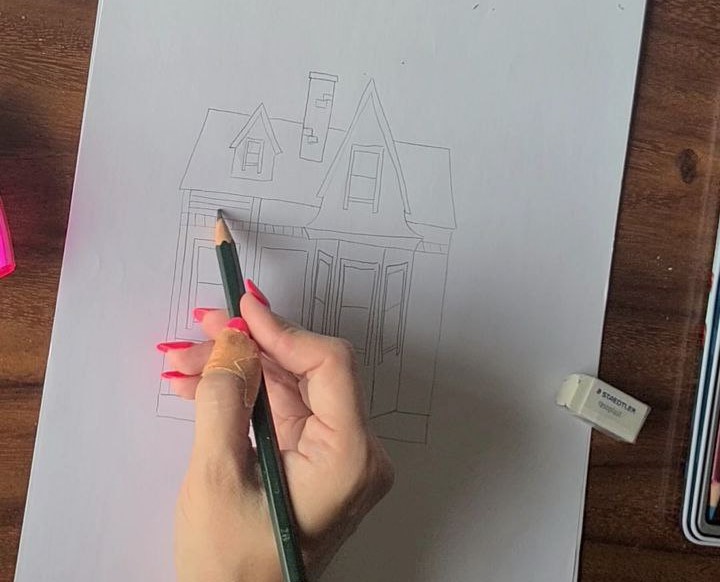
And I need to add a small window to it. Now, the windows of the Up House are special: the vertical frames at the bottom are a bit longer than a window, check here:
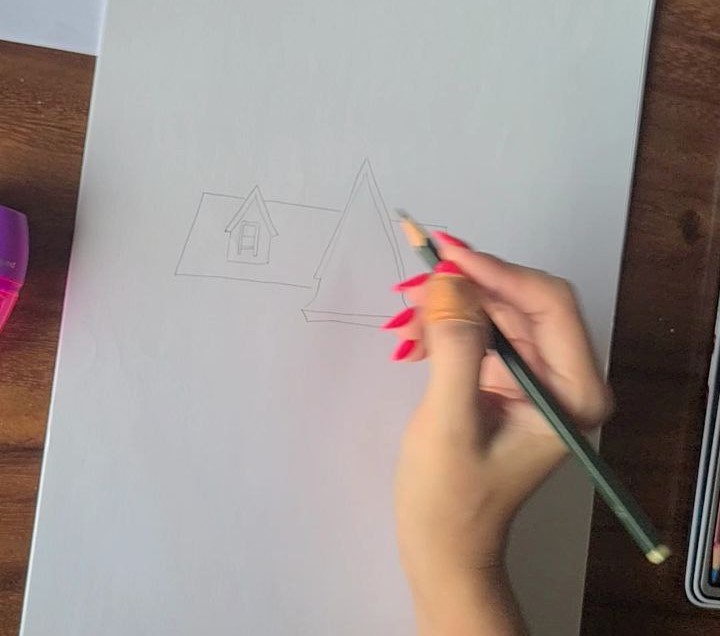
I need to add a bigger window to the other side as well. As you can see I don’t use a ruler and my lines are not perfect, and I’m ok with it. You can absolutely make everything perfectly aligned using a ruler.
Now not to forget the chimney! Draw the long rectangle, then cap on the top. Erase the roof line in the middle and add a few bricks so the chimney looks cuter.
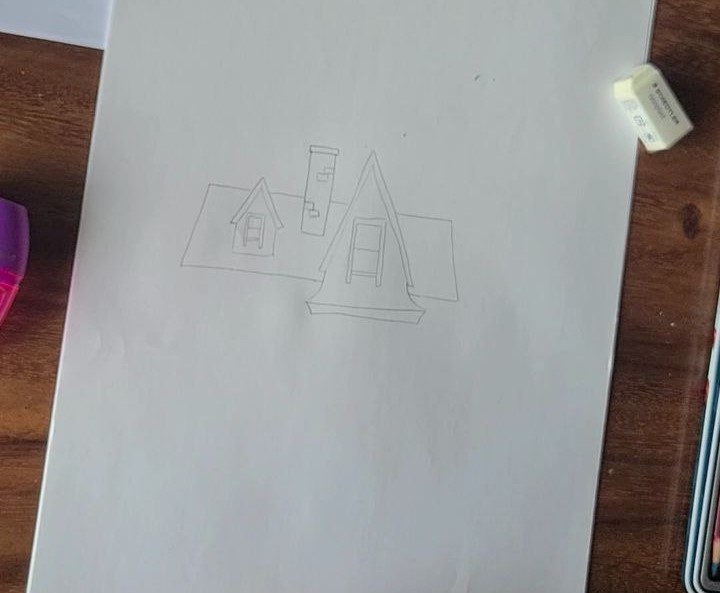
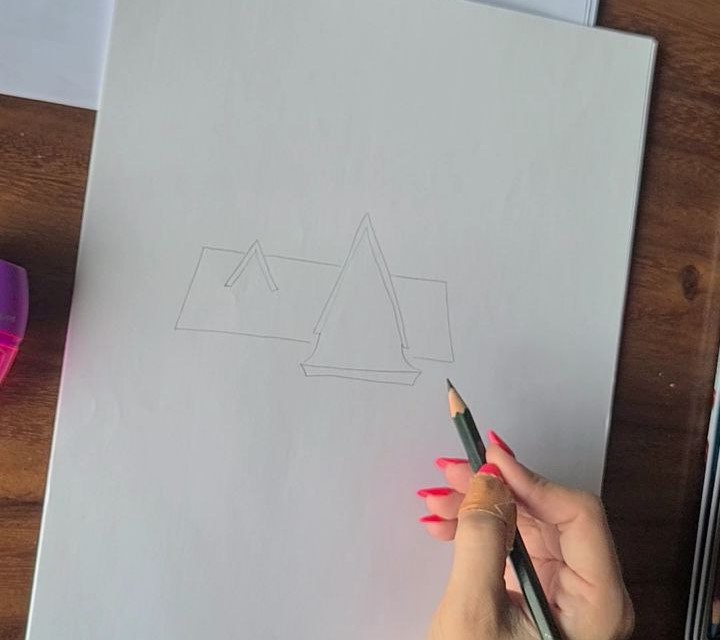
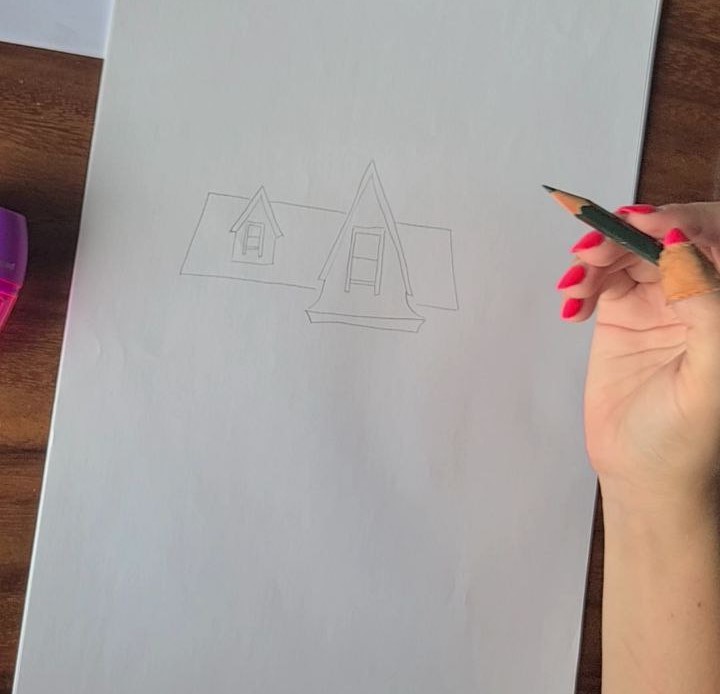
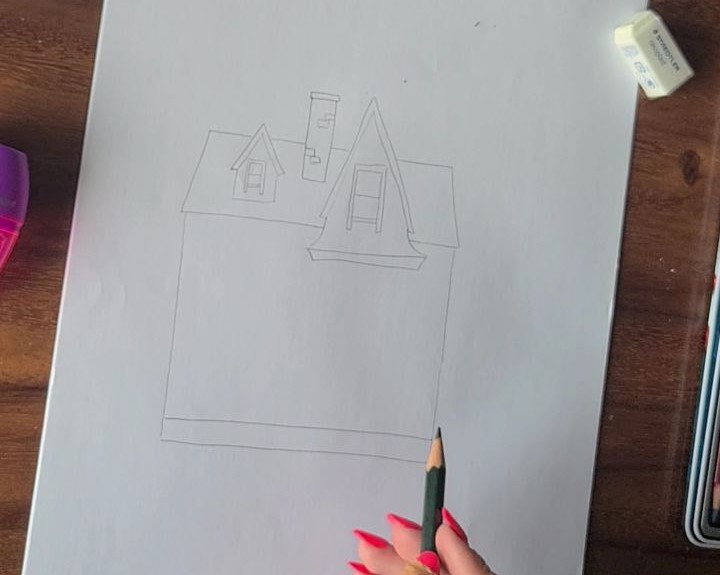
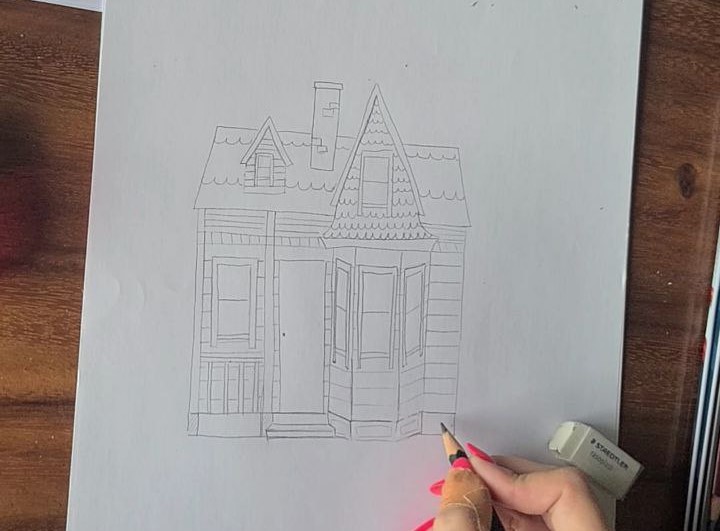
Step 2 – Sketch the House
The house shape is in between a square and a rectangle.
If you are drawing your house on the very edge of the paper sheet, keep a little space at the bottom of the first floor to make steps later.
If you want to draw a flying Up house, make this rectangular and the house slightly tilted to the right or left side. My Up House is still “parked” and I’ll show you how to add a fence if you want later.
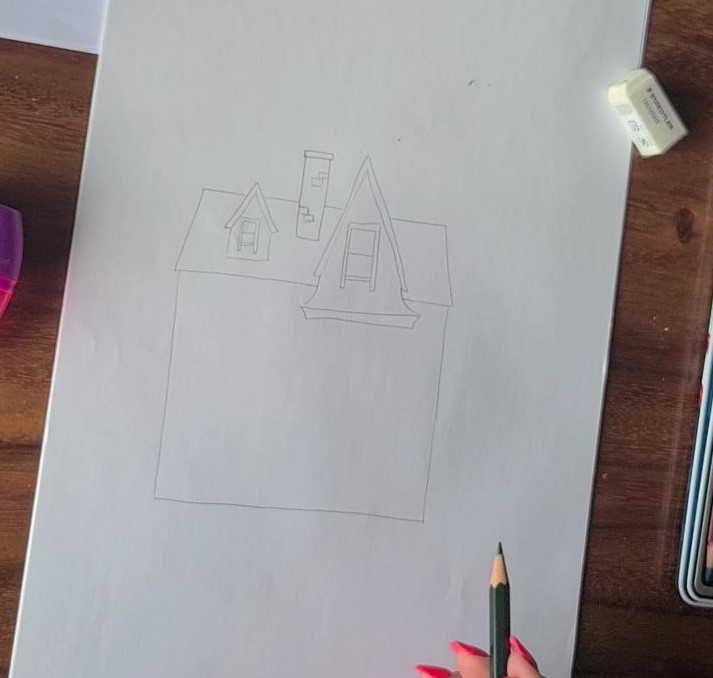
I marked the space for the steps and foundation of the house:
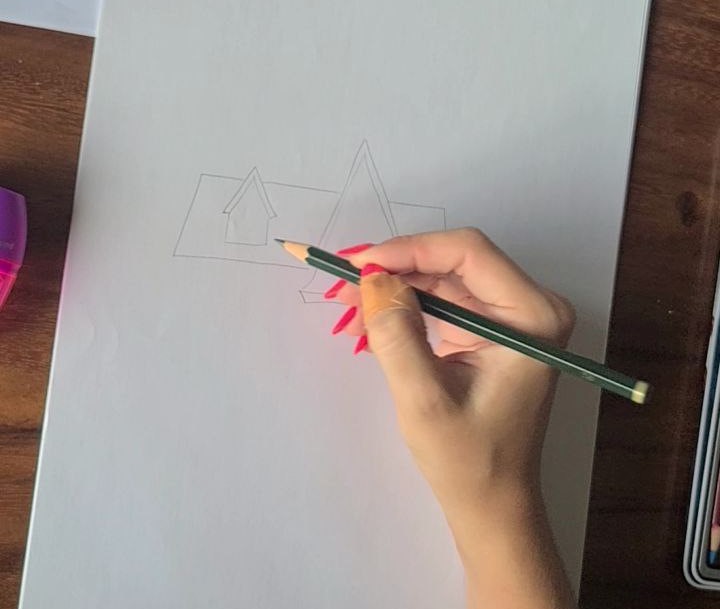
I’m drawing first the porch on the left side. I need to add 2 columns, a railing at the top and at the bottom.
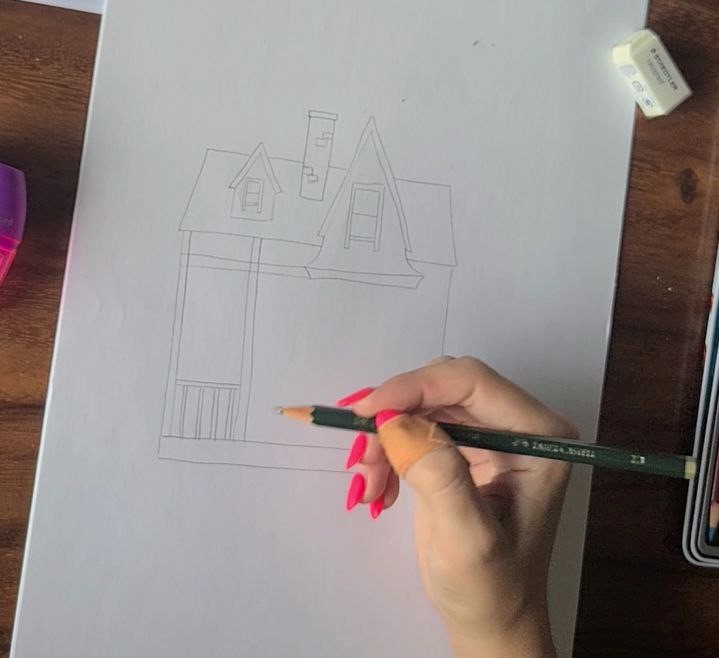
I added details to the top of the porch. There is also one window on that side, let’s draw it.
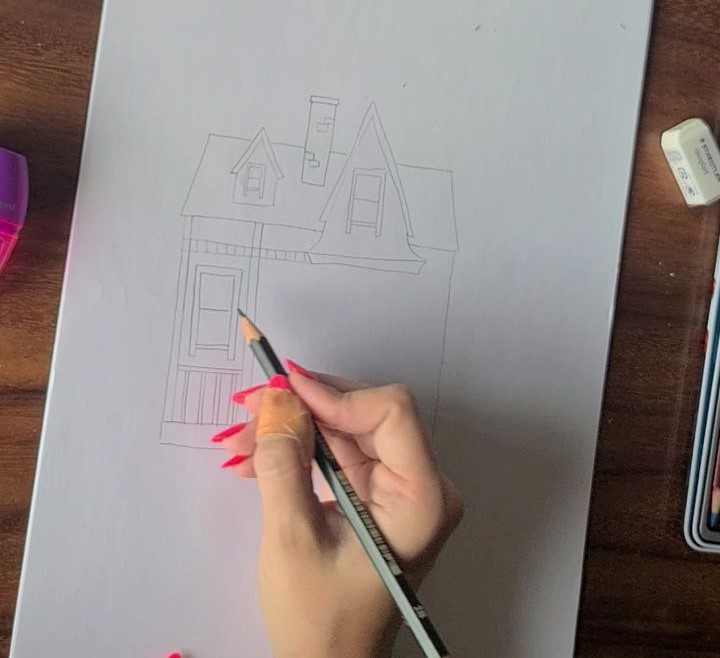
On the other side, there is a big bay with windows. Draw two vertical lines from the big cone down to the foundation:
There will be 3 windows, and 3 walls in this bay, so we need to make 2 more vertical lines:
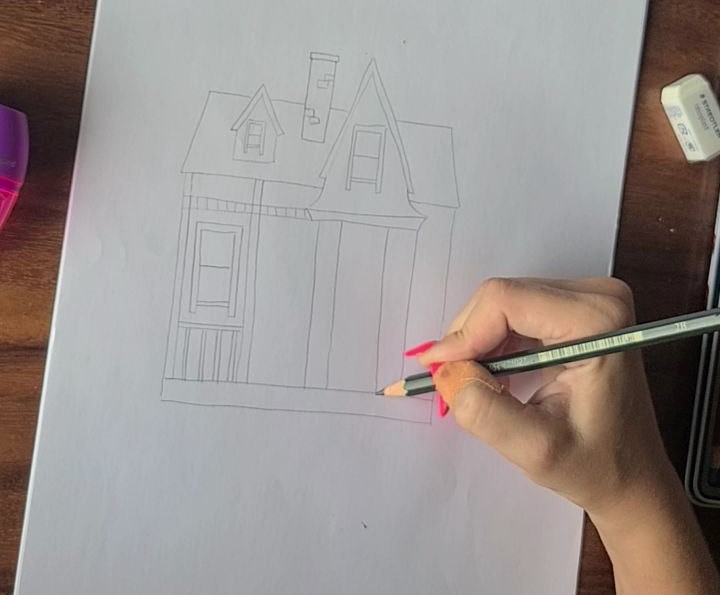
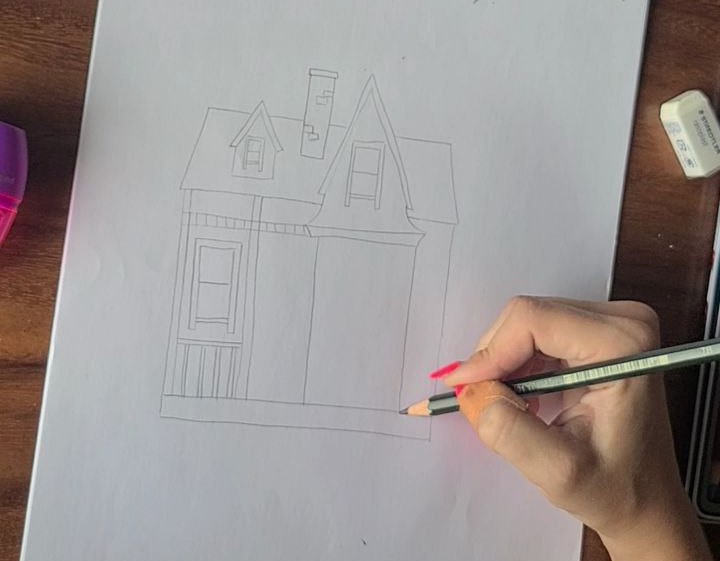
Let’s draw the bay windows. First one is straight:
The other two windows should have a slight angle to show that this bay stands forward. This way we will make it look better.
We need to adjust the bay’s foundation as well, like this:
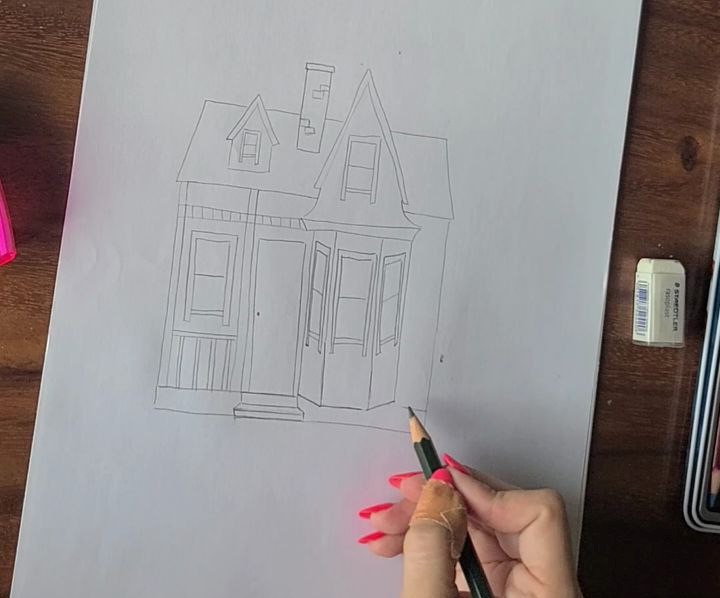
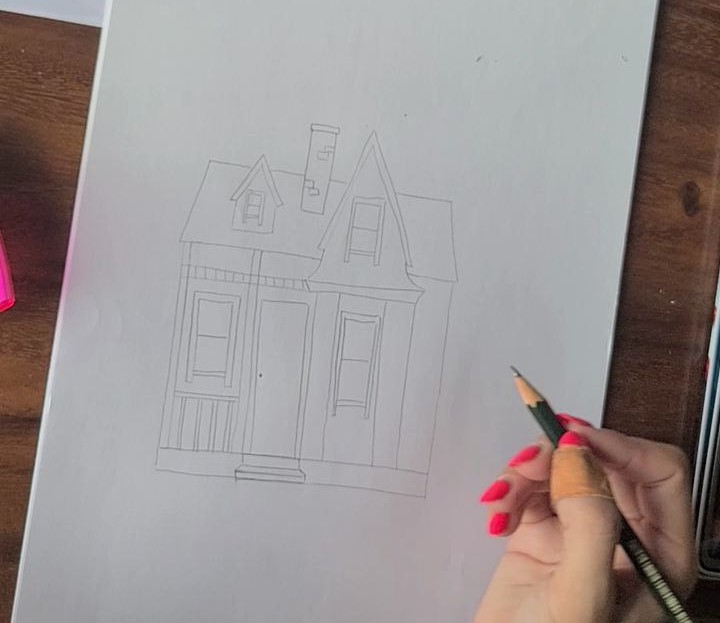
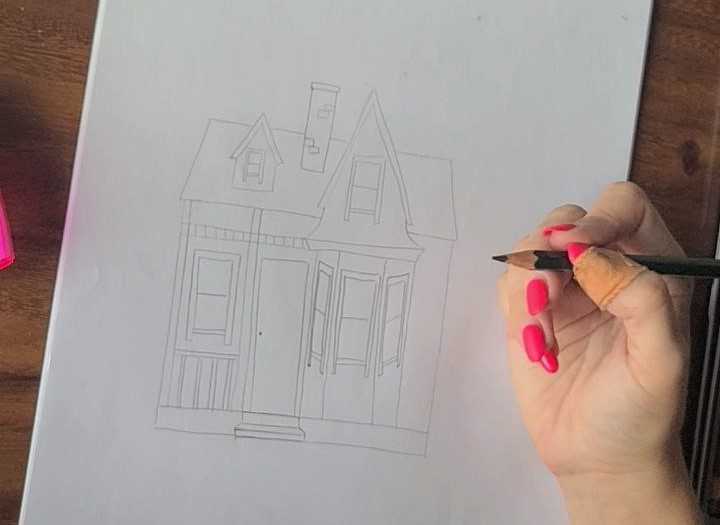
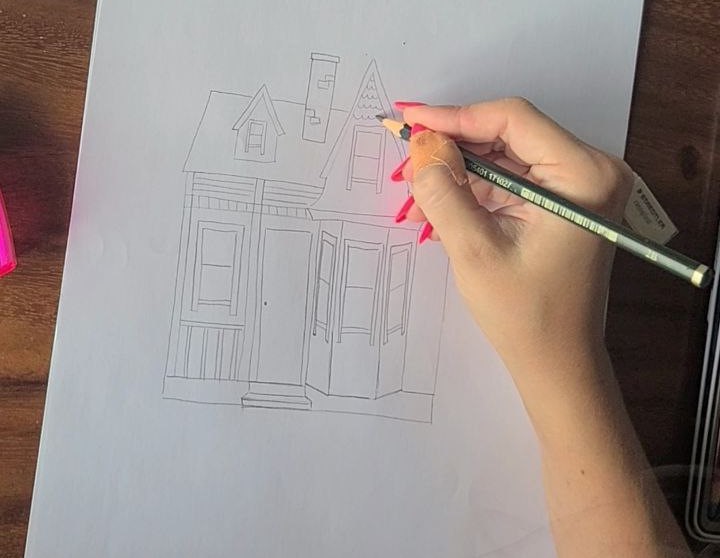
Step 3 – Adding texture and details
The house is made of roof tiles and wooden planks, with simple lines we can make the Up House drawing look more like the house from the cartoon.
Let’s start with wooden planks around the house walls:
Then the balconies – have different textures:
and the smaller ones have the same wooden plank texture:

Now to the roof. You can make all the roof covered with roof tiles, but I thought it would look too heavy so I made the pattern only in a few areas:
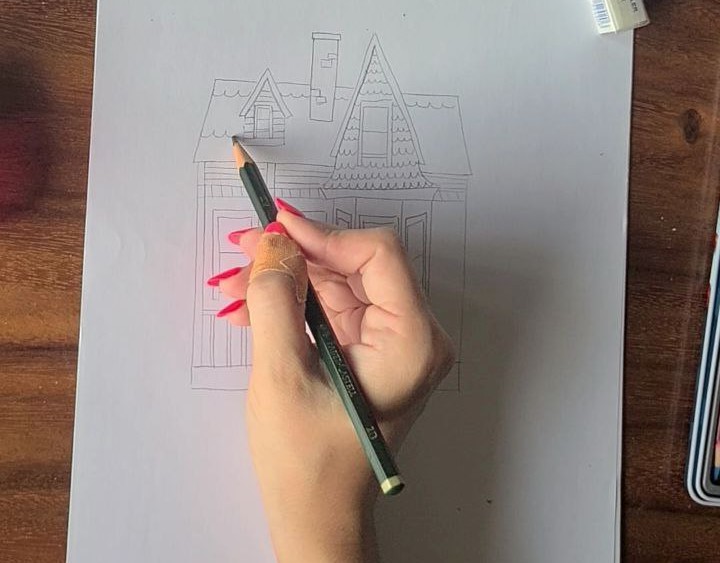
All the walls are made of wood:
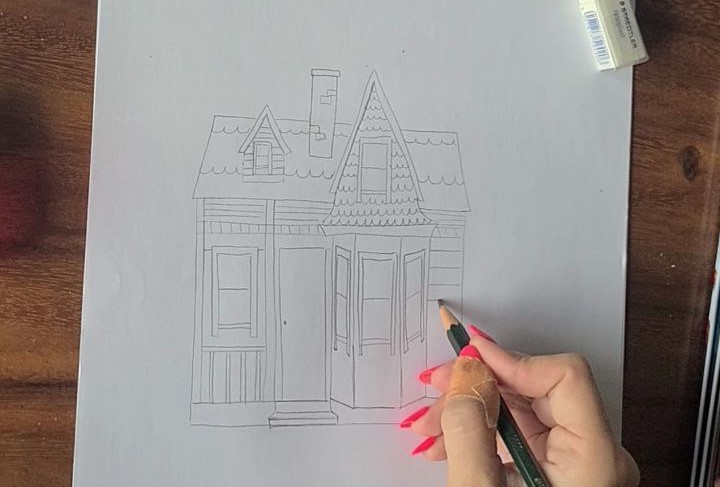
Add details to the bay foundation:
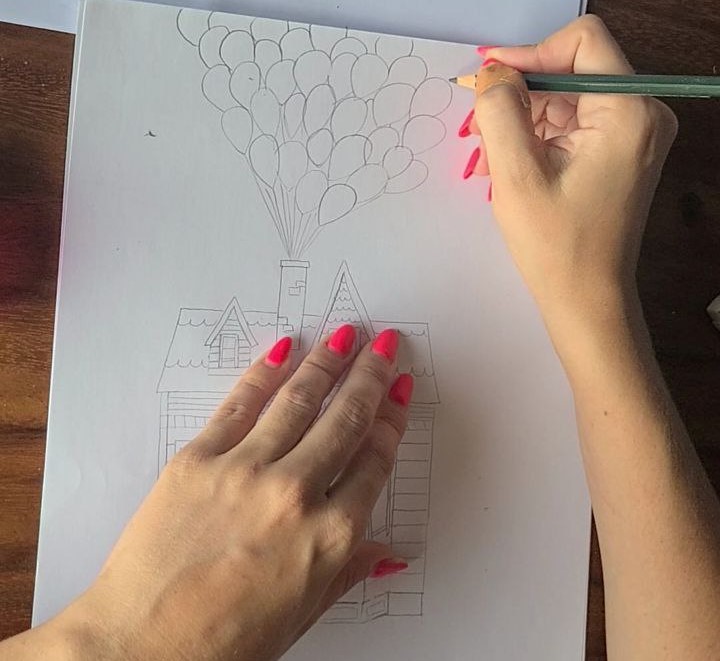
Step 4 – Draw the Balloons
Start with a few big ones located randomly, and make sure they are connected to the chimney with some lines.
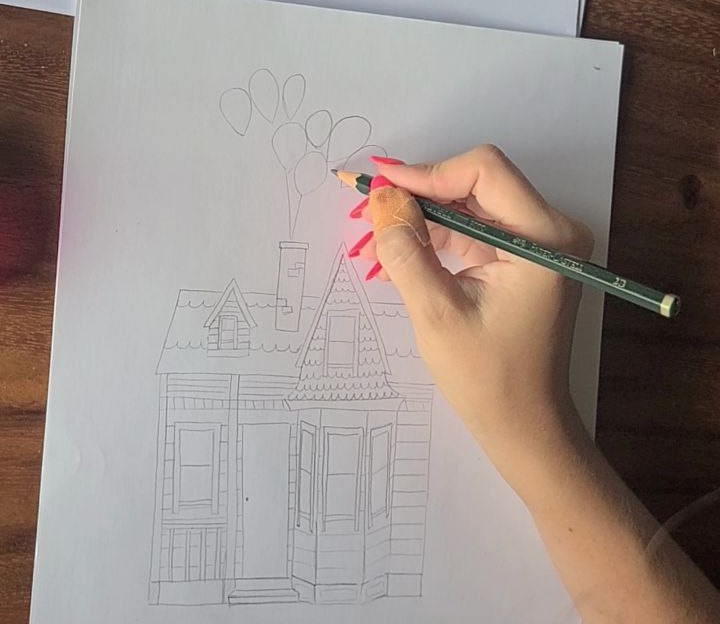
Draw as many as you can, but draw them in levels.
Step 6* – Draw the Fence (Optional!)
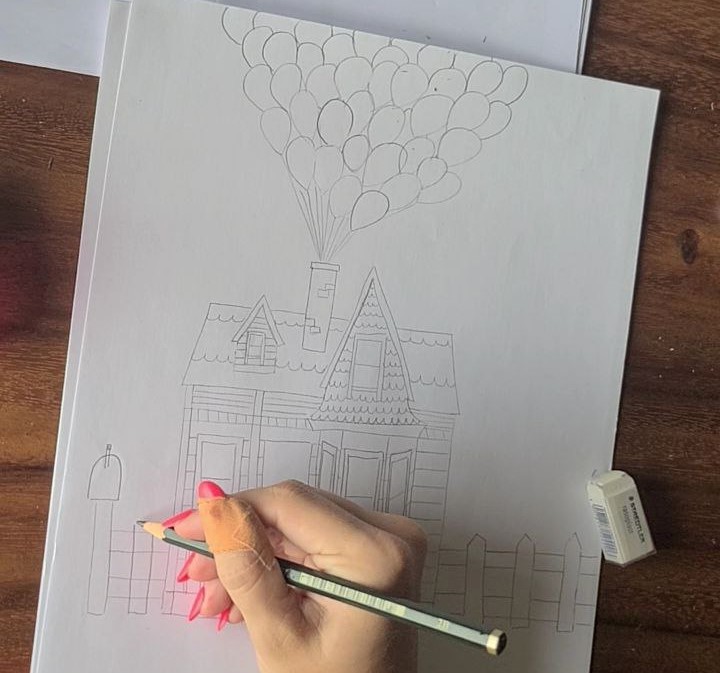
It is an optional step, you can add a fence around your house if you are drawing the standing house that hasn’t yet taken off!
You can skip it easily 🙂
You can draw trees around, and even Carl himself if you’d like 🙂
If you are drawing a floating Up house, you may add clouds or birds!
The final sketch looks like this:

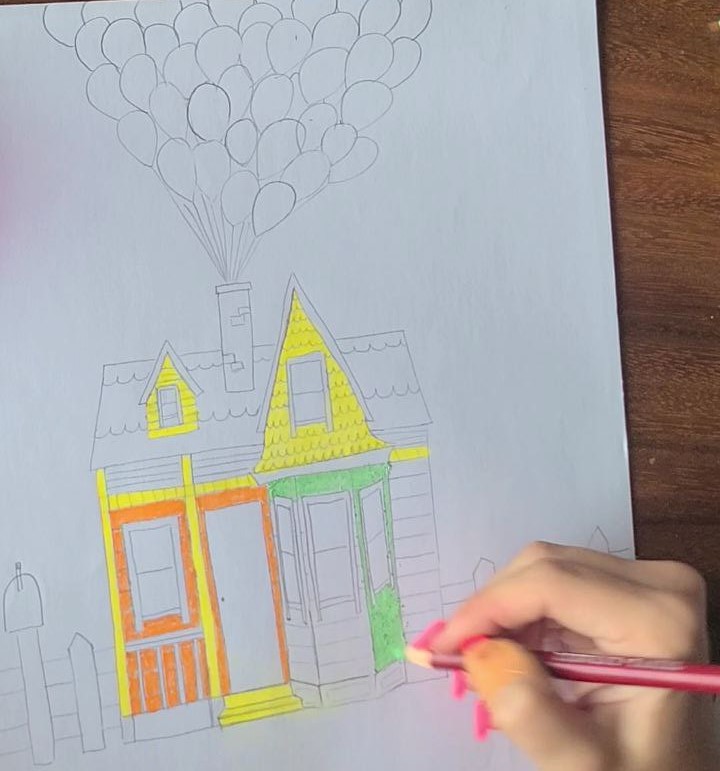
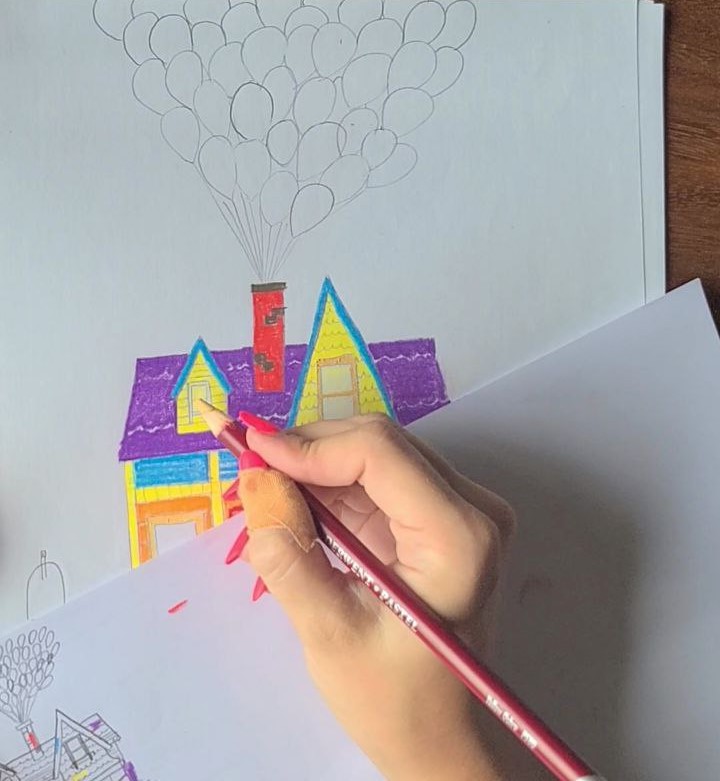
Step 7 – Coloring
You can use any colors you like! Color with paint pens, acrylic paint, colored pencils, or crayons.
I used Derwent pastel pencils. Working with pastel pencils you have a few advantages:
- when you press lightly you have light colors
- when you press harder you have denser brighter colors
- you can smudge (blend) the colors with a piece of paper towel, your finger
- you can layer white pencils or darker pencils over the colored part to create shades or highlights (I’ll show you how)
Acrylic paint colors (budget-friendly) that the Up house with balloons was in the movie:
- House:
- Light green
- Yellow
- Violet
- Light orange
- Beige
- Brown
- Light blue
- Dark purple (roof)
- Dark red (chimney)
- Balloons:
- Light blue
- Blue
- Yellow
- Orange
- Pink
- Light green
- Purple
- Red
- something like Emerald Green
As I was using Derwent pastel pencils I had 12 colors: white, black, yellow ochre, burnt umber, yellow, orange, blue, ultramarine, purple, green, light green, and red.
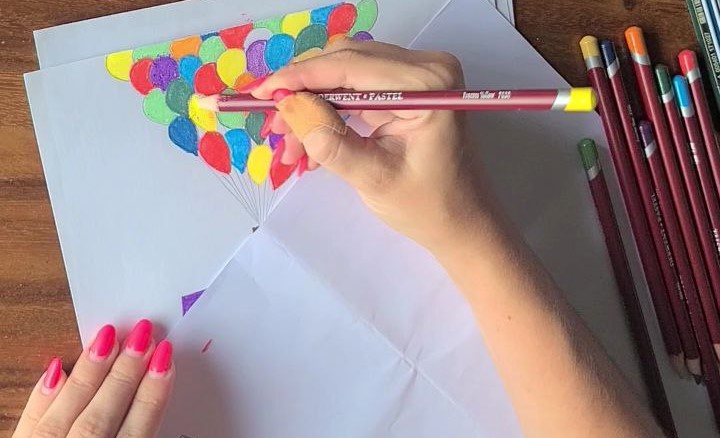
If you are like me, working with pastels, I recommend starting coloring from the top (from balloons). Otherwise, you risk smudging. You can still start from anywhere you want, just remember to use some paper to lay under your hand and arm to avoid making a mess.
I tried to stay as true to the cartoon as possible picking my colors, but it is not mandatory. You can be creative.
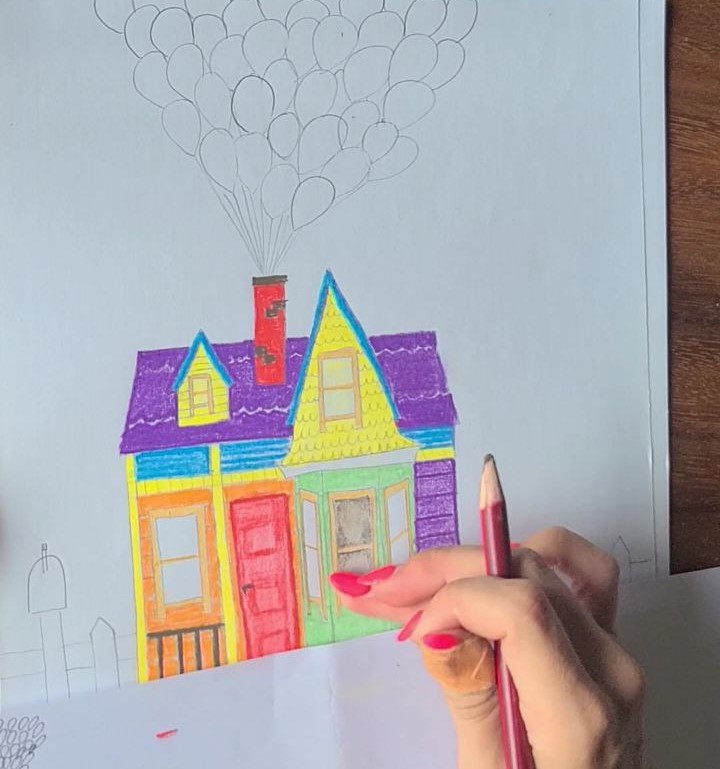
As I said, if you are moving from the bottom, use a piece of paper to avoid smudging:
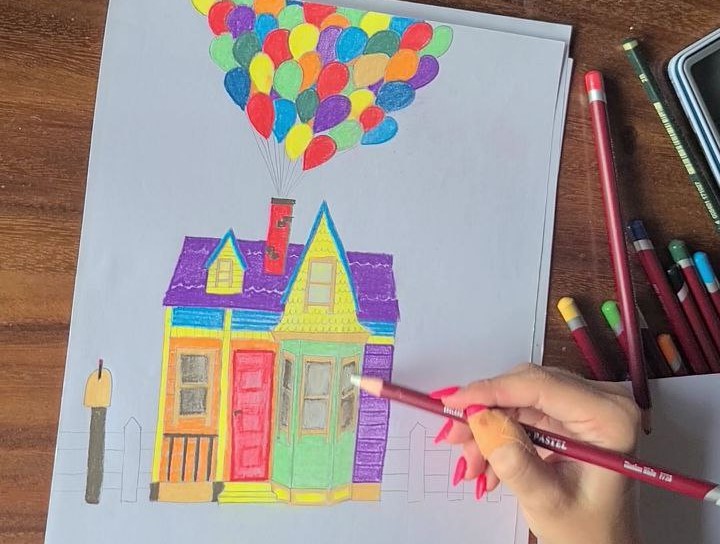
When I was coloring the door, I used a trick. I didn’t want my door to be just flat. So I colored it all red pressing lightly on the pencil. Then, pressing harder, I made some square shapes to make the door look cooler. Look here:
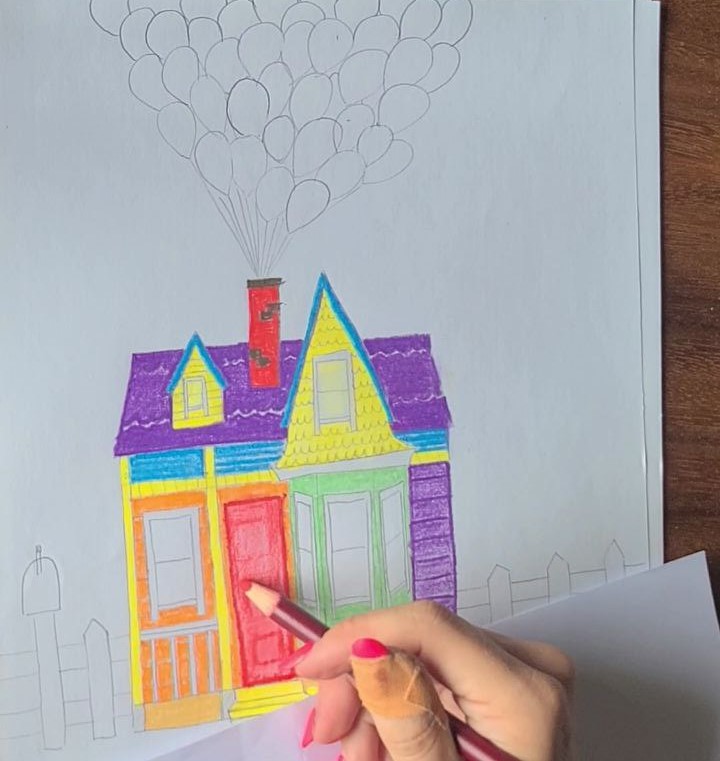
Another trick when coloring with pastel pencils I used to color windows. If I will use brown or black it would be too dark and draw too much attention, leaving it blank also isn’t good. So I made a vignette around the window and with my finger smudged some pigment in the center. It looks better I think than just flat black:
I colored all the balloons. Make sure you place them keeping in mind what colors go well together. For ex., orange and blue, green and blue, etc.:
One more trick I used coloring the fence. Again, there is no nice grey-white color in the pack, and flat brown will look not as nice as something I did. So I first colored the fence with yellow ochre (the fence itself) and brown (the mailbox). Then I layered a white pencil over these colors, it blended and gave me nice pastel color!
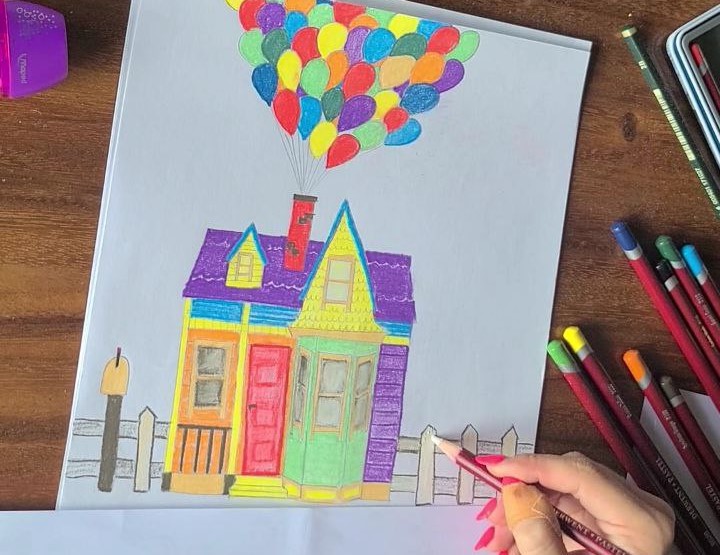
You can add white to the windows as well:
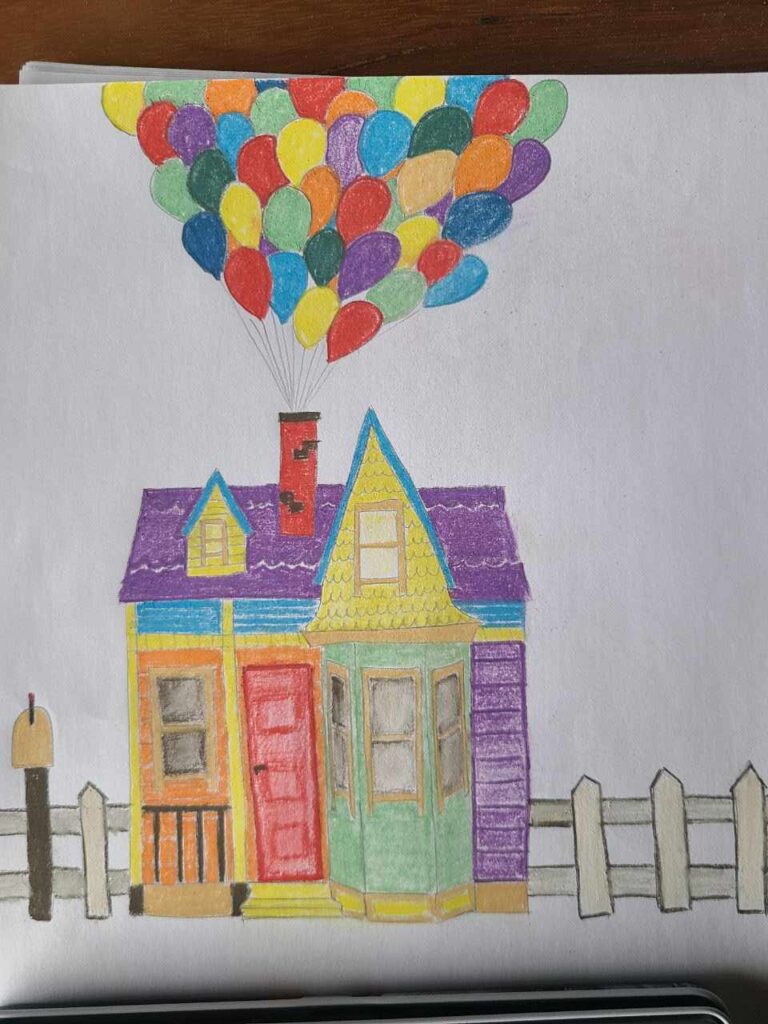
And we are done! Yay!

to Sum Up
Up House drawing and then coloring can also be a good activity for kids’ parties, as well as a therapeutic adult art therapy session.
The full video is on my Youtube channel.
I hope you found some tricks on how to paint the Up house in a better yet simple way and I will be happy to see your drawings and paintings!
Share this house from up drawing with your family and maybe even make a small exhibition! For teachers, it is a great idea for an art class as well 🙂
Need more ideas about what to paint?
- 55+ Easy Star Wars Painting Ideas & Crafts for Star Wars Day
- 55+ Easy Christmas & Winter Canvas Painting Ideas For Beginners
- 101 Easy Acrylic Painting Ideas for Beginners on Canvas

Masha Eretnova, born in 1991, is a Chiang Mai-based certified teacher, artist, and blogger with 20+ years of personal painting journey.
She started painting and drawing very early and is now an international abstract artist and educator passionate about acrylic painting, gouache, and crafts.
Her works are part of international exhibitions and contests, including ArtlyMix (Brazil), Al-Tiba 9 (Spain), Exhibizone (Canada), Italy, and many more.
Besides her artistic pursuits, Masha holds a post-grad diploma in Teaching Film Photography and 2 music school diplomas: piano and opera singing.