Last Updated on March 23, 2024 by Masha Eretnova
Have you been running out of ideas on how to paint with your gouache next? What if we bring your creativity to the next level?
That sounds great, isn’t it? If you’re getting bored with your current painting style, don’t be scared to try something new.
You are free to experiment, explore, and try other gouache painting techniques that will work best for you.

Before you can get the most out of your gouache paints, you must first learn the basics. For adding texture try dry brushing, for smoother application use wet-on-dry, glazing techniques, learn blending to paint the sky, and grisaille to work with natural elements and portraits.
Gouache is such a powerful and versatile water-based paint that you should experiment with it whether you are a professional or a beginner.
If you want to learn more about how to paint creatively with gouache, keep reading because we’ll go over gouache painting techniques and some tips on improving them.

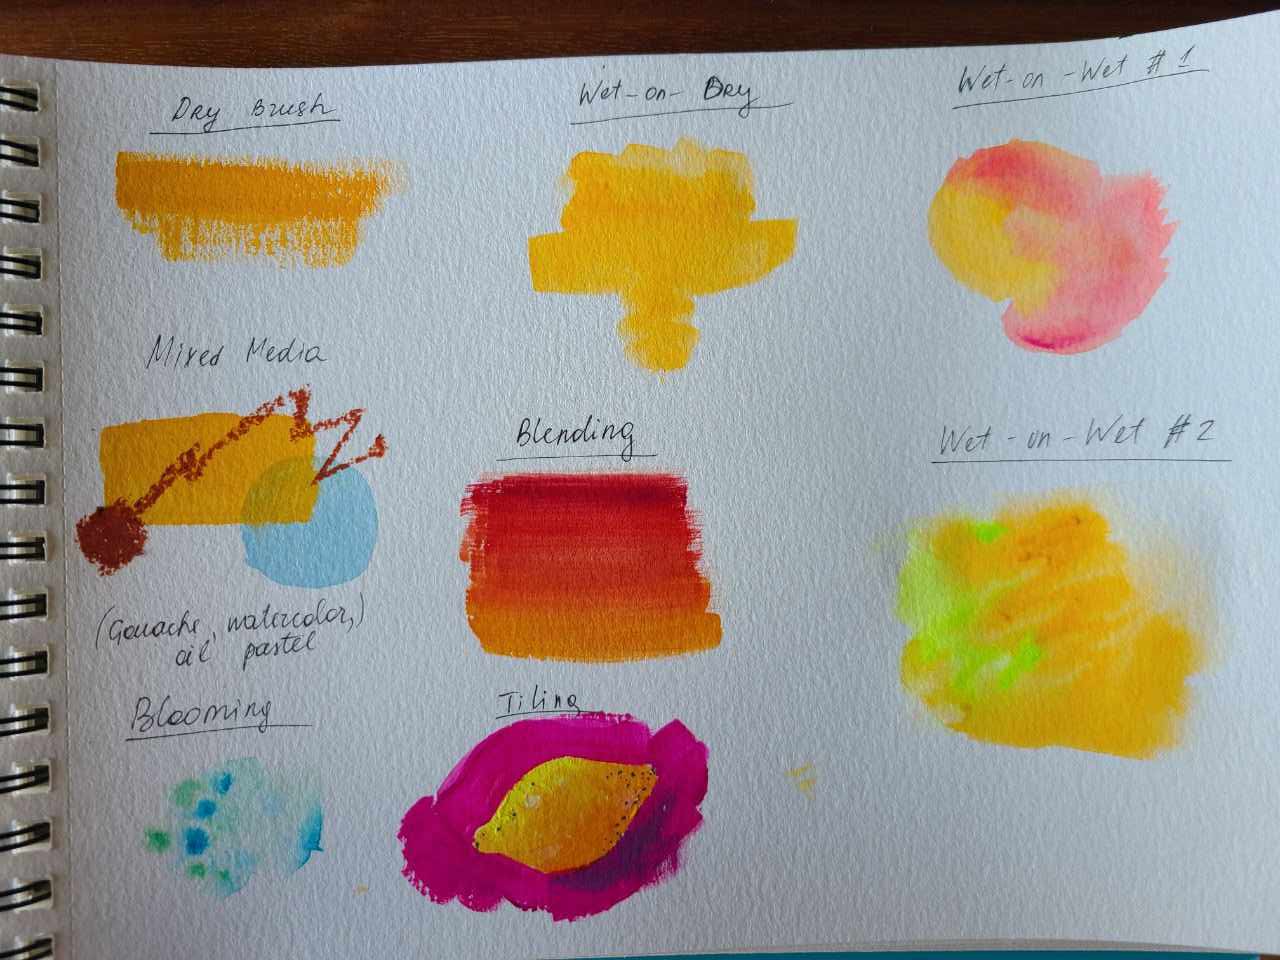
Even though gouache paint offers unlimited creative possibilities, learning some of the most common gouache painting techniques might be extremely helpful. Some of the best to try are as follows:
Dry Brushing
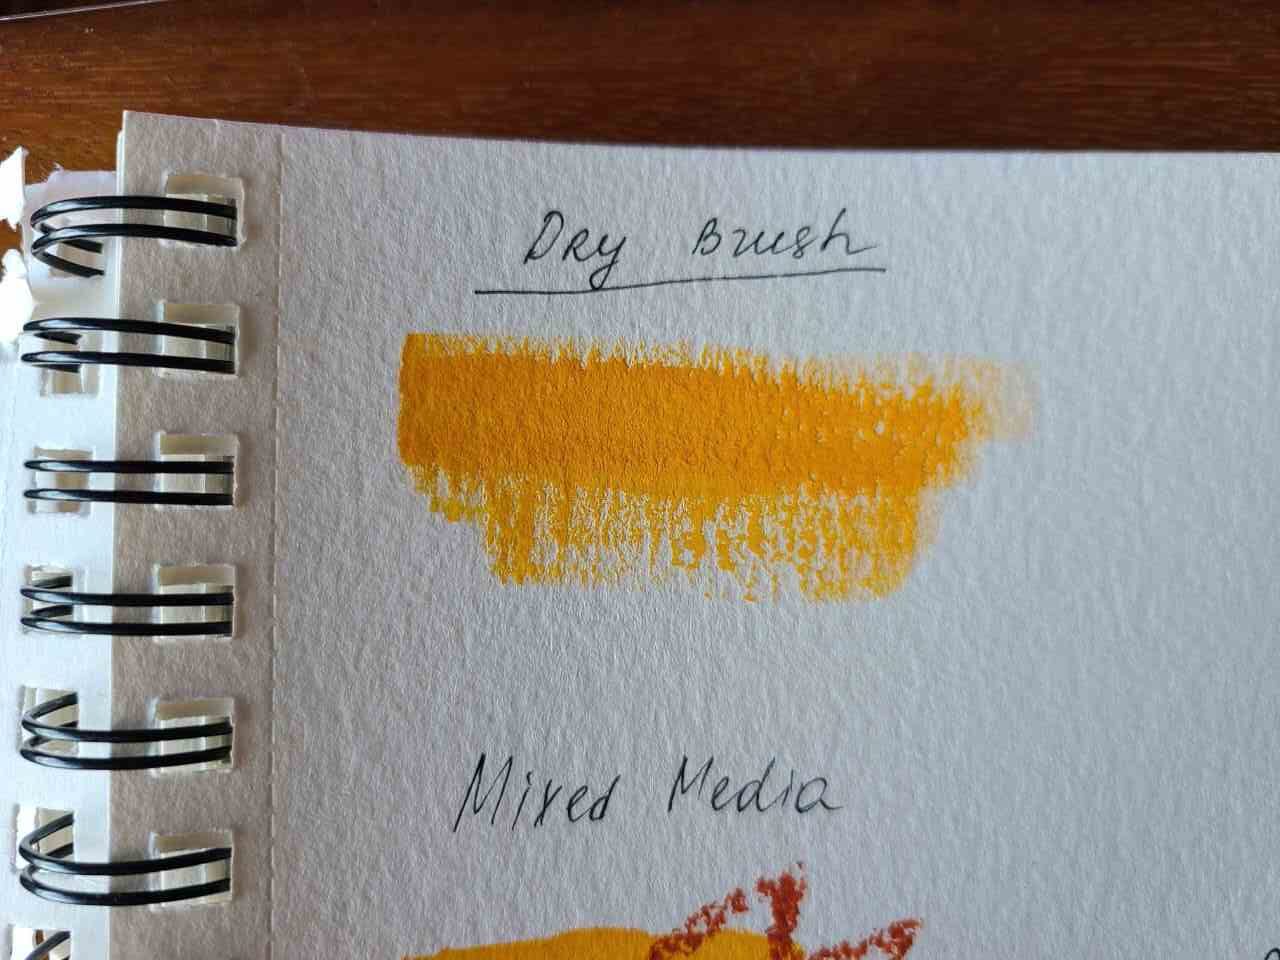
Dry brushing with gouache is a very straightforward technique when you use dry brush dipped in paint on dry paper/canvas.
It works for adding texture to your painting like rustic motives, old wood or bricks.
By nature, gouache has a very creamy texture and are not notorious for working for impasto unlike acrylics, but you can imitate the natural wood grain with dry brush.
This approach is great for creating multi-tonal effects, fine details, backgrounds, and highlights. It also adds dark and light tones to your gouache color.
The dry brushing technique may be ideal for you if you’re into painting landscapes or natural sceneries.
Furthermore, this technique is simple and easy to do.
The paintbrush you’ll use here is nearly dry yet still holds paint. To dry brush with gouache, simply dip your brush into a slightly damp paint and wipe it out with a paper towel or a palette.
Apply the dry brush across your paper or canvas to create a light, feathery look on your painting.
Wet-on-dry
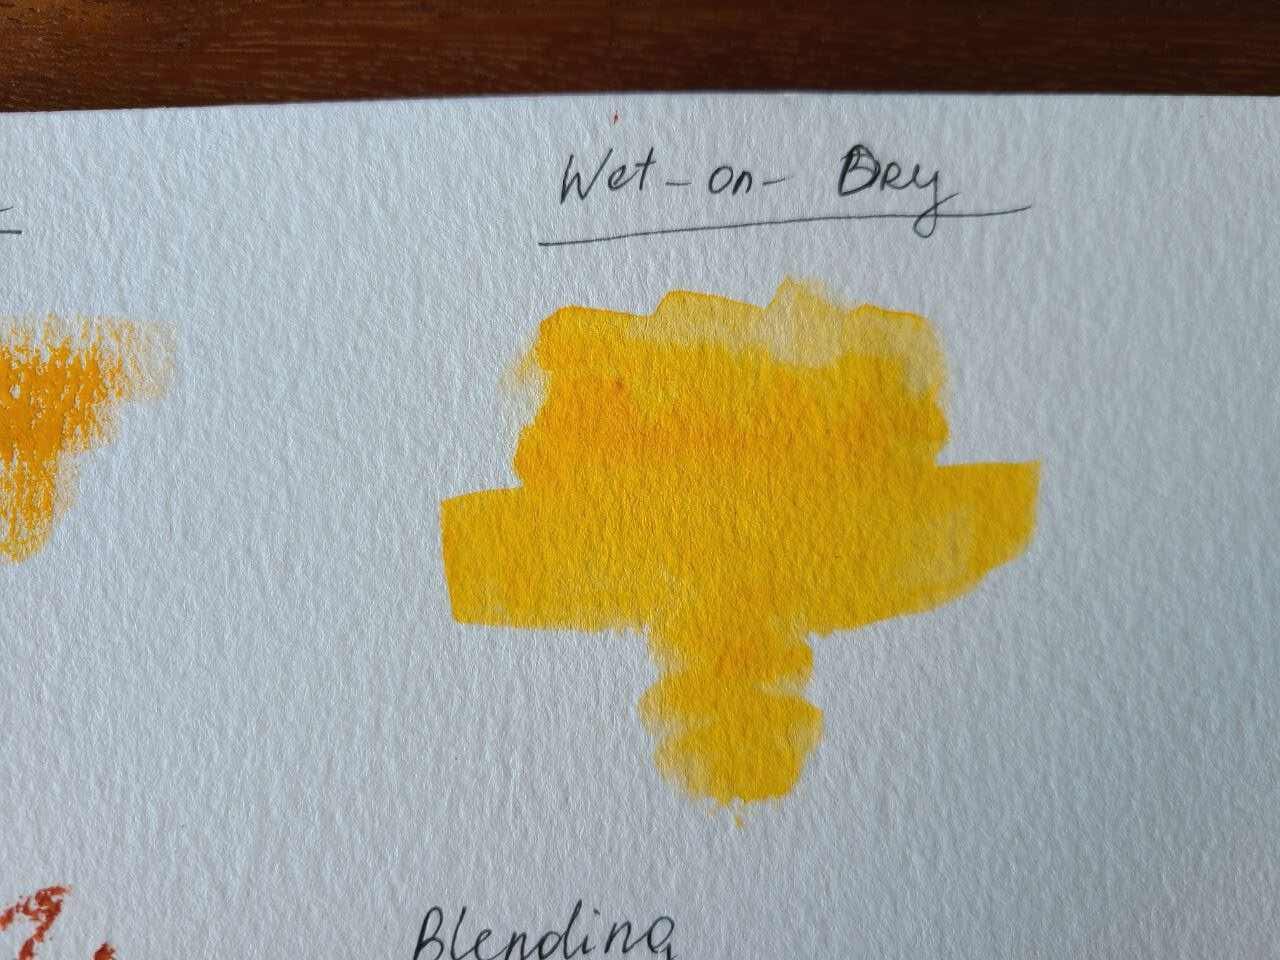
Wet-on-dry painting is simply the application of wet paint directly on top of a dry surface – and this is technically what we always do by default, now you know a fancy name for it 🙂
This technique is often used for fine detail work, full-canvas painting, highlighting, and layering.
Before applying another coat in this technique, ensure the first layer has dried completely. In this regard, make sure the paint you’re about to apply isn’t too wet, as it will only diffuse into the first coat.
If you want a result that provides crisp edges to shapes, the wet-on-dry painting will provide that effect. Controlling brush strokes for defining forms and details is possible with this method. With this technique, you might get less color bleeding and more defined hues.
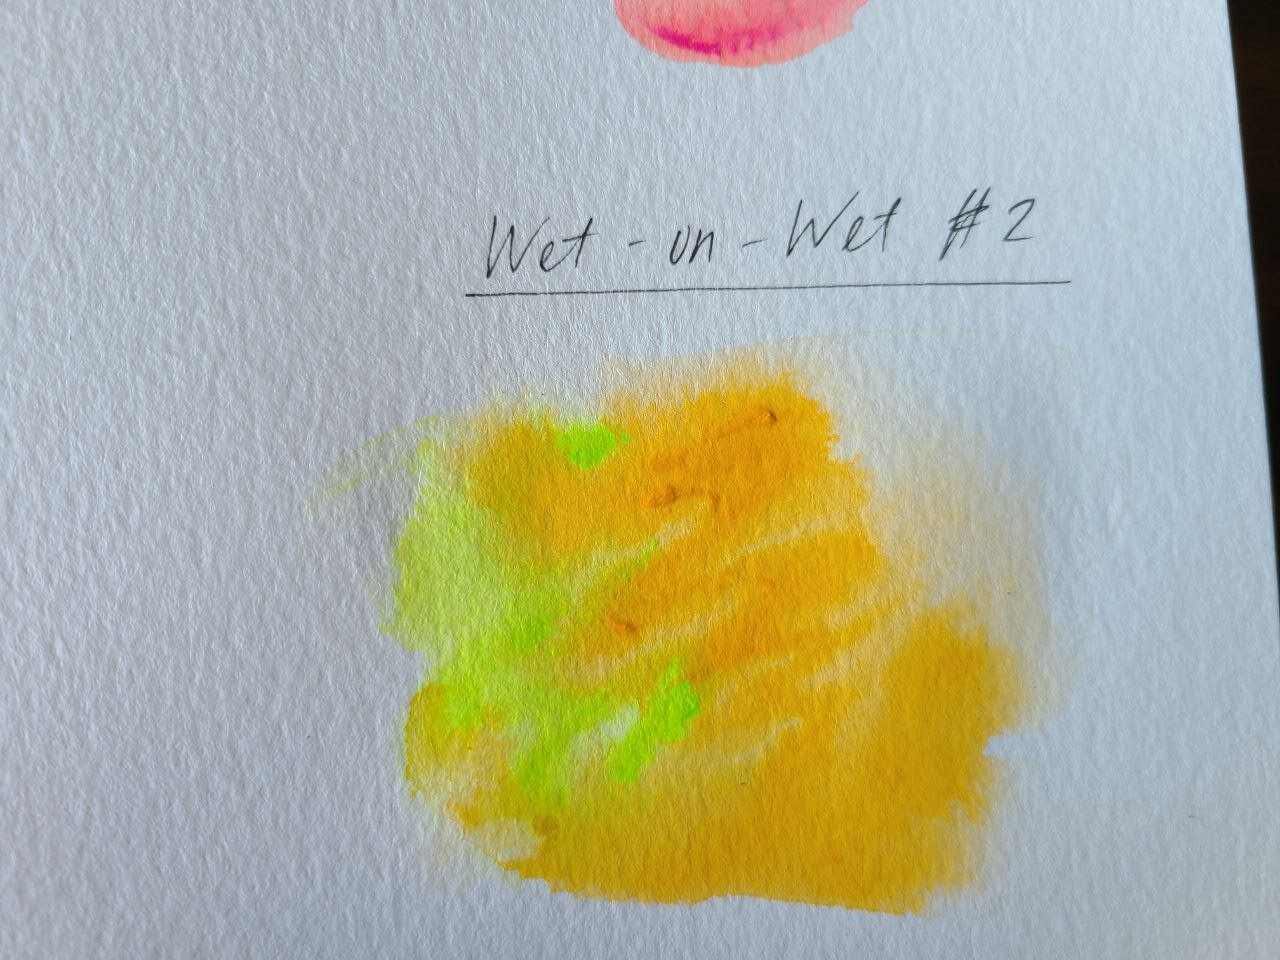
Wet-on-wet technique
Wet-on-wet is a watercolor technique that you can use for gouache, in which you add another color to a wet layer of paint.
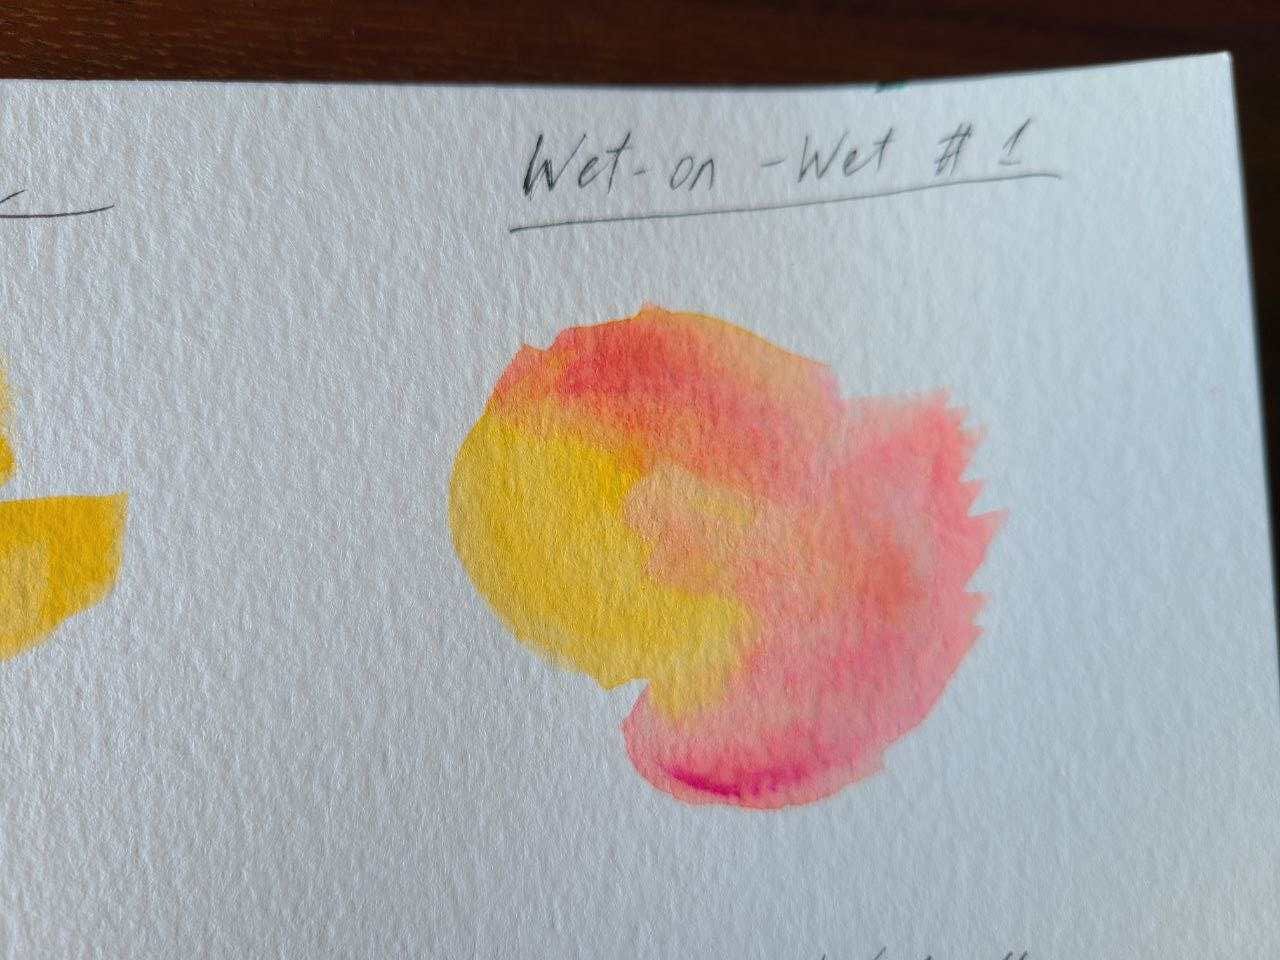
Here, you’ll notice that the colors spread into one another, creating softer shapes and edges. This method effectively paints bodies of water, adds atmosphere to landscapes and horizons, and creates backgrounds.
Using this technique may result in blurred colors and indistinct lines. It is somehow tricky to use. However, you need not be worried because it is a wet-on-wet approach. You must be careful not to over-mix it because the colors can shift from soft and subtle to muddy.
Materials you need for the wet-on-wet technique:
- Use heavyweight paper that weighs from 140-300 lb. It would be best if it’s textured paper.
Another understanding of the wet-on-wet technique from acrylic painting is to use a wet brush on wet paper, it will give you a more watercolor look. Janet Lia has a nice demonstration of this idea of wet on wet, here is my swatch:
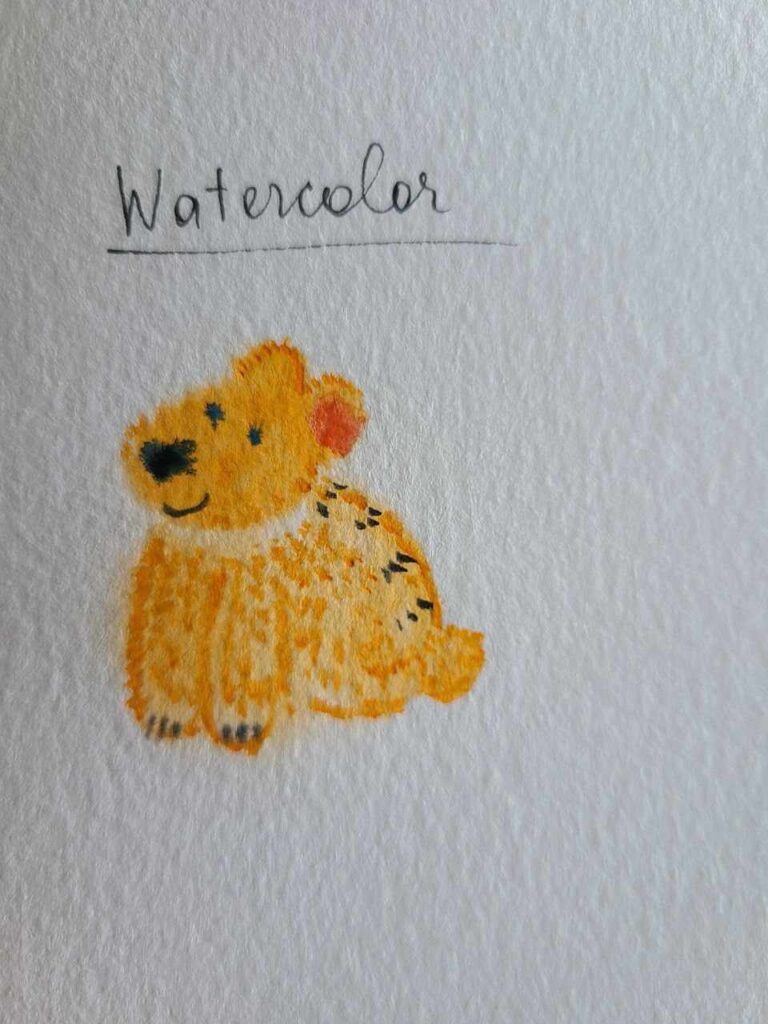
Gouache is frequently compared to watercolor in appearance. Like watercolor, you can rewet gouache with water. They both use the same gum Arabic binder, though gouache has more pigment. These properties allow gouache to resemble watercolor paint. The watercolor imitation technique is easy to do too!
You can not just mimic watercolor with gouache; you can even blend these two paints. To make the gouache look like watercolor, dilute it with water to lessen its opacity and make it transparent. Using gouache on wet paper might even give you the appearance of watercolor paint.
Watercolor imitation with gouache will look more opaque anyway! 🙂
Dabbing
The dabbing technique uses light dabbing motions of a brush to create texture and interesting effect without being too detailed
You don’t want a field to be flat green, you want a feeling there are flowers, hills, bushes, etc. Dabbing can do that.
Mixed Media
The mixed media technique uses gouache and other art mediums such as watercolor pencils, pastels, charcoal, acrylic paints, markers, or ink in one painting. For my example here I used watercolor (blue), gouache (yellow), and oil pastel.
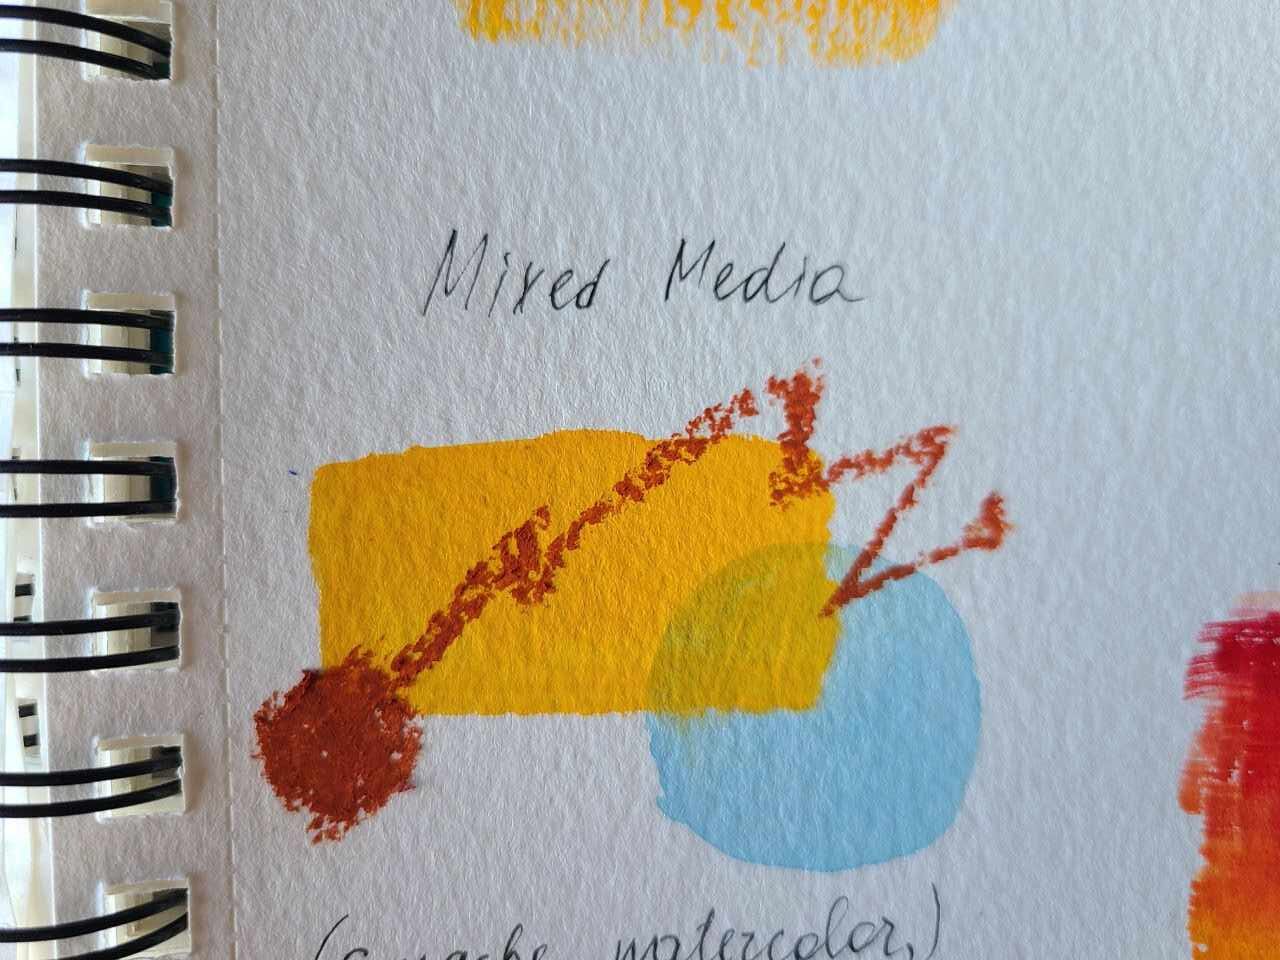
These mediums enable you to enhance your artwork with new colors, textures, dimensions, effects, and details. Since gouache is so versatile, various mediums work well with it.
You’re using various materials here, so it’s not as easy as you can imagine. Before adding other mediums on top, make sure the gouache layer is entirely dried. Also it is better to have basic understanding of all mediums in play.
Materials you can use for the mixed media technique alongside gouache:
- Heavyweight paper that can withstand multiple reworkings
- Crayons and watercolor pencils
- Soft pastels to be applied over still-wet watercolor or matte acrylic paint.
- Waterproof pencils
- Working with charcoal underneath, on top, and into the paint.
- Oil sticks
- You can use oil pastels on top of acrylics, watercolors, and poster paint.
- Acrylic paint pens.
Glazing
Glazing is an advanced gouache painting technique that allows you to create more transparent layered washes on your canvas with darker shadows. It also helps set the tone for more atmospheric artwork.
It is a very controversial gouache technique as you will see many painters ruining their paintings with glazing. It works better with watercolor but some artists successfully use glazing with gouache! It is all about water control!
To accomplish this, apply first shadow layer of gouache in more opaque way, then gradually blend water into your paint to thin it out. In this way, you can experiment with different levels of transparency.
The glazing technique works well with gouache because it dries quickly and can become transparent. After thinning the paint with water, you can apply it over top of previously painted and dried portions. This technique can enhance or even produce new colors.
Realism (adding volume and shades)
Realism is a painting technique where you use gouache to create volume by placing various color values in different parts of your painting. We use this method to depict where light is shining and where there is no light on specific things.
It may be a bit challenging for beginners, but I know you will learn it eventually along the way.
You may try to apply this technique with just one primary color and white paint. Remember that the more light hits a region of your object, the lighter the color should be. On the other hand, if no light is reflecting on your object, the color value will be darker.
Sketching with paint instead of a pencil
It is more of a tip than a technique, but professional artists often use a pointed brush and paint to sketch the future painting on the ground (underpainting or simply foundation layer).
Why? Pencil lines and marks may be visible through transparent colors or the texture of such marks can still be visible or palpable on the finished painting.
More gouache tips are here: 23 Top Gouache Painting Tips & Secrets From Pros
Blending (gradient)
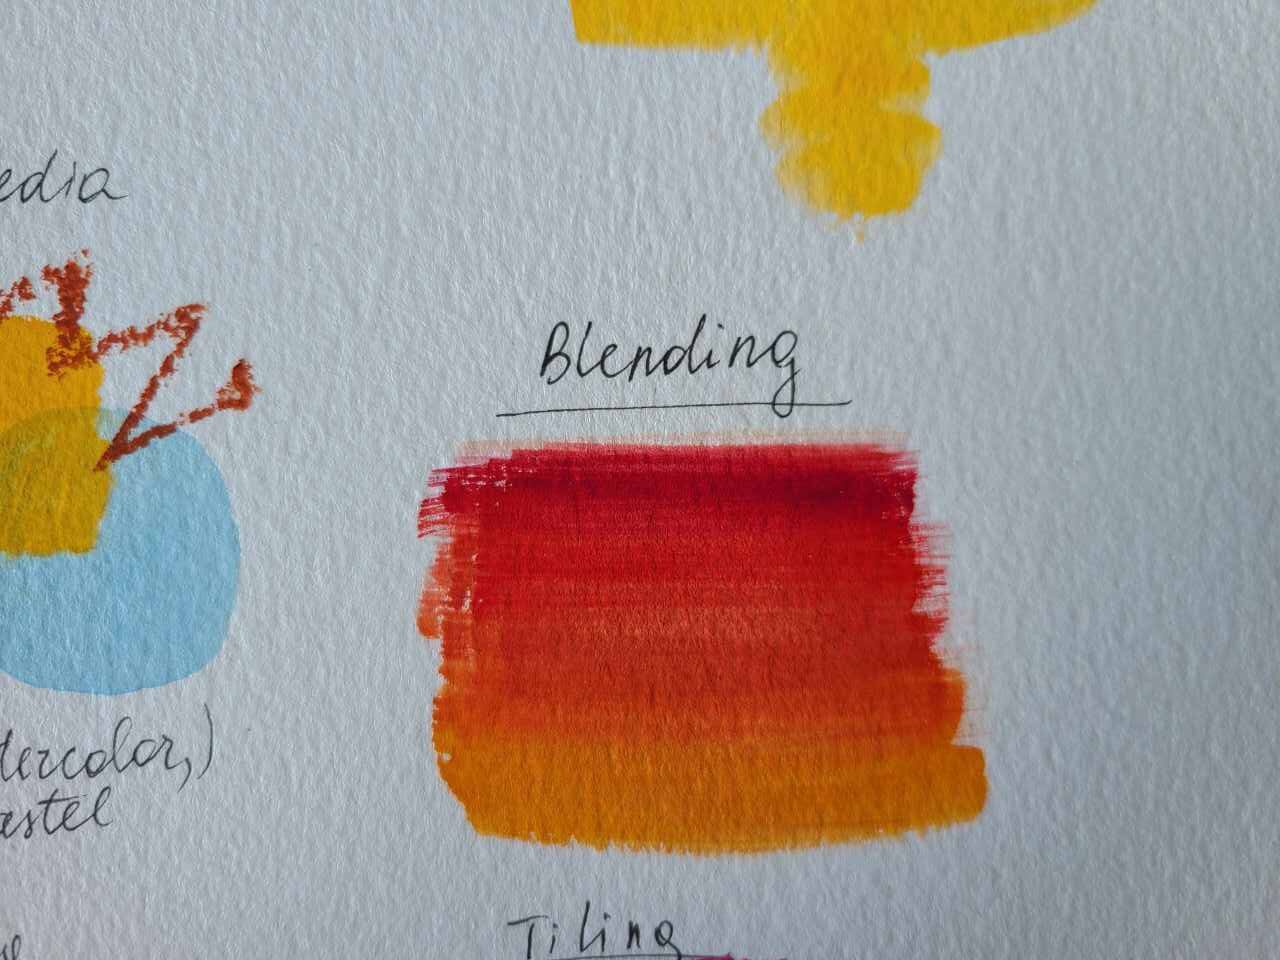
Gouache has a thick and creamy consistency and it works great with water which makes it highly blendable. We need blending for painting skies, backgrounds, more realistic objects, skin, shadows, and many other things.
When working with fine color gradients on a palette or canvas, you can achieve a wide range of shades by just scooping up a tiny bit of one color and combining it with another.
To do this technique, begin with a single color stripe and blend in different colors to create your own gradient swatch. Gradually blend a little of each color into the other until they meet. Using gradient takes some practice, but I’m confident you’ll get it soon. Just keep in mind that the goal is to produce an ombre effect on your artwork.
As gouache or acrylic gouache are close to acrylics in some way, you can try one of these 11 Ways on How to Blend Paint Smoothly.
Blooming (abstract technique for gouache)
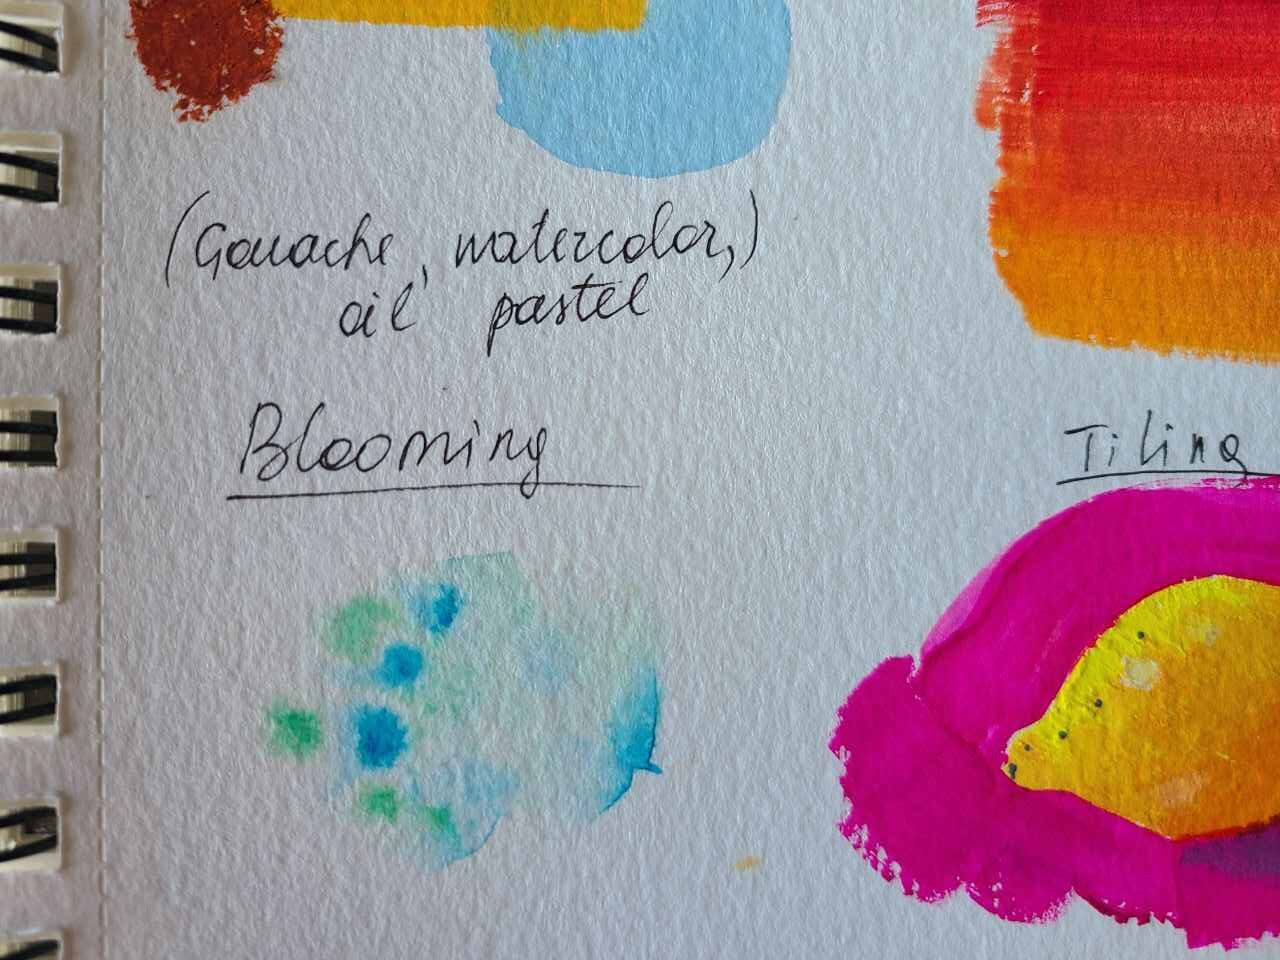
Blooming is a primarily watercolor painting technique that gives little inconsistent and abstract color splotches. It is where the brush is loaded with water and another color that you’ll blot onto the paper, creating small puddles of vibrant color that spread throughout the paper.
If you’re a beginner, you need to be extra careful in painting using blooming but I must say it is super fun!
To apply this technique:
- Moisten the part of the paper where you want the bloom to appear.
- Simply tap the paintbrush tip to the wet paper area while it is still wet, and watch it spread and bleed.
- Try the blooming technique if you want to make a wonderful foundation to paint some flowers, add variation to a landscape, or even make some spotted animals.
Staining
Staining is a gouache painting technique in which you cover an area with a layer of paint that will act as the foundation for the rest of your painting. This technique is used to apply a layer of paint to a wide portion of a painting surface. What’s good about this is that it’s easy to do, even for beginners.
To begin staining, combine your gouache paints with water to make a thin watercolor-like consistency. Then, apply the paint evenly across your paper. This stained section will be the base for the rest of the piece. It works well for producing broad fields, high mountain ranges, and dramatic skies.
It works as underpainting as well.
Master the ground
If for oil painting we do underpainting, for gouache it is called ground. The base, the background for our future painting.
Gouache is an opaque medium and it can be easily reactivated with water even if it is already on the canvas.
So for the ground, you don’t need to do it very densely and aim to cover the canvas very well. A thin wash will be ok. It will dry faster as well.
For your ground, you can pick a neutral color or a contrasting one to make your object pop. It is especially recommended for still-life painting.
Choose the complementary color from the color wheel as the ground, ex, you paint sunflower and it is yellow or orange, so for the ground choose purple or blue.
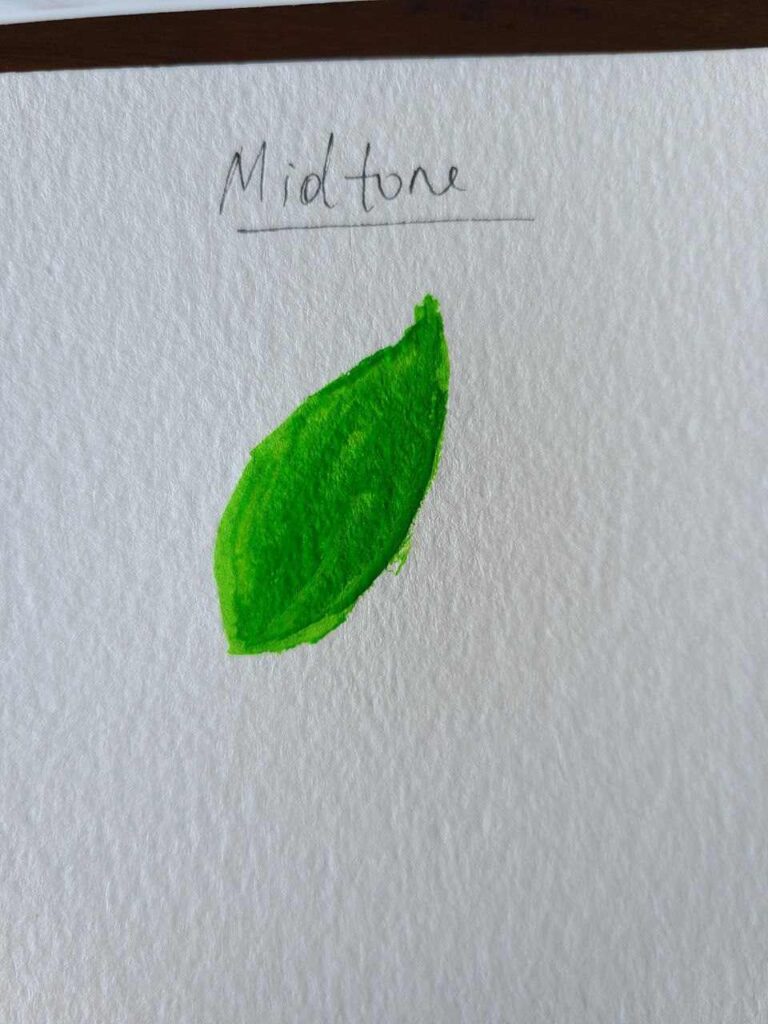
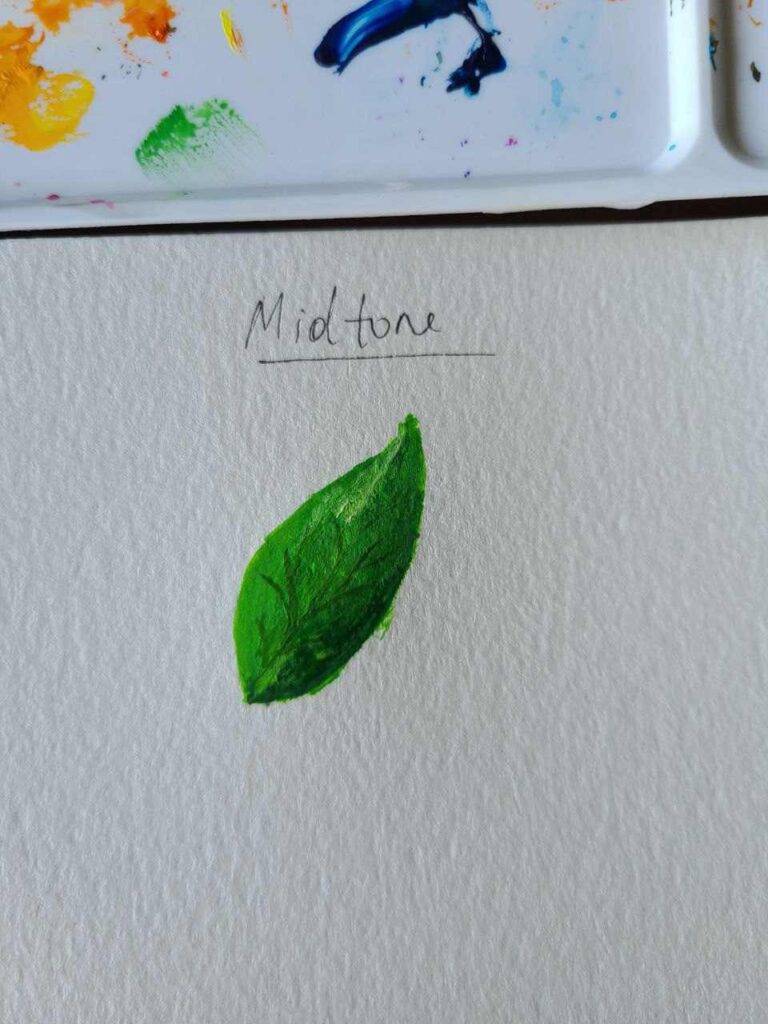
Tiling, Grisaille, and Mid-tone gouache techniques
Hajra Meeks pointed out at least 3 ways how you can apply gouache colors:
- starting with a mid-tone of your object and then adding lighter and darker accents.
- tiling means you are making sort of puzzles with different shades within your painted area without applying one single color across the whole surface.
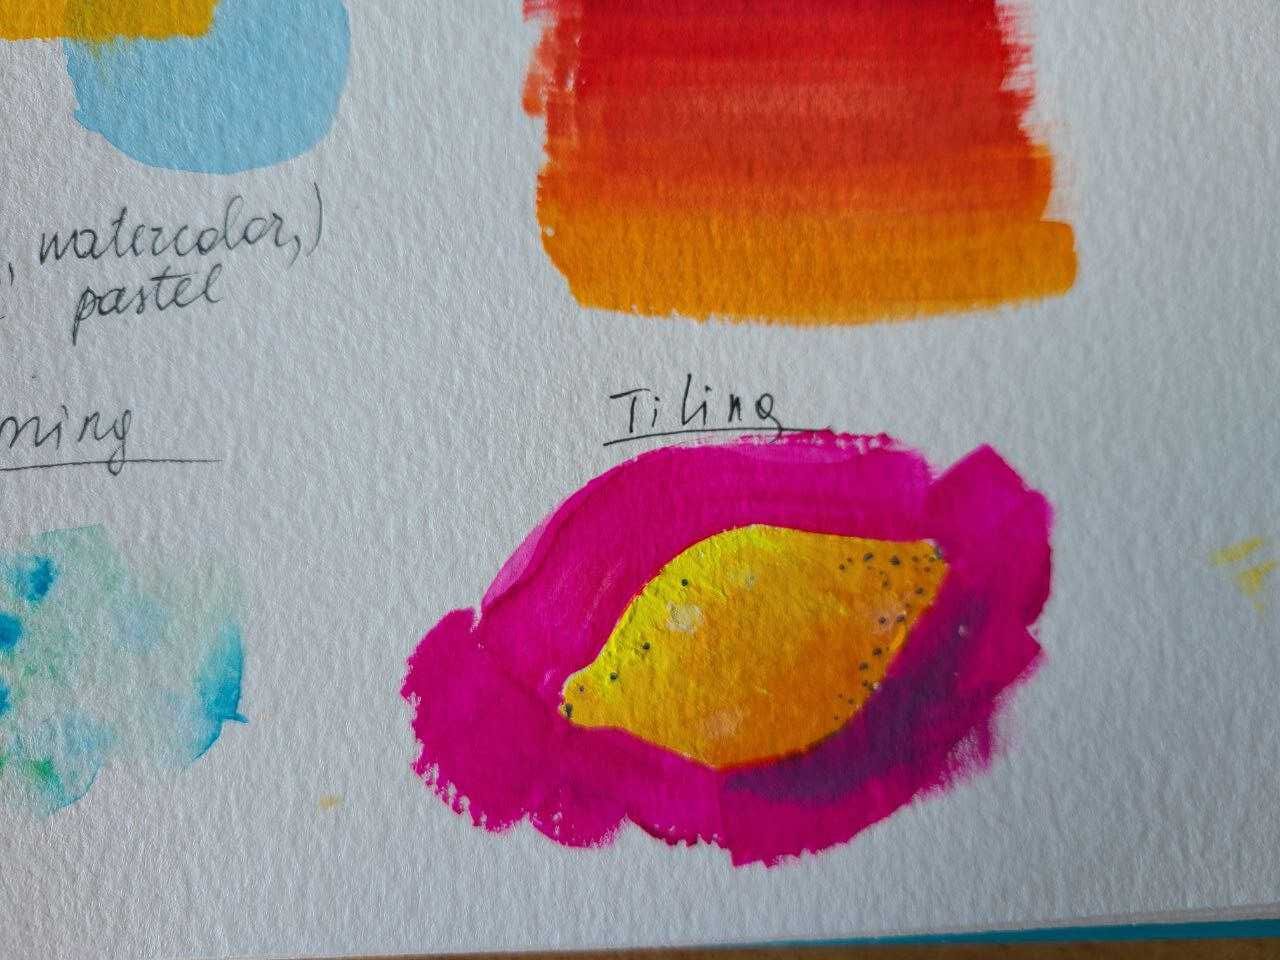
- grisaille method requires you to first layer a value underpainting with the darkest and lightest accents. Then you are applying the actual color of the subject you are painting.
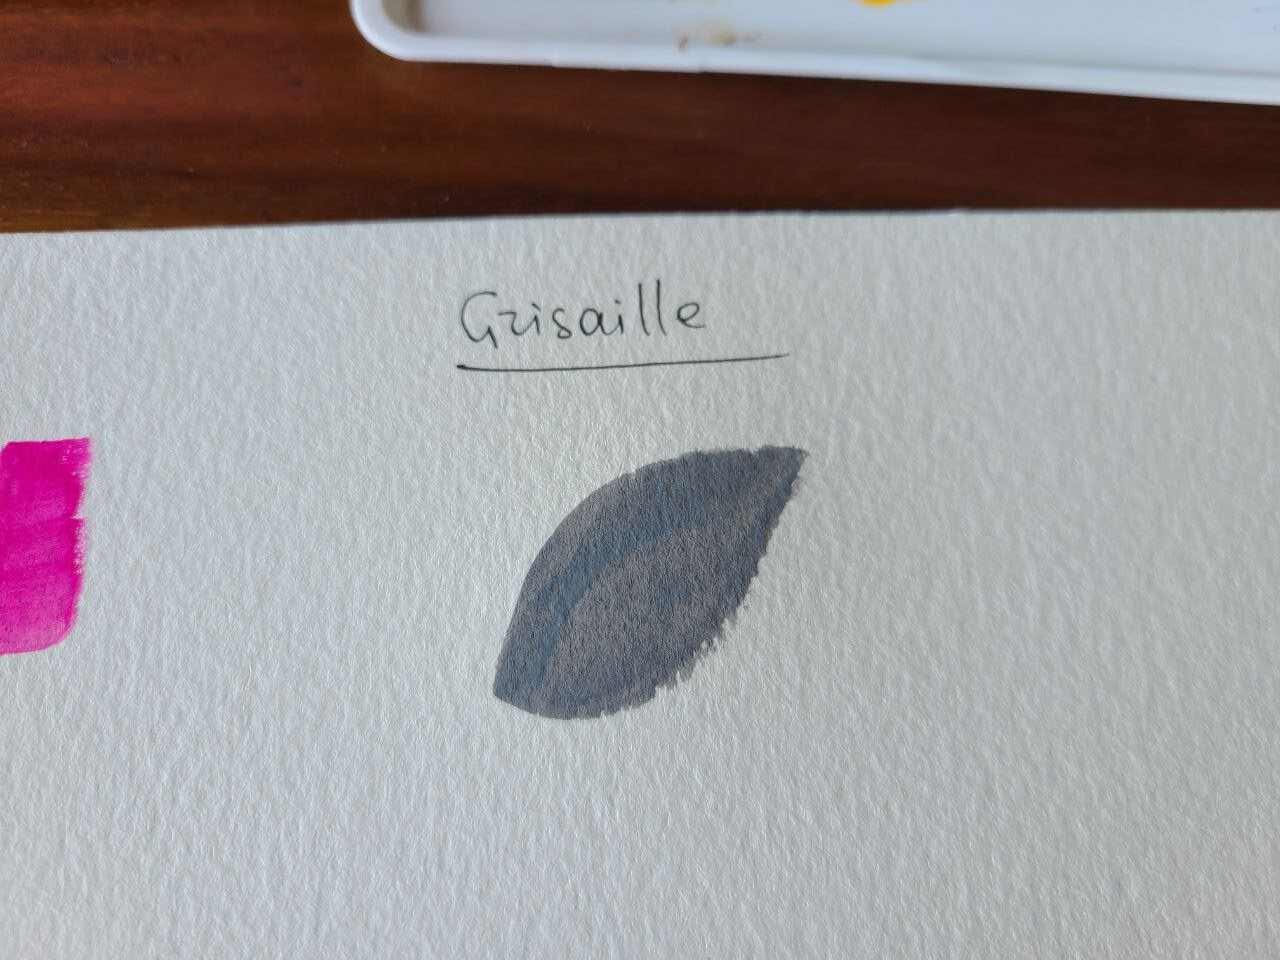
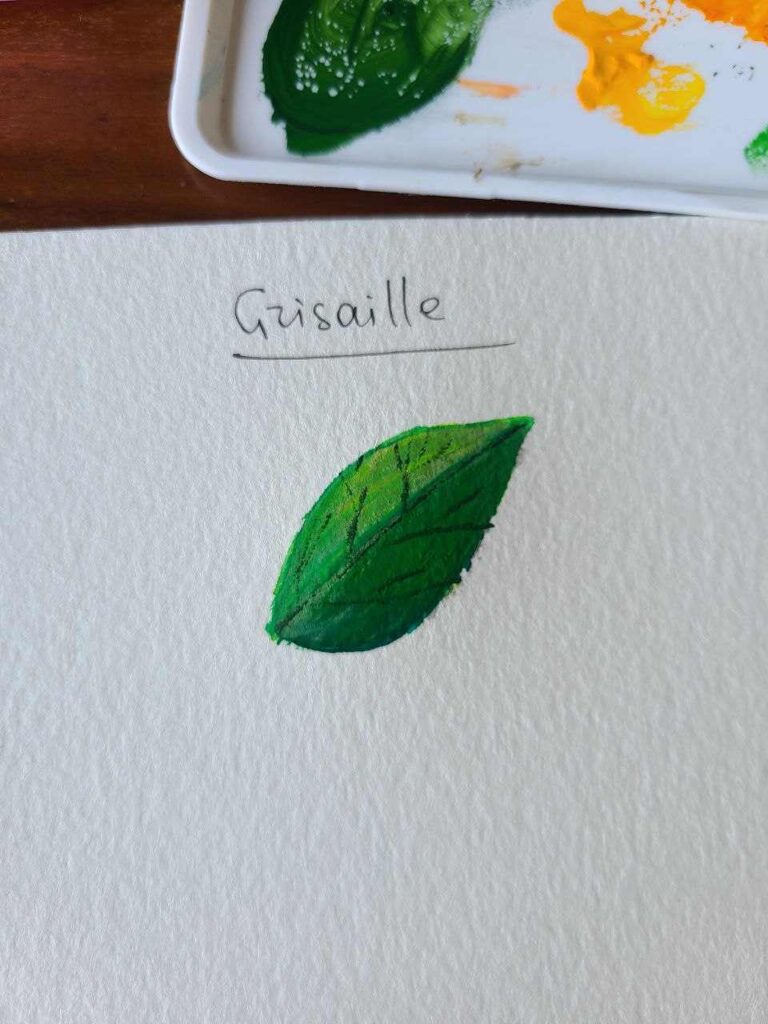
Another artist made an exceptional video demonstration of all three:
Reworking Dry Areas
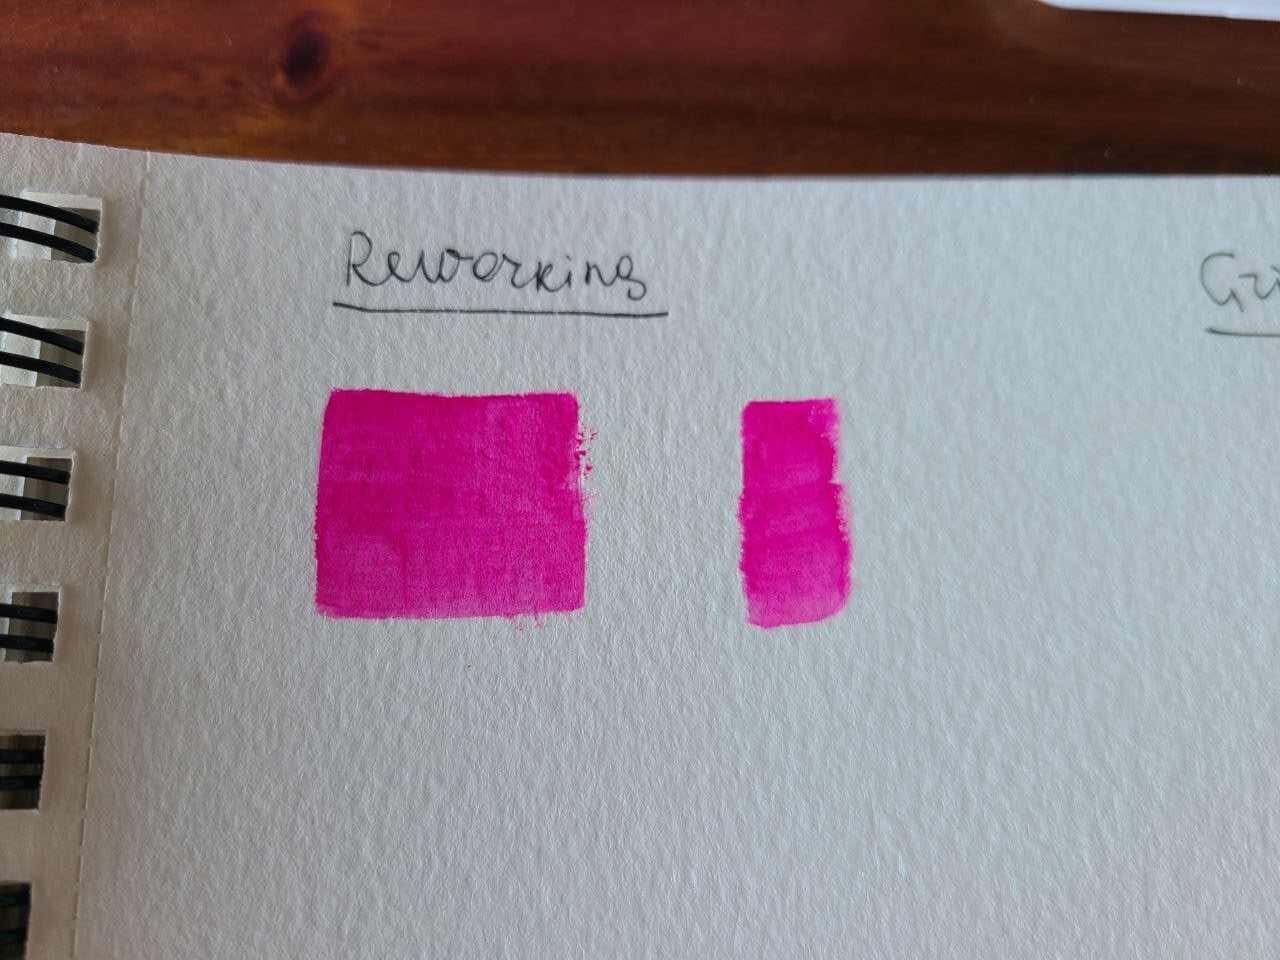
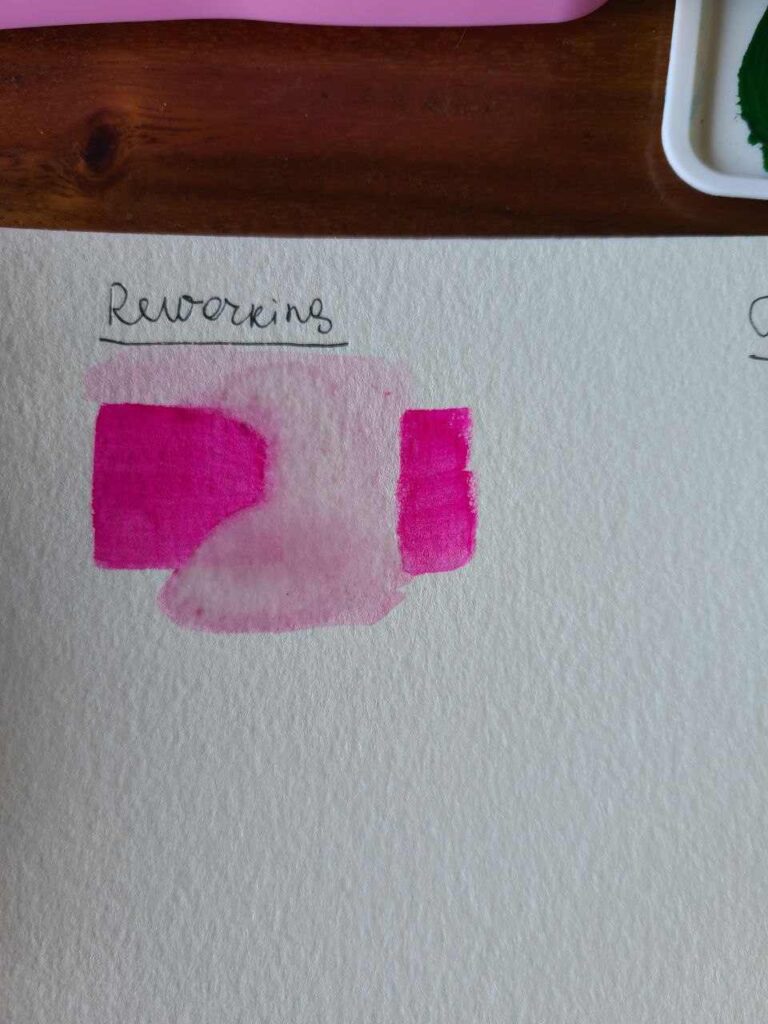

One of the best qualities of gouache is its capacity to be reactivated and reworked after drying. The reworking technique allows you to return to a previously dried area and begin working with it with a brush dipped in water.
You can soften an edge, blend it, or remove color. To experiment, paint a solid rectangular area and let it dry. Then, using a wet paintbrush, paint along the edges of the shape. It softens back into a liquid, allowing you to blur the edges.
Materials you need for the reworking technique:
- You can use pointed round brushes, fan brushes, or flat brushes, whichever you prefer.
- Prepare a paper towel or a rag where you can wipe off the paint.
- Find a gouache paint you’ll be comfortable working with.
- Prepare a cup or bowl of water for mixing and cleanup purposes.
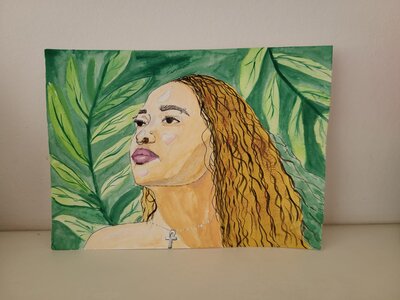
Gouache portrait painting
To create a portrait with gouache you first need to decide if you want realistic paintings or more fantasy style.
For realistic portraits, you should premix skin tones, use the layering gouache painting technique as layers will help you create shades of skin tones and realistic shape and dynamics of a face. Traditional portraits are normally painted over the ground. I would also use a slightly wet brush, almost dry brushing.
For a more fantasy, fashion portrait you should go with watercolor imitation, staining or tiling techniques.
Having an academic understanding of how to draw faces and keep proportions will help a ton to draw a good sketch for your portrait.
Working with colors always starts with covering a larger area with a mid-tone and then gradually add lighter elements or dark shadows and more highlights. A wet round brush helps a lot with it.
I used Turner acryl gouache to make this portrait (approx 5 hrs):
I saw that some cheaper gouache tend to dry darker if diluted with water like watercolor paints, so test your paint set and make swatches before painting a portrait!
How do I improve my gouache paintings?
Now that we’ve already learned about the different techniques you can do with gouache, let’s look at how to enhance your gouache painting skills. Here are some of the best supplies to use and tips to follow to get the results you want:
- Always keep your brush clean every after you paint – To avoid having muddy colors at the end of your painting session, thoroughly clean your brushes as you go between colors. Remember that synthetic brushes work better for gouache than natural hair brushes.
In terms of the best brush to use, watercolor brushes work well with gouache too. I recommend using Princeton Brush Set for the best results. It works well with acrylic, oil, watercolor, and gouache paint.
- Ensure that you’re using the right type of surface – When it comes to working with gouache, there are a few different surfaces to choose from. Whatever works well with watercolor can also work well with gouache.
Watercolor paper of 300gr+ is the best. Canvas is also a choice but somewhat not consistent with gouache.
- Don’t allow your gouache to dry on the palette – Check on your palette while painting to ensure that your gouache isn’t drying out. If the gouache is drying, lightly spray the paint with water to moisten it.
Though not necessary, having a palette to mix your paints on is always recommended to create a wide range of colors. A ceramic palette is one of the best types of palettes to use. This palette includes a lot of color mixing space and is also quite durable.
- Choose a gouache paint that you are comfortable working with – There are many different gouache paints on the market. If you’re a beginner and haven’t found the perfect one for you, you might start by buying a few primary colors.
However, if you want to experiment with other gouache paints, I recommend the HIMI Gouache Paint Set. It comes in 24 vibrant colors made of high-quality natural or synthetic pigments and a palette. They’re handy too!
- Watch other gouache painters, join challenges, find more gouache painting tips and practice practice practice! NO amount of theory will replace a good painting session and experimenting. Don’t know what to paint? Make a list of ideas and challenge yourself to paint every day. You will see enormous progress within one month.
- Use water. Unlike acrylics, gouache is not afraid of water. A paintbrush dipped in water will create nice smooth opaque layers. To make washes or imitate watercolor, gradually mix water into your paint. If you feel like there is already too much water, you can always add some binding agent to the paint.
My final thoughts
Painting has never been boring, especially when so many different techniques exist and with gouache being such a simple and forgiving medium!
Now that you’ve learned multiple ways how to play with gouache, I hope that you got motivated to get started. Painting with gouache is a lot of fun, particularly when you have the best materials with you.
As you continue exploring gouache painting, may this article guide you in choosing the gouache technique that will work best for you?
Just remember to enjoy what you’re doing because it will reflect on the outcome of your artwork.
Share with me, what techniques you’re using the most with gouache.

Masha Eretnova, born in 1991, is a Chiang Mai-based certified teacher, artist, and blogger with 20+ years of personal painting journey.
She started painting and drawing very early and is now an international abstract artist and educator passionate about acrylic painting, gouache, and crafts.
Her works are part of international exhibitions and contests, including ArtlyMix (Brazil), Al-Tiba 9 (Spain), Exhibizone (Canada), Italy, and many more.
Besides her artistic pursuits, Masha holds a post-grad diploma in Teaching Film Photography and 2 music school diplomas: piano and opera singing.