Last Updated on March 18, 2024 by Masha Eretnova
I used to struggle with smooth and seamless gradients and with some heavy body acrylics it is still challenging.
But with practice over the last 4 years, I found many ways to blend acrylic yet some of them are easier and more satisfying.
I think flat and mop brushes allow you to make the smoothest blends on canvas.
This article contains affiliate links. It means no extra cost for you but a little commission (2-3%) for me to support my hobby and blog. Thank you!
What is color blending?
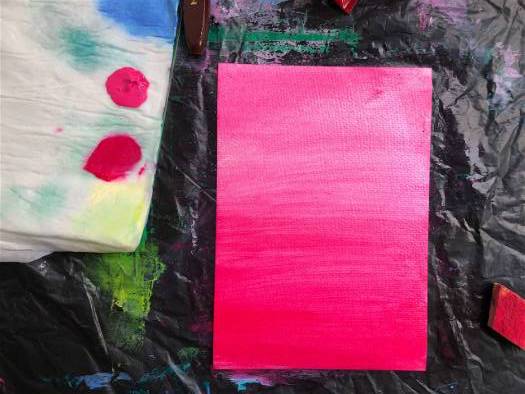
Blending is one of the painting techniques when different colors meet in a nice gradient to create strokes-free backgrounds, soft edges, or elements of abstract painting.
Soft edges can be used to create a natural blur, an almost seamless transition between colors.
For instance, if we were painting an ocean scene, a sunset or sunrise, skin or deep water, then blended soft edges would work best as blending one object with another can create an effect of distance, focus, and height.
Every professional artist went through it and had to master it. Properly blended colors will distinguish your painting skills!
What to Use to Blend Acrylic Paint
When you’re blending with acrylics, there are a few different items that will help you to create the perfect blends: brushes, sponges, fingers…
I recommend getting a flat brush, a jar or container for water, and a paper towel.
Supplies to blend acrylic paint:
- Slow-drying medium or a fluid retarder
- Acrylic paint:
- Slow-drying paint or open paint like Golden Open Acrylics, or
- Regular acrylic paint (+ slow drying medium), or
- Soft Brush:
- A 1-inch flat paintbrush will be great. Flat-shaped brushes made of synthetic bristles are soft and perfect for blending. Some people use wash brushes, mop brushes, and blender makeup brushes.
- A jar of water to rinse brushes,
- Paper towels or a rug for cleaning
I find Liquitex acrylic paint and Golden blend extremely well, while Pebeo or Daler Rownery Simply not as easy.
Optional:
- a couple of extra flat brushes
- and masking tape if you want to create clean borders around your painting.
- spray bottle.
11 Blending Techniques
My experience and review upfront:
I’ve tried all techniques and I can say that the best way to blend acrylic paint for beginners is blending acrylic paint with water or wet technique.
Yet, I’m an abstract artist, so often I just blend colors with a palette knife.
Technique 1 – Dry Brush Blending
One of the easiest techniques to blend acrylic paint is dry blending as you basically don’t need any additional supplies, just your paint, and a dry brush.
You can even use a stiff flat brush here and you will be fine. Dry blending is literally scrubbing the paint into the painting surface and blending colors when they meet.
My favorite brushes are Princeton Acrylic Paint Brush but you’re welcome to choose whatever brush you like or can afford. I made a whole review of acrylic paint brushes brands for you.
Steps:
- Make sure your brush is completely dry. Dry it one more time with a paper towel.
- Pick your color, and squeeze a little bit on the palette.
- Start with the first color at the bottom and scrub the paint onto the painting surface moving up. Try to keep the layer thin.
- When you think it’s time, dip the brush into the second color, without cleaning it, and start applying your second color.
- Moving up, clean your brush and dip it again in the second color and finish the top with solid color.
- This was your first layer, if you see some brush strokes or any white areas (your surface is showing up), apply the second layer once the first layer is dry! (up to 20-30 min).
Variation:
You can start from the top with the first color, and when you’re in the middle of your painting surface, clean your brush and start applying pure second color from the bottom to the middle.
Once you’ve reached the middle again, blend the edges nicely, and brush over several times to make sure the edges are soft.
This variation on How to blend acrylic paint is universal for dry and wet techniques.
You need to really load your brush well and keep moving fast, as the paint is drying super fast!!
Still, you’ll get some brushstrokes and white areas, so you’ll have to brush them over.
Technique 2 – Wet blending
Yes, this is probably the most obvious method – you CAN blend acrylic paint with water, some artists call it the “watercolor technique”, or wet technique.
This is the cheapest and most beginner-friendly option, as long as you don’t get all messy with too much water.
There are some variations on how to blend acrylic paint with water:
- you can just add water to your paint (wet-on-dry), or
- both to your paint and onto your painting surface (wet-on-wet).
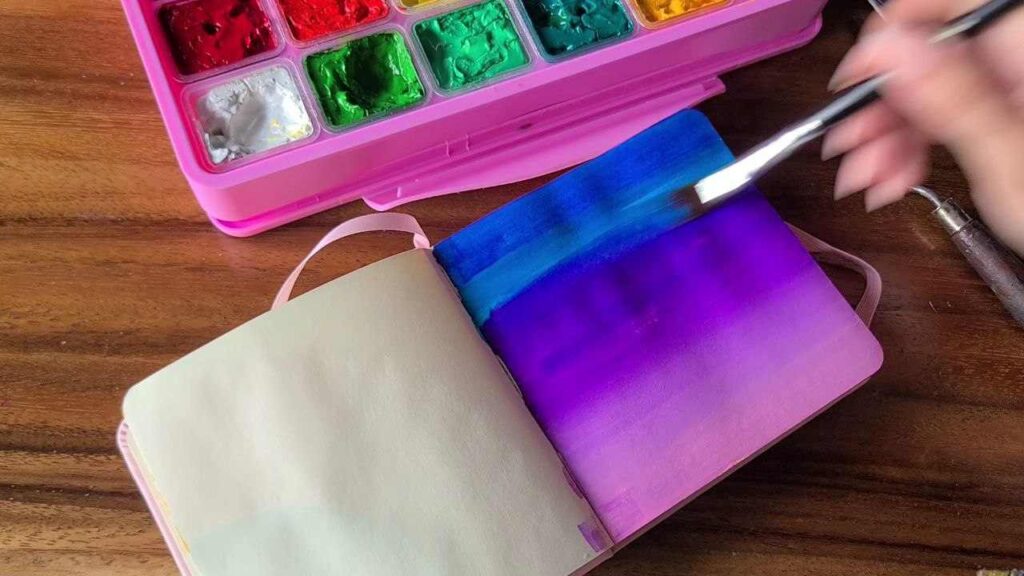
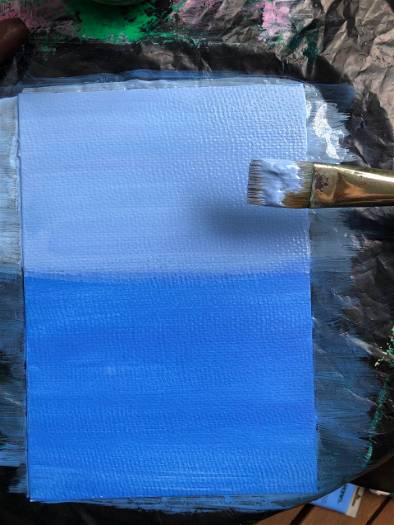
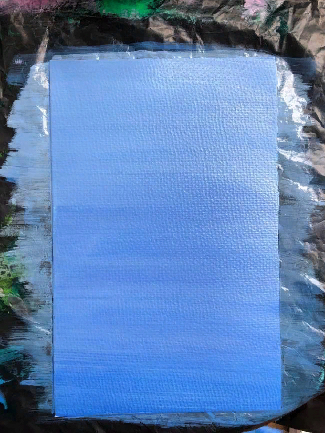
A) Blend acrylic paint with water: Wet-on-wet blending technique
The Wet-on-wet technique to blend your acrylic paint is natural and easy: both paint and surface are wet. That’s all, no magic!
What do you need:
- a soft brush: use a flat brush 1′ or round mop brush. They are both very affordable and will be useful in future.
- jar of water.
- regular acrylic paint or acrylic paint with increased flow capacity like Liquitex Acrylic Ink or Golden High Flow Acrylics*
- palette or even Stay Wet palette (from a store or DIY)
- paper towels.
* Other brands can also have high-flow paint and be less expensive, but those two brands are the most reputable. Nothing wrong with using regular acrylics too! If you use inks, you may not use water.
Steps:
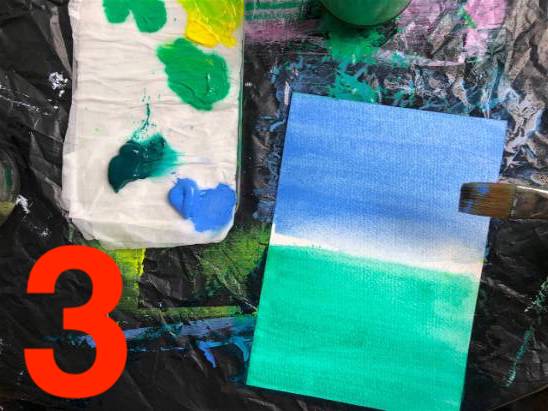
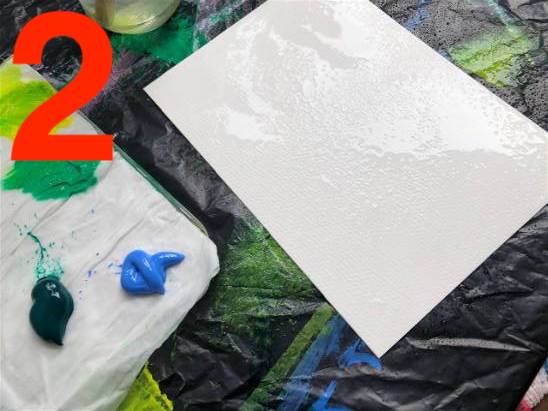
- Prepare water, paper towels, and paint.
- Squeeze a little amount of 2 colors you’ve chosen on the palette and thin acrylics with water. You can use
Titanium white to get the right color or nice opacity. - Soak your brush in water, brush it over a paper towel to make sure there is no drips.
- You can spray the canvas or paper with a little bit of water too.*
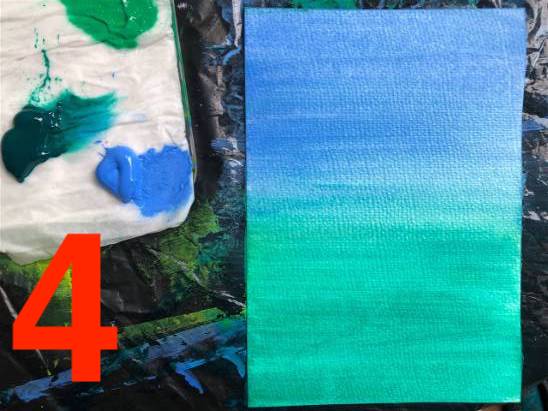
- Start applying wide strokes of paint from side to side. There are 2 ways of blending the colors:
- Usually, first color goes from top to bottom. Second color comes from the bottom and they meet in the middle of the paper (or canvas) forming a gradient.
- Alternatively, you can go from top to bottom with the first color, then dip the brush into the second color without rinsing the brush off and apply the transition color. Finally, getting closer to the bottom, rinse the brush and apply clean second color.
- Try to go with straight lines from one side to another, evenly pressing on the brush (not too much pressure).
- You may need extra layers to achieve nice intensity of the color gradient or leave it more transparent. Wait until the previous layer is completely dry (as we used a lot of water, it may take more time) or use a hair dryer to speed up the process.
We use water, so be careful with drips and don’t overflood your painting surface.
Yet, watercolor is not as easy as acrylic paint and this technique has a trap: water is something we can’t really control and the brush strokes will be not as even as with other techniques.
They may look like a typical watercolor wash, so I would not recommend this technique for a complete beginner.
Plus, I like and am used to more intense colors than the wet-on-wet technique may offer.
This technique works for larger areas both horizontal and circular blending. If you do circles, start in the center of the circle going to the periphery.
*Some artists even use the airbrush to moist the canvas, but it’s a bit excessive if you don’t have an airbrush to get one. So if you have one, consider this as an option.
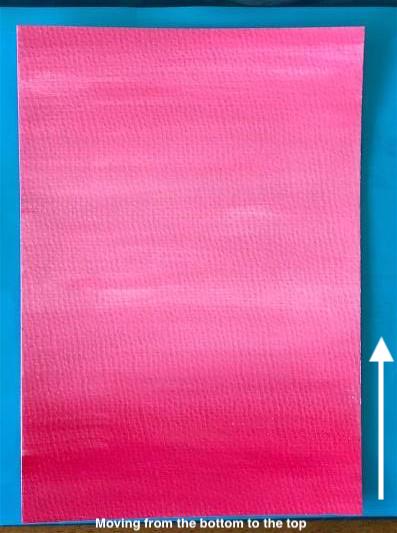
B) Blend acrylic paint with water: Wet-on-dry blending technique
This technique is different from wet-on-wet blending only in one thing: your painting surface stays dry, you don’t mist it with water.
Only your brush or paint can be wet for this technique.
- Squeeze a little amount of 2 colors you’ve chosen on the palette and thin acrylics with water if they are too thick and not creamy.
- Cover your painting surface with the first color (darker one) completely – it will be your base coat. Let it dry.
- Start applying your second, lighter, color from the top or bottom (depending on your painting idea).
- Without dipping the brush into paint again, move with lighter color towards the middle of the painting surface where you want two colors to meet. You’ll have less and less paint left on the brush and this is exactly what we need.
- Keep moving towards the other edge of the surface with the same loaded brush. If the brush becomes too dry, dip it in the water – a little dip!!
- Keep going with wide strokes until you like the smooth transition.
You may pick different colors and the result will be more distinctive than mine, the purpose was to show the process 🙏
Technique 3 – Half-Half blending
You need a large flat brush, large enough that you can load both colors on it.
- Load one part (half) of the brush with one color and the other half with another color.
- Start with broad brush strokes in the middle of the canvas or wherever your colors are supposed to meet.
- Slowly move up and down until you get a nice smooth transition.
- Clean and dry the brush and apply clean solid colors on top and at the bottom, you want kind of reinstitute the two edges of the gradient.
Technique 4 – Sponge
A sponge is a great alternative to a brush if you want to blend acrylic paint seamlessly! I’ve found that this creates better blends along edges than the palette knife or brush method.
The potential downside is you may not get as straight horizontal or vertical lines as you’ll achieve with a brush.
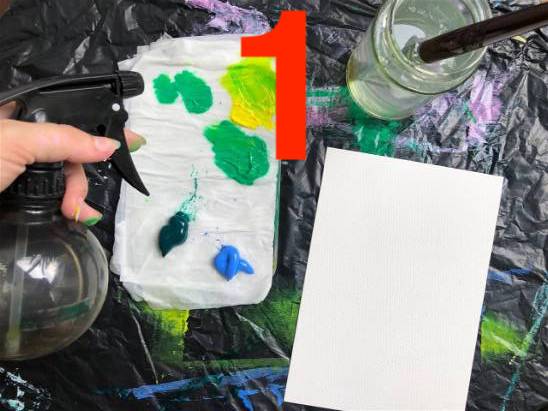
- First, put some of the colors you want to blend on your palette.
- Next, dip your sponge in water or a medium (slow drying or flow improver).
- Sponge one color towards the other color until they begin to slightly blend together.
- Once you’ve created the desired effect, use your fingers to lightly rub the colors together to create a smooth blend.
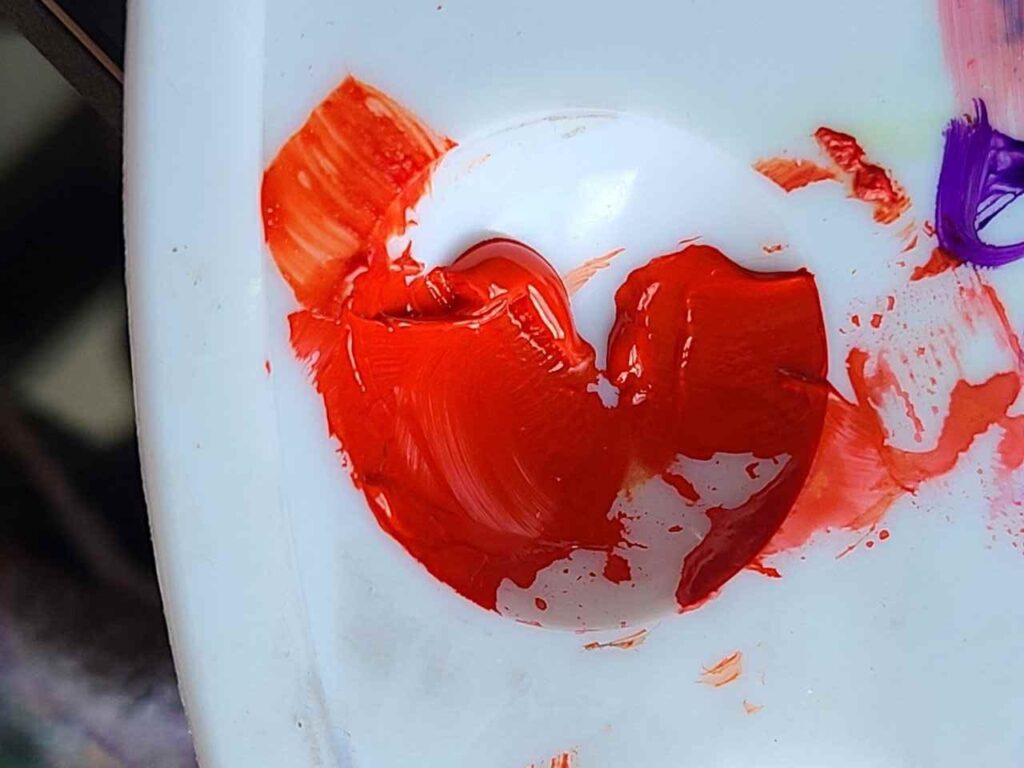
Technique 5 – Using a palette knife
Blending acrylic paint with a palette knife may be best for some abstract paintings.
A Palette knife may give you a bit thicker paint layer than a brush, so it will dry slower. But I will be honest, working with palette knives is sooooo satisfying!
Smearing with your palette knife will create different effects depending on how much pressure you use, how fast you drag it across the colors, and how long you leave it in one spot.
If there are any areas where the paint is still globby or thick, try using your palette knife to spread and smooth the color.

- Apply paint directly on the painting surface on both edges.
- Put your dry clean palette knife on one color and just start dragging it from side to side moving towards the middle
- Do the same with the second color. Work quickly or use slow-drying mediums to make sure your acrylics don’t harden sitting on the surface.
- Let color meet in the middle
- Go back to some areas where you are still not satisfied with the result. You can also clean the palette knife and add a cleaner solid color on the edges.
Sometimes I just squeeze colors next to each other and drag the palette knife across the surface.
It’s not quite blending, but it will create an interesting effect, very uncontrollable and unpredictable, but definitely beautiful.
Technique 6 – Using a Mop Brush or a Makeup Brush
A mop brush is easy to get – it can be found at any store, it’s cheap, and it can be really useful for blending.
Mop brushes give a good blend of colors.

You will need a mop brush, ideally 1-inch:
- buy a cheap one at any store
- buy a good one, like Princeton mop brush (they are my fav brushes, truly)
- buy a makeup brush.
The process:
- You apply colors from both edges, moving towards the middle, and overlapping them to create a gradient. Mop brush is a soft brush so it just helps to create a more seamless background.
For best results you need to wet the mop brush but squeeze our all water while applying colors. Then for blending use a completely dry mop brush and very light hand movements.
Technique 7 – Blend acrylic paint like oils
The main difference between blending acrylic paint and oil paint is that oils dry so much slower that you can easily work with your gradient until it’s perfect and smooth.
The most effective ways to slow acrylic paint dry time to blend it like oils are:
- Using a paint retarder (buy one or make a diy paint retarder) or slow drying medium, OR
- Using special acrylic paint that stays open and workable up to 1-2 hours. The only acrylic paint like this on the market is Golden Open Acrylics, OR
Directions:
- Pick your colors, squeeze them on the palette, mix with slow-drying medium if you use regular acrylic paint. Or just use Golden Open or Chroma Atelier.
- Premix transition colors on the palette: for ex. if you’re blending a sky, you may need light blue, some lighter blue colors and white.
- Place colors on the painting surface without them touching each other or overlapping. Just apply them really close. It should look like a transition but without a smooth effect.
- Get a clean brush and moving with crosshatch strokes, blend colors edges until you get a seamless gradient. Use clean brushes for dark and light areas.
- Finish the color transition with parallel strokes – it will help get back those wide transition lines.
This is one of the classic approaches to blend oil paint, that we can implement for acrylics.
Sometimes slow-drying acrylic paint may feel too long to dry. Don’t worry! You can use a hairdryer to speed up the drying or next time, mix slow-drying acrylic paint with regular acrylic paint (both should be of good quality and ones you already know and tried!). The more normal acrylic you add, the faster the paint will dry.
Read also: Can You Mix Oil And Acrylic Paint? How To Best Use Oils And Acrylics Together
Technique 8 – Blending Acrylic Paint With Glazing Medium
Blending with a glazing medium also thins the acrylic paint and allows us to work with it for a longer period.
Glazing medium is usually used to create diamond-like glazes, but they also significantly extend the working time of acrylic paint – bingo! They also will thin your paint to make it flow better.
I need to warn you that acrylic glazing medium will make your paint more transparent or sometimes you need extra layers.
What glazing medium is good? Golden is the best. But feel free to dig in and choose any for your budget and preferences.
Directions:
- Pick your colors.
- Paint the entire painting surface with one solid color. Let it dry. It will be our base coat.
- Mix the second color with the glazing medium. For large projects, a ratio may be up to 1:4 (1 part acrylic glazing liquid to 4 parts of acrylic paint), but we can easily adjust it as we go.
- Start applying the second color premixed with glazing medium from the bottom (or top, as you wish and as your idea goes).
- As you move forward, add a bit more glazing to make the second color more and more transparent and make the base coat visible. Simply have a cup with a bit of glazing medium next to you and dip your brush in it.
- If you think you need more layers – go for it, just really let the paint dry! Continue until you get a perfect gradient.
The main disadvantage of working with glazing mediums for blending is that it can leave some brushstrokes and it takes time.
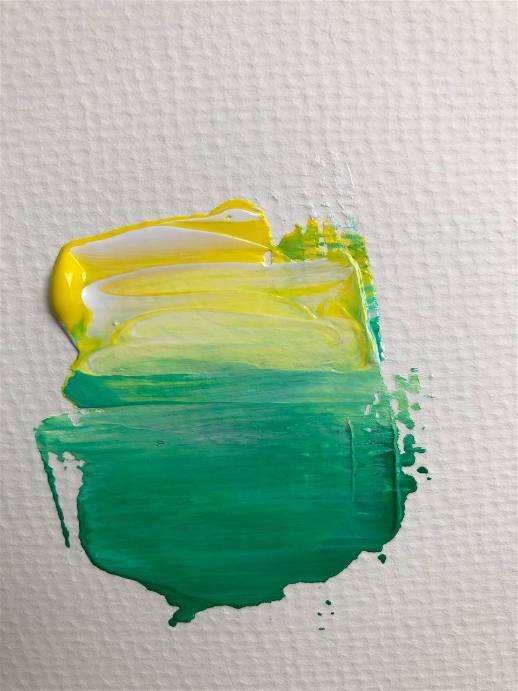
Technique 9 – Blocking technique
If you need a gradient but you’re scared of trying blending or you’re not yet confident in your artistic skills, I have a trick for you: blocking painting technique!
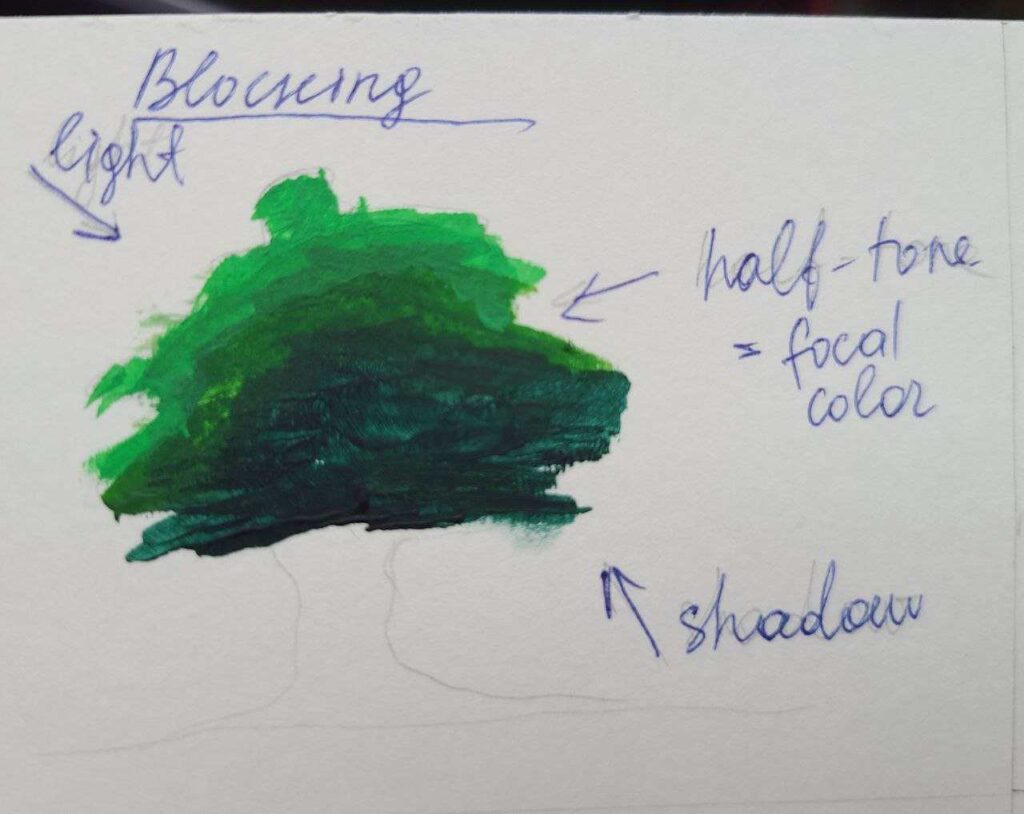
We will manually create a transition. This can take more time and the edges maybe not as smooth as with real blending, but it is a nice alternative for beginners.
This method can actually work for small areas too!
What do you need to do:
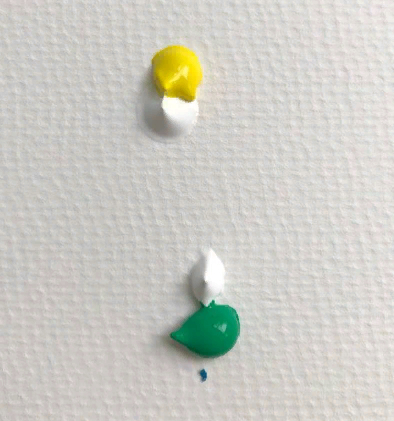
- Pick your colors and think how many transition colors you want/need. Use color chart if you’re totally confused.
- Squeeze colors onto the palette with
Titanium white and premix your transition colors. You can still use slow-drying mediums to have more open time for blending. - Starting from top or bottom, lay out colors next to each other as if they form a gradient. Keep your brush strokes wide and firm. Each color – clean brush! Do not overlap the colors or blend them, just place them on the surface next to each other
What if I don’t like how it looks?
The final blend will not actually look like a perfect blend. You can either leave it alone or get a dry mop brush and very gently try to smooth the edges. Gently moving from side to side, or, using oils technique, first going in zig-zag and then polishing it with wide straight parallel strokes.
Technique 10 – Fast Blending With Heavy Body Acrylics
Heavy-body acrylic paint isn’t generally good for blending, but still, there is a chance to blend it seamlessly. But, you have to work fast.
This blending technique is good for blending colors in small areas.
Heavy body paint is thick, has a high viscosity, and doesn’t flow at all. Yet, it can be one of the easiest and the smoothest ways to blend acrylic paint.
The heavy body will dry very fast, so either get a spray bottle and mist the paint while working or work really fast!
Directions
- Start with wide strokes of the first color from the top or bottom.
- Introduce the second color as you move, with the same brush.
- When you’re getting close to another edge of the surface, clean the brush and apply strokes of the second color.
Alternatively:
- Apply both colors from both edges meeting them in the middle.
- Get a separate soft brush and blend the middle transition area.
Technique 11 – Double blending
Double blending is also a technique more suitable for abstract painting.
You actually have your paint loaded with two colors, you chose to blend.
Sounds like a half-half technique, but with double blending, you don’t necessarily keep colors apart on one half of the brush and another.
What do you need to do:
- You load the flat brush with the First color
- Dip the loaded brush in white or any other color you want, but make sure you won’t create a mess.
- Using the full width of the brush, work from side to side with good strokes.
- If you feel like the brush is too dry, dip it in water.
Technique 12: Blending 2 completely different colors
If you want to create a smooth transition between two very different colors like green to red for example, you need to have a barrier between them, as if you just overlay them, they will mix and either create a neutral color or mud.
The easiest way is to apply color 1, then white, then color 2.
Tips For Seamless Blending
Read also: How to Use Acrylic Paint: 3 Easy Steps To Paint With Acrylics On Canvas
- Practice to work faster: acrylic paint dries fast and you need to keep up.
- We don’t need thick paint for blending, we need creamy thin almost liquid paint (also goes as low viscosity or liquid acrylics). If your paint is too thick you will have visible strokes and will dry slower, but when the paint is too thin, the gradient will get messy.
- Keep your paint wet and workable (use water or stay-wet palette, slow drying mediums, glazing mediums, or special paint).
- Be careful with your sketch! If you will draw thick lines with a pencil, they will be visible through paint even if you blend them well! I strongly recommend using one of 10 sketching methods that pros use to make sure your sketch will not ruin your blending and final result.
- Learn more about Color bias – different colors can contaminate each other. Make sure you clean the brush to apply pure colors on the edges. Otherwise, your painting will get messy.
- Keep the right paint consistency/viscosity – use a medium or a flow aid. The paint should be creamy and apply easily. Choose low viscosity paint or high flow paint.
- Get a soft brush. Stiff bristles only work with thick paint and dry blending. For most blending techniques use a soft flat brush size 1.
- Always use confident wide strokes across the painting surfaces. Try to go as straight as you can from one side to another. Use all width of your brush and always go all the way from one side to another.
- Watch out the pressure you put on the brush and don’t forget to overlap the layers of paint.
- Always keep some paper towels around – get rid of extra water, paint excess and any mess.
- Load your brush well – you need to have enough paint to go from one side to another, but do not let the brush drip.
- Using water to spray and wet your palette, paint or painting surface keep an eye on drips – choose not so powerful sprays and keep a reasonable distance from your working area. A drop will ruin your blend.
- If you see some hard edges or brush strokes, sometimes you only need to brush this area over couple of times, moving from side to side. That’s it!
- Master different techniques to find out your own way to quickly blend acrylic paint.
- Keep in mind that regular acrylics tend to dry darker than they are wet! So some transitions may dissapear! Learn about paint opacity and what colors are naturally more transparent or opaque.
Troubleshooting
How to blend acrylic paint after it’s dried?
Once acrylics are dried, there is no way you can reactivate them and blend it. Apply a fresh layer of acrylic paint and blend it.
How to blend acrylic paint in small spaces?
To blend acrylic paint in small areas you can use the blocking technique, when you just place lighter and darker transition colors very close to each other, without really blending them.
Don’t get into small spaces with a lot of water or glazing – you can not only create a muddy mess but contaminate surrounding areas.
How do you blend acrylic paint without streaks?
Some streaks may appear while blending colors. This can happen for a couple of reasons: you didn’t use enough paint or the quality of paint is very poor.
The second reason is the wrong brush and applying too much pressure on it – choose flat synthetic brushes (1 inch is ok) and always go through the whole stroke in one application. You can go over again later. Don’t also forget that thin layers should overlap one another.
Different brands have different paint qualities, try to choose artist-grade paint.
You can also avoid streaks using a sponge or blender brush (mostly used for makeup) – they create very soft edges.
If you already have some streaks, you may consider leaving them as they are or fixing them by applying a second layer. Sometimes, you can always use a blender brush to smooth them.
Some Final thoughts
Always remember that practice makes perfect!
Take some time every day to experiment and learn how different blending techniques work on their own as well as in combination with others. That way, when you’re ready for more advanced tutorials, you’ll have lots of experience under your belt!
Blending is what sets apart great acrylic artists from beginners who struggle with creating smooth transitions between colors.
Don’t let yourself fall into that second category – keep practicing daily and soon you’ll be producing paintings worth showing off!
Many different techniques can help you create beautiful blends when painting in acrylics. Try each one out and see which ones work best for your unique style of artwork!
Practice every day so that the next time someone asks “how do you get those amazing transitions?”, then you can proudly say, “I used my blending technique!” You’ve got this – no matter how difficult it might seem at first, remember that practice makes perfect!
Keep working hard until all of your hard work pays off. Soon enough, people will be asking how to make smooth blends in their acrylic paintings.
Pss…after mastering blending you can create beautiful sunsets and maybe try one of 101 painting ideas for beginners? 😉
If you have any questions about blending, please ask in the comments! I’m here to help.

Masha Eretnova, born in 1991, is a Chiang Mai-based certified teacher, artist, and blogger with 20+ years of personal painting journey.
She started painting and drawing very early and is now an international abstract artist and educator passionate about acrylic painting, gouache, and crafts.
Her works are part of international exhibitions and contests, including ArtlyMix (Brazil), Al-Tiba 9 (Spain), Exhibizone (Canada), Italy, and many more.
Besides her artistic pursuits, Masha holds a post-grad diploma in Teaching Film Photography and 2 music school diplomas: piano and opera singing.