
Last Updated on November 28, 2023 by Masha Eretnova
Acrylic painting is a versatile, fun-to-use, and very performant medium. A beginner starts to paint with a wet brush on a dry canvas, but there is so much to explore.
Technically, I’ve learned what acrylic painting techniques are called after I tried them experimenting.
Be curious, be creative and you will find your own techniques.
No time for research?
I got you covered – all acrylic painting techniques for beginners are here!
I’ve tried to briefly describe the principle of each technique and to illustrate it with a short video.
This article may contain affiliates. It means if you purchase anything using my links, it will have no extra costs for you, but I will receive a tiny commission that will support this website. Thank you!
ACRYLIC PAINTING TECHNIQUES FOR BEGINNERS
I love painting and the creative process can be a real therapy.
Using different tools, and mediums, using my own fingers, I like to explore art. I hope these techniques will inspire you too.
Related posts:
- The Best Brush for Acrylic Paint on Canvas
- 38 Best Canvas for Acrylic Painting for Beginners that Professionals use
- 21 Best Acrylic Paint Brands for Beginners and Professional Artists
- 51 Simple Acrylic Painting Tips for Beginners & Pros
What is Acrylic Paint?
Acrylic paint is a water-based medium, like gouache and watercolor.
It dries very fast, and forms a water-resistant glossy film.
Unlike oils it doesn’t need any smelly thinners, but unlike watercolors or gouache it is also solid film once dry – no amount of water will revive it.
Acrylics are versatile and thus – many techniques can be usedin painting on canvas or other surfaces.
What is Acrylic Paint? Ultimate Acrylics 101 – Full guide to understand the nature and main features of acrylics.
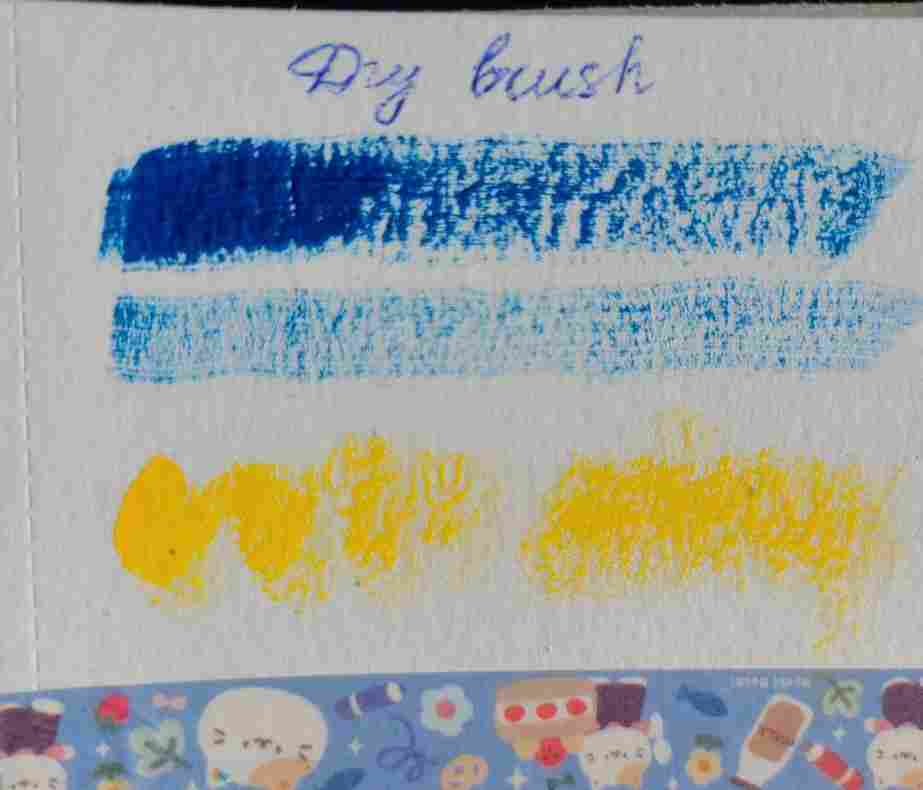
#1 Dry brushing
Artist grade professional acrylic paint comes in heavy body, high viscosity form.
Dry brushing means that you do not dilute paint with water, you do not wet your brush.
You directly apply paint from your palette or tube with a dry brush on a dry surface.
Dry brushing creates uneven strokes, an interesting coverage with a bit of texture.
It is a very simple technique. You can load the brush and make thick strokes, or load your brush with a little bit of paint and create transparent uneven lines and shades.
To succeed try different brushes before painting, if you want more uneven coverage, use older brushes.
You can always combine this technique with regular wet brushing and layering.
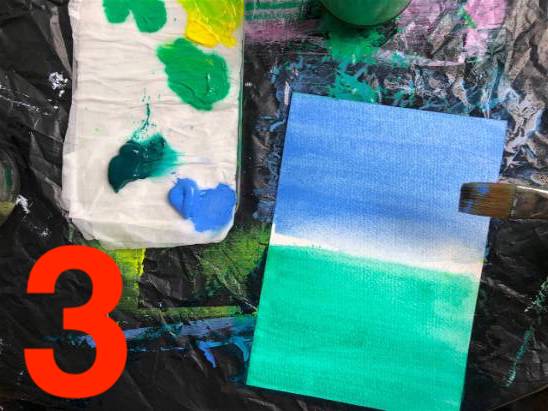
#2 Washing or watercolor imitation
Acrylic paint is water based and water soluble.
That’s why a group of techniques include adding water to the paint, as basically acrylics are quite thick and heavy.
To create washing effect add about 50% water to acrylic paint.
Acrylic paint washes are widely used as backgrounds.
Even if we can dilute acrylic paint and use it as watercolor, please remember, that acrylics are very fast-drying, especially when applied in thin layers, and they cannot be reopen after they dry – they become water-resistant.
Comparing to watercolor, acrylic acting as watercolor is less forgiving.
To thin acrylics you can actually use not only water, as water may affect the overall quality of the paint and its permanence.
But you can use other methods to thin acrylics, such as mediums – I made a simple guide and list of best thinners, feel free to use it.
#3 Stippling
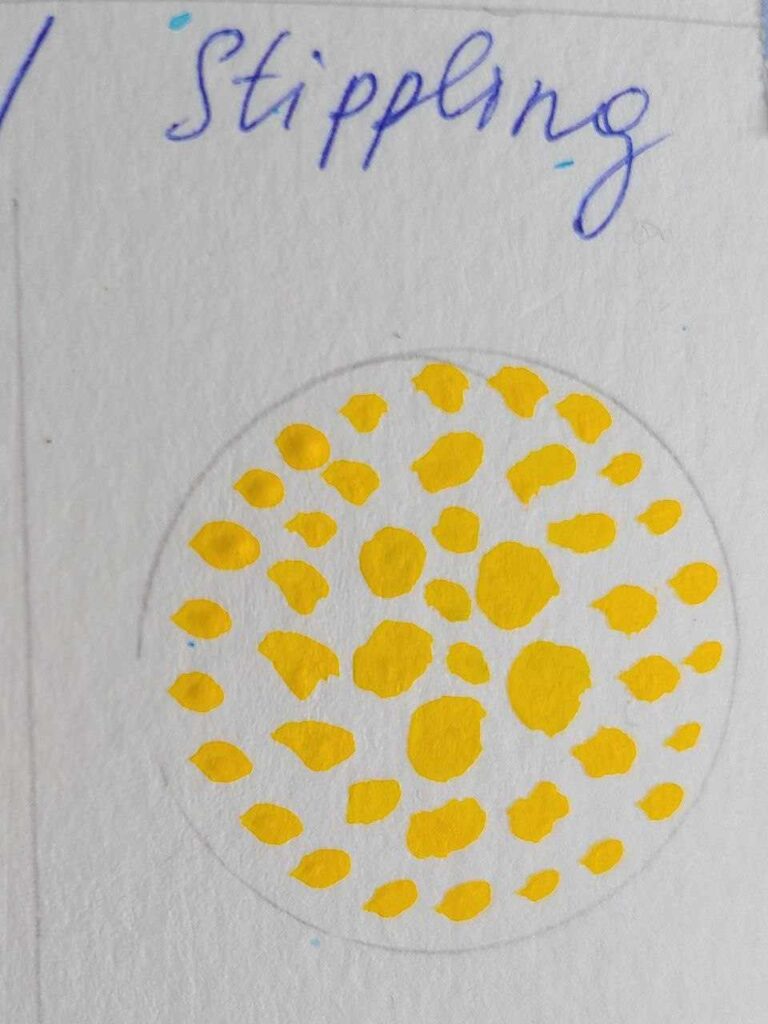
Stippling is a painting technique when you create a pattern, a texture, using small dots.
To make dots with acrylic paint you usually will use a brush, but in general you can use pen, sticks, or any other tools.
You are free to apply one layer of dots, or to make a multilayer painting to show depth.
You control the size of dots, they could be tiny, or quite big.
The best use of this technique is landscape, especially trees.
It is fine to combine this technique with others or paint the whole piece using only stippling.
Stippling is also considered to be the case when you use a brush to dabb the color into the surface (not only making dots).
Stippling is similar but not the same as Pointillism. Pointillism tries to make illusion of blended colors by using dots of different colors.
#4 Hatching
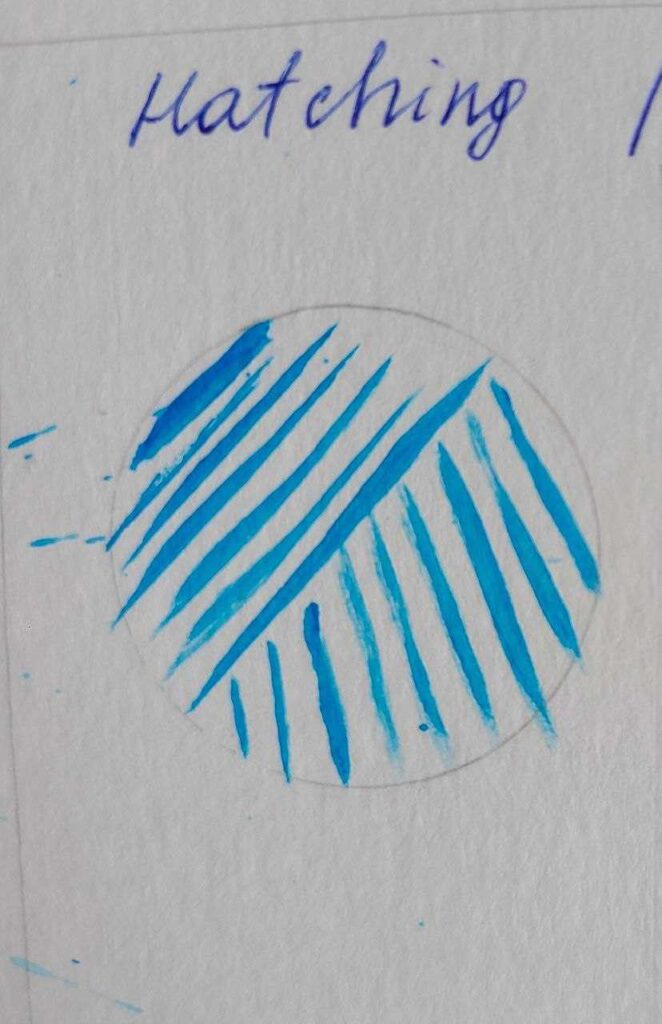
Hatching is a similar to stippling technique, but instead of dots you have lines.
You create a pattern in 1 or multiple layers using lines of size and thickness of your preference.
For basic layers use darker colors and be consistent with brushstrokes, line should look similar.
Hatching is mostly used with pencils, but with acrylics this technique can be also used.
for ex., to create background or shades, as hatching helps to paint dense, deep in color areas.
#5 Flicking or Splattering
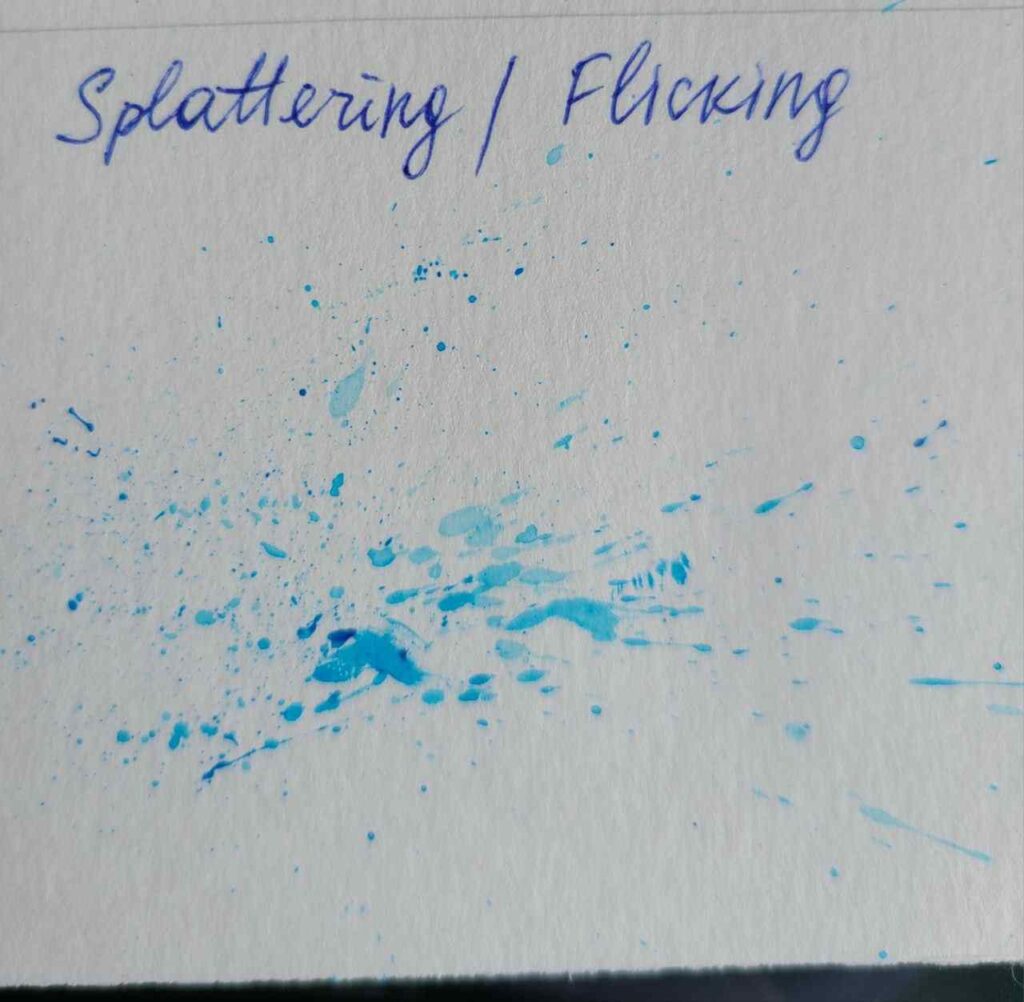
Flicking, also called splattering, is a fun and easy to use technique:
- you load your brush with thinned paint. This will not work as you think with heavy body paint.
- place it on top of your painting.
- splatter by tapping the handle or flicking the brush or pulling the bristles
This technique is more common for abstract painting, especially to create interesting details and effects.
But also widely used to paint stars or freckles.
Be careful and do not overdo – it can become messy and less artistic.
Also keep in mind, that using this technique you absolutely need to protect floor or surface you paint on, as splatters can be everywhere!
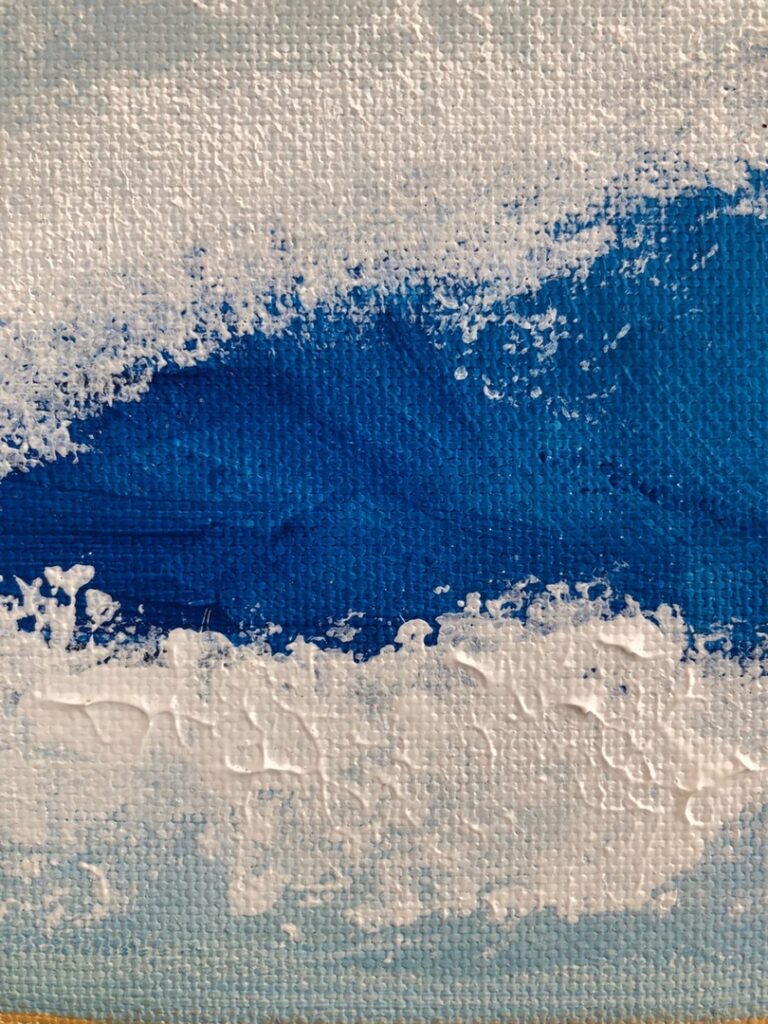
#6 Dabbing
Dabbing is another fun and easy to apply technique.
You need a sponge or a piece of towel (paper towel, I even used old normal towel) dipped into the paint.
The whole process is just loading paint and dabbing the surface.
Use stencils to dabb a shape, or use dabbing for painting backgrounds.
It can be smooth or with texture, depending on how much paint you will use each time.
This foamy wave was created with a make up sponge in several layers.
#7 Detailing
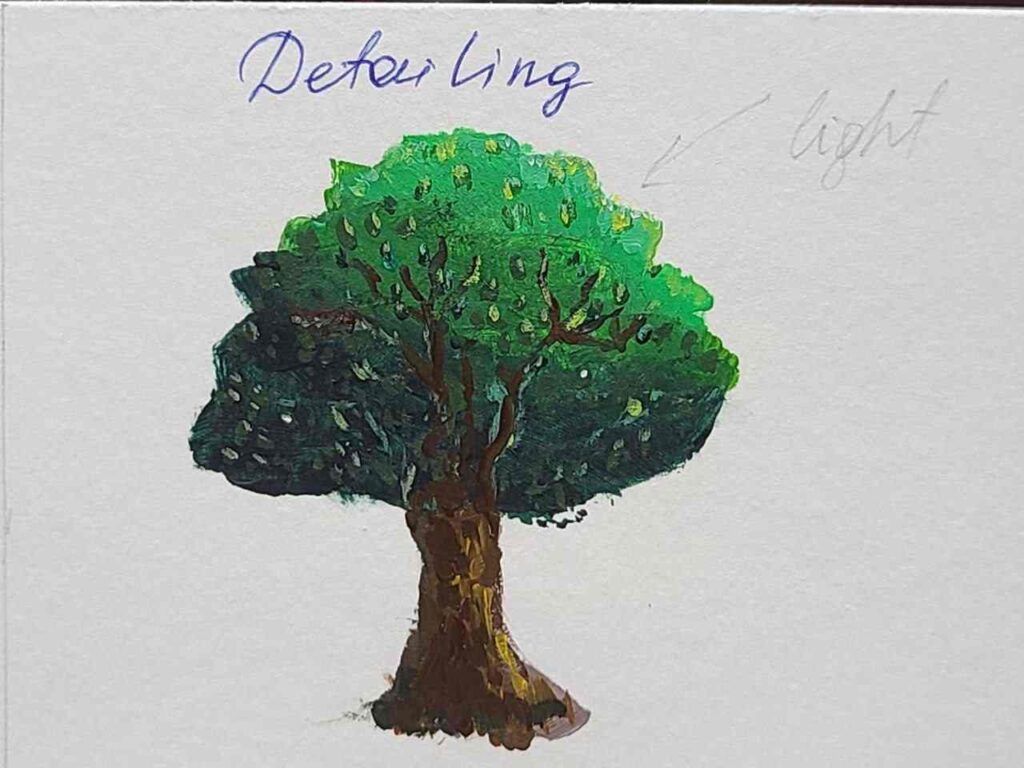
Detailing is the way to create extremely detailed paintings using detail brush.
This technique needs time to master, patience and delicacy, but the result is worth it!
The key to this technique is the right detail brush: use synthetic brushes for acrylic paint. Some brands offer sets of details brushes, for ex., this set of 10 brushes.
If you prefer to buy brushes individually, look for liners, detail brushes, riggers, I love Princeton Velvetouch Series 3950.
To paint details you need to thin the acrylic paint to an inky consistency or use acrylic ink – it is important that the paint was homogenous, easy to flow and control.
Some tips for detailing with acrylics:
- apply paint with light touch.
- let the painting dry completely before you paint details. Paint details last.
- depending on how it is more comfortable for you: use an easel or lay your painting horizontally.
- keep a paper towel to erase mistakes immediately.
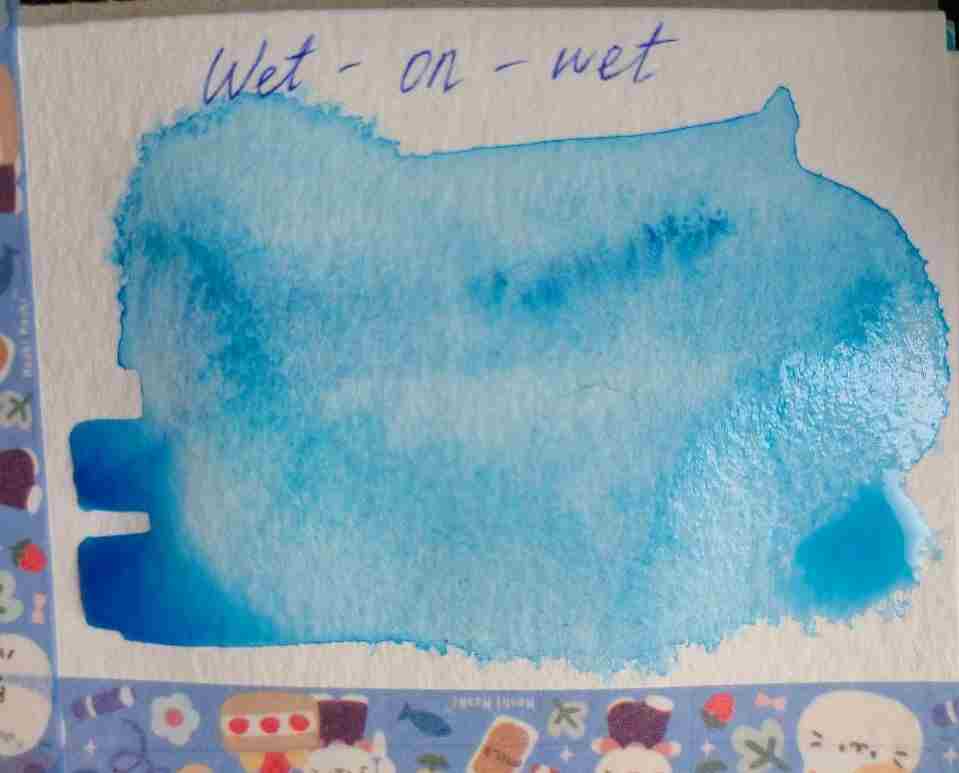
#8 Wet-on-wet blending
Wet on wet is a basic technique for watercolor and blending technique for some oil paintings and acrylic paint, and gouache too.
As acrylics are fast-drying wet-on-wet technique is not widely used.
Basically what you do: you apply the first color and while it is still open (acrylics stay wet for 10-20 min) you directly apply second color and blend them immediately on the surface to create a gradient.
If you are using this technique you may need to slow down the drying process, use on of these 15 methods to make acrylic paint dry slower, or simply spray the paint with a little bit of water.
Please make sure you let your paint dry fully as uneven drying can lead to cracking.
#9 Wet brush on dry canvas

Wet the brush on dry surface is the standard technique for painting.
You have a jar with water, you wet the brush, and apply paint with wet brush.
You can also add water to the paint, mix it to the uniform consistency and apply in layers to the canvas.
If you painting on canvas for the first time, use this step-by-step guide.
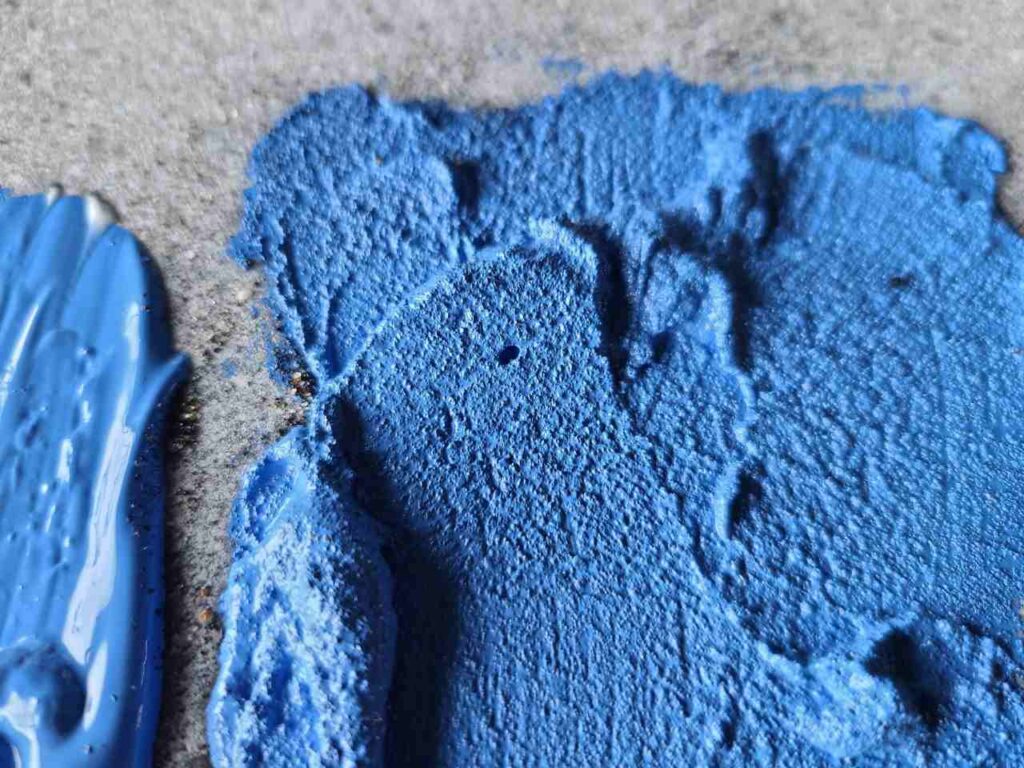
#10 Painting with a Palette knife
Painting with a palette knife, as form of impasto technique, is used in abstract painting, portrait and landscape painting a lot.
Usually we use a palette knife to mix colors, but it is much more fun to paint with them.
You can directly apply the paint in the surface and shape it using palette knives to create texture and thick layers.
While for abstract painting is quite easy to use palette knife, if you’re aiming to paint a portrait using palette knives, you’ll need some time and practice.
You can apply paint using the blade or create lines using the edge of the knife, you can also scratch paint with a palette knife or just create a smooth coverage, like a cake.
#11 Glazing
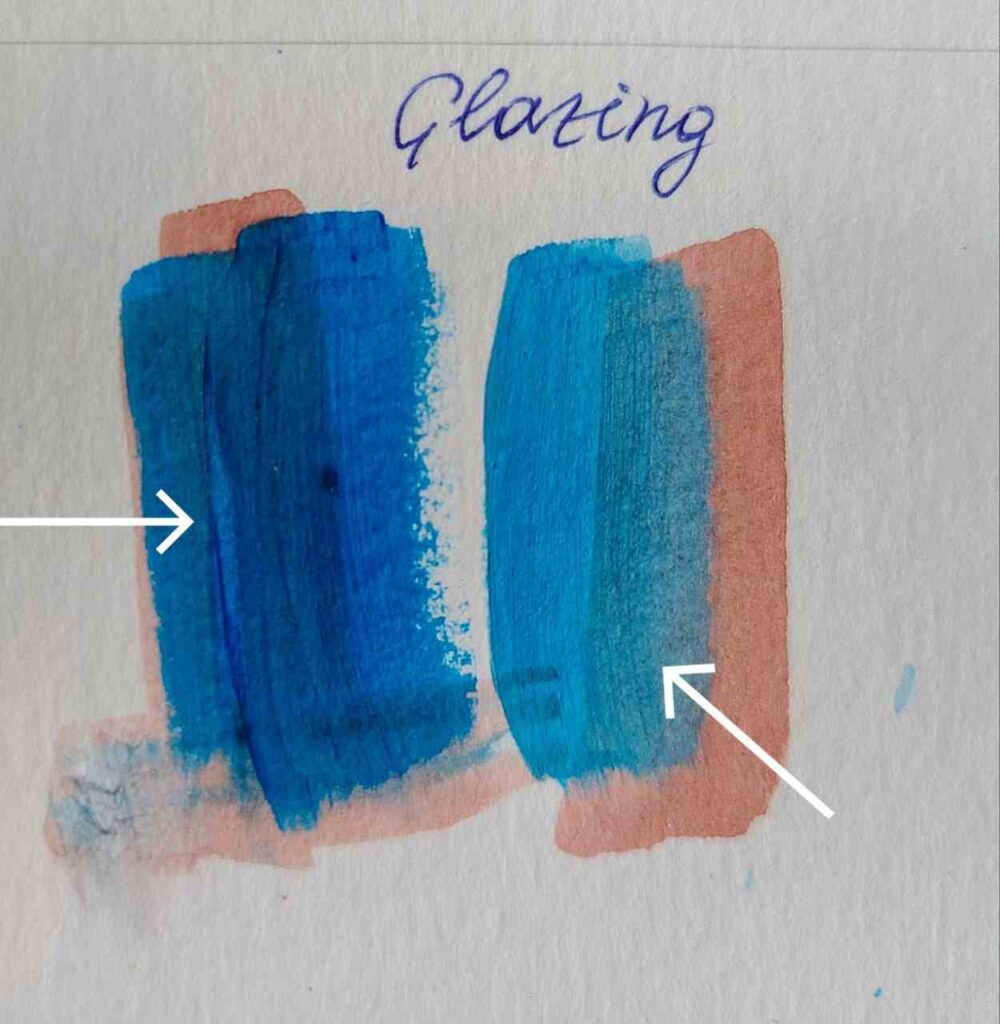
Glazing means applying layers of glaze. Glaze is a thin, semi-transparent paint layer.
Glaze is never used alone, glazing is a number of the thin layers that will create depth and modify the colors: each glaze will be applied once another is dried, so they will not blend.
The effect is then different from mixing 2 colors.
- Apply an underlying color
- Apply several glazes
- Enjoy!
To work with glazing, you need to thin the acrylic paint, as you need fluid and transparent layers. Use water or special thinners.
I will not call this technique an easy one, first – as it requires a glazing medium, second you need to know color chart and color theory to understand how the color can interact.
#12 Sgraffito

Sgraffito is a painting technique when we scratch, as it comes from Italian sgraffire – “to scratch”.
This technique adds an interesting effect: from top layer scratches we see the layer below, ex. when we painting hairs, trees, water, abstract.
How to use scgraffito technique:
- apply the layer that you want to be visible through scratches and let it dry.
- apply the top layer
- scratch the top layer while it is still wet (you have up to 30 min, if you need more use extenders or other slow-drying methods).
To scratch you can use any tool you have at yours, or special silicone or rubber tools, or paint shapers.
#13 Expressive brushstrokes
Sometimes we want to get rid of visible brushstrokes, but it is, in fact, a whole technique – expressive brushstrokes.
This technique reminds me oil painting with thick, visible, buttery brushstrokes creating volume, texture and depth.
For this technique, a good brush is the key to success. I reviewed 20+ brushes for acrylic painting here.
There is even a book about brushstroke techniques – Brushstrokes: Acrylic: Effortless painting with minimal tools and materials.
#14 Under-painting technique
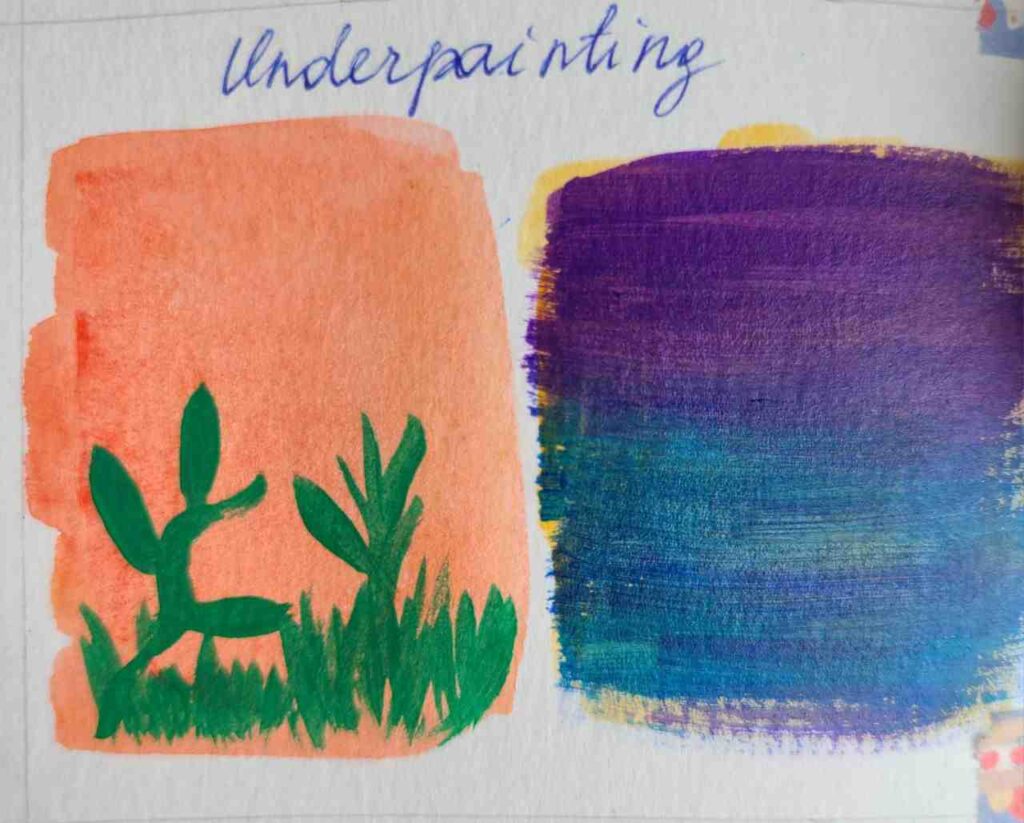
Underpainting technique comes to us from a very old and academic tradition – you need to build a sketch, an underpainting, for your future painting.
Usually, an underpainting is made with a main color in contrast with the whole piece, some artists use brown-ish tones.
Painting, you will normally cover the underpainting or leave it as shade or accents.
It is usually made in washes, quickly.
#15 Layering
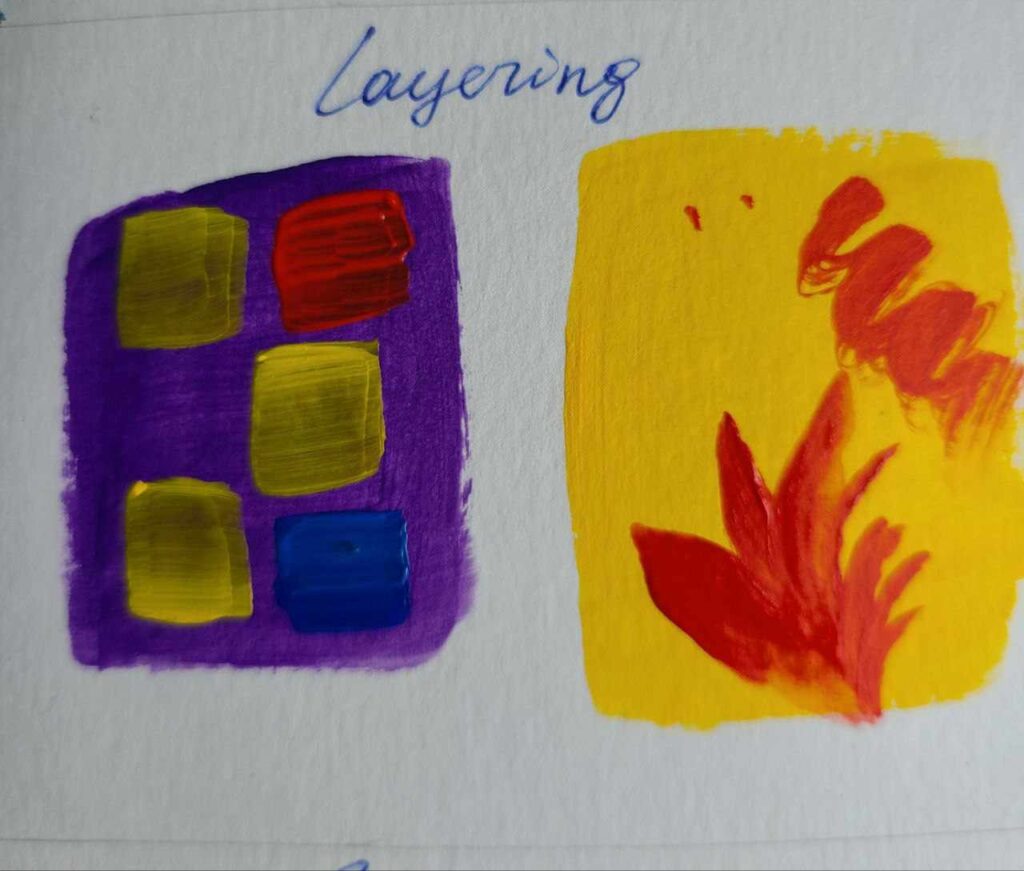
Layering is the most basic and necessary building painting technique for acrylics.
It is simply means that you apply paint in thin layers, letting them dry in between (if you don’t have any other ideas and technique in mind).
With layers you’are mowing from dark to light colors, from background to details.
It needs your full attention, patience and time (not as much as with oil, as acrylics are fast-drying).
#16 Paint in blocks of color
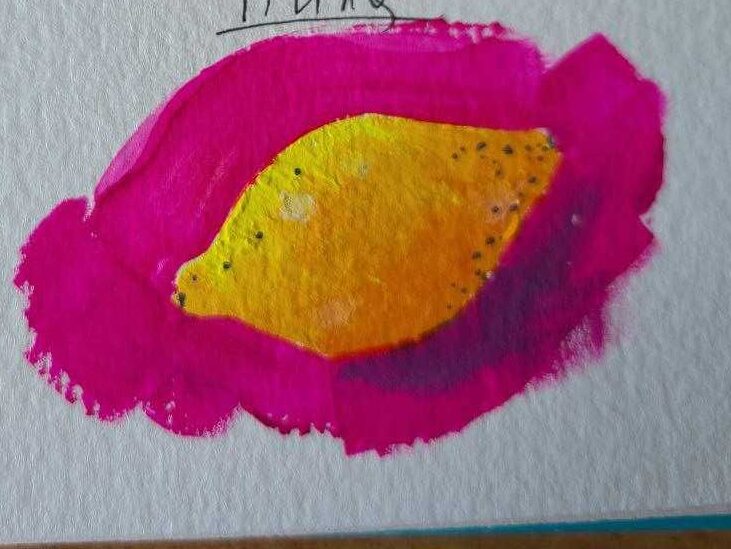
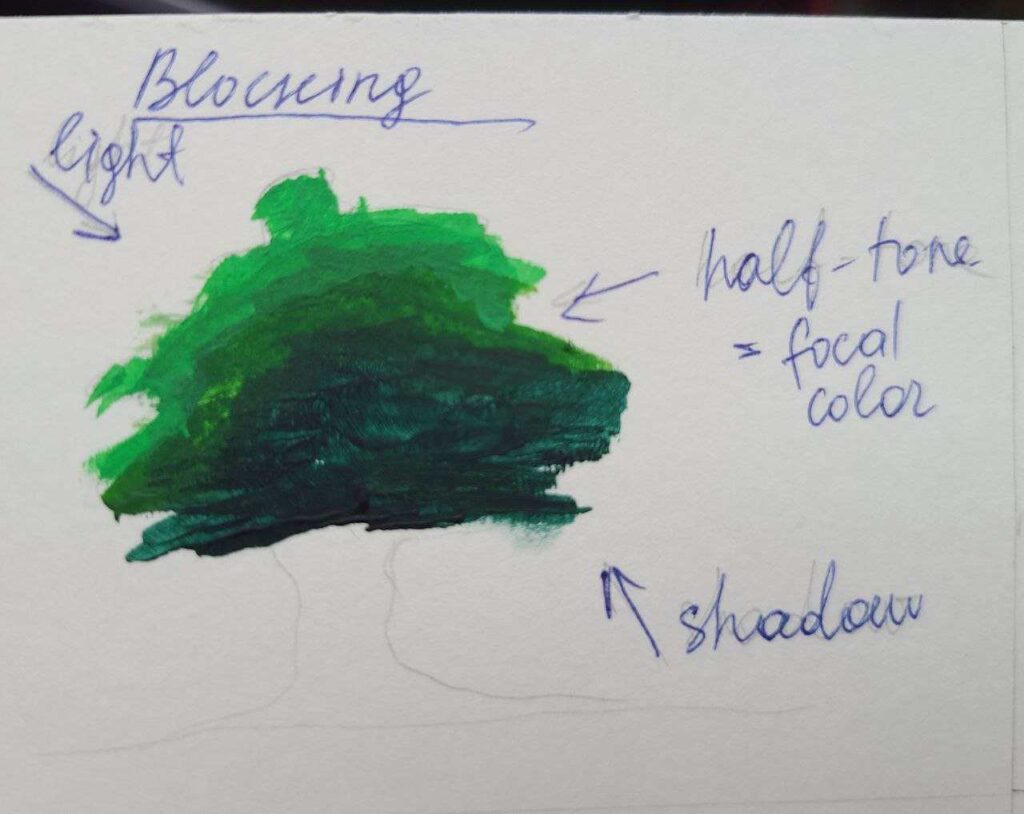
Blocking is only one of the step in traditional painting, it creates color areas according to light/shadow parts.
And it prepares your painting for adding details.
Look at the lemon, it has 3 visible blocks of colors: bright yellow, medium yellow and yellow-orange almost red.
Look at the tree – 3 visible blocks.
Light area, warm color where the light comes, hald-tone and shadow.
However, contemporary artists often use blocking as a style on its own, without following it up with detailing.
#17 Only partially mixed colors
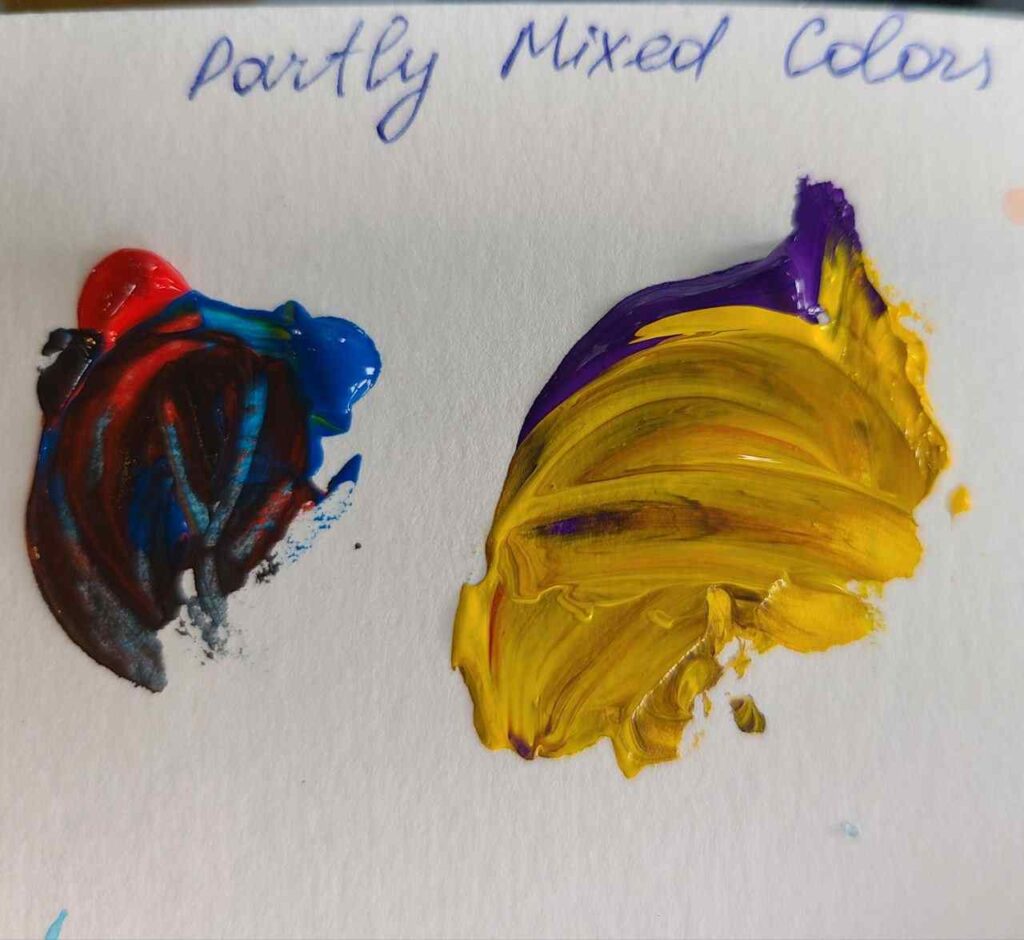
Usually, we mix colors to achieve a tone we need on the palette or directly on the surface.
Only partially mixed colors can create an amazing effect:
- apply one color on the surface
- apply another color or colors
- start mixing them with palette knife, but just slightly mix them, not until they will form a new color,
OR
- apply two or more colors next to each other on the surface
- using dry brush or a palette knife go over the colors
Great technique mostly for abstract painting. I use it a lot, to be honest.
#18 Paint with a family of tones
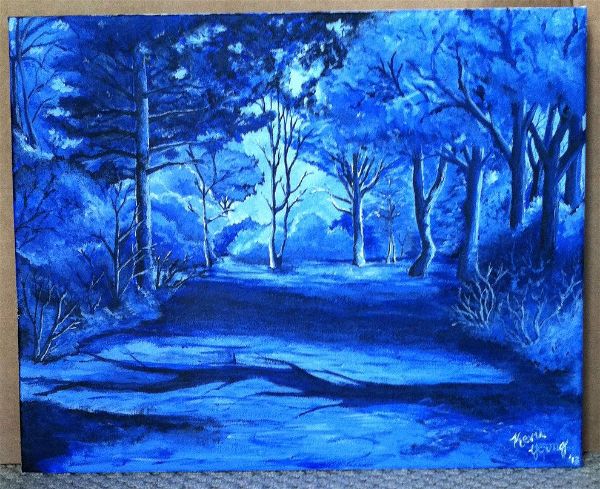
This can be an idea for a whole painting: you choose the main, primary, tone, then you mix different tones using
It works very well with flowers – to create shades, depth, detail and delicate touch. It will also work for sceneries.
This technique require a lot of time for preparation, time for making swatches, practice (to know exactly how much to mix) and patience.
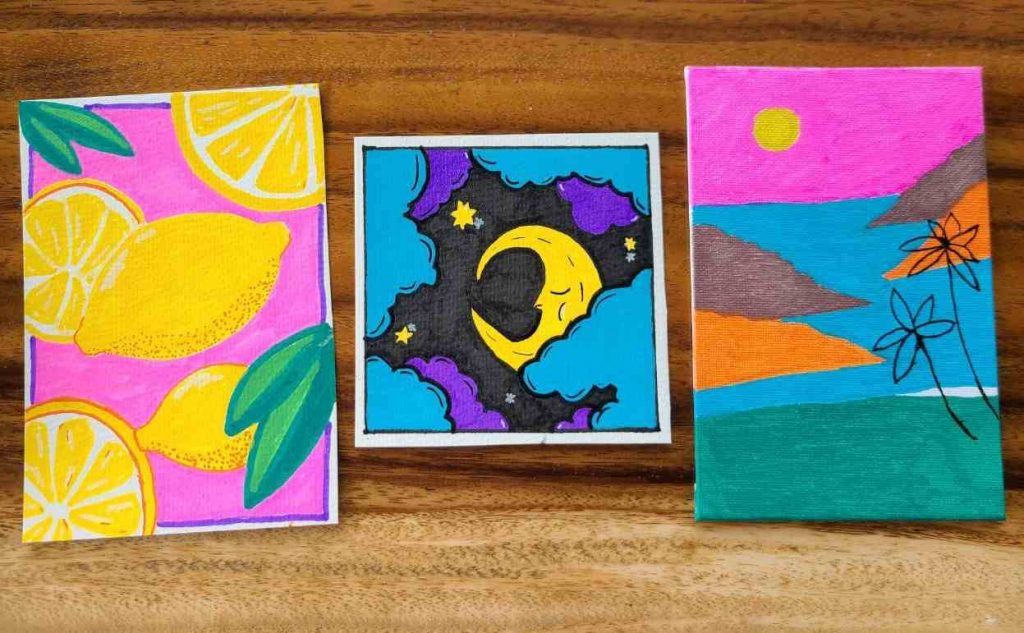
#19 Flat color technique

Flat color technique means that you create even, solid, uninterrupted, and completely uniform in brushstroke, and color intensity area of a color.
The edges are usually hard.
Perfect for backgrounds (if it fits your idea), and abstract art.
To work with flat colors, you need a good brush, master your brush techniques, use opaque and high-quality paint.
Do not thin paint too much for this technique, and if your paint is not opaque enough try to mix it with more opaque colors or try other methods to make acrylics mire opaque.
For me flat colors remind contemporary art, digital art and illustrations.
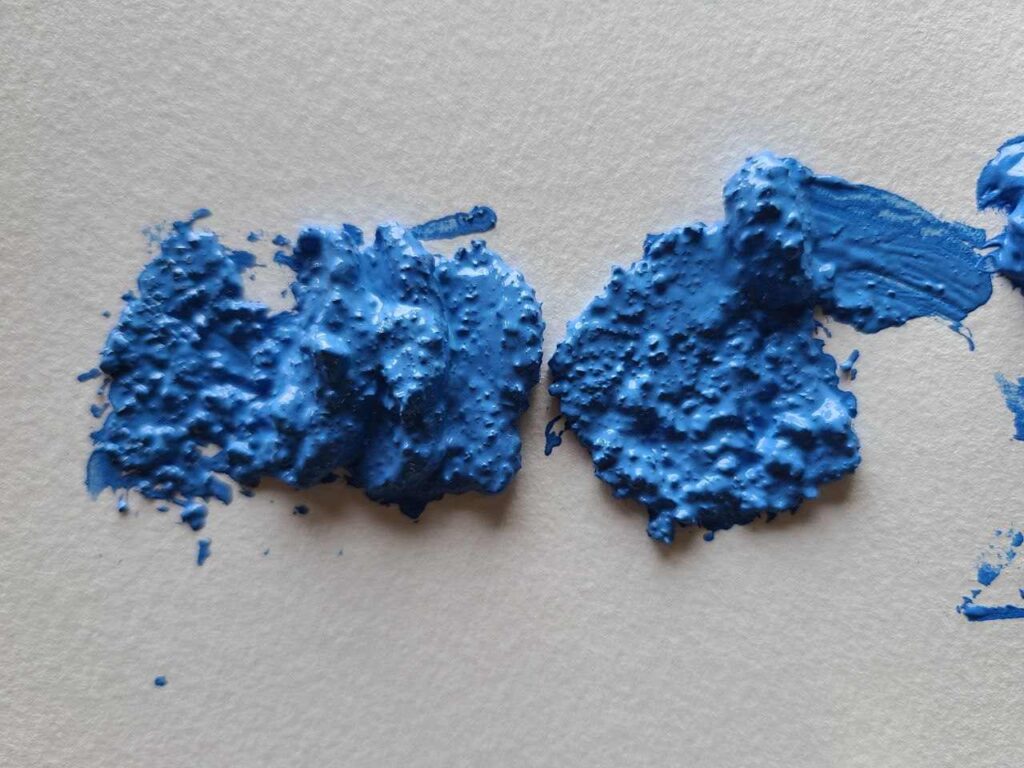
#20 Acrylic impasto painting technique
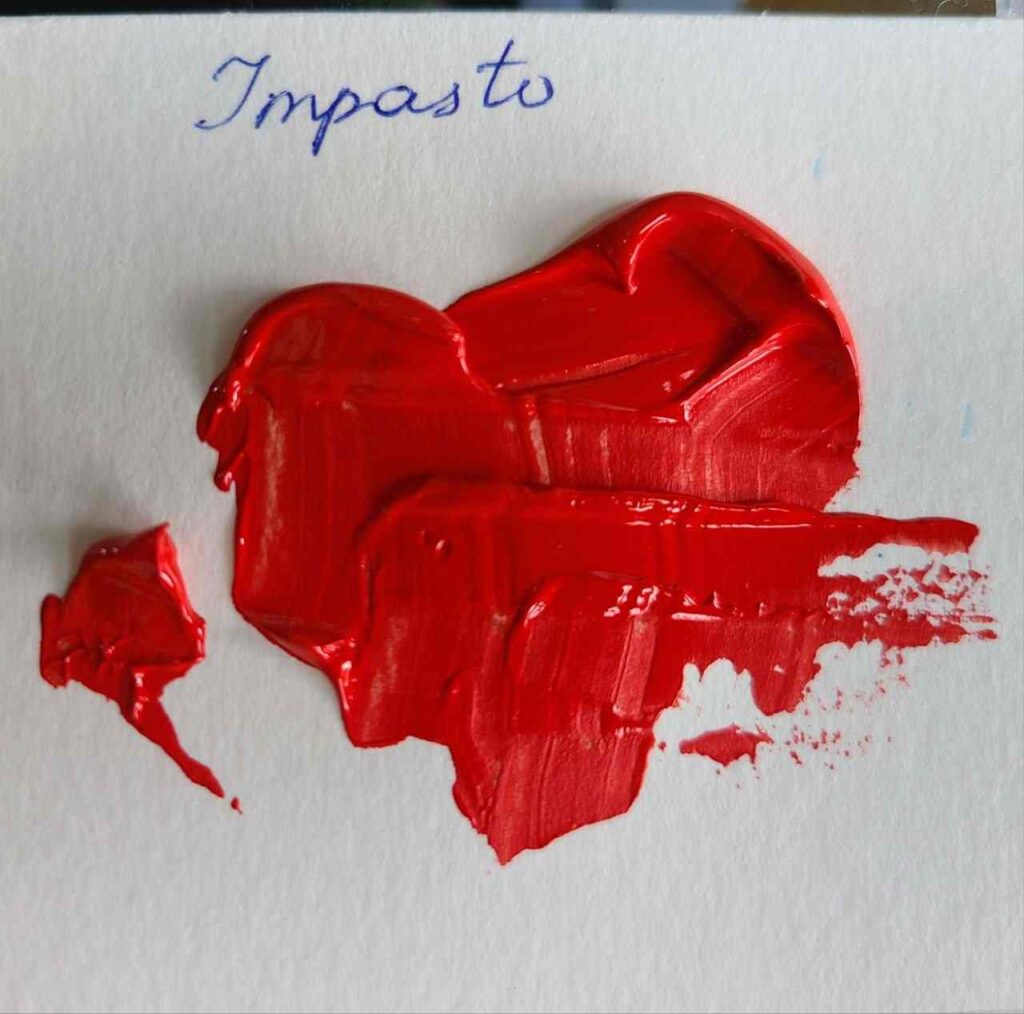
Impasto technique needs heavy body paint or extra gel mediums to create thick, textured, original paintings, to create dimension.
I mostly use impasto for abstract painting, but it can be easily used for any other style.
To work with impasto you need heavy body paint, impasto or gel medium or a modeling paste, and a palette knife.
As this technique suggests creating textures, you may need more open time than regular acrylic paint can offer. In this case use retarders. Do not use water with impasto technique.
Many famous artists loved impasto: Van Gogh, Rembrandt van Rijn, Jackson Pollock, and others.
You can also create a basic impasto layer and than glaze it or paint it, once it is fully dried.
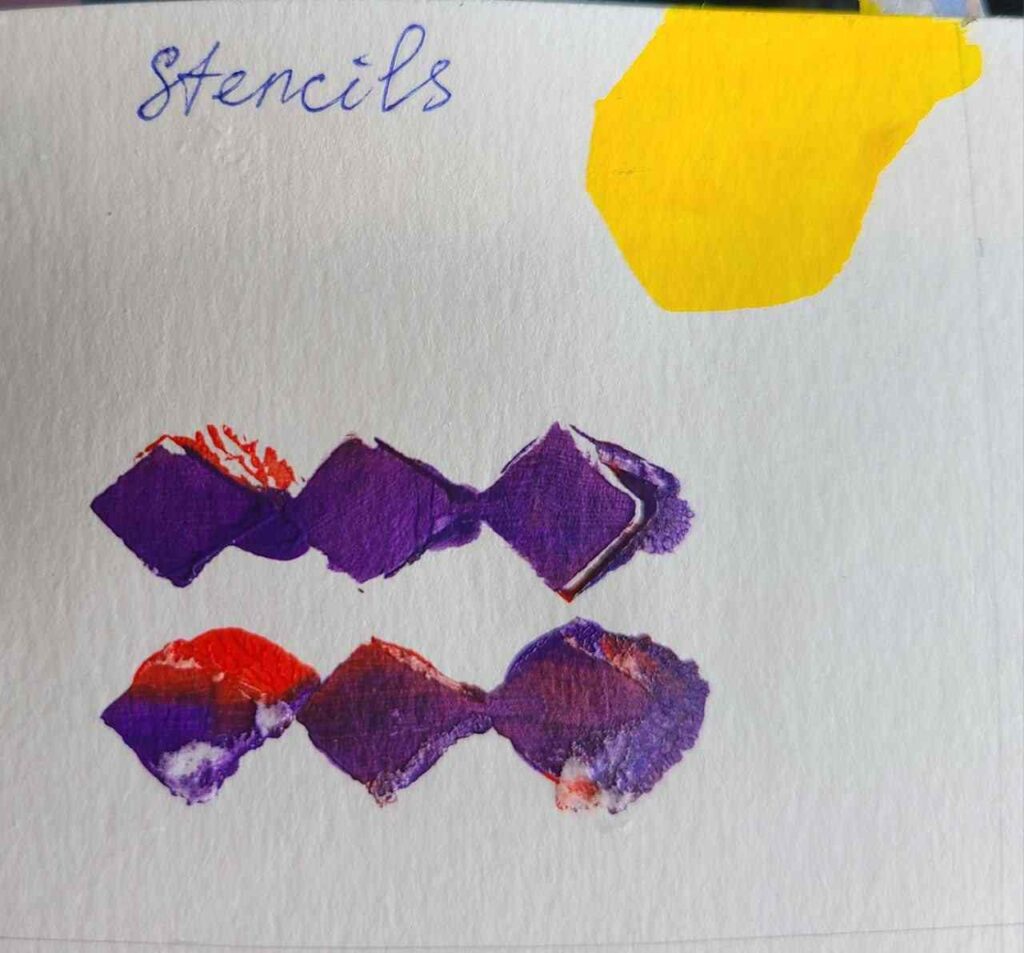
#21 Stenciling
Stenciling implies using stencils – you can buy them or cut from paper or any other material (to reuse them).
You can also use tapes to create needed shapes or cut some cardboard but it won’t be perfect (see pic).
You can:
- use stenciling to color an area
- use different stencils in layers
- use a stencil to create a painting inside it
For stenciling you do not need fluid paint, use soft body paint, brushes, sponges or spraying to color the areas.
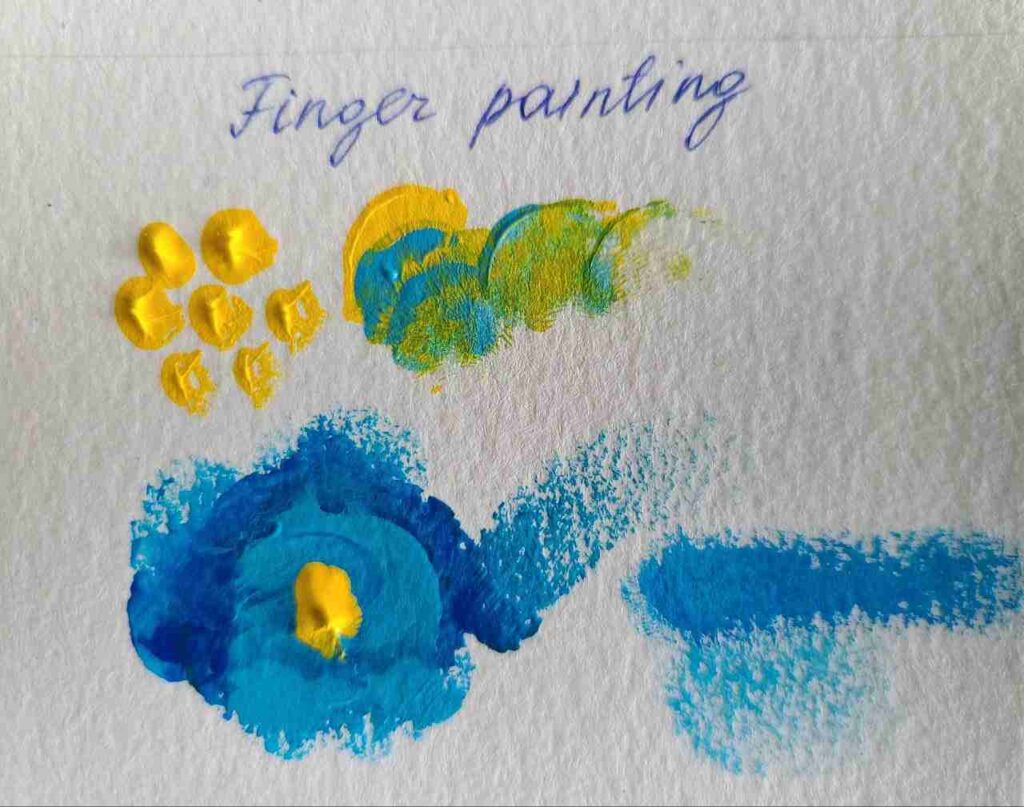
#22 Painting with fingers
Painting with fingers can be fun not only for kids, and it is the easiest and “cheapest” painting technique – you only need your fingers.
- fingers and palm have unique texture and pattern
- blending is very easy and smooth with fingers
- you fingers can create dots, lines, combining fingers, you can use different colors at once – different colors on each finger, and so on, and so forth…
Always keep towels around and wear apron to protect yourself – acrylics are hard to wash off from clothes.
Sounds creative, right?
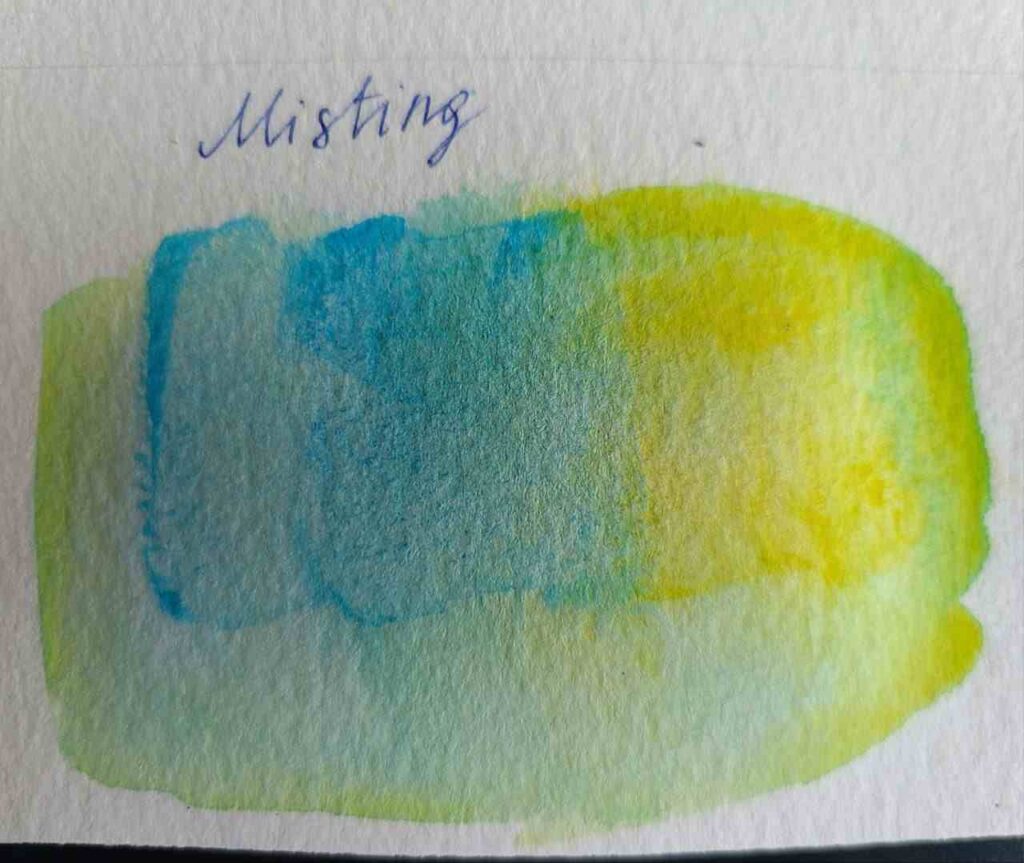
#23 Misting
Misting is a wet technique.
You paint and then mist painted areas while they are still wet or semi dry to create runny paint or work longer with paint.
Use an old spray bottle with wetting spray or water.
#24 Acrylic Pouring
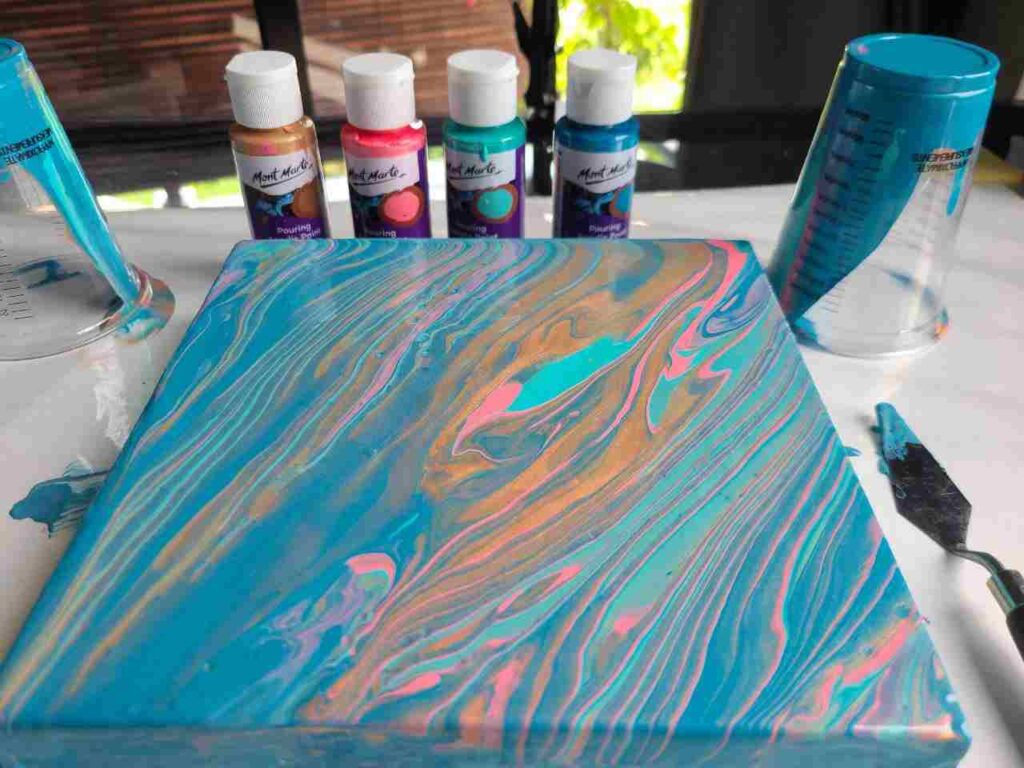
Acrylic pouring is a new art trend. It is quite easy and extremely free and creative process.
You need fluid paint, floetrol, a hair dryer and a canvas to start.
Acrylic pouring may be considered as abstract painting.
The main process is pouring fluid acrylic colors on the surface and move the surface to make colors interact and create dynamic pattern. You can also create effect using a straw or a hairdryer.
Try a ready-to-use acrylic pouring sets to save money.
Read my ultimate tutorials list 33 WOW Acrylic Pouring Techniques for Beginners and Advanced Artists that I’m curating, showing you the best techniques and the best pour painters around the world.
To get the best results consider picking one of the popular color palettes: 38 Stunning Paint Pouring Color Combinations
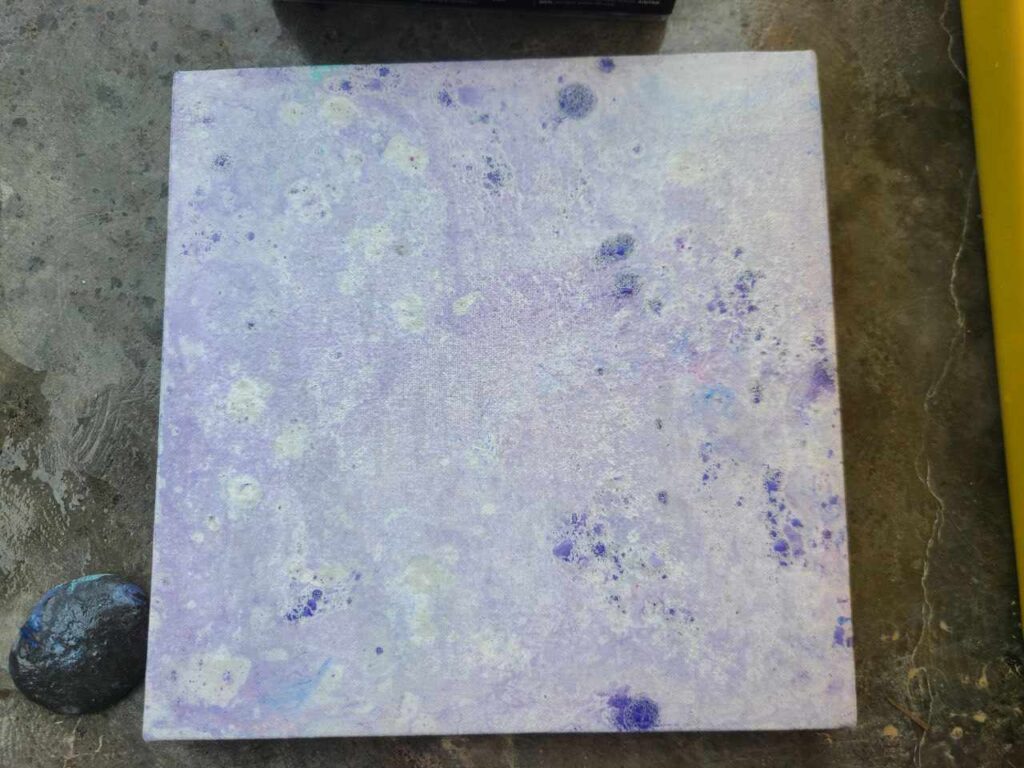
#25 Scumbling

Scumbling is a technique to create smoky effects and soft blends of color.
The main goal of scumbling is to highlight bottom layer with a broken top layer.
Usually we use white color for scumbling.
- You need a dry brush or cloth
- Rub small quantities of paint over a dry layer to expose the color underneath.
Thinned paint or transparent does not work for scumbling, try to use heavy body, opaque paint.
#26 Hydro Dipping with Acrylics
Initially started with special hydrographic paints and spray paints, hydro dipping is now can be done with acrylic paint and even nail polish for fun.
It is an easy and unique way to customize your Nike, ornaments, phone case, guitars and skateboards, and anything you have in mind!
Professionals hydro dip cars detailing!
However, spray paints work better for hydro dips than acrylic.
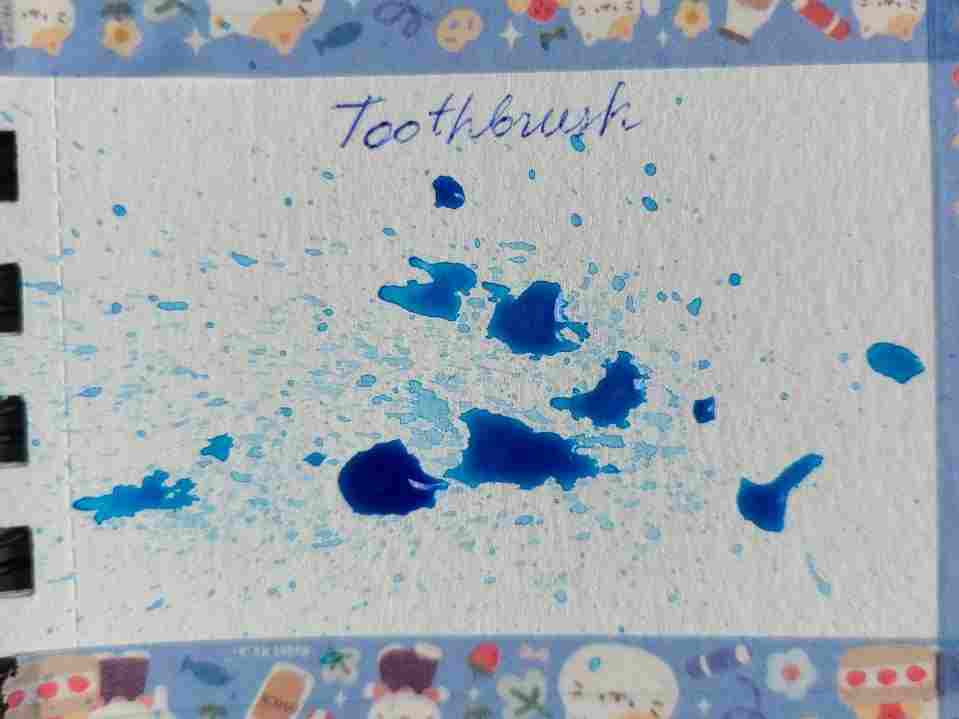
27 – Toothbrush splatters
Use old toothbrush to create splatters for night sky, galaxy paintings and added effects.
You can use dry toothbrush or slightly wet it, but watered down acrylic paint will splatter better.
Can splatter directly on paper or over painted (and dried) area.
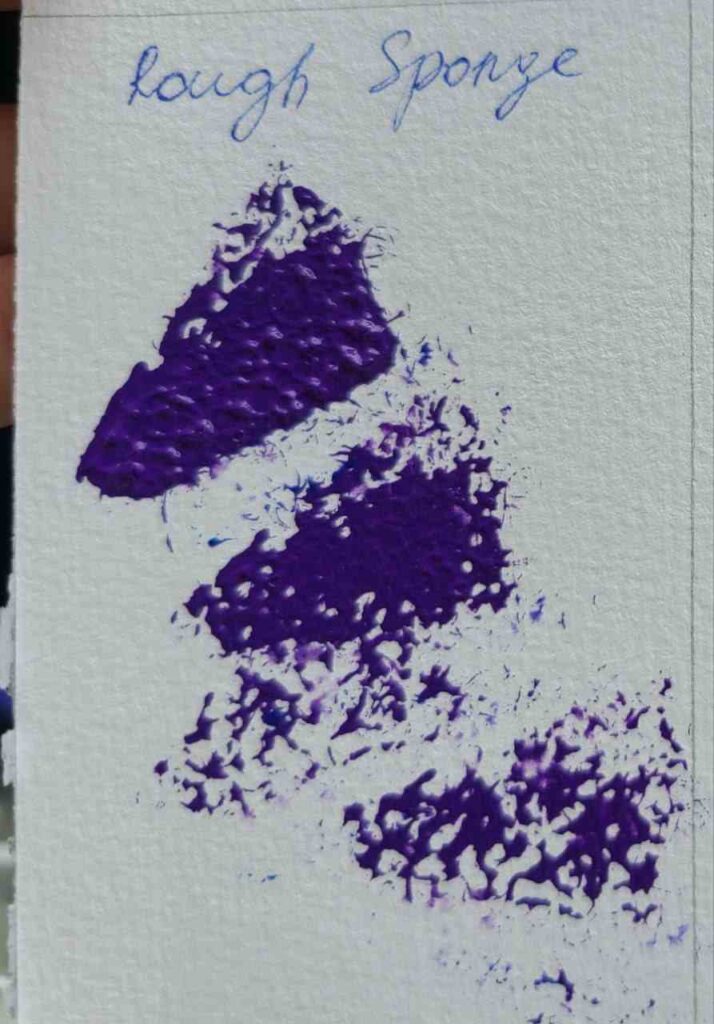
28 – Dry rough sponge
Use the rough side of the sponge.
Dip in the paint and dab.
Try not to go over the same area many times as it will not add more texture while the painting is still wet.
Easy to use for waves foam, flowers and greenery in the background, snow, clouds, etc.
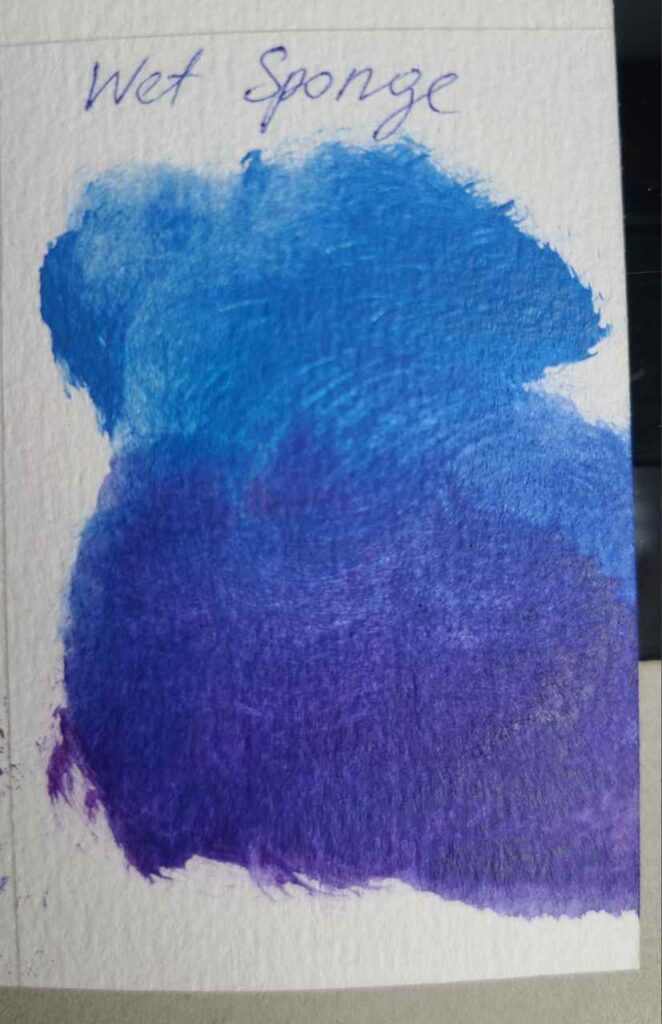
29 – Wet sponge
Wet sponge or a foam brush can be used to create large washes, blend the paint, and create drips.
A wet sponge holds a looot of water.
Great tool for drips and blending depending on how much water you will soak in.
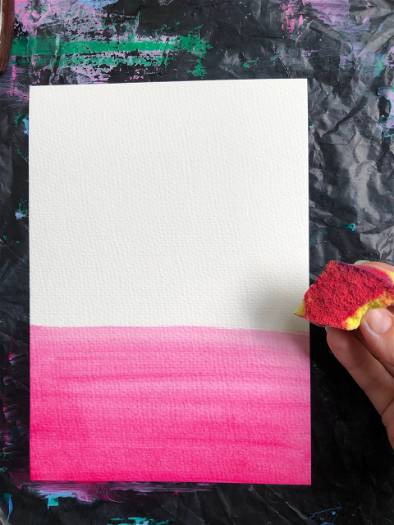
30 – Sponge blending
Sponges make blending very easy, with soft edges.
You can use any sponge: from make up to dish washing one.
The downside of using a sponge is that it soak too much water too quickly, so don’t make it too wet.
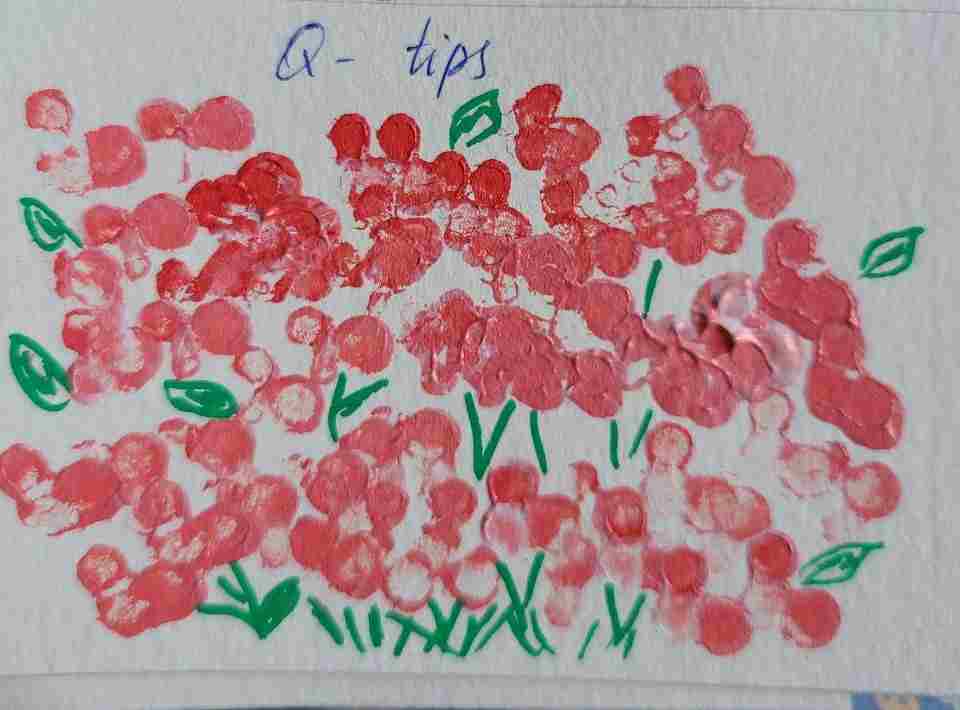
31 – Q-Tips
Using Q tips to apply acrylic paint is super fun and fits adults, amateurs, kids and school projects.
You can:
- get a bunch of Q-tips and load them with paint to make flowers like lilacs.
- load each Q-tip with different color
- draw around with markers or paint.
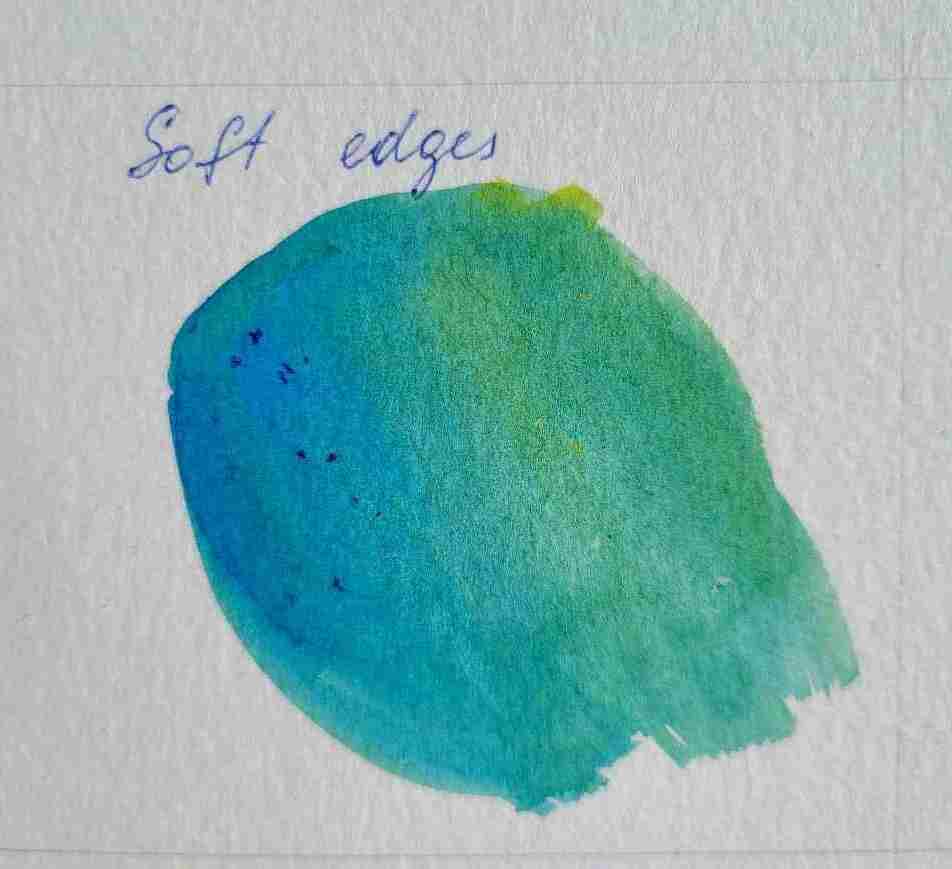
32 – Soft Edges
Soft edges technique means that you don’t leave sharp visible lines in between colors.
Soft edges are subtle and smoother and you cannot really tell where one color stops and another one starts.
You can soften edges with a dry brush or a mop brush.
Great technique for shadows.
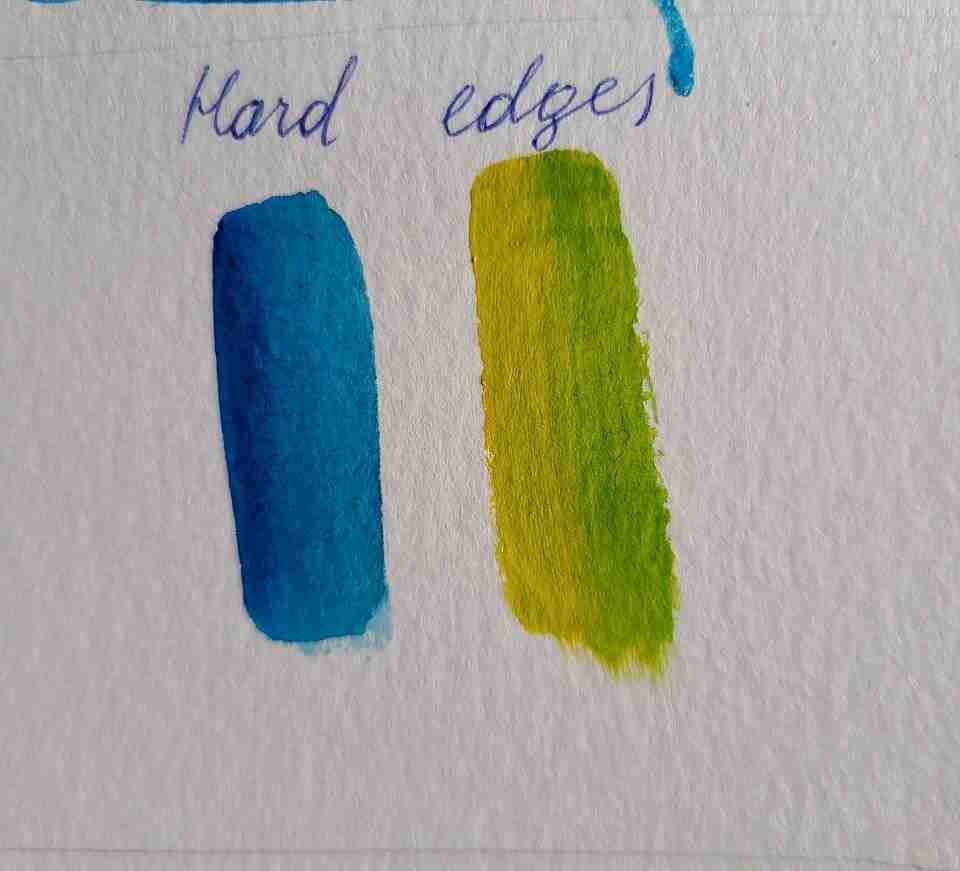
33 – Hard Edges
Hard edges are bold and immediately draw attention.
Two colors have visible clear edges and are very distinctive.
Used mostly in abstract painting.
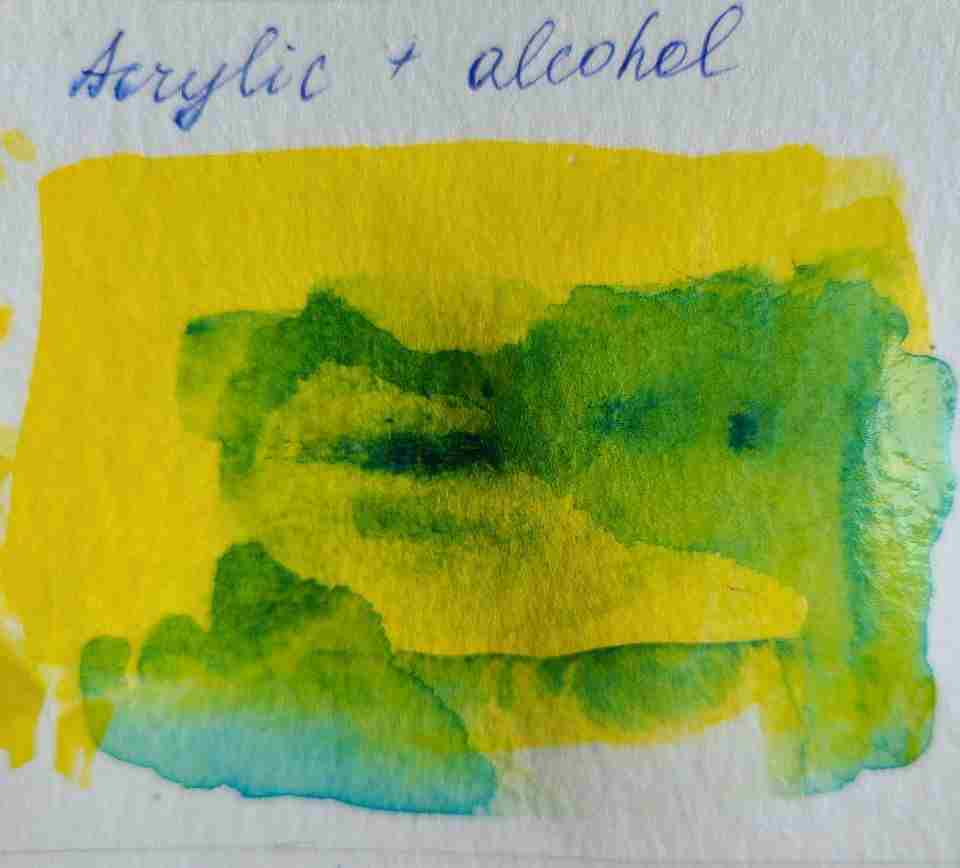
34 – Dripping Isopropyl Alcohol
Alcohol based products and acrylic paint are not “friends”.
As soon as a drop of alcohol touches the painted area (with still wet paint), acrylic paint runs away and doesn’t flow anymore in the area covered with alcohol.
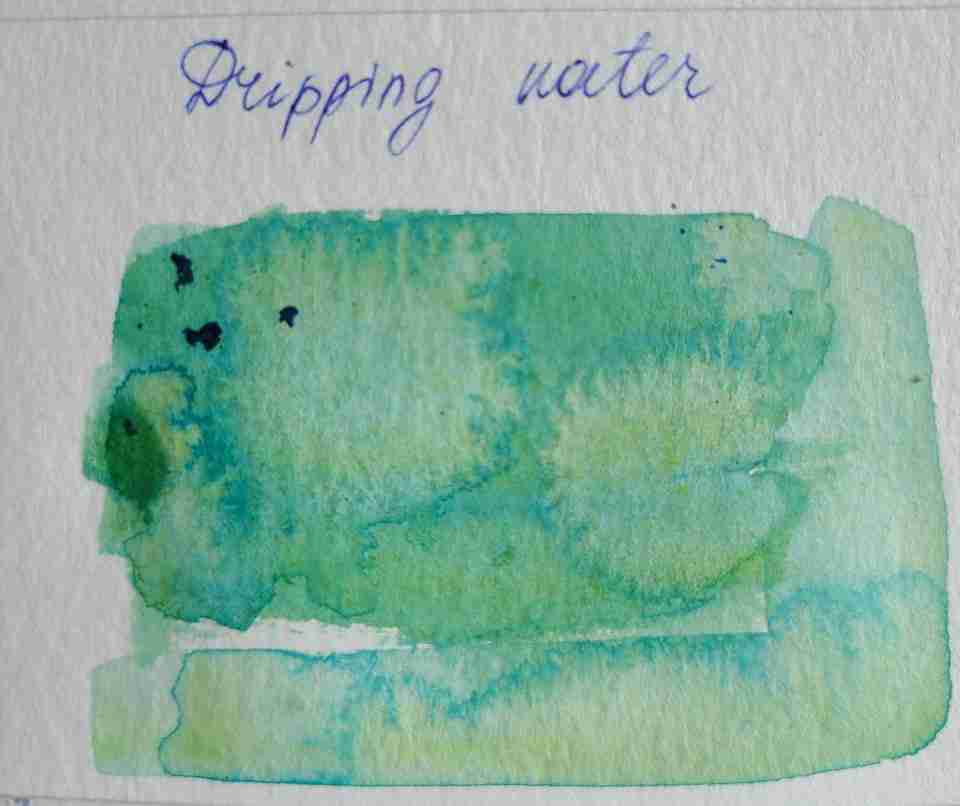
35 – Dripping Water
Add water to acrylic paint.
Use a wet brush and paint an area.
While the acrylic paint is still wet, add some drops of water.
They will immediately create dendrites-alike shapes.
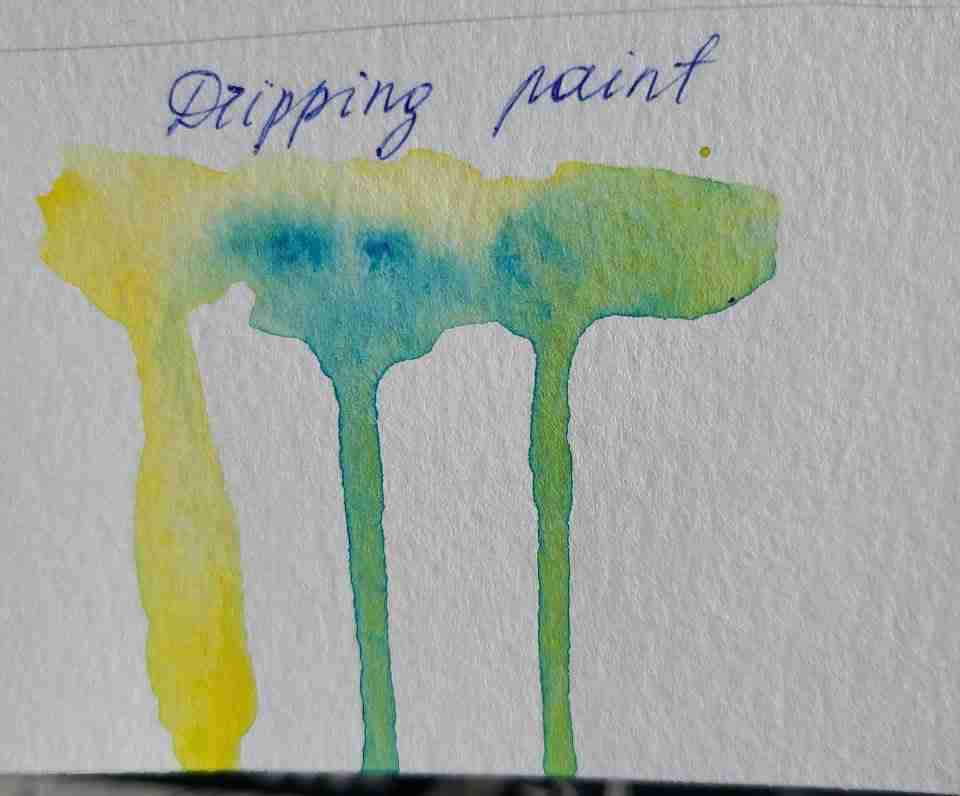
36 – Drip marks
Watered down paint or fluid paint runs and flows easily.
If you will hold your canvas at an angle or place it vertically, you can apply thinned paint on the top and it will drip down.
If using mixed colors it will create beautiful effect.
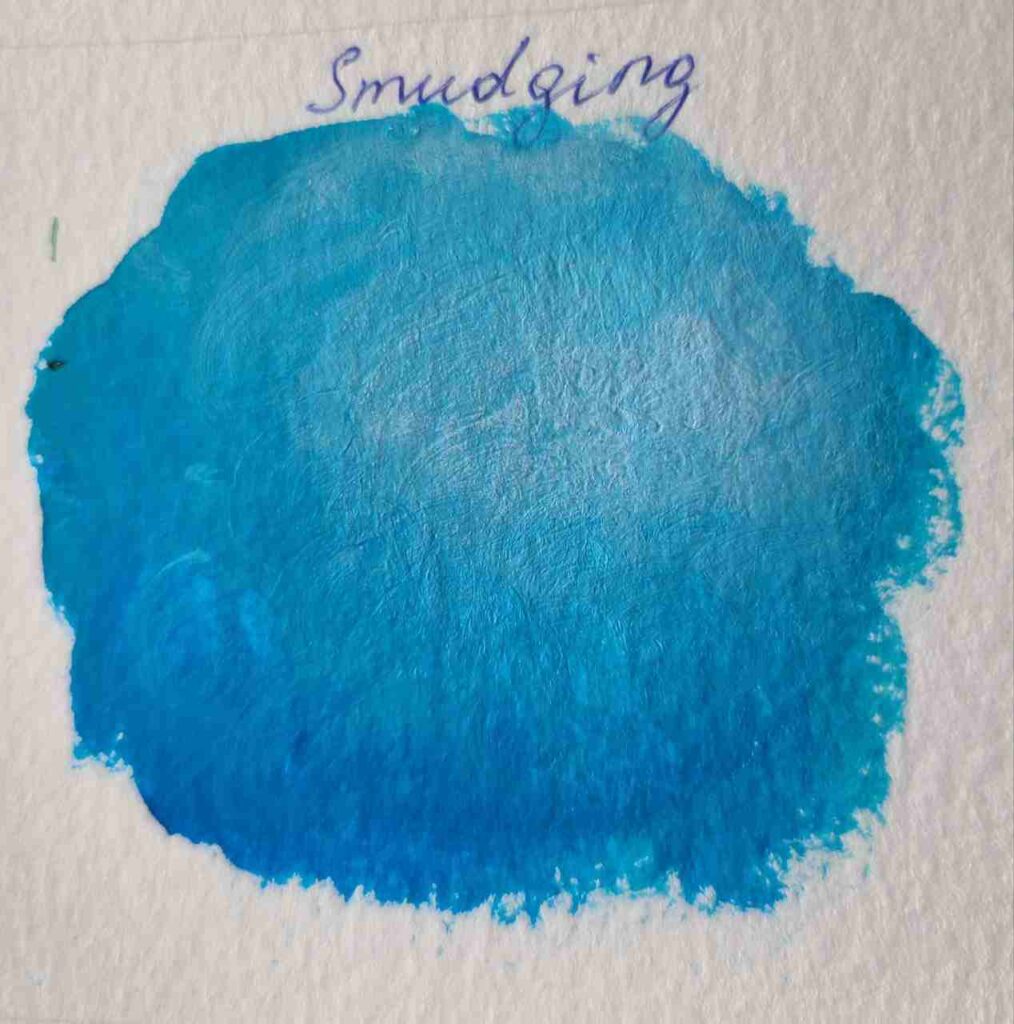
37 – Smudging
Smudging is widely used in charcoal and pencil painting to create shades.
You can use the same technique with acrylic paint, but instead of your finger you will use a dry brush.
Place as many colors as you want on the canvas, then with circular motions smear them together.
Technique is also good for blendingon canvas with soft edges.
38 – Mix acrylic paint with sand
One of my favorite acrylic painting techniques that add texture to canvas.
You can approach it in 2 ways:
- mix acrylic colors with sand directly
- color sand and dry it – so you have colorful sand.
39 – Mix acrylic paint with coffee
A DIY painting technique to add coarse texture is to add coffee to your acrylic paint.
It doesn’t guarantee archival qualities.
But, the texture is very unique and application is easy both on paper (though it can be too heavy) and canvas.
Read also: Can you use curcuma for painting? My Turmeric Painting Experiment
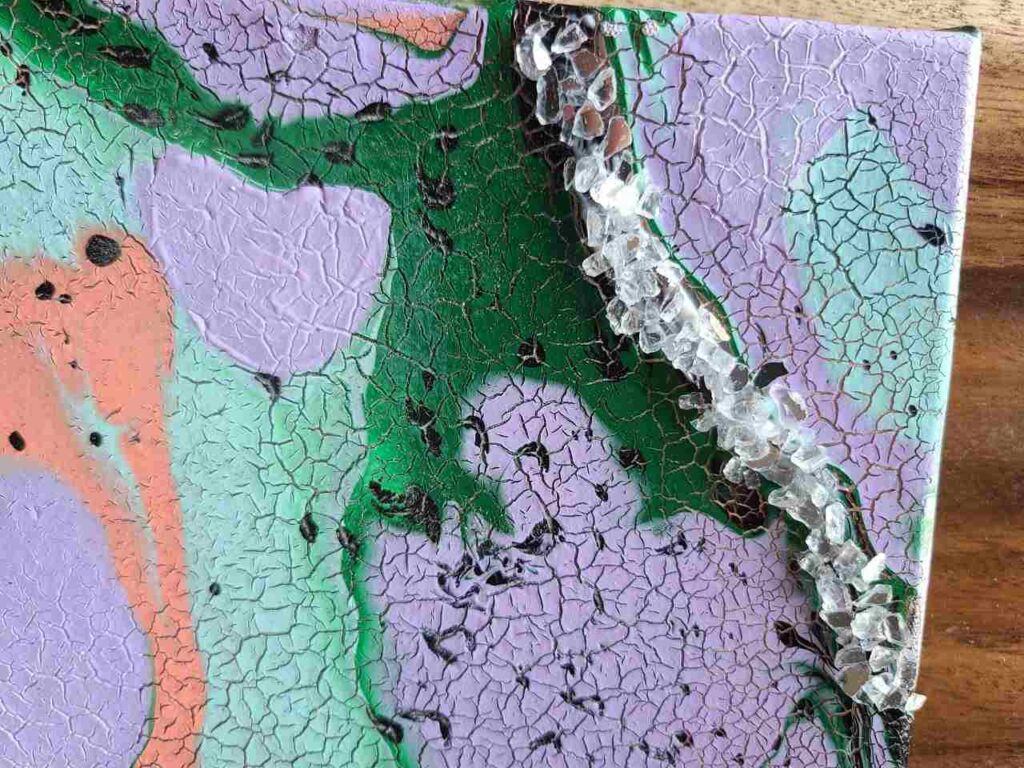
40 – Crackle
Normally if our acrylic painting cracks we panick.
Yet, in many cases, cracks are beautiful. And the technique,as well as the medium is called crackle.
Acrylic paint naturally cracks if the underlying layer is too thick.
But you can better use a crackle medium for guaranteed results.

41 – Pumice
There are fine to extra coarse pumice gel mediums for acrylic paint on the market.
It adds visible texture and volume and dries to hard coarse (or fine) film.
Simply mix ith paint and apply.
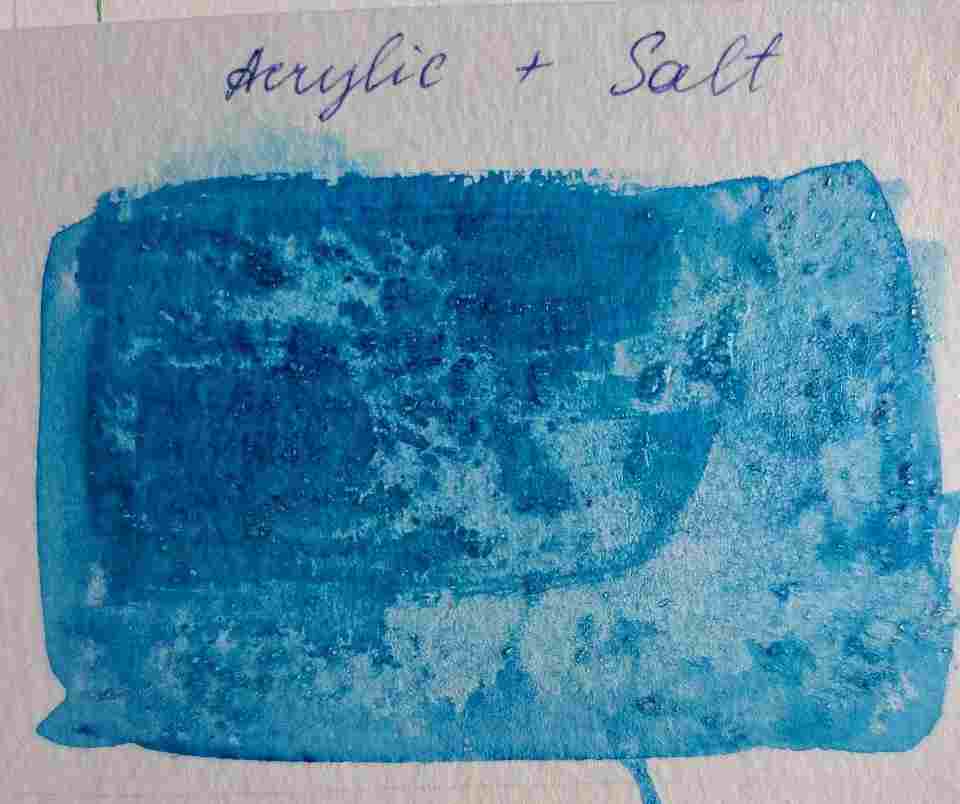
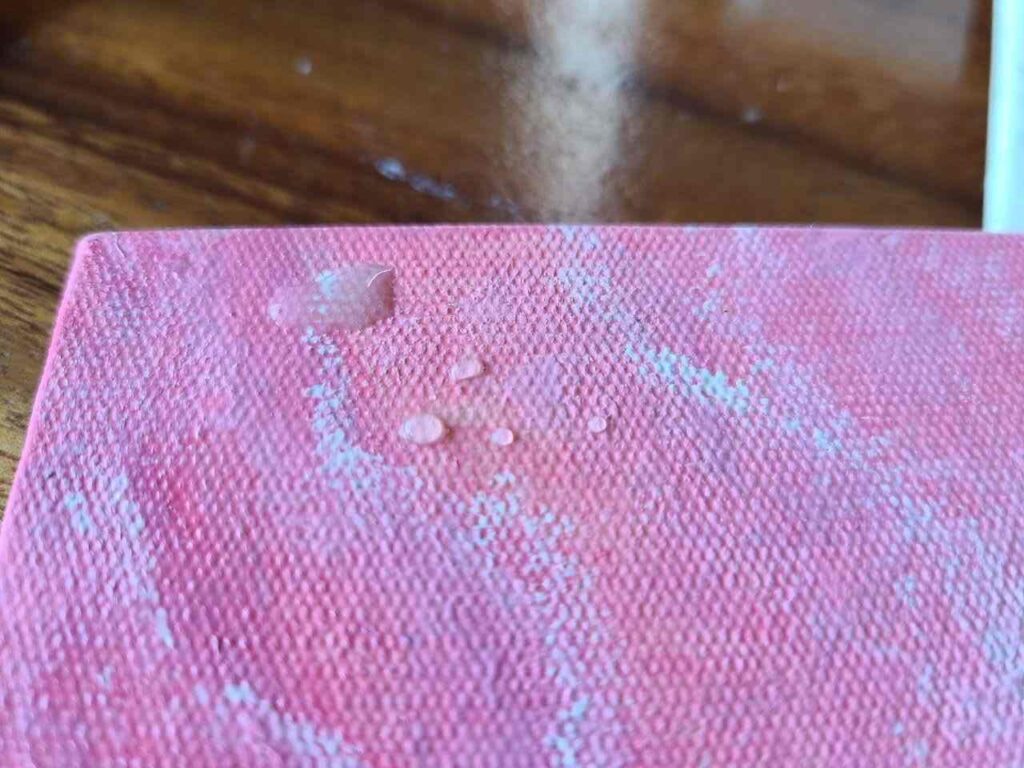
42 – Salt
Sprinkle salt on wet paint and you will see interesting patterns appear on the paint.
The paint must be wet as the water reaction with salt is necessary for the effects.
Better to use cheaper paint for this acrylic painting technique.

43 – Stamps with veggies/ Fruit
Stamping with vegetables is a DIY, craft, painting technique.
Great for fun activities with kids.
You can use apples, potatoes, carrots, something leafy, beets and even citruses for stamps with acrylic paint.
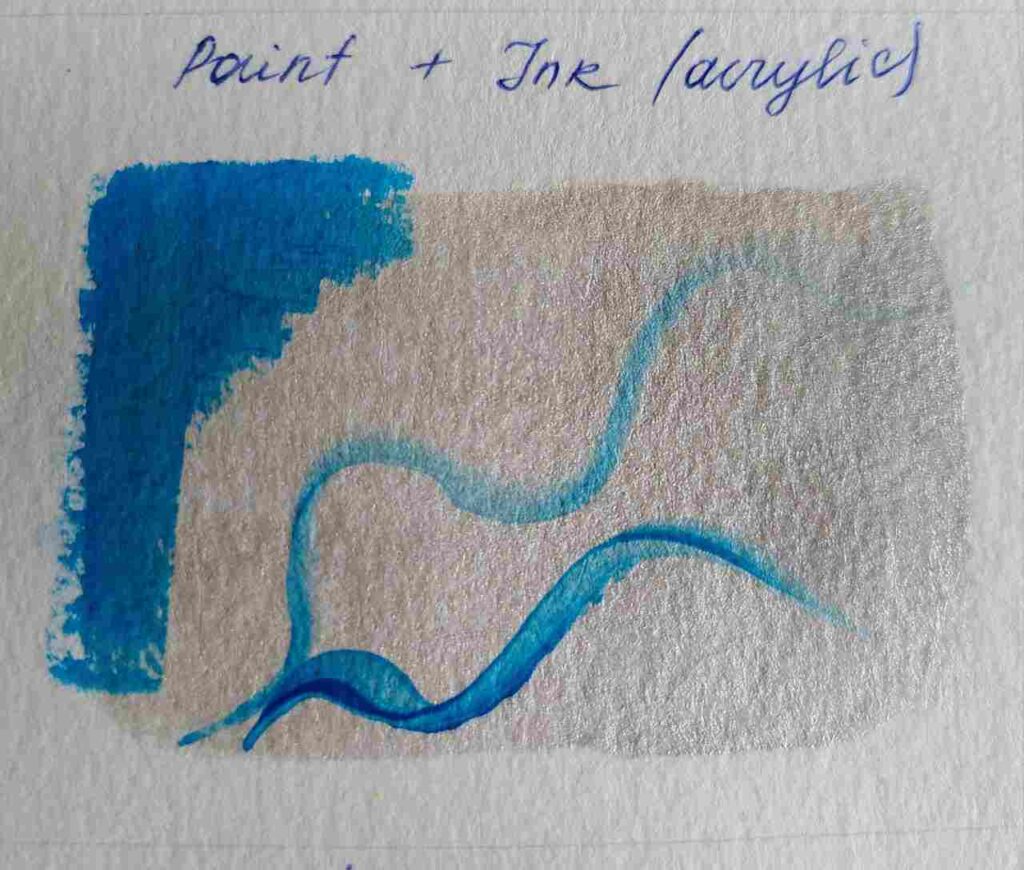
44 – Acrylic paint with inks
Acrylic inks are easy to dilute with water and they also have nice matte finish.
Regular acrylicpaint has semi-gloss finish so combining the two you can play with sheen.
Inks are also cool to make effects with water, drops and splatters.
45 – Acrylic paint with oil pastels
For acrylic painters, oil pastels are very useful small friends.
You can use them to create mixed media paintings, create lines over acrylic paint and play with different textures.
While acrylic is plastic and semi-gloss, oil pastels are velvety, smooth and buttery.
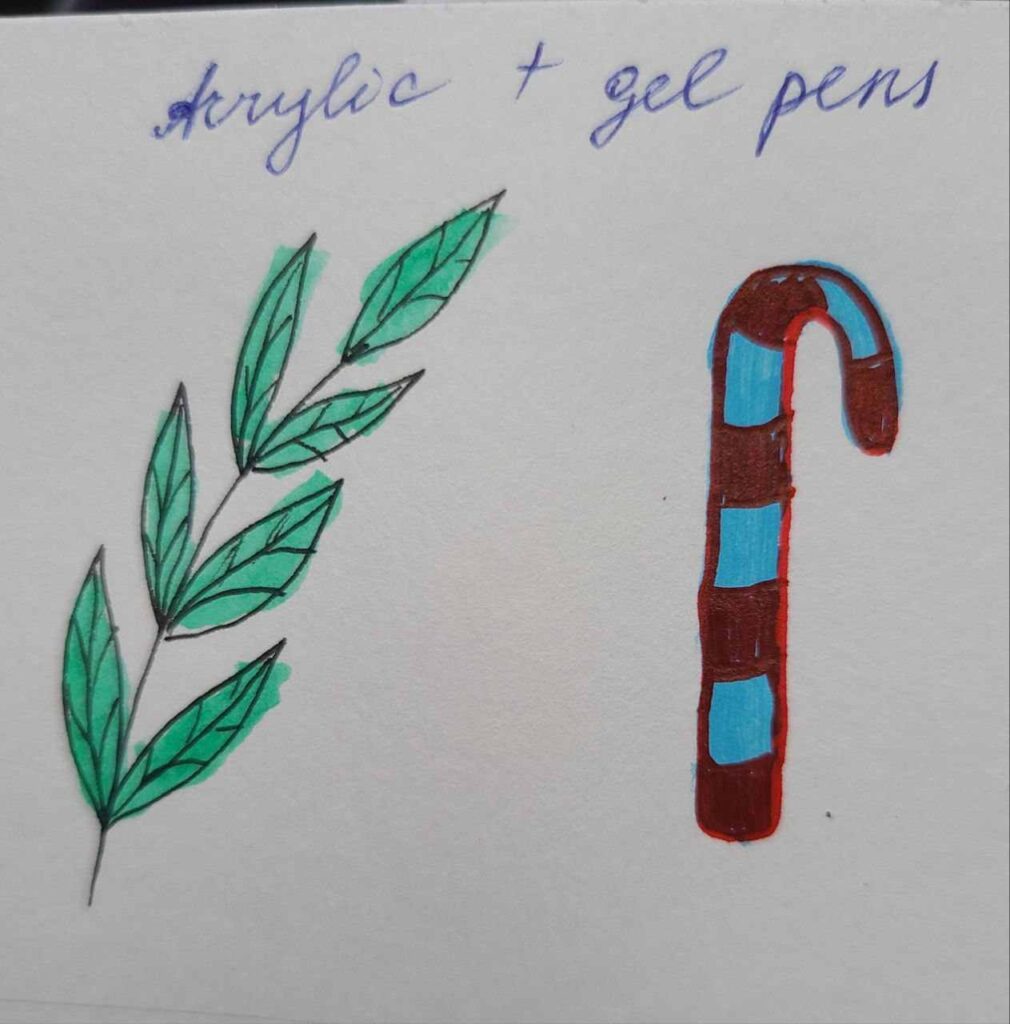
46 – Acrylic paint with gel pens
Gel pens add sharp visible and clear lines to acrylic painting.
You can make an outline with gel pens, then only use watered down acrylic.
Regular acrylic from the tube will be too opaque and cover the gel pen lines.
Or paint an area with acrylic first and then add lines and shapes with gel pens.
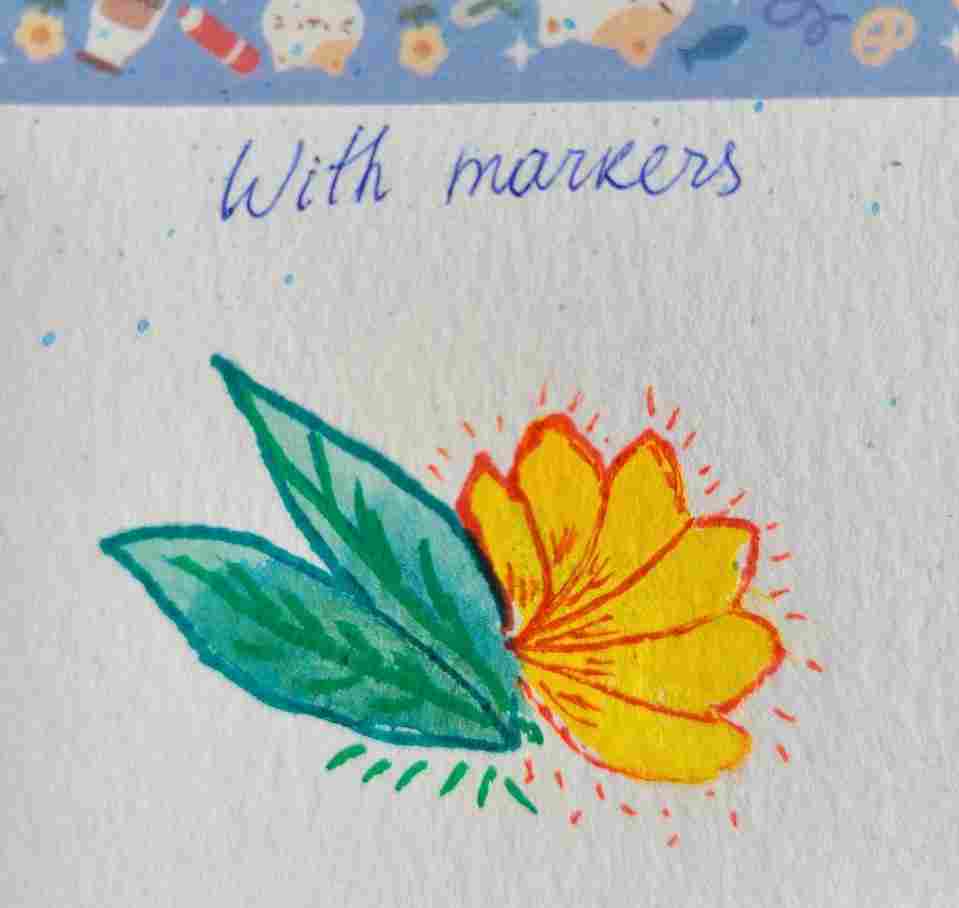
47 – Acrylic paint with markers
Markers can help you draw shapes over acrylic paint once it’s dry.
Posca, Sharpie, Artistro and Artiqo markers are some brands I tested with acrylic paints and they work.
The beauty of this technique is its simplicity – you don’t have to master acrylic paint perfectly to paint something.
You can always add details with a paint pen.
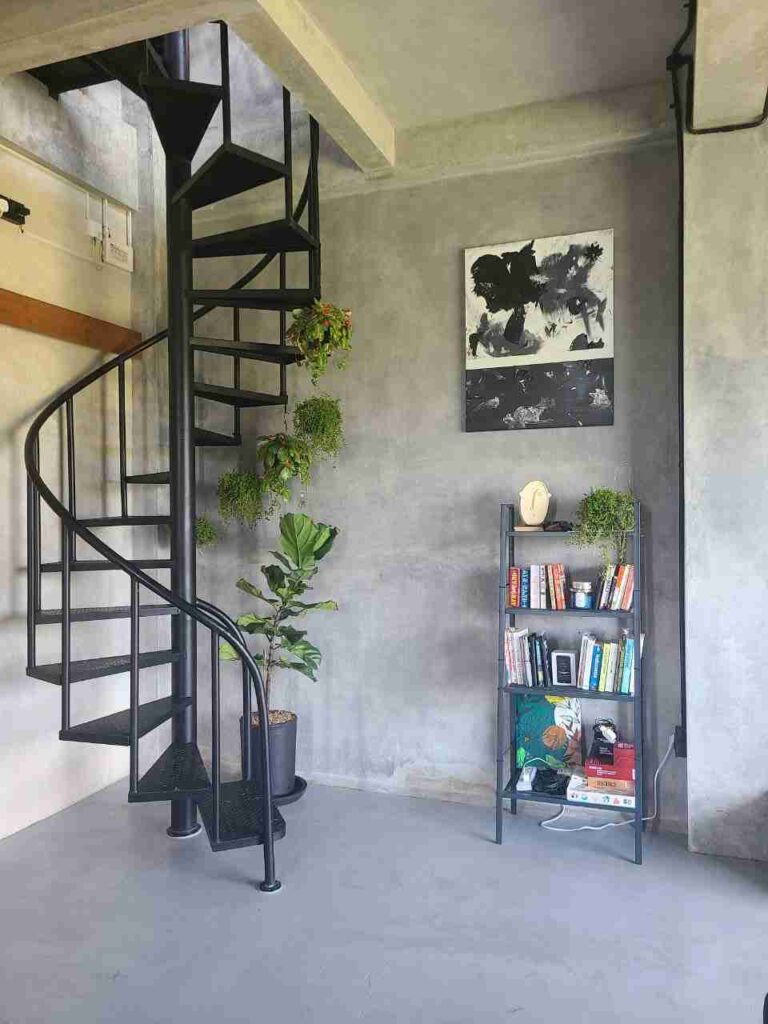
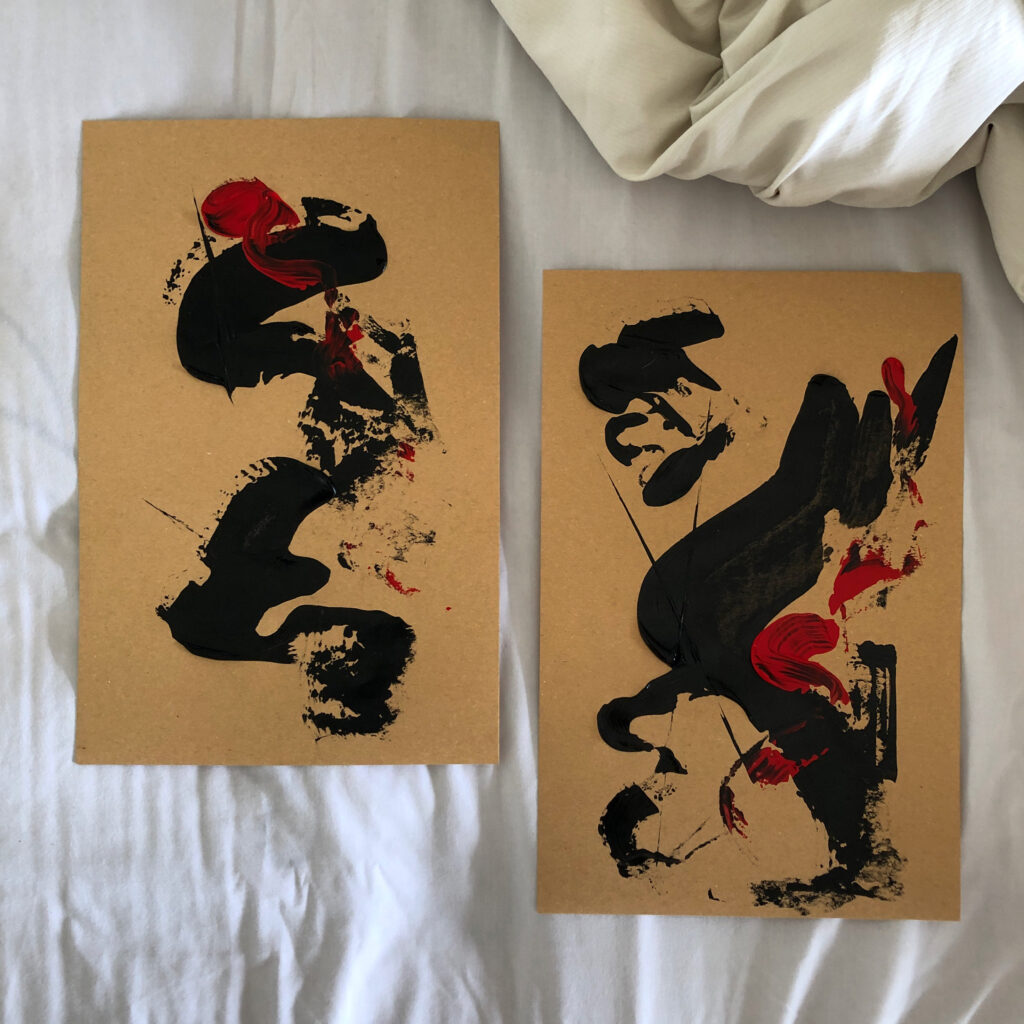
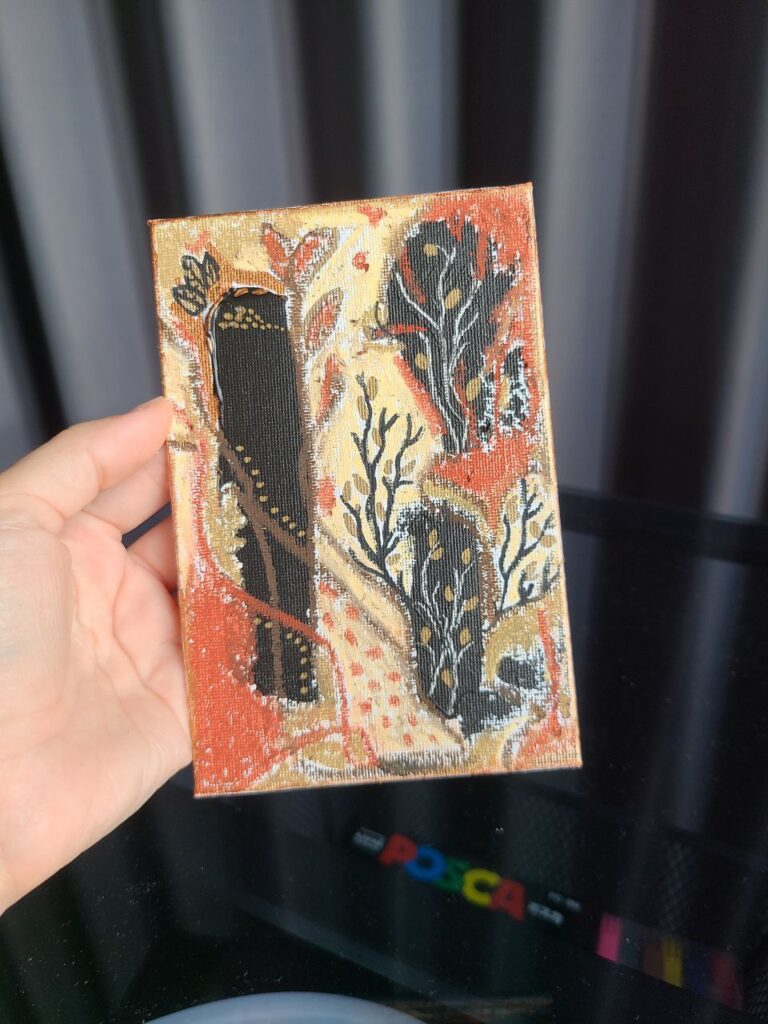
48 – Abstract acrylic painting
Abstract painting is the technique where you can have the most freedom.
It is my style and I see abstract art as a type of meditation, I follow the paint without trying to copy anything specific.
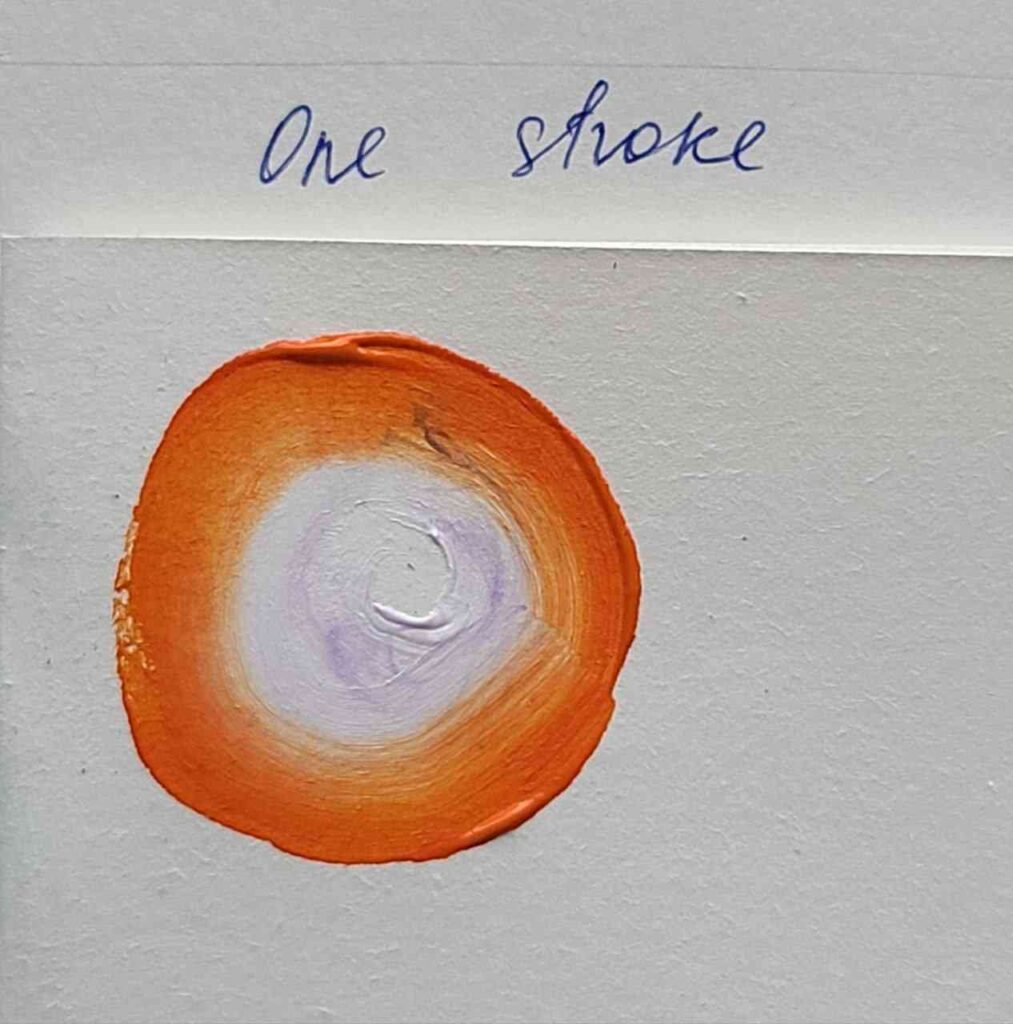
49 – One stroke
One stroke with acrylic paint is when you load your wet brush with a few colors and then trying to finish an element with one stroke.
If not the whole element, try to make one layer with one stroke.
One stroke painting technique is widely used for painting flowers.
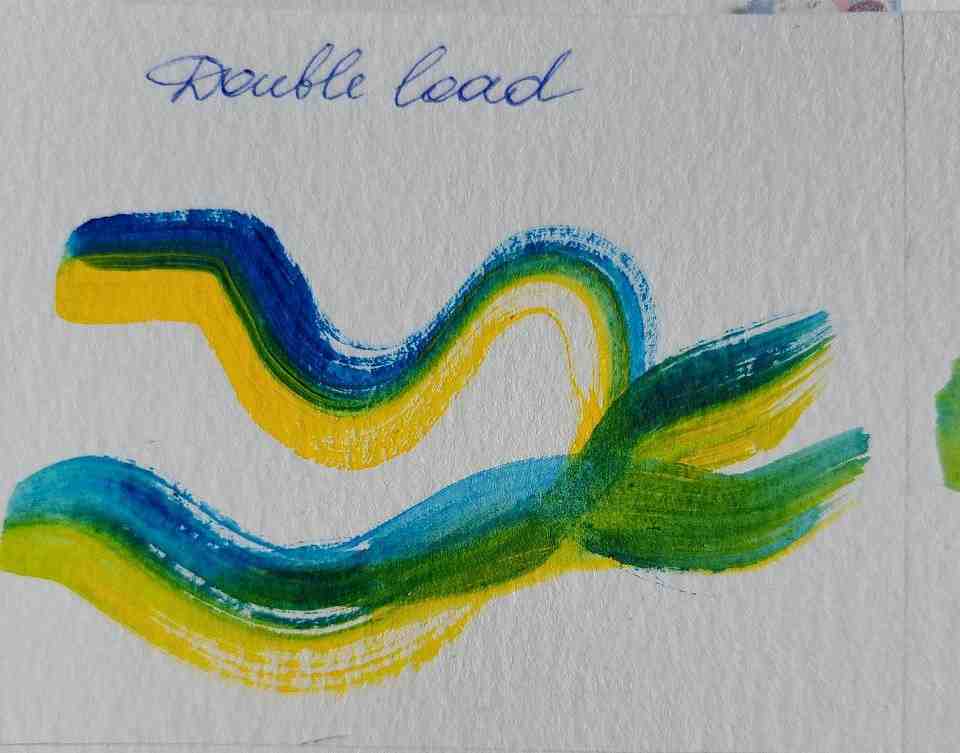
50 – Double loaded brush
Tocreate colorful brush strokes you can load on your brush 2 and more colors.
Here I loaded 2 colors, but you can easily pick 3.
And you can also use this technique with a long palette knife instead of a brush.
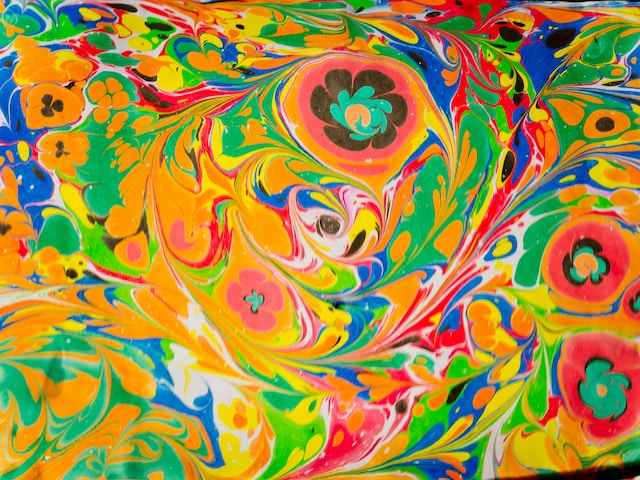
51 – Psychedelic Acrylic Painting
Psychedelic are all bright, highly contrasting, maybe even bright neon colors.
It is easy to make psychedelic acrylic painting with pouring techniques, but you can also draw lines, shapes, forms and colors them.
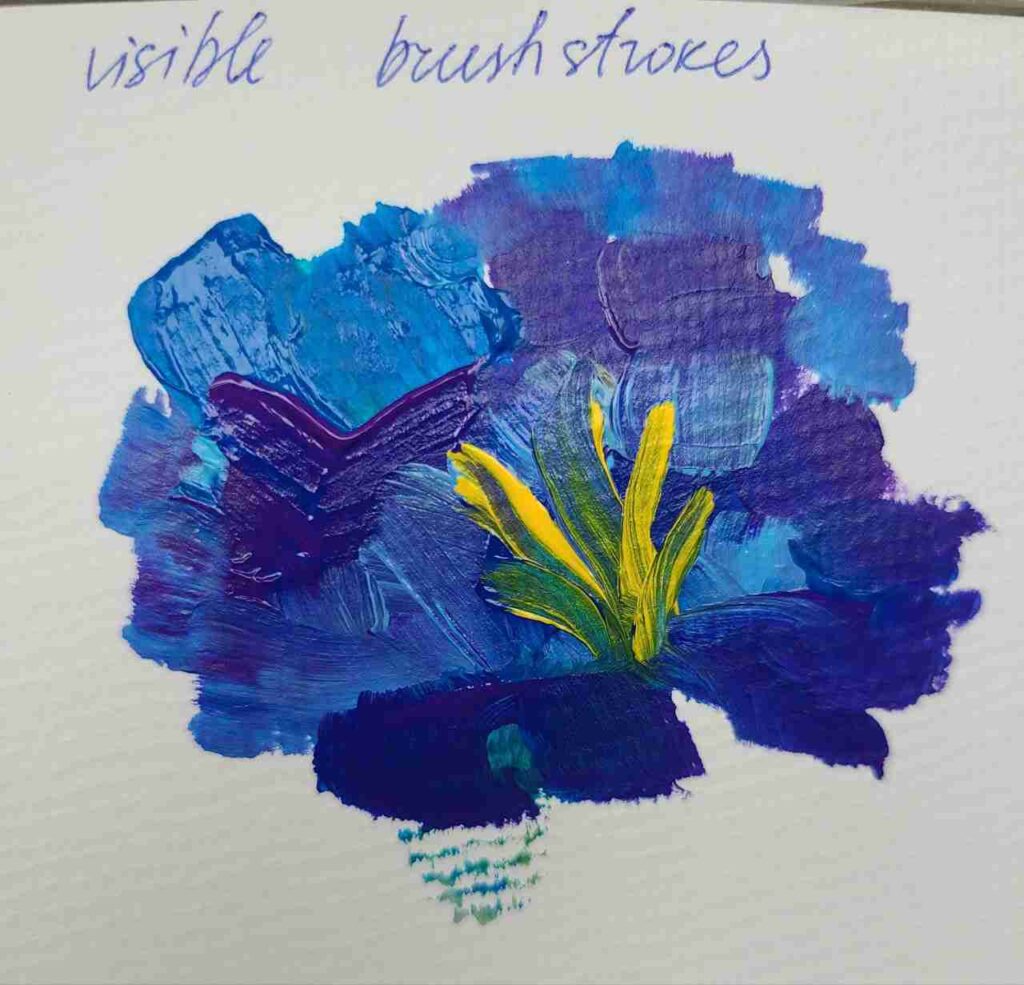
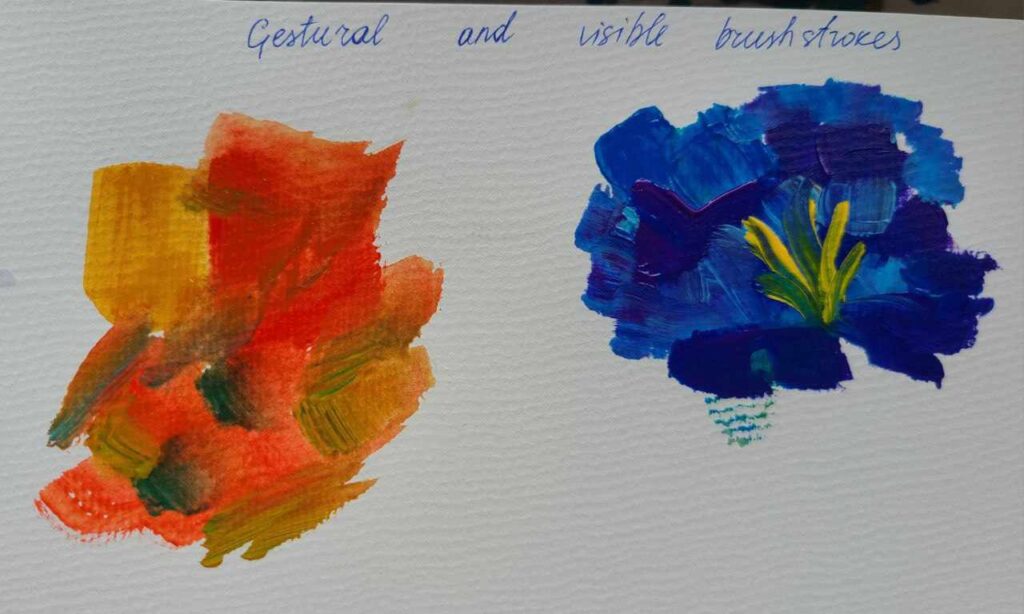
52 – Visible brush strokes
Usually we are trying to avoid brush strokes at any cost.
Yet, visible brush strokes is a very expressive acrylic painting technique and it work perfectly with heavy body (thick) acrylics.
Use a flat brush and apply thick layers of paint in one movement, trying to keep them at the same length.
Directions are also important with visible brush strokes – can be circular, a-la Van Gogh, can be flat horizontal/vertical or diagonal for dynamic.
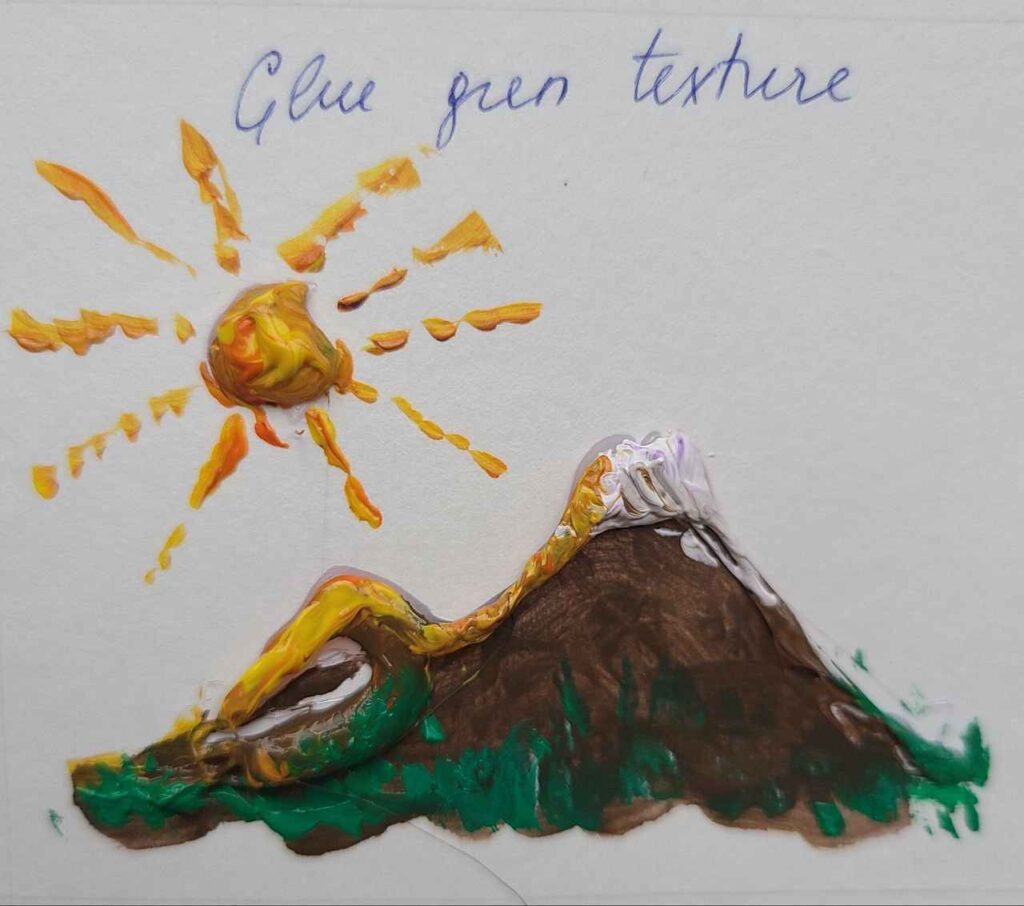
53 – Adding texture with a glue gun
With a glue gun we can not only glue things.
We can use it as a texture tool for making 3D outlines, for ex., for flower petals, butterflies, dragonflies, reptile skins, etc.
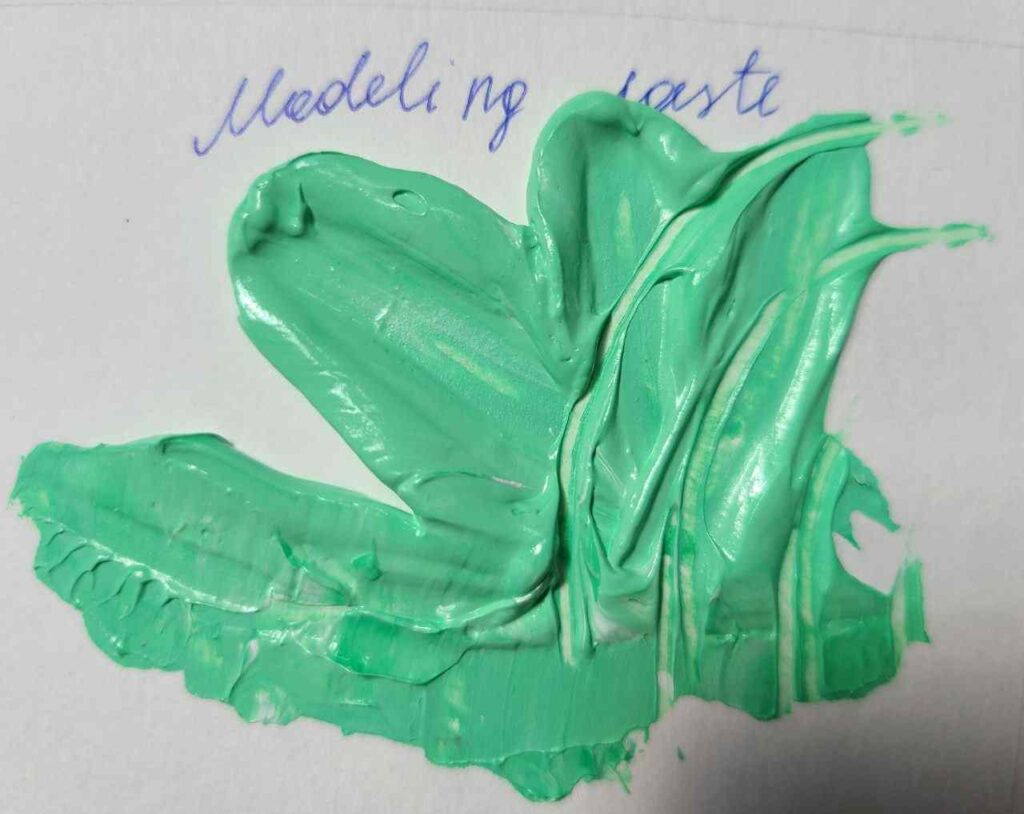
54 – Textured Acrylic Painting With Modeling Paste
Modelling paste is one of the easiest way to add lots of texture and volume to acrylic paint.
The idea is to mix it with paint for thick application. You will need a palette knife.
For some beginners pastes are expensive, you can use plaster or joint compound to make a DIY texture paste.
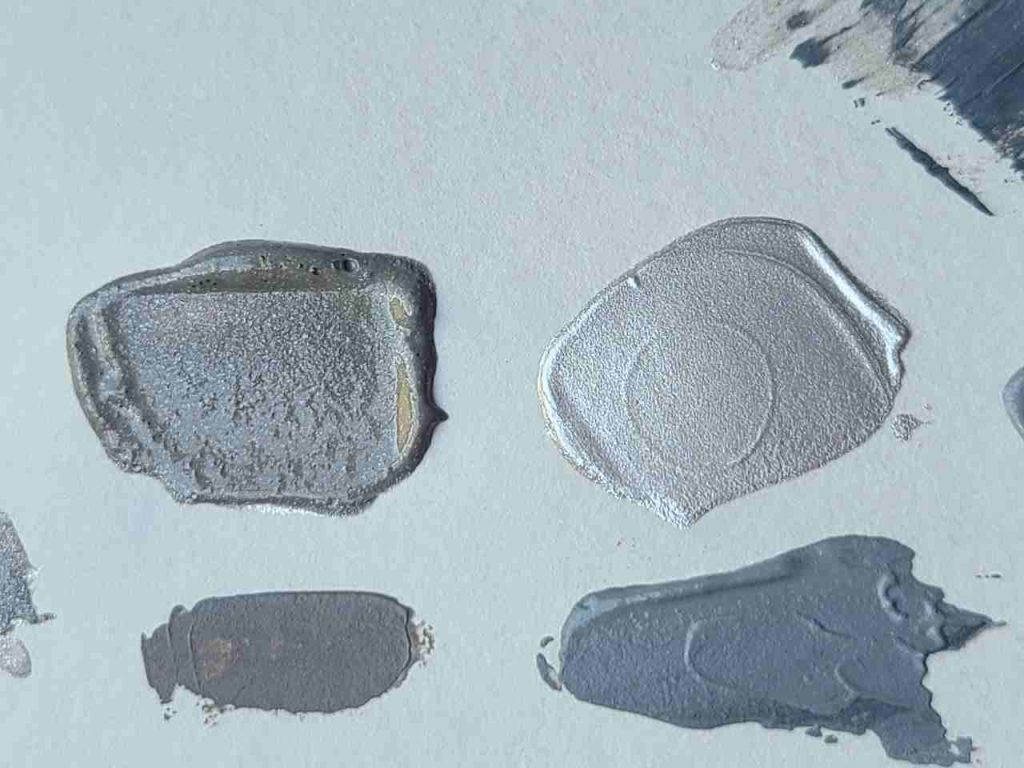
55 – Iridescent Colors
Even if you have regular acrylic paint, you can easily make it shimmer with:
- glitters
- metallic mica powders
- iridescent medium (Liquitex)
It adds stunning effects and the colors will play under sunlight.
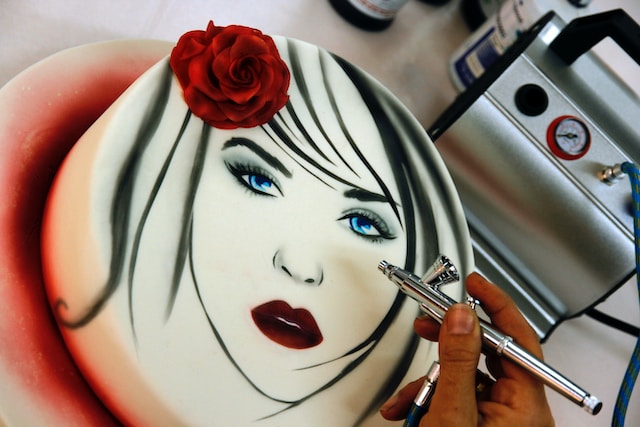
56 – Airbrushing
Airbrushing is an advanced painting technique.
Not only you need to know how to use the machine, you need to buy an airbrush and a compressor.
Yet, it is one of the best techniques to paint miniatures, models and to spray halos.

57 – Gel Printing With Acrylic Paint
Gel printing is a fun technique you can use with inks and acrylic paints.
As any form of printing we are basically transferring an image or patterns onto paper.
You need a gel printing plate and a roller to make some prints.
Youcan always add prints to your painting as an element of mixed media.
58 – Carving
Paint carving not wood carving! Yes, you hear me right.
There are 2 approaches:
- layer a lot (very much a lot) coats of paint and let them dry in between and afterwards.
- apply multiple layers of a DIY mix of gesso, baking soda and Mod Podge (or Elmer’s glue), let it dry, sand, carve it and paint it 🙂
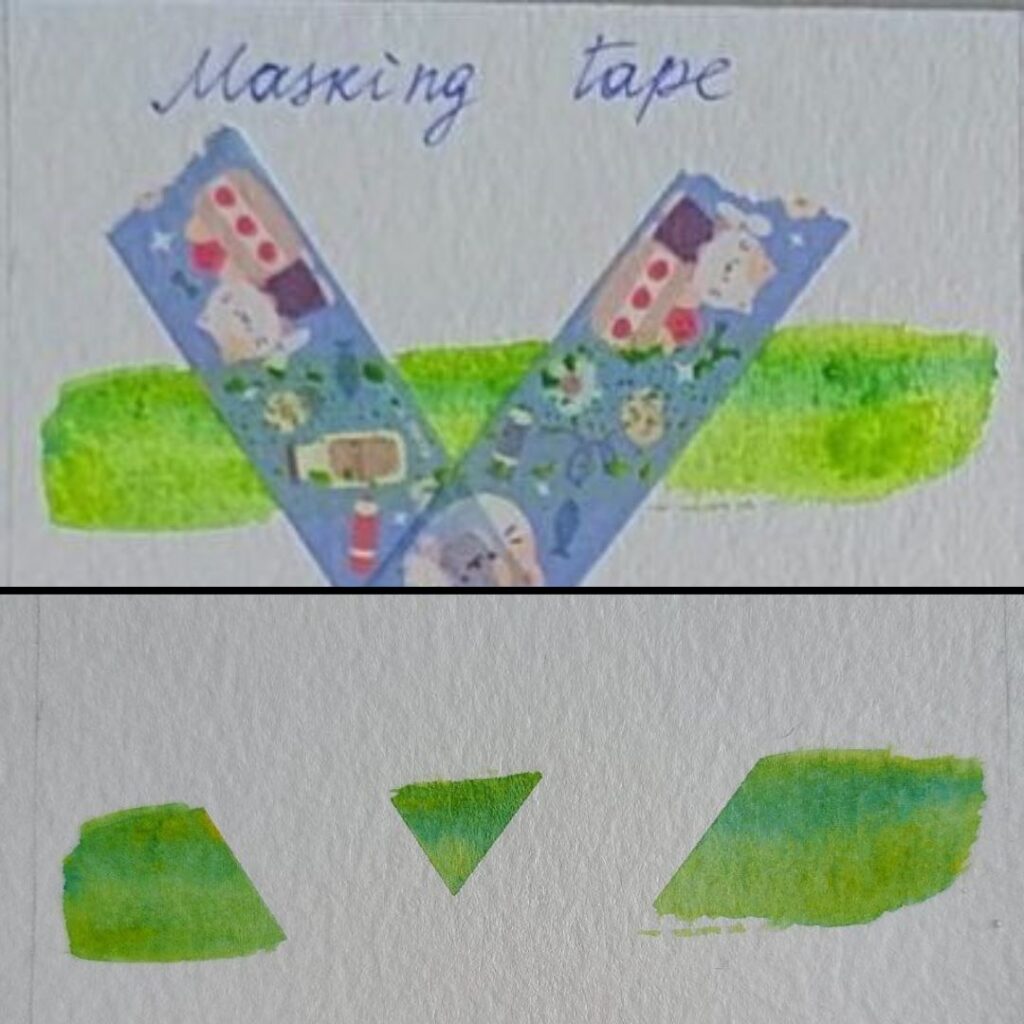
59 – Masking tape
Masking tape techniques is best to create geometrical paintings, for ex., a diamond.
Tape the areas you don’t want to be painted, paint over, let dry and remove the tape.
All the edges will be clean and hard.
60 – Contrasting colors
The best use for contrasting colors is to choose a contrasting color for the background.
It is easy to do with a color wheel: pick the colors opposite from each other.
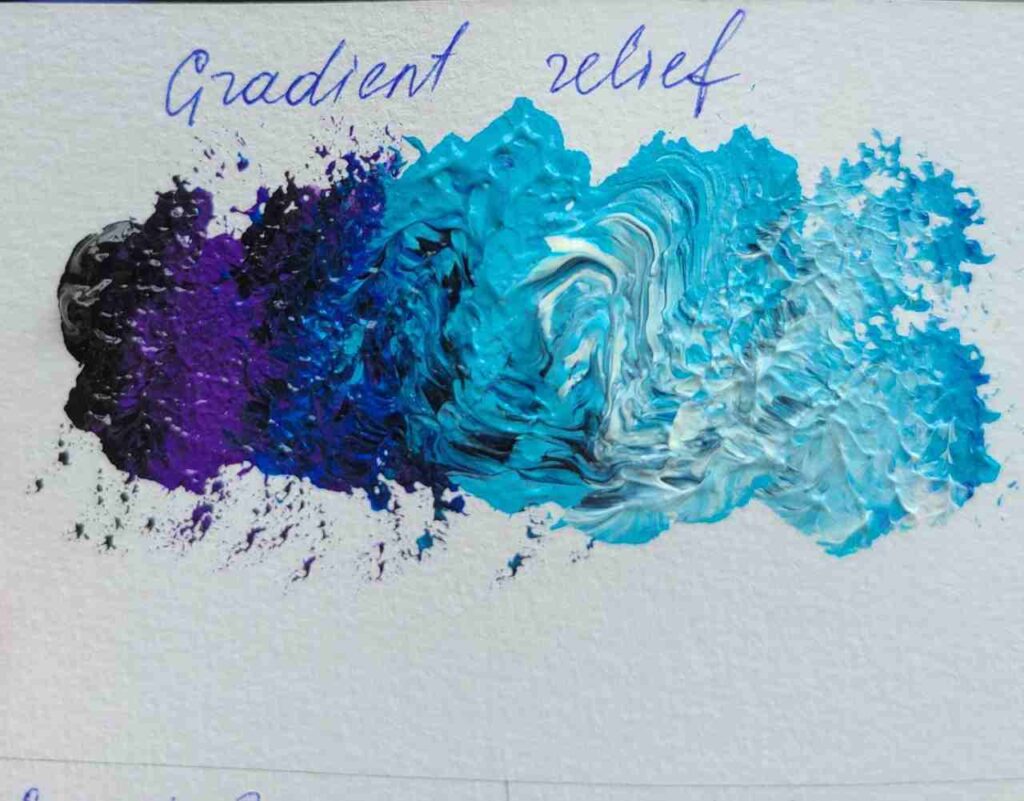
61 – Gradient Relief
The idea behind this technique is to create a loose gradient by partly blending the paint.
At the same time, we leave the texture (brushstrokes or sponge texture) without smoothing it out.
The dome made with rough sponge.
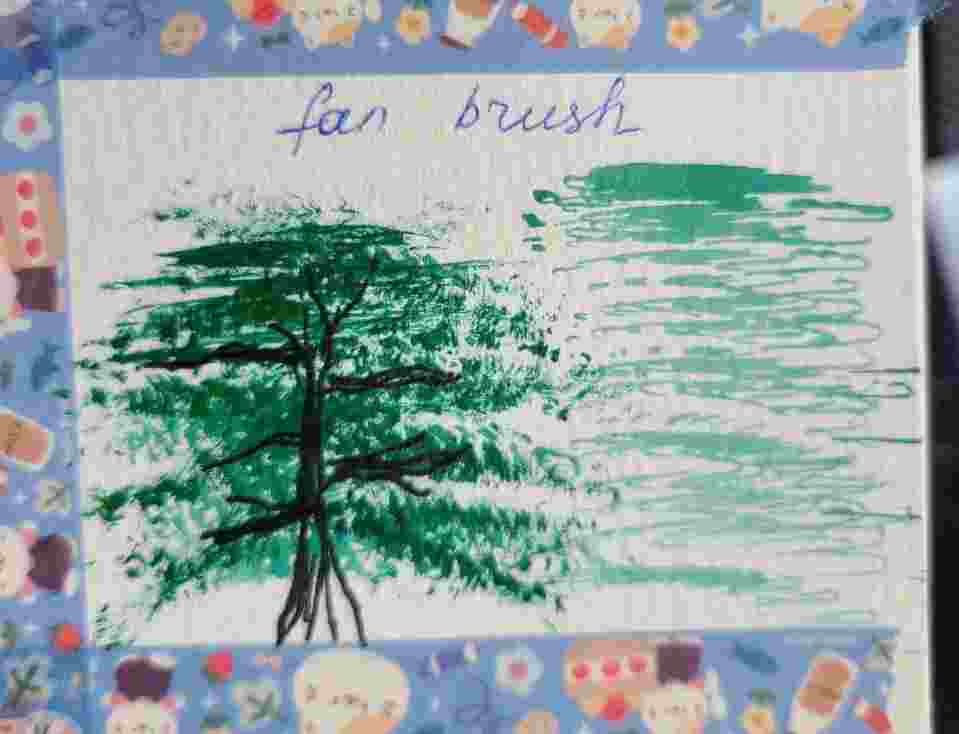
62 – Paint Trees With Fan Brush
Fan brush doesn’t really make it to my basic setup, but I happen to have 2 different sizes.
They are famous for how easy you can make a loose tree.
63 – Highlighting
Using a dry brush loaded with some white or black(or any other color) you can add light highlights.
Very useful for clouds, mountains, flowers that are not painted in details.

64 – Mixing Colors
Mixing colors is not only a must-have technique but it is also a skill every Pro painter has.
We use this technique in every painting, as we need to mix our own colors, shades and tones.
Try first to make a mixing chart for your palette.
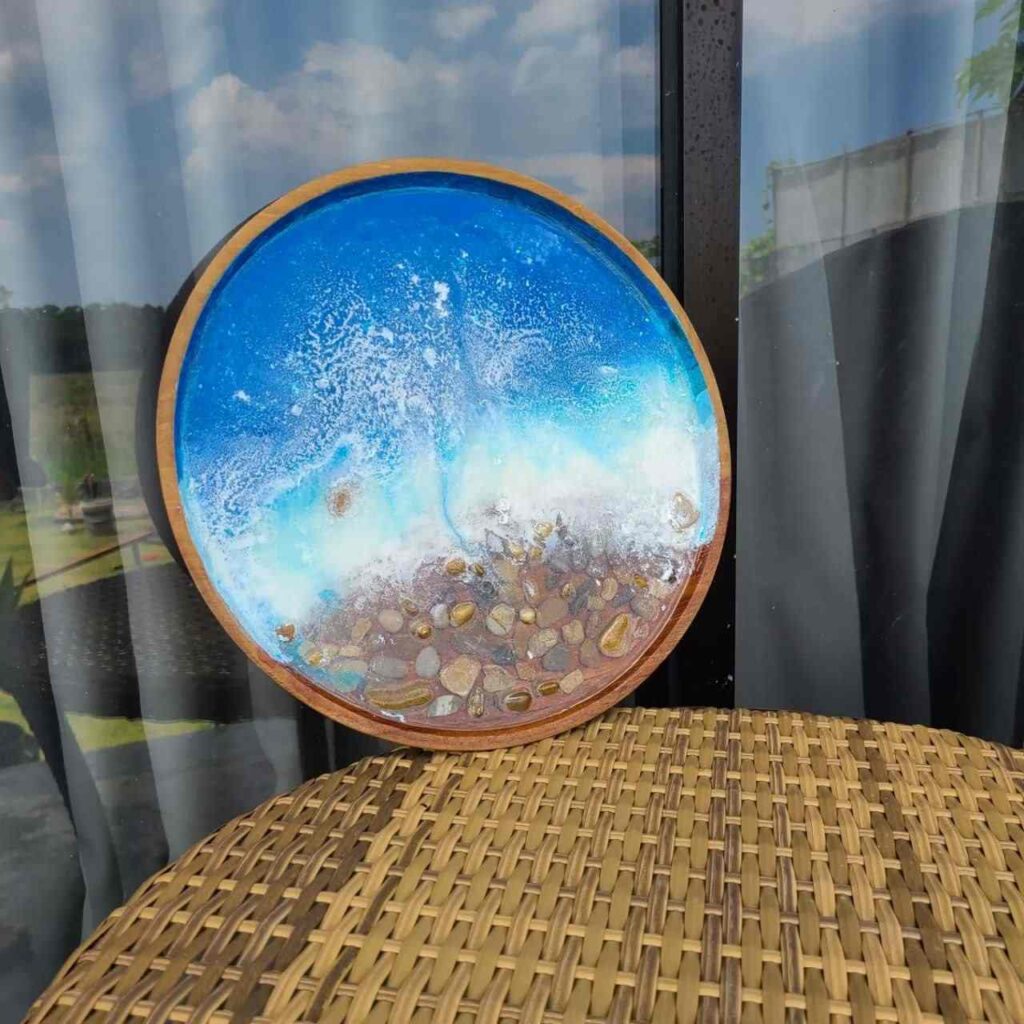
65 – Mixing Colors With Epoxy
This pretty ocean art is made with epoxy and acrylic paint.
The key is to properly mix all colors with epoxy in separate cups and to act quickly.
Acrylic and epoxy resin mix very well and the finish will be glossy, smooth and resin enhances the colors.
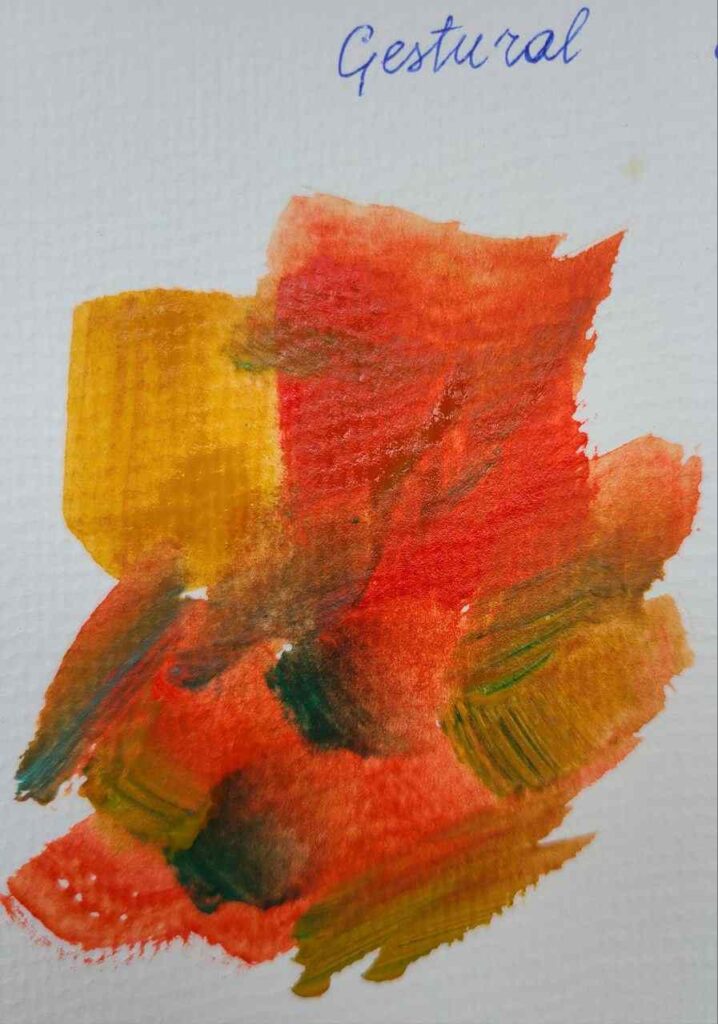
66 – Gestural Brushstrokes
Gesturalism or gestural brush strokes is mostly used with oil paint, but can be done with acrylic.
Most often seen in portraits.
Simply means that you can see the strokes and “feel” the gesture behind it.
Technical side of it is that using brushes with long handles allows us more gesture.
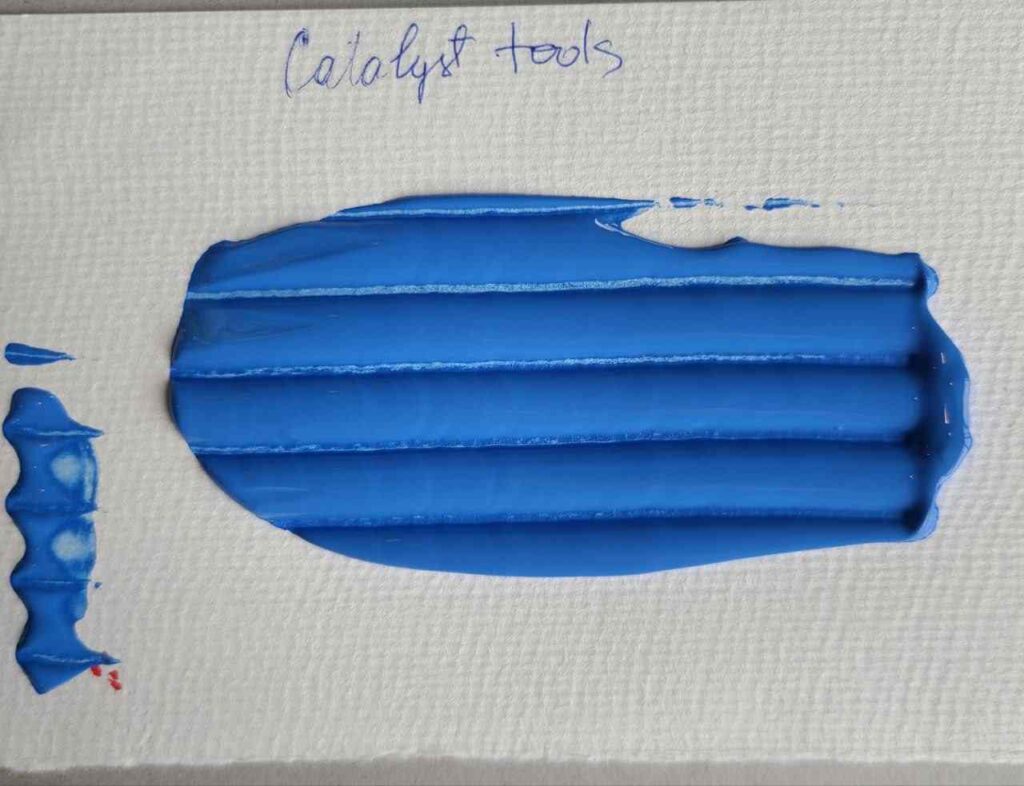
67 – Using catalyst contour tools
Catalyst contour tools are super fun to use to add texture and effects to thick applied paint or paste.
They have so many! But you can always use a regular hair comb as an alternative.
Make waves, lines, sharp edges, zigzags!
68 – White Misty Fog Acrylic Technique
Do you want to create a foggy morning in a forest kinda landscape?
Sarah (Brellian) came up with an amazing and easy techniques for doing so.
She uses a misting bottle filled with watered down white paint and mist with it every layer of forest she paints. She teaches it as well.
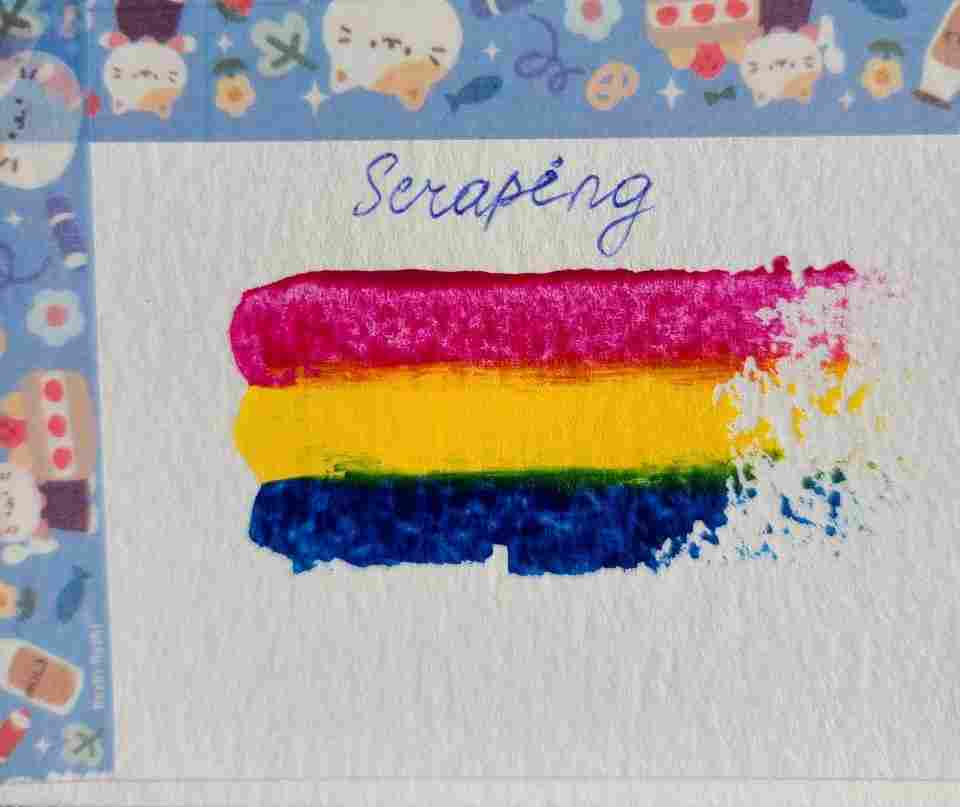
69 – Scraping Paint
Place a few dollops of paint in line.
Take a flat, smooth something that you can scrape with. You can also buy one for under $10.
With light pressure and firm hand drag the tool.
You will get beautiful coverage, some mixing colors in between and a smooth finish.
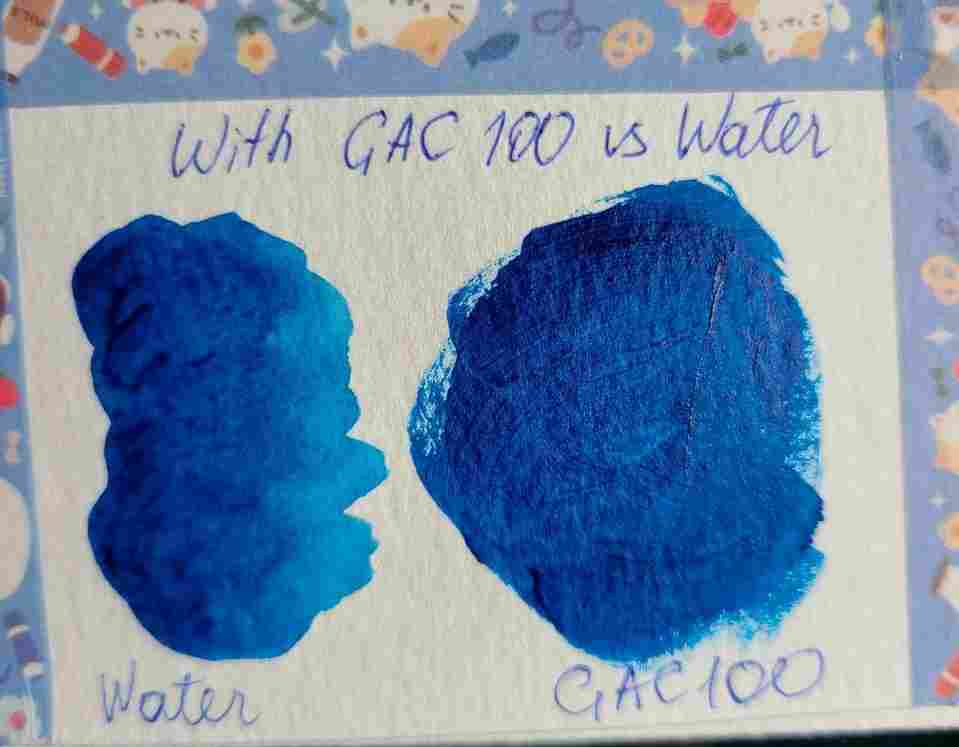
70 – Using GAC 100 Instead Of Water
This technique is also something professional acrylic artist do.
Water thins the paint and improves the flow, but also makes paint more transparent.
And we don’t always need it.
GAC 100 will not only keep the color intensity and opacity, but will also slower drying process without breaking paint and binder bond like water.
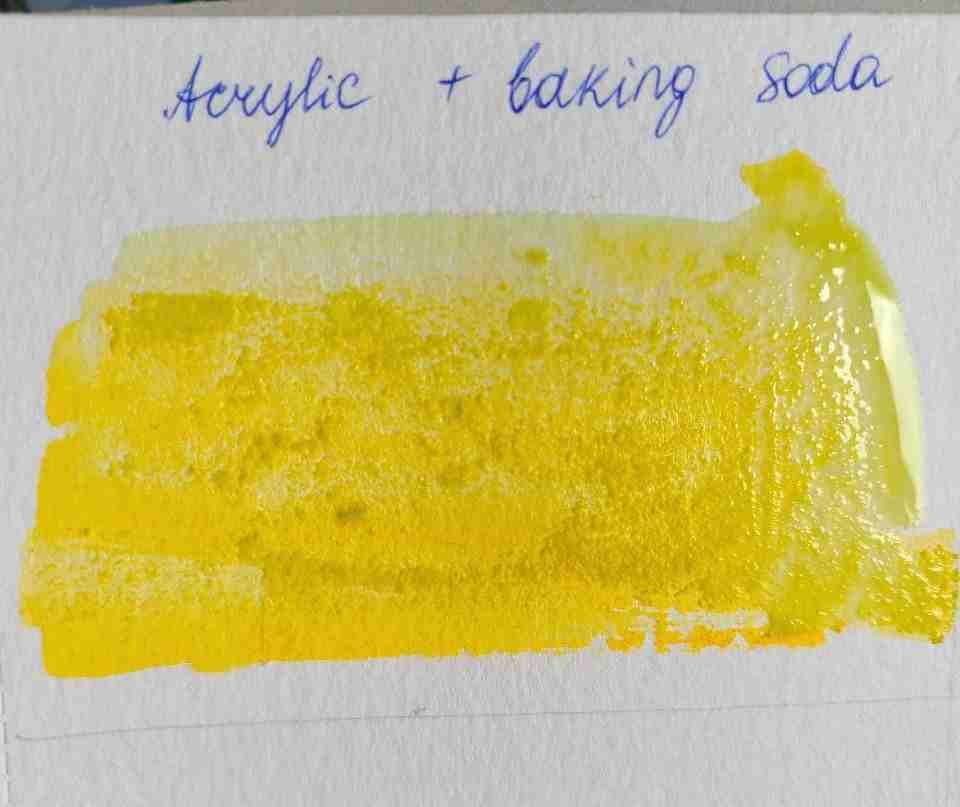
71 – Acrylic paint with Baking Soda
Mixing baking soda with acrylic paint is a craft painting technique.
Yet it add fine texture to the paint.
Apply wet paint and sprinkle or spread some baking soda on top.
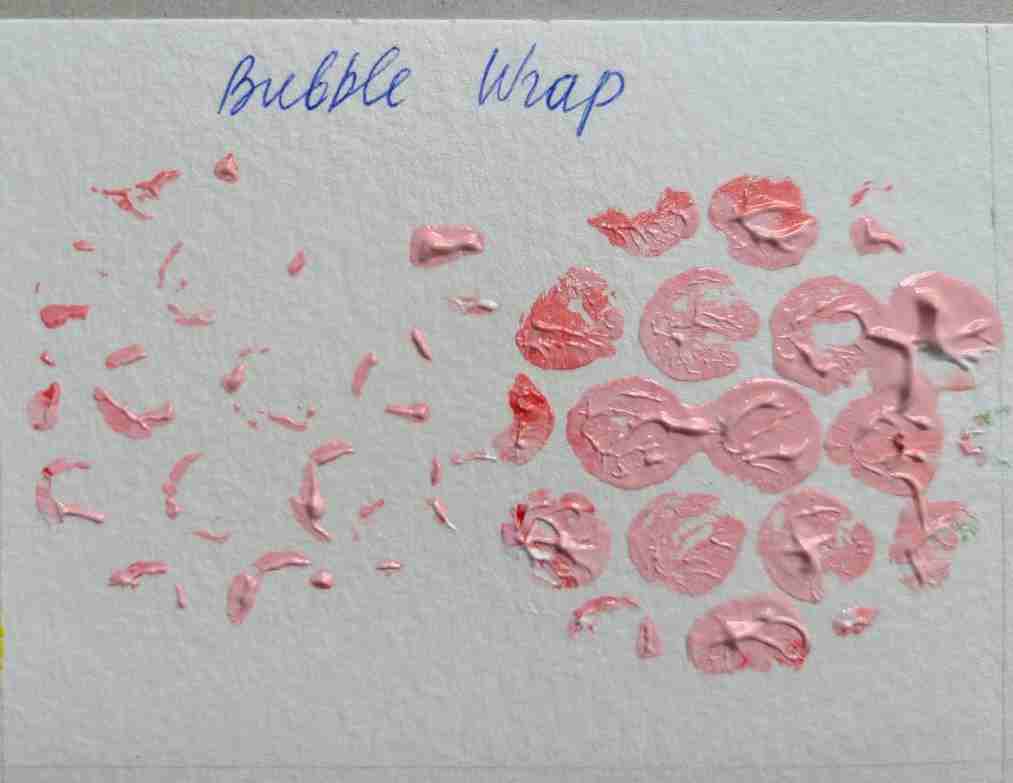
72 – Texture with bubble wrap
Texture and flowers are easy to make for crafts with regular bubble wrap.
Mix some paint on the palette, dip the bubble wrap.
You can stamp it lightly if you are adding some highlights, or press hard to stamp.
You can see my stamp is round, you can paint over bubble wrap any shape you want and make stamps.
Fun for crafting with kids.
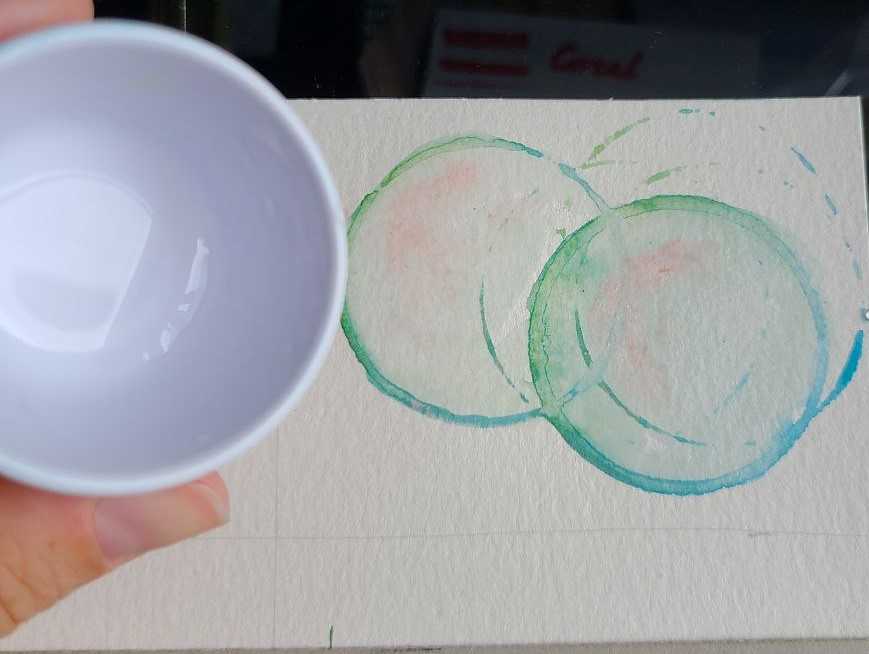
73 – Painting transparent bubbles
An easy acrylic painting technique to make transparent bubbles is to use something of round shape.
Mix some wet colors on the palette. Add water so the colors are transparent.
Wet the cup, dip in the colors and then stamp it on paper.
Take a wet round brush and go along the circle so some colors flow inside the circle.
Need inspiration? Check some of my painting ideas collection:
- 55+ Easy Winter Canvas Painting Ideas For Beginners
- 60 Cool and Easy Black and White Painting Ideas
- 55+ Easy & Cute Spring Painting Ideas on Canvas for Beginners
- 29 Gouache Painting Ideas & 16 Famous Gouache Paintings You Will Love
To Recap: All acrylic painting techniques
- dry brushing
- watercolor imitation or washing
- stippling
- hatching
- flicking
- dabbing
- detailing
- wet-on-wet blending
- wet on dry
- painting with a palette knife
- glazing
- sgraffito
- expressive brushstrokes
- underpainting
- layering
- paint in blocks
- partially mixed colors
- family of colors
- flat color technique
- impasto
- stenciling
- painting with fingers
- misting
- acrylic pouring
- scumbling
- hydro dipping
- Toothbrush splatters
- Wet sponge
- Sponge blending
- Rough sponge
- Q tips
- Gradient relief
- Scumbling
- Soft Edges
- Hard Edges
- Water drops
- Smudging
- Acrylic with Pastel
- Acrylic With Markers
- Acrylic with Gel pens
- Drip marks
- With sand
- With coffee
- Abstract
- Crackle
- Pumice
- With inks
- Double load brush
- Highlighting
- Color mixing
- Stamping (veggies)
- Dripping Isopropyl Alcohol
- Salt
- Contrasting colors
- One stroke
- Psychedelic Painting
- Masking tape
- Glue gun texture
- Visible strokes
- Airbrush
- Modelling paste
- Mixing on canvas
- Gestural brushstrokes
- Paint Carving
- White mist fog
- Gel printing
- Iridescent effect
- Bubble Wrap
- Painting Transparent Objects
- GAC100
- Acrylic With Baking Soda
- Catalyst contour tools
- Scraping paint
Acrylic Painting Techniques FAQ
What is the most common acrylic painting technique?
Using a dry brush or wet brush are the most common acrylic painting techniques. They simply imply they you either don’t use any water or dip your brush in a jar with clean water before you paint. You should also learn to mix colors and blend as it is the most needed skill in acrylic painting!
At the same time, one of the most beautiful and now popular acrylic painting techniques is for sure acrylic pouring when we thin paint with Floetrol or other pouring mediums and literally pour it on the canvas to make a brilliant abstract painting.
Do you wet the brush before using acrylic paint?
You can use a completely dry brush or wet your brushes before using acrylic paint. Thinned paint will flow better and create thinner layers that will dry faster than thick layers of paint. You can fill a jar with water or use a stay-wet palette to keep your paint wet. If you don’t wet acrylics they are fast-drying by nature and will dry to touch in 5-20 minutes!
What order do you paint acrylic?
It is recommended for beginners to paint acrylic from dark to light and from the background moving forward, adding details and highlights last. If you are painting a landscape I also suggest doing an approximate sketch before painting the canvas.
No matter what acrylic painting technique you’re choosing, make sure you have the right supplies and properly prepare your canvas.
Most acrylic techniques are easy to learn for beginners and can help you create diverse paintings and explore art and acrylic possibilities better. My particular love lies with impasto and palette knives.

Masha Eretnova, born in 1991, is a Chiang Mai-based certified teacher, artist, and blogger with 20+ years of personal painting journey.
She started painting and drawing very early and is now an international abstract artist and educator passionate about acrylic painting, gouache, and crafts.
Her works are part of international exhibitions and contests, including ArtlyMix (Brazil), Al-Tiba 9 (Spain), Exhibizone (Canada), Italy, and many more.
Besides her artistic pursuits, Masha holds a post-grad diploma in Teaching Film Photography and 2 music school diplomas: piano and opera singing.
Last update on 2026-07-21 / Affiliate links / Images from Amazon Product Advertising API