Last Updated on March 13, 2024 by Masha Eretnova
Excited to start acrylic painting but not sure what will be the right first step?
Acrylics are amazing for beginners in art. They are easier to use, dry faster, last longer and are cheaper than oils or watercolor.
Here are some acrylic painting tips I’ve learned by reading, attending classes and painting for last 4 years.
Table of Contents
acrylic paints
Buy good paint, don’t go for cheap
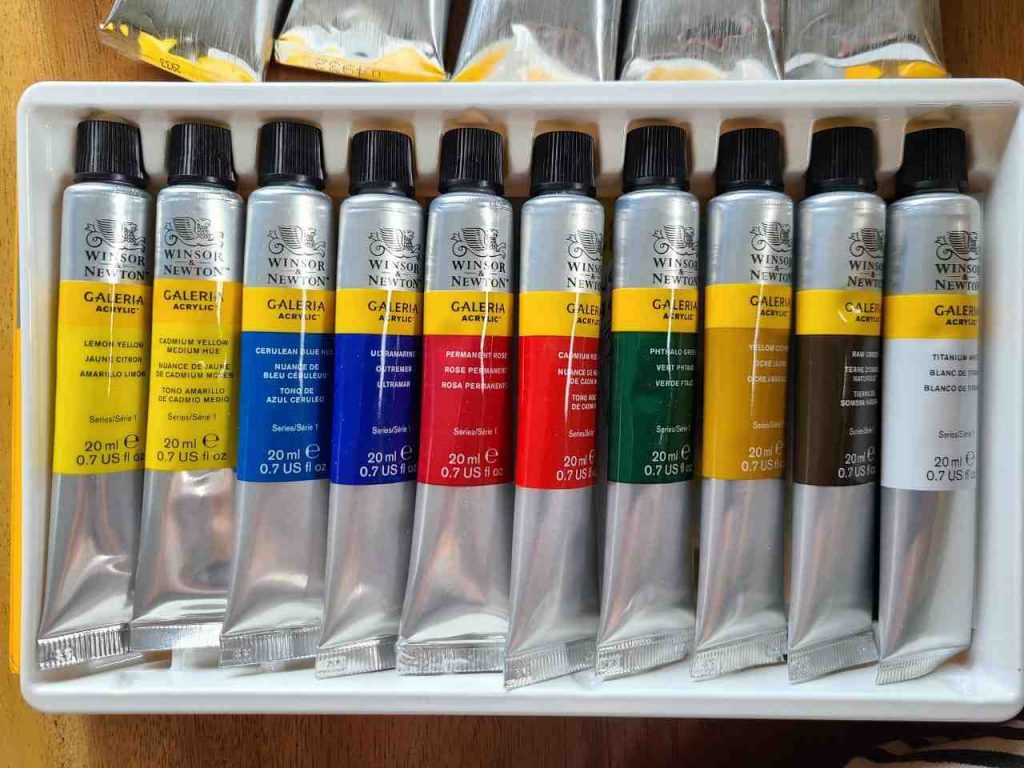
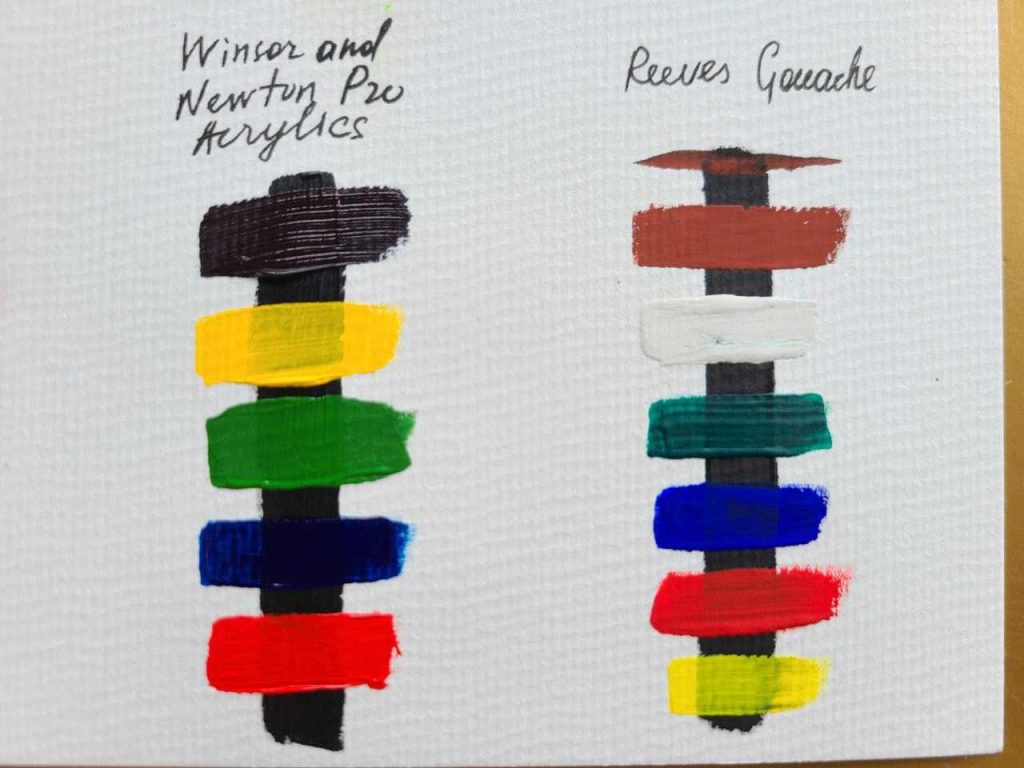
There are 2 grades of acrylic paint: student quality and artist quality.
They differ by quality and composition. Artist grade is better, contains more pigments, and can be more expensive, but it is the real paint artist will use for painting that will last centuries. Try to find the best price-quality option.
Another options is craft paints – nothing wrong with it, they are extremely affordable and always come in a big paint set which comes in handy to a beginner. They have less pigment and are not professional at all.
- It is better to use tubes rather than jars of paint because acrylic paint stays cleaner in a tube.
- To make the most out of your tube always squeeze from the bottom of the tube.
Related post: 21 Best Acrylic Paint Brands for Beginners and Professional Artists
Don’t buy all paint colors
To start you only need yellow, red and blue, white and black and an earthy tone like burnt umber or yellow ochre

Good paint brands are Amsterdam, Golden, Liquitex, Winsor&Newton, Pebeo, Utrecht, etc.
Read also: Best Eco-friendly Alternative to Acrylic Paint: 17 Options
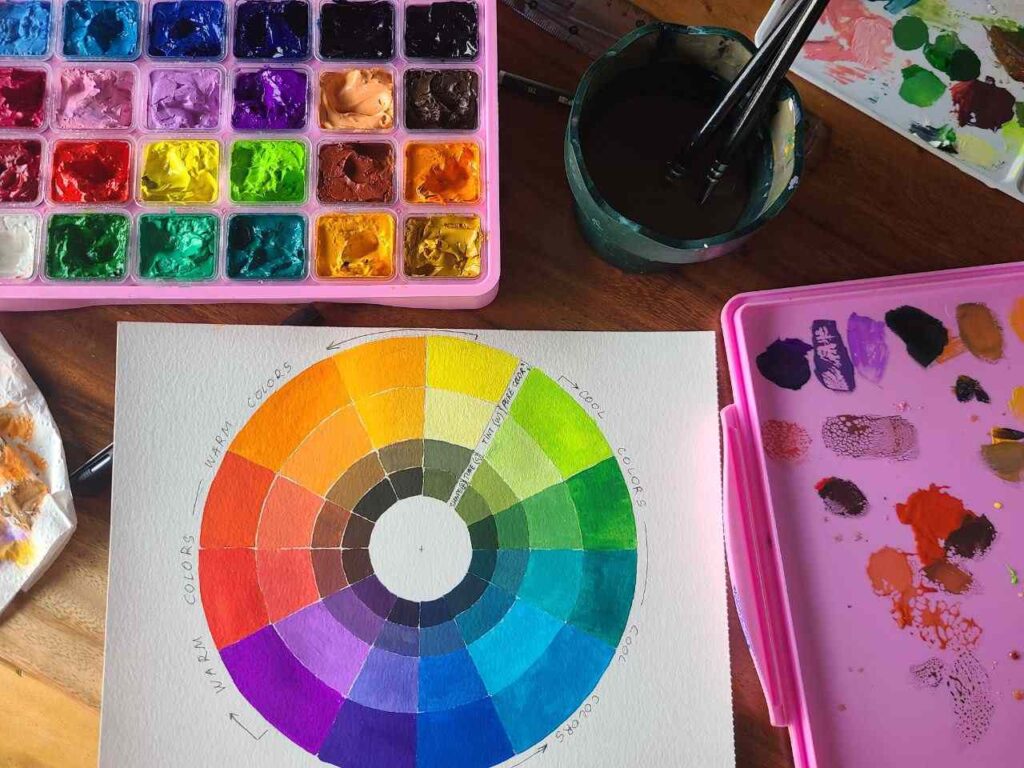
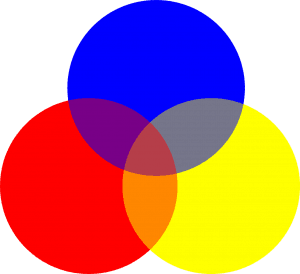
Buy a color wheel
A color wheel is basically a circle with colored sections representing the relationships between colors. Main colors and the color spectrum change.
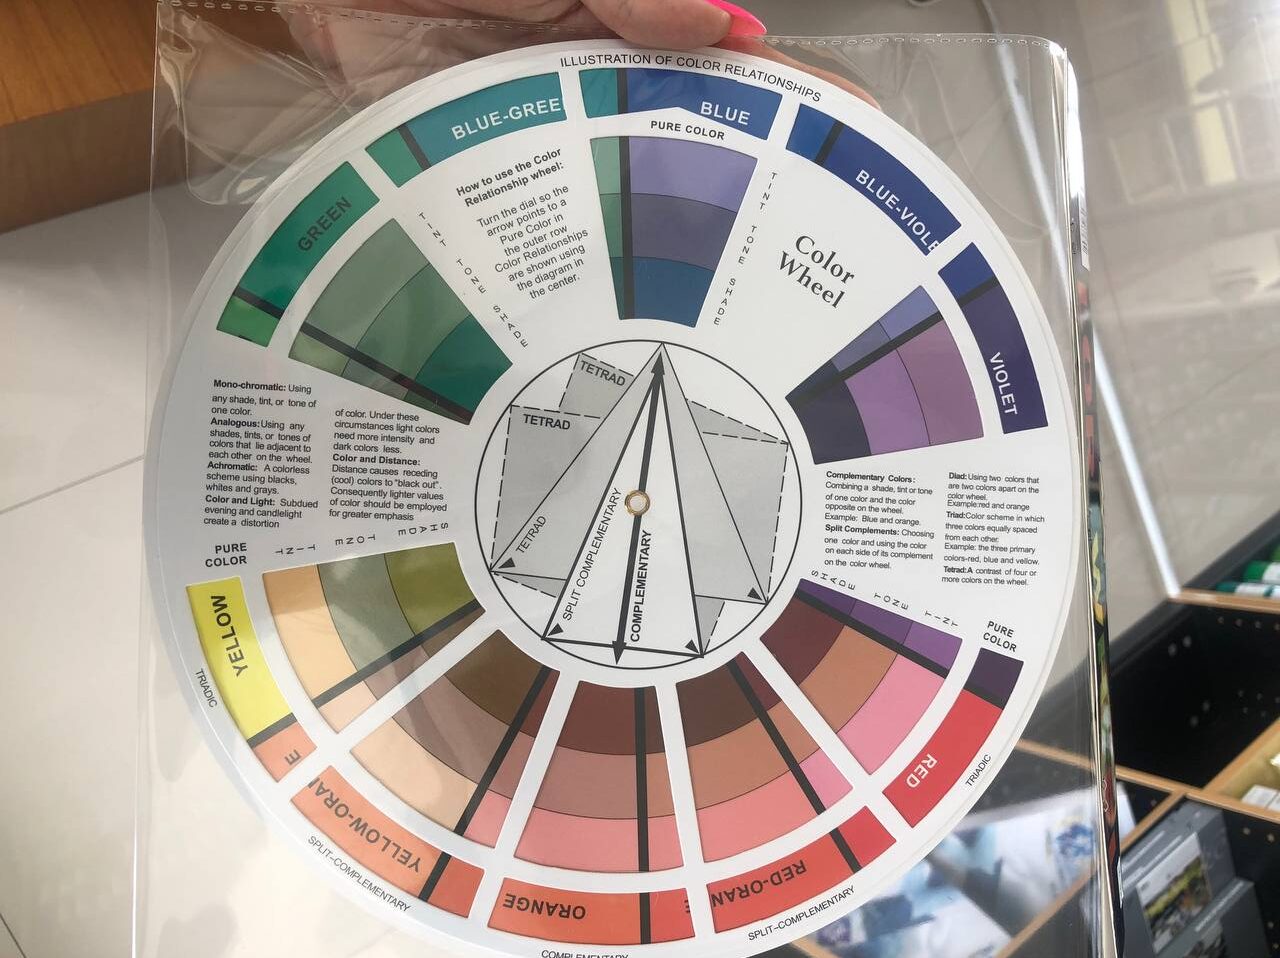
Why you should use it?
- first of all, you can learn how to mix colors
- you will also learn how the same color will look like if you mix it with white or black
- you can also buy a black-and-white color wheel to learn color mixing
- to learn what colors contrast with each other
A color wheel is normally easy to find and purchase in every art shop or online.
Use a stay-wet palette
Acrylics are fast-drying unlike oil paints, and when you squeeze more paint than you will use on the palette, it will dry out and you won’t be able to reactivate it again.
You will learn with experience how much paint you need, meanwhile, use stay-wet palettes.
A Stay-wet palette is a palette for paint that keeps them wet and slows down the drying process.
You can easily make one of these plastic palettes at home: get a container and paper towel, soak them in water, and Voila!
You have more time to work with paint, you have less ruined dried paint – save time and money!
Paint should be always clean
When you’re painting, you dip a brush into water and into a palette or directly in paint (do not recommend this).
To keep the paint clean, use one container with water only to wet brushes and another one to clean them.
After you are done painting clean the head of the paint tube and the lid so the paint doesn’t build up and drt there.
Use palette knives for mixing and texture
Use a palette knife for mixing colors on the palette, because a brush can mud colors while a palette knife is easy to clean and mix paints better and faster.
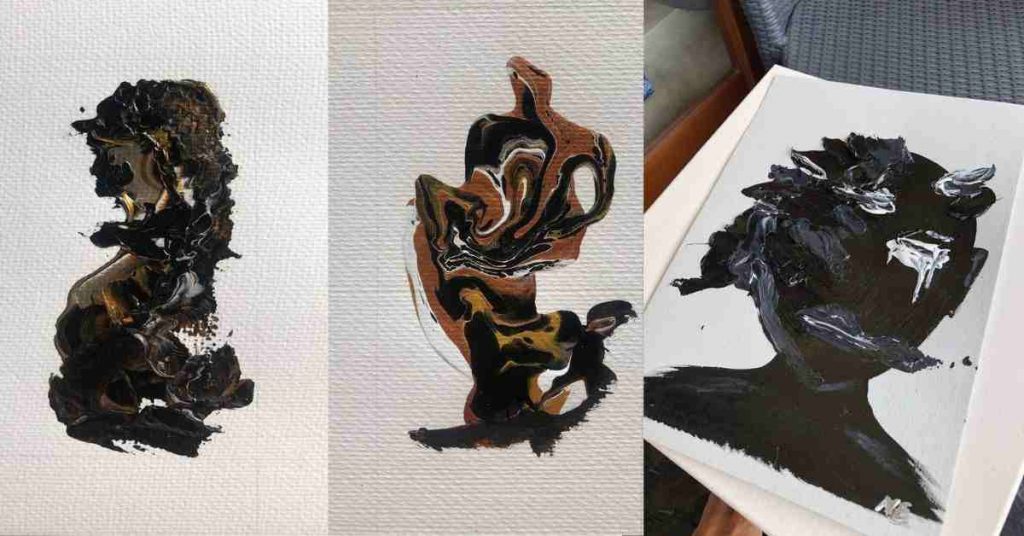
You can also use a palette knife to create an interesting texture – this is how I create my painting.
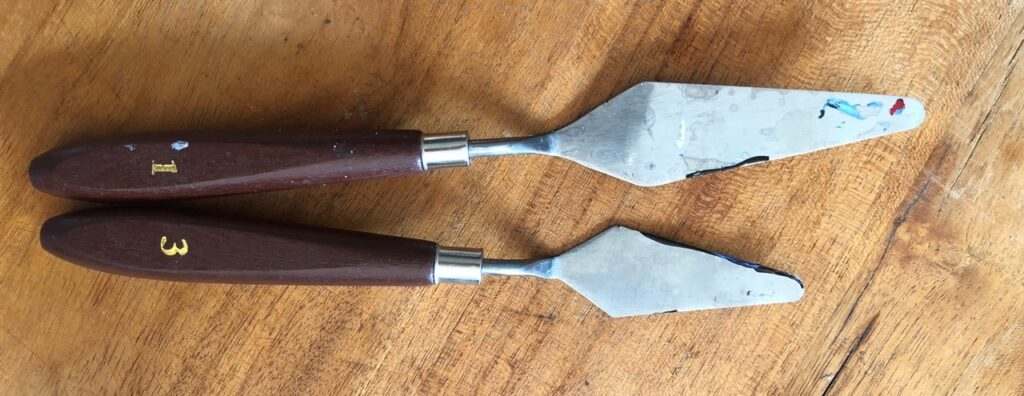
You can apply thick layers with sharp movements, create gentle flower petals, paint landscapes and portraits or you can scrap with a palette knife or you can create an even and smooth surface. Experiment!
I saw plastic knife for sale the other day, but I would always prefer the classic one – metal head and wooden handle.
Use water to help the paint flow
Water dissolves paint, and a little bit of water or a wet brush will help acrylic paint flow better and it will be easier to painting with a brush.
If you use a lot of water your acrylic paint will look like watercolor – transparent.
As water makes a color more transparent if I don’t want this I use Golden GAC100 to thin the paint instead.
Never use solvents or mineral spirits to thin acrylic paint.
Related post: How to Thin Acrylic Paint
Make your paint dry slower if you need more time
For a beginner fast-drying properties of the acrylics can not be fun, you have only 10-20 minutes to finish the layer.
The good news is that we have a lot of ways to slow down the process and have more open time – more time to work with paint.
You can make acrylic paint dry slower by spraying the paint on the palette or the canvas, or using a special medium (slow drying) or even special slow-drying paint (pricey)
Related post: 15 Proven Ways How to Make Acrylic Paint Dry Slower & Homemade Acrylic Paint Retarder Recipe
Use White to make the paint more opaque
Student-grade paint is less opaque than artist paint and some colors can be naturally more transparent like reds and yellows.
To add opacity to the paint, you can simply add a little bit of white or black color to it, but it will alter the color too.
Related post: 7 Ways to Make Acrylics More Opaque
Use hair-dryer to speed up drying
If you are impatient and want to speed up the drying process, the easiest way is to use a hair dryer.
Don’t direct it straight on the painting, don’t turn on the max power, and avoid using the hairdryer too long.
Related post: How to Make Acrylic Paint Dry Faster
Add flow improver if the paint is too thick
The easiest and most effective way is to make acrylic paint fluil is to use a flow improver, like Liquitex.
You just add a little bit and the paint will become immediately fluid.
Thicken acrylics to create texture
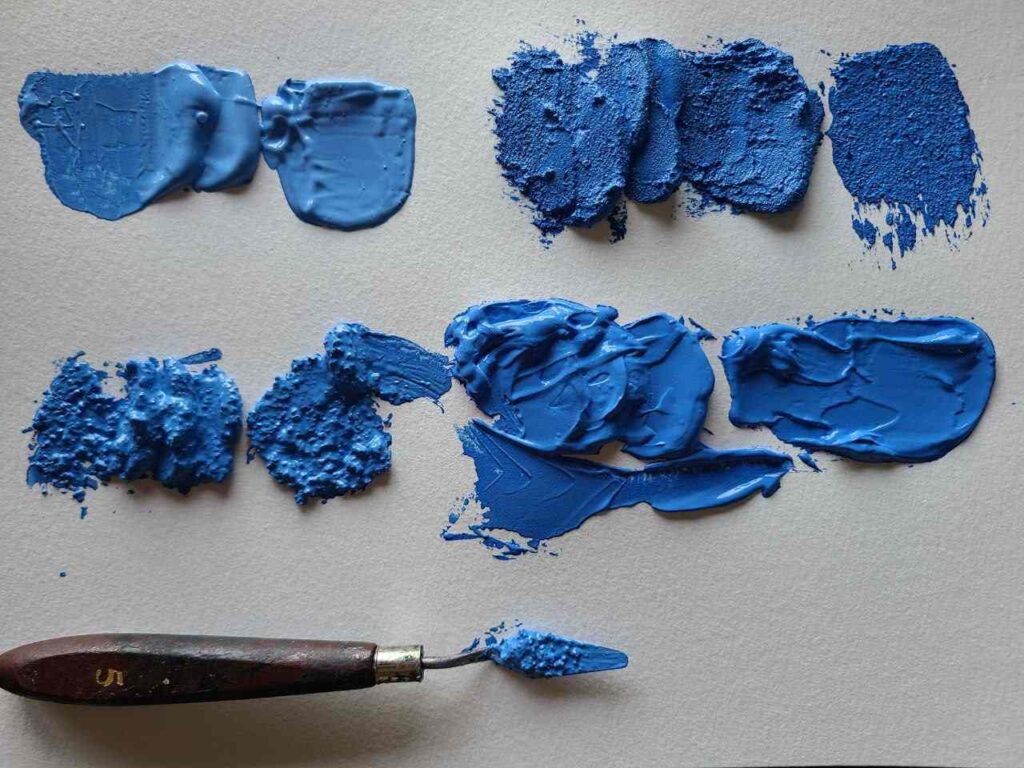
Acrylic paint can be applied thin and thick. To thicken acrylics you can use pretty much anything: from coffee grounds and sand (my favorite) to special thickening pastes.
Perfect idea for creating a sandy beach or 3D flowers.
Read also: 18 Easy Ways How to Make Acrylic Paint Thicker: A Comprehensive Guide
Use color contrasts
Warm pigments like red, orange, and yellow will create a contrast with cool pigments – blue, green, and purple. Complementary colors sitting opposite each other on the color wheel, like red and green will also make a nice contrast.
Contrast is the best way to make your paintings visually interesting yet stay in harmony.
You can start painting with acrylics today: How to Paint with Acrylics on Canvas: 3 Easy Steps [Supplies included
Blending is easier with wet paint
You can use the wet-into-wet technique – blend the colors together while they are still wet right on the canvas to create a gradual and smooth transition.
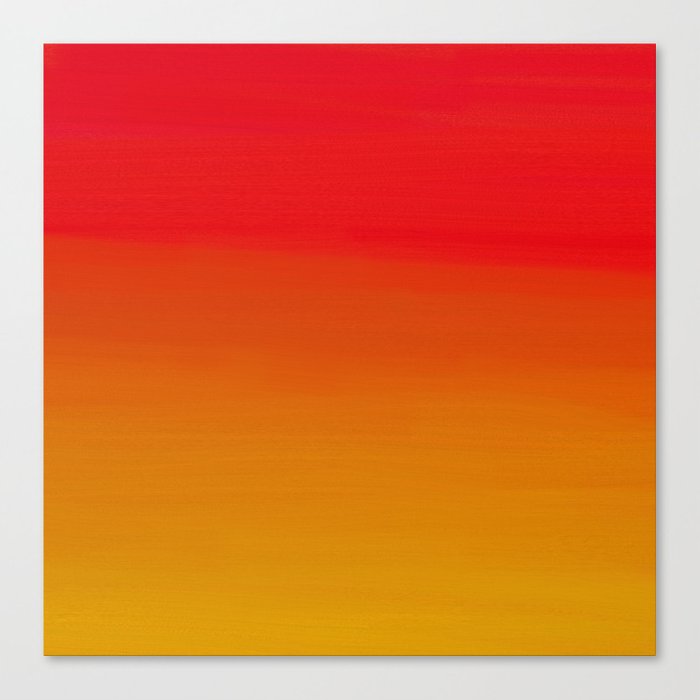
It will take some time, but you will definitely get it. Once you know how to blend, your backgrounds will be perfect!
Related post: 11 Easy Techniques on How to Blend Acrylic Paint Smoothly
You can mix any color with just 3 paints
You can learn to mix any color from the 3 basic colors: red, blue, and yellow.
Guide: How To Mix Acrylic Paint? – Your Complete Color Mixing Guide
Mixing colors and being able to understand them and mix them by yourself – is a kind of creative freedom.
It is also the question of saving money, quality – as we discussed some colors are more opaque when you’re mixing them by yourself, and variety – now you can create so many tints!
Professional artists are more likely to mix all colors they need by themselves.
Swatches will also help you to discover that some acrylics dry darker. Usually, the cheaper paint is, the bigger can be that difference.
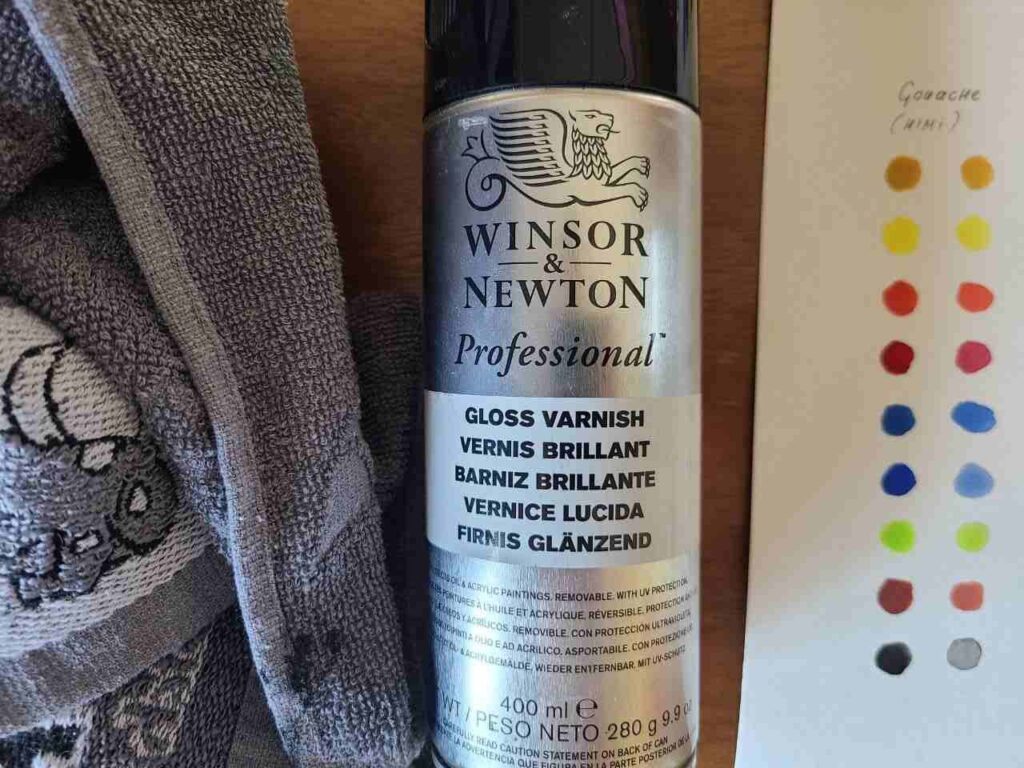
Mix varnish with paint
It is a risky one but worth experimenting. Mixing acrylic paint with water-based acrylic varnishes will make paint dry significantly slower, increase its flow, and will be paint and protection 2 in 1!
Some artists also say it will make it shinier (it applies only if you use gloss varnish though, won’t work with matte).
Some colors dry darker
Acrylic paints tend to dry a little bit darker. Make swatches before painting to see if it is the case with your paints.
acrylic paint brushes
Use synthetic brushes
For acrylic, we use synthetic brushes. You only need 2 flat brushes and 2 round brushes to start (big and small).
But also, don’t be teased by the cheapest option. The higher quality of all materials is very important. A cheap and low-quality paintbrush will leave brush strokes and bristles everywhere.

Related post: The Best Brush for Acrylic Paint on Canvas
Don’t press too hard
Never put too much pressure on brushes or canvas, the canvas is stretched and the shifts in stretching can lead to sagging, which means your painting is damaged.
Painting details try to be as light as possible, but still very decisive!
Clean brushes right after your painting session
Paint dried on brushes can destroy them and they will not last long.
While painting use 2 jars with water during painting to keep brushes clean and a special towel to dry them quickly. I use an old piece of towel.
After painting use mild soap or brush cleaner and wash them in warm water. Do not soak brushes.
Related post: How to Clean Acrylic Paint Brushes [The Ultimate Cleaning Guide]
Store brushes properly
Use a separate jar or glass and store all brushes only bristles up, otherwise, the bristles can be bent.
Store brushes only when they are clean and dried. Store brushes for varnish separately and sign them.
Use large brushes and wide strokes
With a larger brush, it is easier and faster to cover any area (size 10+)
It saves time and creates fewer brushstrokes on the canvas (if your brush leaves them).
Wider strokes are perfect for backgrounds, and thin strokes – are for details. Professional artists can create all kinds of shades and details with wide strokes.
Read more: 18 Tips To Avoid Brush Strokes In Acrylic Painting
To paint a tree easily, use a fan brush

I don’t really use a fan brush, but one tim
painting process
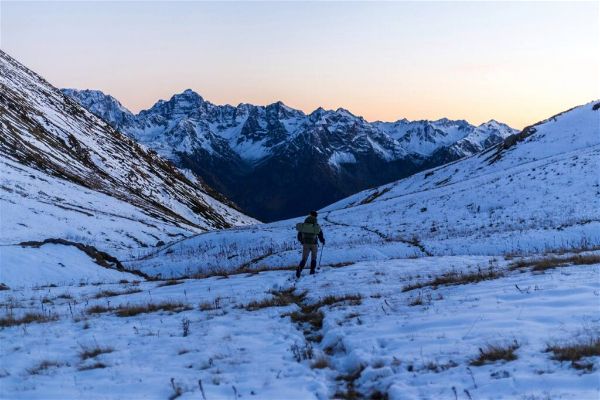
Print a reference
For some beginners the most difficult part is to start, and a printed reference will help you with sketch and color choices.
The static image is better to start painting. If you will print a photo, you can choose in what size you will print it. To have a printed reference in front of you is a real-time-saver.
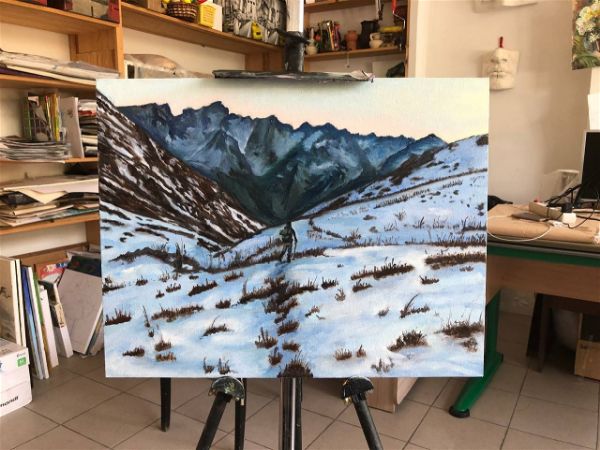
Start painting with an easel
If you are a beginner, it may be useful for you and easier to start acrylic painting with an easel.
If you place the canvas horizontally on the table, it will slightly alter all proportions. With easel it is easier to step back and evaluate the progress.
And it is also healthier for your back.
Try different unique techniques
Learning means not only learning how to paint but also discovering which technique and style are yours.
Think about artists you like, why you like them?
Think about other crafty activities you like – sewing, handmade, photography, pottery? How you can combine them or what techniques you can borrow?
For example, a great artist nowadays, Rebecca Stern uses fabric collages on paper with acrylics and it looks gorgeous:
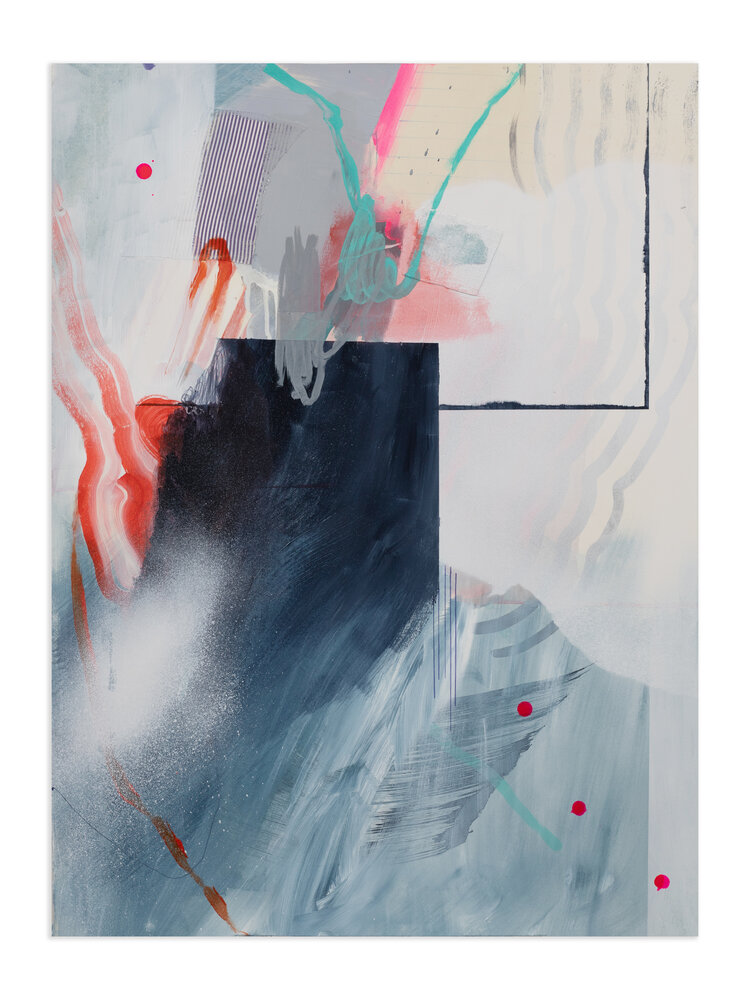
30”x22”, Acrylic, ink, spray paint, and fabric collage on paper
Paint over mistakes or scrap the painting you don’t like and reuse the canvas
Mistakes are vital for learning. You can paint over mistakes with acrylics easily. They are more forgiving than oil paint.
“Anyone who has never made a mistake has never tried anything new.” – is an absolute truth.
To paint over a mistake, either paint a new color directly OR apply 1-2 layers of gesso, sand it and paint again!
Related post: How To Fix Cracked Acrylic Painting
I’ve heard a “legend” about pottery, that the first piece you make could be the most beautiful piece you will ever make, but you will appreciate it only over time.
Set up right environment
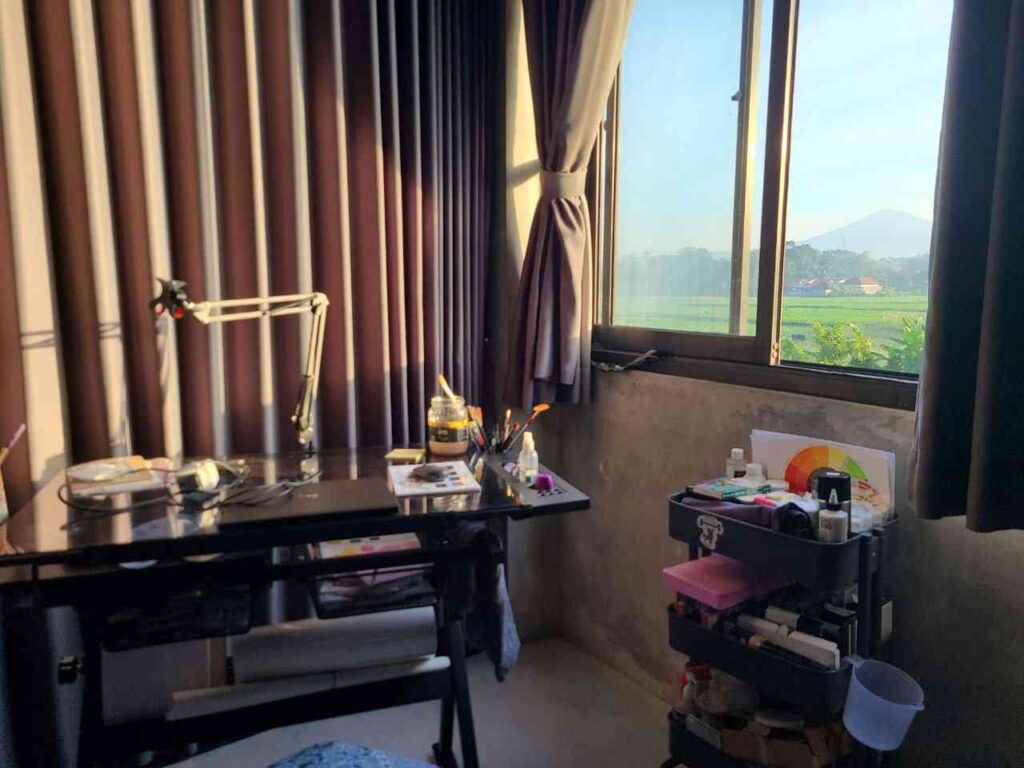
Paint, canvas, and finished painting are sensitive to environmental factors like temperature, humidity, and airflow.
The ideal environment for painting is 65-75 degrees Fahrenheit (18 – 24 C), with 50% humidity and a well-aired room.
High humidity (50%+), and low temperature ( below 65F (18C)) will slow down the drying process of acrylics.
Use trash bags/newspaper to protect the floor
A cost-effective way to protect the floor or walls and other surfaces is just to cut big trash bags and fix them with duck tape.

If you have tiles on the floor, it can be fine, you can clean it right after you finish painting but it can still stain the surface.
Acrylics are quite hard to wash off from clothes and fabric, so you can protect them with trash bags even on your couch.
Wear something to paint
Acrylic paint is pretty hard to wash off from clothes so try to wear something that you will not regret and you feel comfortable moving and painting.
Don’t be afraid of paint on your skin.
Modern formulas are non-toxic and easy to wash off. Still better not to use acrylic on the skin, it is not supposed to be used this way and still contains agents and chemicals.
Do a sketch
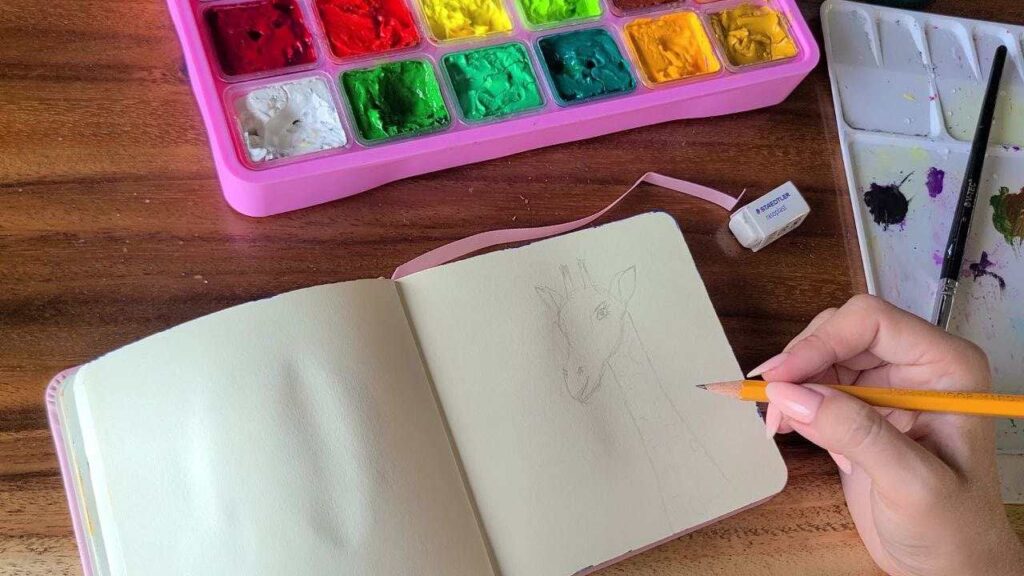
For beginning in painting better to do a sketch, especially if you paint landscape, portraits or nature morte.
It is a key part to take the right perspective while painting landscapes, or cities.
You can do it with a pencil, trying to place objects on the canvas. Don’t go deep into details, just the overall composition.
To seal your pencil sketch if you want the pencil lines to be visible you can always use a glaze or fixative.
Paint dark to light
The golden rule of painting is to paint from dark areas or mid-tone to light details.
It allows you to create depth, but also it has a practical reason – it would be hard to shape light objects with dark paint colors and control the thickness of each layer.
Related post: Do You Paint Acrylic Light to Dark or Dark to Light?
Paint quickly and be decisive
Acrylics are quick-drying and you will get used to them over time.
Based on it, you need to move your brush quickly enough and be very sure about what you are doing. The first time, just think less and do, it after you can analyze your strokes.
Sketching will help you navigate.
Use rule of the thirds to help you with composition
Tthe rule of the thirds basically tells us how to place objects on our painting.
You will first draw a rectangle divided in 3 even columns. Then add 2 horizontal lines to create total of 9 equal rectangles.
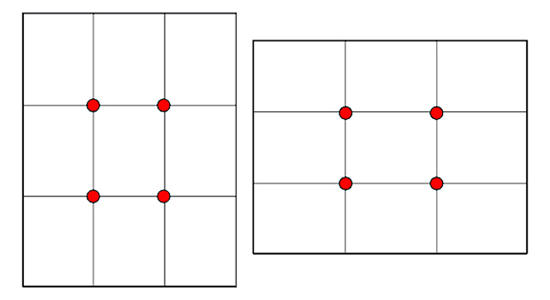
This creates for us 4 intersections or focal points if we apply it for painting.
One of these 4 focal points are where we should place the main accents and contract areas if we are painting abstract or main objects if we are painting landscape or anything else. You don’t have to use all 4 in one painting!
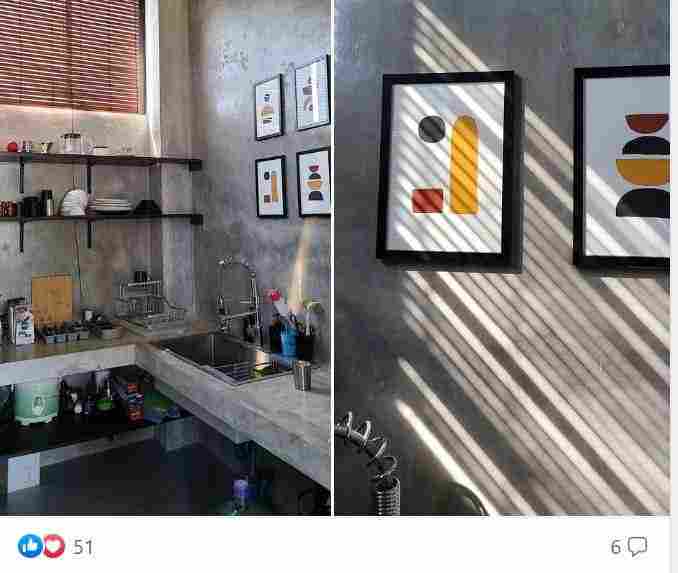
Use a sponge for edges
A painting looks finished when we don’t forget to paint the edges too.
Especially if we don’t frame it immediately.
Not always a brush is the most convenient way to do it, but a simple sponge is!
Make sure the water/paint is not dripping and quickly run the sponge across the edges. It is much faster than brushing them.
Step back to look at the painting
Like a real artist from movies, you need to step back.
It is important to have an overall view, to see the whole composition from time to time.
Sign and date
Yes, even if you don’t still believe in yourself, you are already an artist, sign your work. And put a date on the back, plus, mention mediums (acrylics on canvas, e.i.).
You can sign your painting on the back or in the corner of the painting itself. You can even have a simple stamp with your name.
Choose your signature wisely, it should be something permanent, that you will use for years. Plus, it should be something to help people identify your work.
A first name or initial and last name usually works.
Take photos before applying isolation coat or varnish
A great photo can be not a case if you want to take a photo of a finished and varnished painting, simply because the protective finish usually has gloss.
What you need to do is to remember that you take photos when the finished acrylic painting is fully dried, BEFORE isolation coats or a protective finish.
Always wait until it dries
The drying process is extremely important to follow.
Acrylic paint is fast-drying and still, it is fully dried, normally, in 24 hrs., except if you thin it, use retarders or open acrylics. If so, you need to wait longer.
And not only when it is done, but, ideally between all layers:
- between gesso layers you need to wait as much as the manufacturer asks you (read the label),
- between paint layers (thin layers dry faster),
- before applying isolation coat and
- before the protective finish.
Be patient, changes in dry time and shifts in dry time between layers will result in paint cracking or even peeling off.
Remember that thick layers of paint, paint with retarders will dry slower, and thin layers will dry faster. In general, acrylic paint dries in 10-20 minutes to touch.
If you are impatient you can make your paint dry faster, ex. using a hairdryer. If you’re learning and feel a lack of time, use one of these 15 ways to make the paint dry slower.
Paint in layers
We like acrylic painting because acrylics are fast-drying and you can paint over faster. This is why acrylic painting is a painting of layers: we are moving from underpainting, from background layers to top, detailed ones.
Acrylic painting is like a cake: we prime a canvas, then we put the first layer, second, third, and so on. As we discussed, usually we go from darker to lighter colors and from larger objects to small details.
Protect the painting
Acrylic painting can last centuries and it all depends on how well it was protected and maintained. The easiest way to seal a finished acrylic painting is to varnish it.
The full protection guide is here with a detailed explanation, links, and how-to guides.
For extra durability and sheen use epoxy instead of varnish
Have you seen painting that look like a smooth glass surface and the colors are so bright?! Probably the artist applied epoxy over this painting.
This process is tricky but as epoxy is self-leveling it will guarantee a 100% smooth even shiny surface. It also will be the most durable protection for your painting or pouring.
I’ve talked more about it here: 5 Pro Steps to Protect Acrylic Paintings on Canvas
You can also apply epoxy at he back of the canvas for extra durability. It makes the canvas very sturdy and will prevent sagging.
Use cloth roller before varnishing
Smart, huh?!
To make your finished dry painting absolutely clean and ready to be varnished, you can use the regular cloth roller so all hairs and small dust you don’t even see and know about will stick to it!
Painting canvases and other surfaces
Use pre-primed pre-stretched canvas
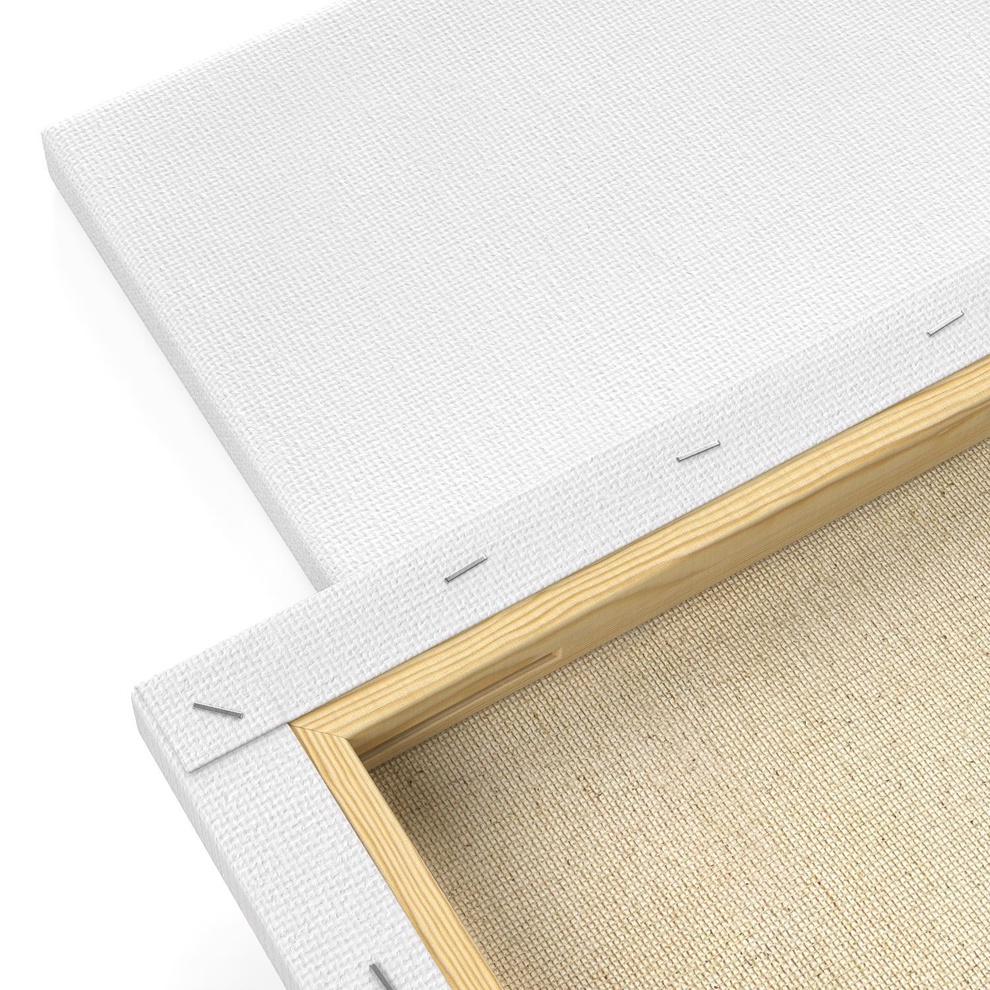
The best way to start for a beginner is to buy online or in an art supplies store a pre-stretched and pre-primed (triple primed is the best option) cotton canvas.
Linen canvases will be more expensive and a beginner (and some pros, to be honest) won’t be able to tell the difference sometimes.
The most common primer is a gesso.
Read more: Best Canvas for Acrylic Painting + Full Bueyrs Guide
Use paper pins to elevate your canvas
On Amazon there are tons of special triangles to elevate your canvas. But you can actually use simple paper pins for small and medium canvases!
Why you need to elevate your canvas? It helps you access easily the edges and paint it and it helps poured paint drip on the table and prevents your canvas being stuck to it when the paint dries.
Use canvas pads or panels for practice
You can use acrylics on canvas panels and paper or canvas pads. It is a cheaper option for practicing.
Panels are cotton or linen fabric glued to a board and are quite hard to hang. Pads include usually 10-20 paper sheets which are very easy to frame if you want.
I personally use Canson.
For more details about what is it and what are other alternatives feel free to read in a related article.
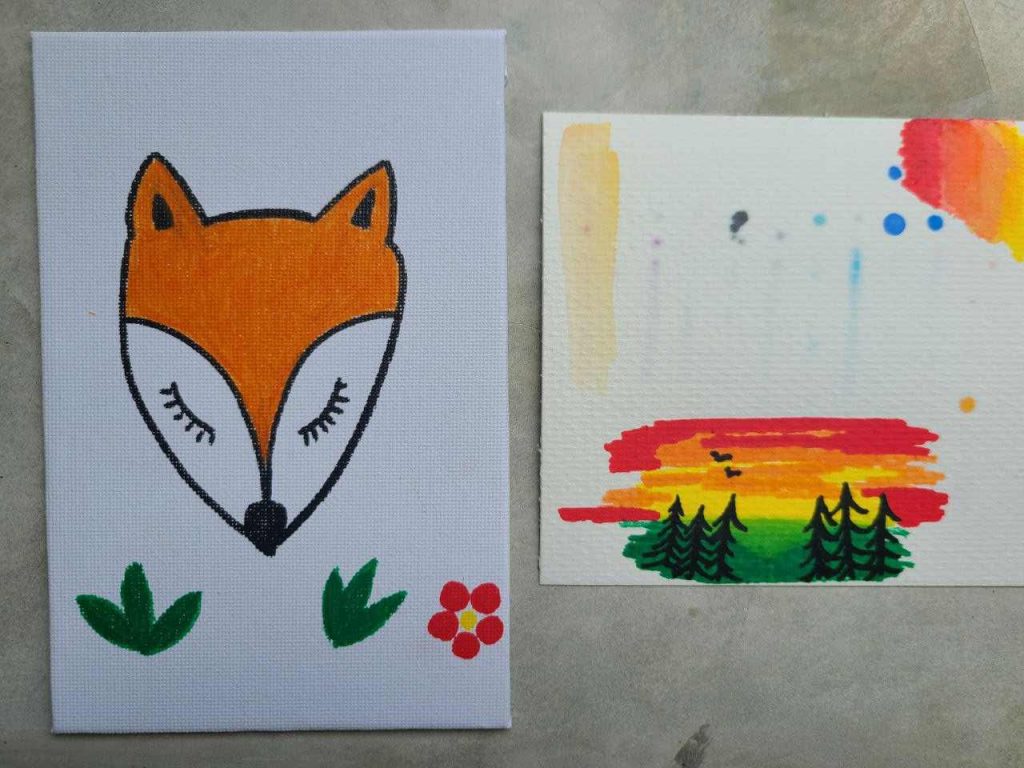
Don’t be afraid of paper
There are special paper and paper pads for acrylic paint. This paper is thicker and rougher than a normal one and has a canvas-like texture.
It is also a portable option and extremely cheap. I use Canson or Strathmore. Very affordable.
Try diverse surfaces
Anything that acrylic paint can stick to: canvas, paper, wood, fabric, plastic, metal, glass, etc. WIth acrylics you can decorate your shoes and your shelves 🙂
More tips for painting with acrylic paint
I got some more painting tips for beginners up my sleeve and I will adding more and more as I always keep my eyes open on how to save money and effort, and upskill!
Use white misting spray
It is a DIY trick I’ve seen pro abstract artists using and I think it’s a genius idea which I implemented right away.
You fill a misting bottle with water and a tiny bit of white paint, shake it well, let it sit.
When you struggle with blending, when you need more white, or to create mist (for landscapes) you can use this bottle!
I suggest mixing white not only with water but with a little bit of GAC100 as too much water can eventually ruin the acrylic paint and the GAC helps maintain the paint stability.
Leave secret messages!
If you are selling your work or your art is a part of a therapy for you, you can always leave a message on the canvas before you paint on it. You can write it down with paint (better with paint as pencil will show marks).
I saw many artist doing this, and even for pouring I saw Olga Soby leaving nice inspirational and emotional words on her canvas before she pours over it.
Parchment paper helps storing
If you have a few painting finished and not varnished and you just piled them up…you may find them stuck together after a while! Sometimes you can remove each one of them safely, but sometimes….it pulls the paint away *scream*.
To prevent it firstly, don’t pile them up or let painted surfaces touch each other.
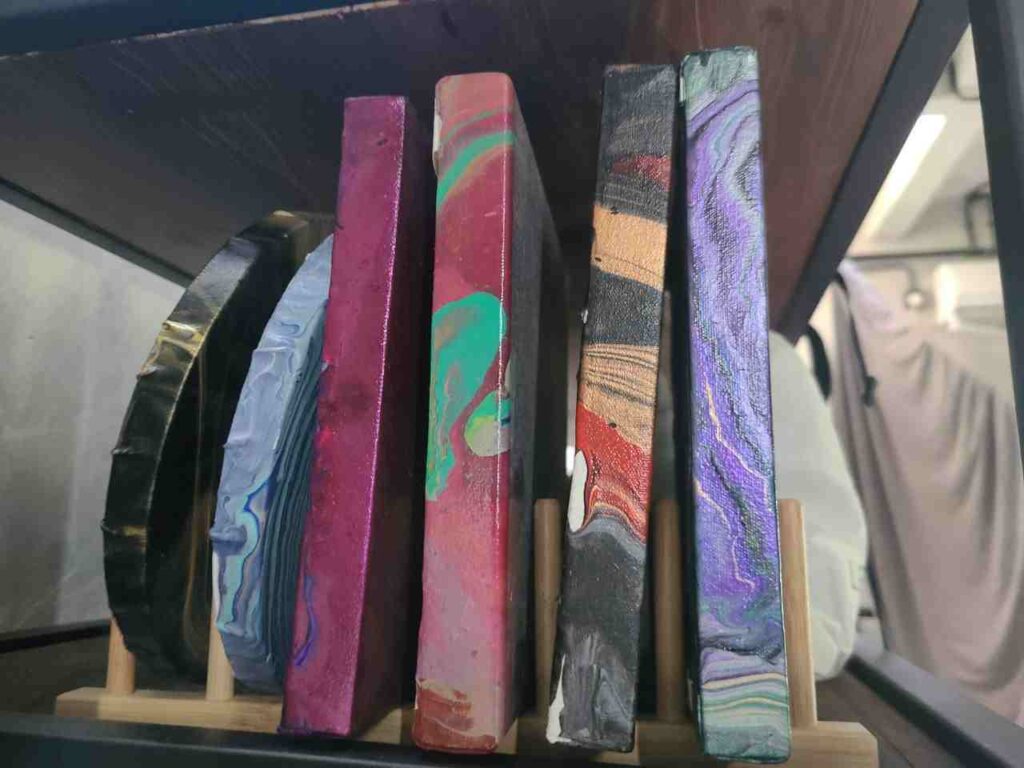
Secondly, varnish it.
For the time you are waiting for varnishing (or in case you skipped it for now), you can use parchment paper, NOT regular paper as acrylic sticks to it, to lay in between paintings.
Anything that acrylic paint doesn’t stick to will work, but acrylics truly are super versatile and can adhere to pretty much any surface.
Mindest Painting Tips
Make notes
Making notes will save your time and money many times throughout your artistic life.
Notes will help you to identify a paint brand that cracks, a canvas that warps, the best brushes, or mistakes in varnishing and drying process.
It is also important because you can not remember everything.
However, paintings are supposed to last centuries, and sometimes you need to maintain them by replacing varnish, for example.
Are you sure that in 50 years you will remember exactly how much and what brand varnish you used to be sure this time your painting will not become milky or yellow?
Just buy a simple notebook and write down the materials, techniques, and experiments you had.
Use Artfinder or Saatchi Art to sell your art
When you will have at least 15 works, sign up and create a profile on Artfinder and Saatchi Art.
They are popular online galleries where artists of all styles and levels can sell their art safely.
The process of application is not complicated, but you need to have good photos and a motivational letter.

Related post: Art Selling Websites Successful Artists Love to Easily Make Money
Show your paintings
Another way to learn and have feedback in a healthy atmosphere is to join some Facebook groups for absolute beginners.
Don’t be afraid of sharing your art! The feedback and support of others will motivate you to keep going and boost your self-esteem as an artist.
Be generous in return and you are very likely to meet some new friends there!
These groups are also a great platform to ask questions and see what people recommend.
Share your painting on your social media too, to your friends and family. I’m sure they will be happy to have some of your works as a gift.
Showing your painting is a key to your progress. If you will hide your paintings you will never see the progress and be conscious of real feedback or things to improve.
Experiment first and more than follow instructions
I’m part of many groups on Facebook for acrylic painting.
And the most often question and recommendation a beginner acrylic painter is looking for are “Advise me some good tutorial on how to paint …“.
I have nothing against it, we need to have an idea about anatomy if we’re working in realism and other not abstract movements, shades, color mixing, etc.
But believe me, techniques will never replace your creativity.
What I suggest is when you want to paint a dog, try to paint it as you feel first, experiment as you have no guidance and limits to your art, and feel this freedom.
And then, after trying and experimenting, watch some tutorials or read some step-by-step guides.
Here is the thing. The more our brain sees and learns something the stronger this neural connection will be.
I spent 7 years in music school but by the end of it I could not compose AT ALL. But well I could easily read notes.
The same is with painting.
Even if you’re painting with your canvas upside down, like dab painting or using dots instead of lines – why not? Maybe you are up to something new?
So my very first hint will be: Feel yourself and your creative cravings first, then polish them.
And unique art selss very well too!
Be yourself and love what you are doing!
To continue with being your first reference – art is the scene where you can be yourself and at the same time whoever you want – a magician in some sense.
You create, you deliver or message or you heal your traumas – it doesn’t matter, painting is great for all purposes.
It is a proven method for art therapy, but it is also one of the most popular hobbies in the world – art was in the TOP-10 hobbies and interests in the USA in 2020 (30% of people mention it as favorite activity).
Why it is so important to love what you are doing?
Psychological studies have proven that loving what you do boosts overall productivity and enhances performance and creativity. People who enjoy what are they doing in life are more likely to be optimistic, motivated, learn faster, and make fewer mistakes.
Can you imagine?
It is not only mental health that is important, loving what you create means don’t judge yourself, don’t compare too much with other artists, and don’t evaluate yourself based on their success stories or paintings.
There is no “right” art and you are your toughest critic.
Art is unquestionably one of the purest and highest elements in human happiness. It trains the mind through the eye and the eye through the mind. As the sun colors flowers, so does art color life.
― John Lubbock
Ask questions or read blogs
I already shared the idea of joining other groups, so don’t be afraid to ask like-minded people what they think.
One of the typical posts in these groups is when a beginner shares a painting and says what he/she is struggling with and ask for advice.
Great option!
Another way is to simply google.
My blog and many others try to help you find the answer and Google will help you to find the most relevant blog.
I also often get questions on Pinterest and I am happy to answer them.
Practice makes perfect Better
Painting regularly is crucial for beginning painters. Start with 15-30 minutes daily and in one month you will be impressed with your progress!
Have some inspiration folders on your phone or boards on Pinterest, try something new or work on something that you want to improve, but be consistent.
Be ready for lack of inspiration
Sometimes we feel like we are not creative at all.
It is normal and inspiration depends on our stress level and many other factors. And sometimes we are just tired of what we are doing, not only art.
You can either push yourself and get nothing because it will only lead you to irritation. Or you can admit it and let it be without stressing yourself even more.
As I said stress blocks creativity.
We all have friends, loved ones, family, jobs, and something is always happening. Sometimes we feel like it is not the right moment for art. It could be it.
Stuck and need ideas? Check 101 Easy Acrylic Painting Ideas for Beginners on Canvas
Ugly stage
Painting teaches you patience.
A sketch and first large strokes of darker color easily demotivate some beginners. You are right, it will look nice sometime soon.
Turn on your imagination and be focused on final painting, you don’t judge a cake by the appearance of the dough.
FAQ
What should I paint with acrylics?
Acrylic paint is extremely versatile, has a fast drying time, and you can paint just about anything you want: from landscape to abstract. Acrylics are also often used for painting with mixed media, to create texture, or for pouring techniques. TONS of ideas and formats: on wood, rocks, glass, leather, and fabric, your favorite mug, or just paper and canvas.
Tips when painting with acrylic?
If you will need to summarize, the best tips when painting with acrylic paint are: try to not use a lot of water, always paint in thin layers, let the painting dry fully before applying the next coat or protective finish, and use good quality supplies, and get creative! To learn 50+ tips read my extreme list of Acrylic painting tips.
What do you need to paint with acrylics?
Acrylics are very affordable and you only need a couple of brushes (start with round brushes and flat ones), good yet affordable acrylic paint, and a painting surface – canvas or paper! Once painting becomes a bigger part of your life, you will start experimenting with acrylic mediums, different surfaces, and techniques. To see the full list of essential and extra supplies, check my simple guide.
Final thoughts
Painting with acrylics is one of my favorite things to do in life.
Painting in general is a great hobby, profession or therapy tool. And you don’t have to be a senior artist to have your own painting tips.
You absolutely should learn about nature of acrylic paint and color theory, but other than that, you are free to experiment.
If you think you came up with a great idea, share it with me! I’m happy to hear. I’m happy to hear and add to my list a few pointers.
If you need some guidance, I’m here to help you with my blog and tutorials.
What advice is the most useful for you today?

Masha Eretnova, born in 1991, is a Chiang Mai-based certified teacher, artist, and blogger with 20+ years of personal painting journey.
She started painting and drawing very early and is now an international abstract artist and educator passionate about acrylic painting, gouache, and crafts.
Her works are part of international exhibitions and contests, including ArtlyMix (Brazil), Al-Tiba 9 (Spain), Exhibizone (Canada), Italy, and many more.
Besides her artistic pursuits, Masha holds a post-grad diploma in Teaching Film Photography and 2 music school diplomas: piano and opera singing.