Last Updated on June 26, 2026 by Masha Eretnova
Acrylics are versatile and one of the most popular mediums for painting.
It is easier than watercolor and oil to learn how to use acrylic paint on canvas but still, acrylics offer you an incredible variety of techniques and paintings look amazing and are sold for hundreds of thousands.
To paint with acrylic on canvas you need essential supplies (acrylic paint, canvas, brushes, palette) and some extra supplies (easel, palette knife, jars, etc). The process relies on 3 main stages: preparation, painting, and protection. You also will need patience and knowledge on how to prepare the surface, how to mix and blend acrylic paint, and how to protect the painting.
All of it is here.
I will guide you through the basic process that you will repeat again and again no matter what you’re painting. It is quite universal to start and it will be your base.
After you will be more confident, you are free to break any rules and experiment!
Let’s start your creative journey.
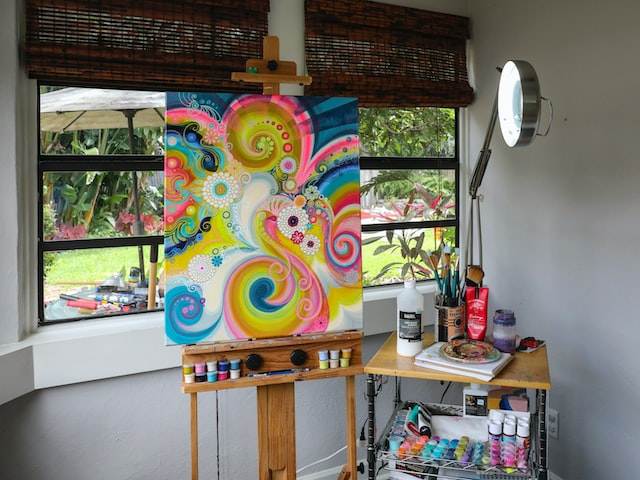
Table of Contents
This article contains affiliate links. It means no extra cost for you but a little commission (2-3%) for me to support my hobby and blog. Thank you!
LIST OF ART SUPPLIES
What do you need for acrylic painting?
This is the list of essential supplies and extra materials for acrylic painting.
To buy at an art store or online:
- acrylic paint
- pre-primed and pre-stretched canvas
- easel
- synthetic brushes
- palette
- palette knife
- Golden GAC 100
To find at home:
- * jars for water
- * trash plastic bags and tape
- * spray bottle
- * towel or paper towel
- * apron
There is no acrylic mediums on that list as mediums, as for me, require a bit more knowledge in painting. This guide is for a complete beginner.
Just for quick notice, mediums can help us make acrylics dry slower, make it more fluid, heavier for different techniques, make it pourable for acrylic pouring, etc.
Related posts:
- Essential Tools for Acrylic Painting You Will Love To Use
- Acrylic Painting Tips for Beginners & Pros
- Can You Use Acrylic Paint on Wood? Best Supplies for Painting Acrylic on Wood
- Is Acrylic Painting Expensive? Cost Breakdown From An Actual Artist
WHAT IS ACRYLIC PAINT?
Acrylic paint is a water-based paint which makes it water-soluble.
It means, to make paint more fluid, we can easily add some water – this process is called thinning. It also means that acrylic is fast-drying because the process of drying is a simple process of water evaporation.
Normally, a thin layer of acrylic dries in 5-20 minutes. I reviewed 20+ acrylic paint brands for your convenience and to help you make a decision!
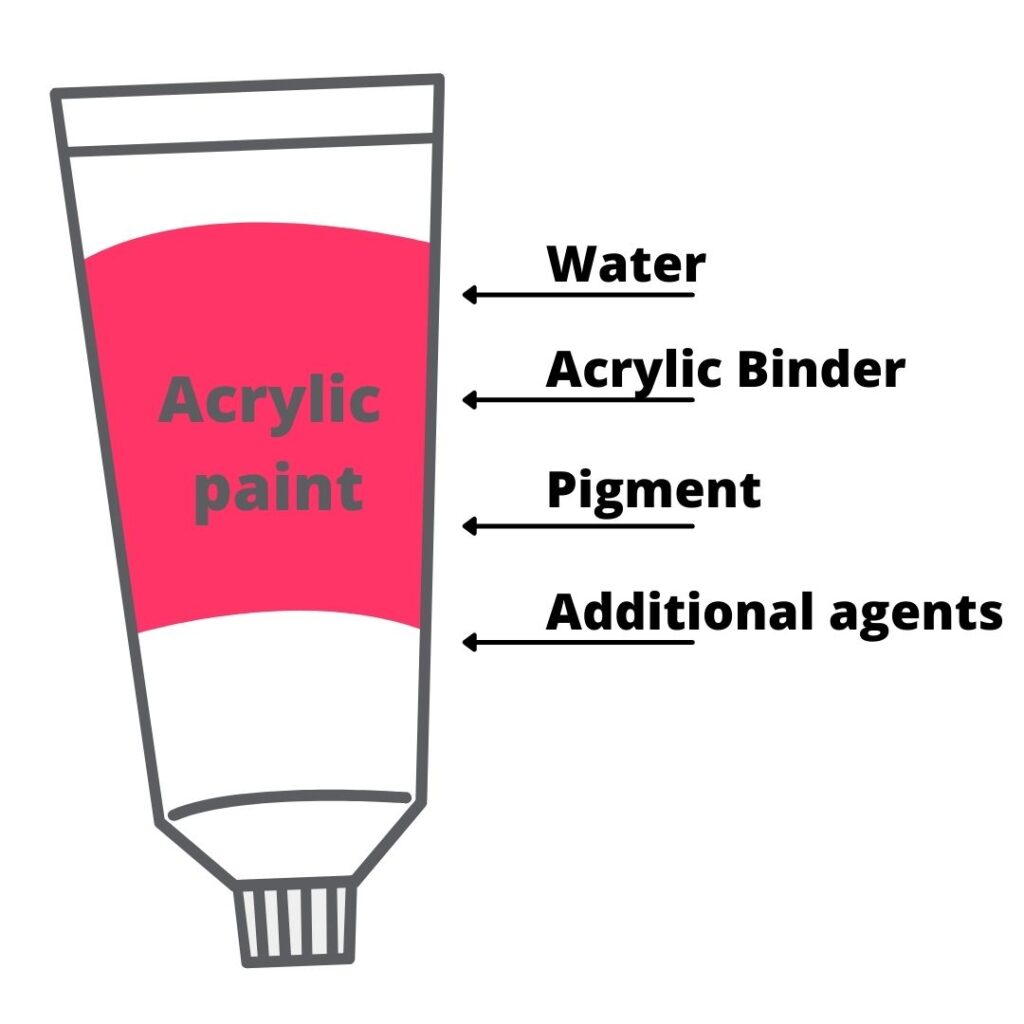
Acrylics are made of:
- a pigment that gives color
- water + binder – drying water evaporates and leaves a film. A binder (polymer) that assure waterproofness, gloss, and fast and even drying
- other agents that provide durability.
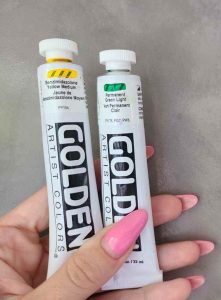
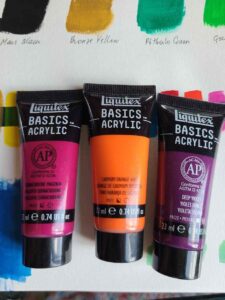
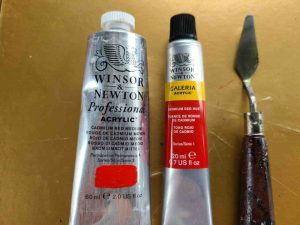
Most known for quality and long history paint brands are Golden, Liquitex, Winsor & Newton, and others.
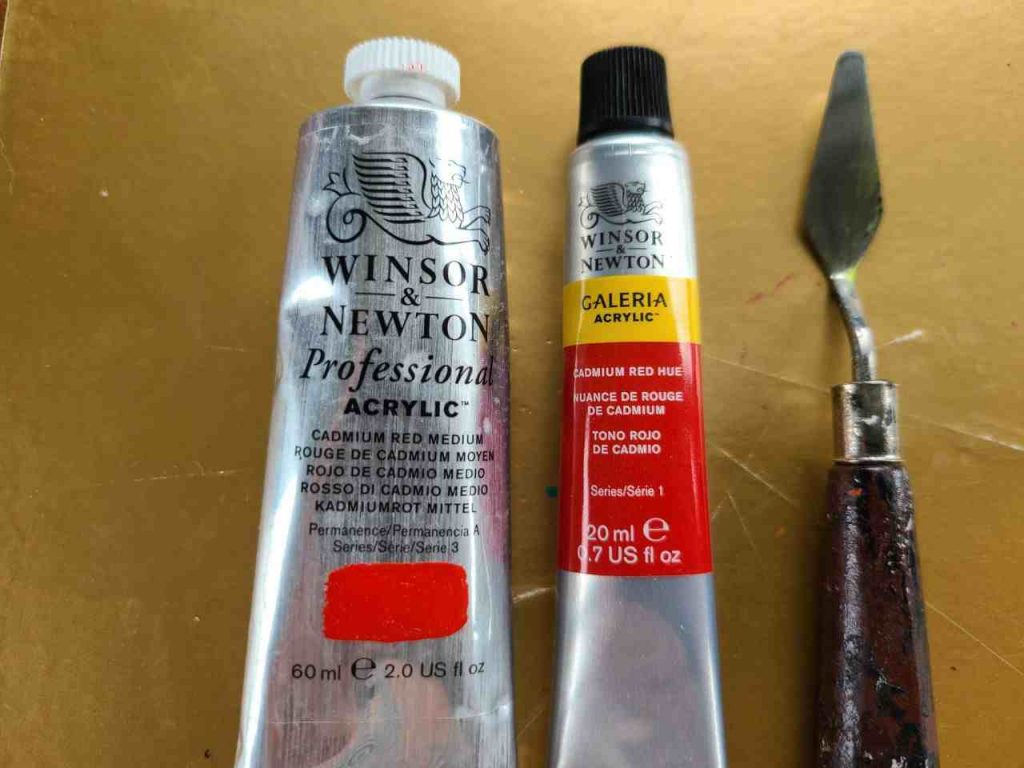
Based on quality, paint is divided into 2 categories or grades: artist and student
You may guess, that student grade is cheaper, it contains less pigment, while artist-grade is professional paint, with more pigment, and can be slightly or significantly more expensive.
I will always recommend choosing artist-grade acrylic paint if you want to make painting a serious hobby and enjoy the results more.
One more characteristic of paint is opacity/transparency – how much light the paint absorb and reflects, e, i. white and black are opaque.
It is not about the brand but specific pigments, some of them are more opaque than others. Sure, artist-grade paint tends to be more opaque than student paint.
Learn more: What is Acrylic Paint? Ultimate Acrylics 101
WHICH ACRYLIC PAINT IS THE BEST?
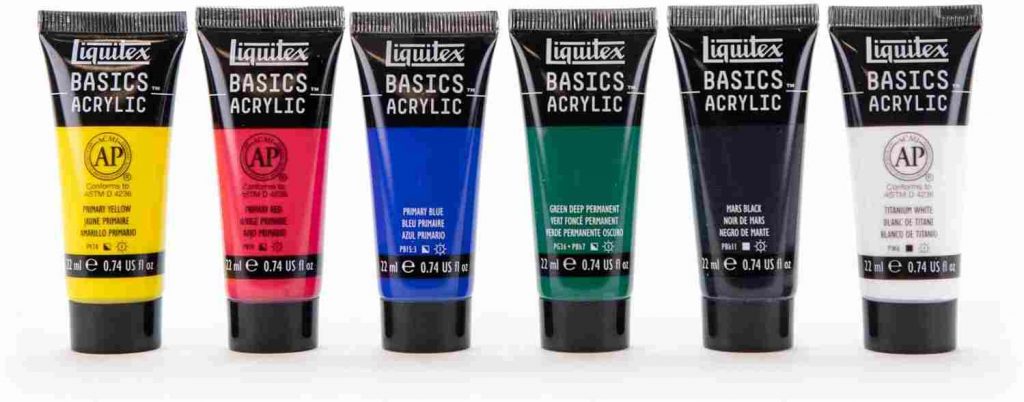
When you just start painting, you can simply purchase an acrylic paint set of 6-12-24 colors to make it easier for you.
If you buy only 6 colors, you will be either very limited in what you can create, and you will learn how to mix the paint by yourself (which is a pro-level skill).
TOP-3 acrylic paint sets for beginners:
1) Liquitex Basics Acrylic Paint - Best Sellers Set of 24,
2) Golden Heavy Body Artist Acrylic Set of 6 and
3) Winsor & Newton Beginners Acrylic Set of 10
You can always purchase any color individually.
BEST CANVAS FOR ACRYLIC PAINTING
If you start researching canvases you’ll be overwhelmed in a minute, because there are so many alternatives!
If you still want to dig in and learn as much as you can about weaves, stretching, and all canvas brands, I have this big and comprehensive article for you on choosing canvas. If not, keep reading and we will go through the essentials.
What we need to know?
2 main fabrics for canvas are cotton and linen.
- 100% cotton is the most popular canvas, it is cheaper, has great quality, is best for beginners, and may not be suitable for large paintings.
- Linen is rough, higher quality, more expensive than cotton, and best for larger scales and professional artists.
Choose the size and shape you want, if you start painting, buy pre-primed and pre-stretched canvas.
What does it mean?
Priming is necessary to achieve needed paint adhesion to canvas, it smooths and “seals” the painting surface of raw canvas. Without priming, the canvas will soak too much water or paint. The most used primer is Gesso.
Stretching is a process to put a canvas on the stretcher bars, to make sure the surface is evenly smooth and tight! A saggy canvas can ruin your whole masterpiece.
Stretching requires knowledge, time, and patience. That’s why, for beginners, I recommend starting with a pre-stretched canvas.
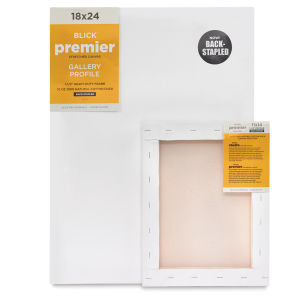
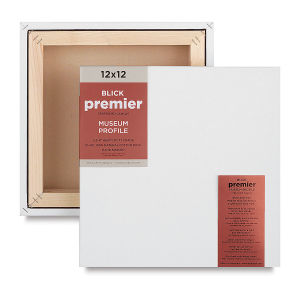
THE BEST CANVAS TO BUY for acrylic painting for a beginner – Blick Premier Cotton Canvas – best quality with really unique properties and a very appealing price. An 8″ x 10″ canvas will cost you only around $5!

WHICH PAINT BRUSHES TO USE?
For acrylic painting, we use synthetic paint brushes, because acrylics can damage natural bristles.
Some professional artists can work with natural brushes, but I do not recommend complicating things for beginners.
Brushes are your main tools to create a painting, there are about 8 essential shapes of brushes, but when you start painting, you need only 2 of them: round brushes (small round brush and big) and flat.
Here are all shapes:
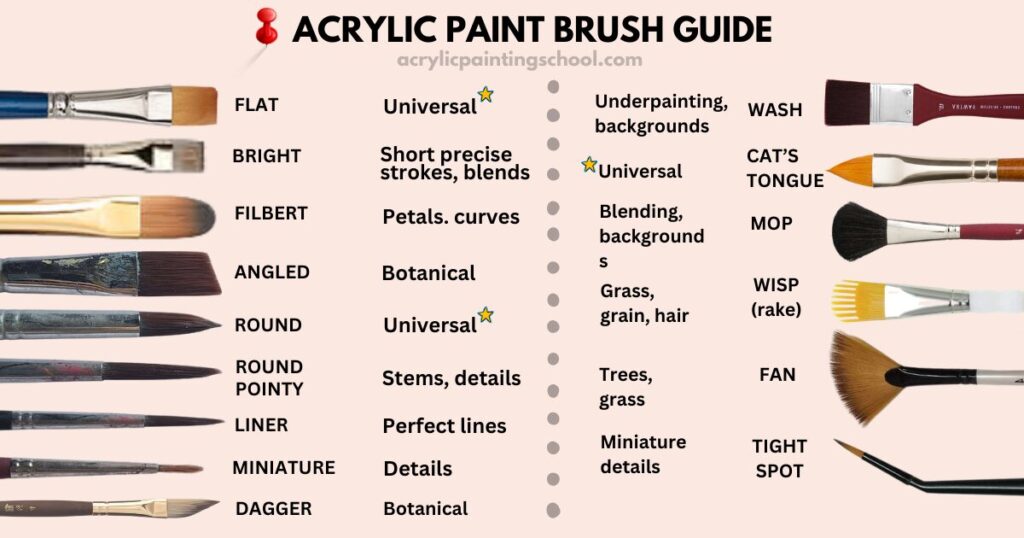
Each shape has a size range for your needs, you will learn it with experience, but, in general, the smaller brush is the more detailed work you can do with it. Fan brush is handy for painting trees.
A full buyer’s guide about brushes for acrylics is here.
If you want to buy all brushes individually, the Best brushes are Princeton Acrylic Paint Brush – comfortable to use, high-quality, affordable, and offers all kinds of shapes and sizes.
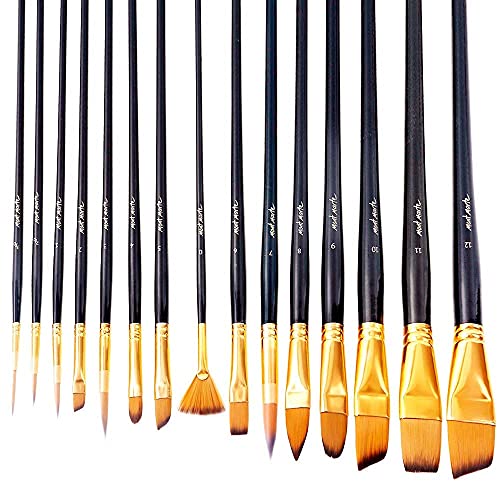
If you’re looking for a brush set, to buy all shapes at once and experiment, try Mont Marte Art Paint Brushes Set of 15 – 15 brushes will cost you $17 and you will be covered for many upcoming paintings!
BEST PALETTE FOR ACRYLIC PAINTING
If you have issues with fast-drying acrylic paint and you want to make it dry slower, you definitely can use the stay-wet palettes by Masterson Sta-Wet Premier Palette.
You can always use normal palettes: plastic palettes are the most popular and cheap.
I don’t really like palettes with wells, because it is so uncomfortable to use! I think they work better for watercolor paints as you need a well to hold water.
I prefer a flat surface as a palette, where I can easily mix paint and there will be not much paint left, as it often happens with wells.
However, you should make your own choice, try the standard palette, e.i. plastic flat palette (I do not like wells for acrylic), or just make your homemade one 🙂

Another option is to make your palette with a piece of cardboard, an empty plastic container, or a tray. A paper plate will work too!
I also know some artists who use a piece of tile as a palette or make their palette from clay. For me, personally, these types of palettes are too heavy.
PALETTE KNIFE FOR ACRYLICS
A palette knife is a multipurpose tool when you’re painting. First of all, it helps you mix paint on the palette better than a brush will do because a brush will soak unmixed paint too and you will have multicolor strokes.
A palette knife is also a tool for abstract painting or for creating effects. With a palette knife, the paint application will be thicker, or you can use the blade or the belly of the knife to create textures.
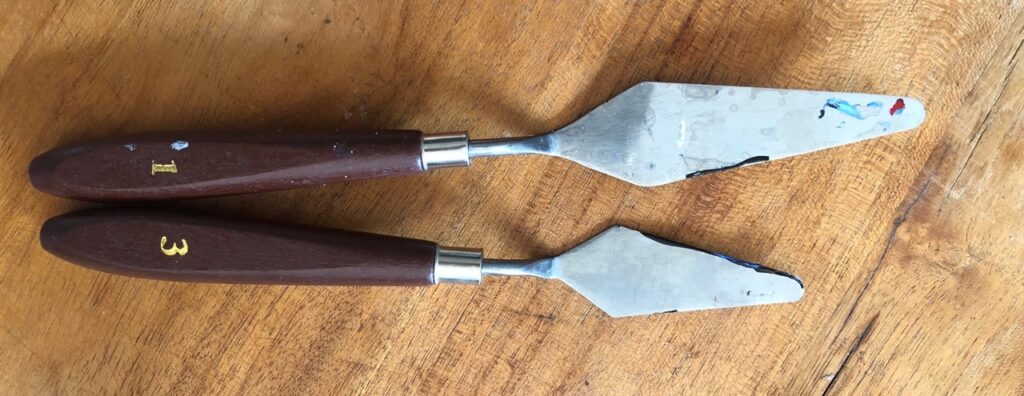
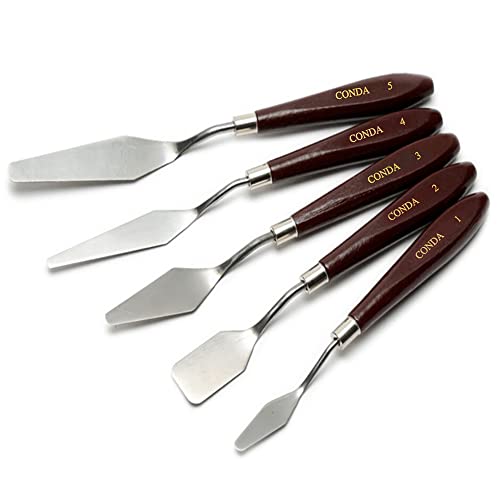
There are several shapes of palette knives, but the most used are these ones (I use the simplest and cheapest knives by Conda):
They are easy and cheap to buy, at every art shop you will find a set of 5 knives. CONDA Palette Knife set of 5 will cost you under $10 on Amazon and will probably last a decade.
WATER: Do you mix water with acrylic paint on canvas?
Water is important in the painting process – it is a part of acrylic, it helps thin the paint, and it helps keep paint from drying.
But. There is a “but”.
Water also dissolves paint composition, making it weaker.
It means you should avoid, by any means, using a lot of water (more than 20-30%), and, if you can, use distilled water instead of tap water as distilled water contains fewer impurities.
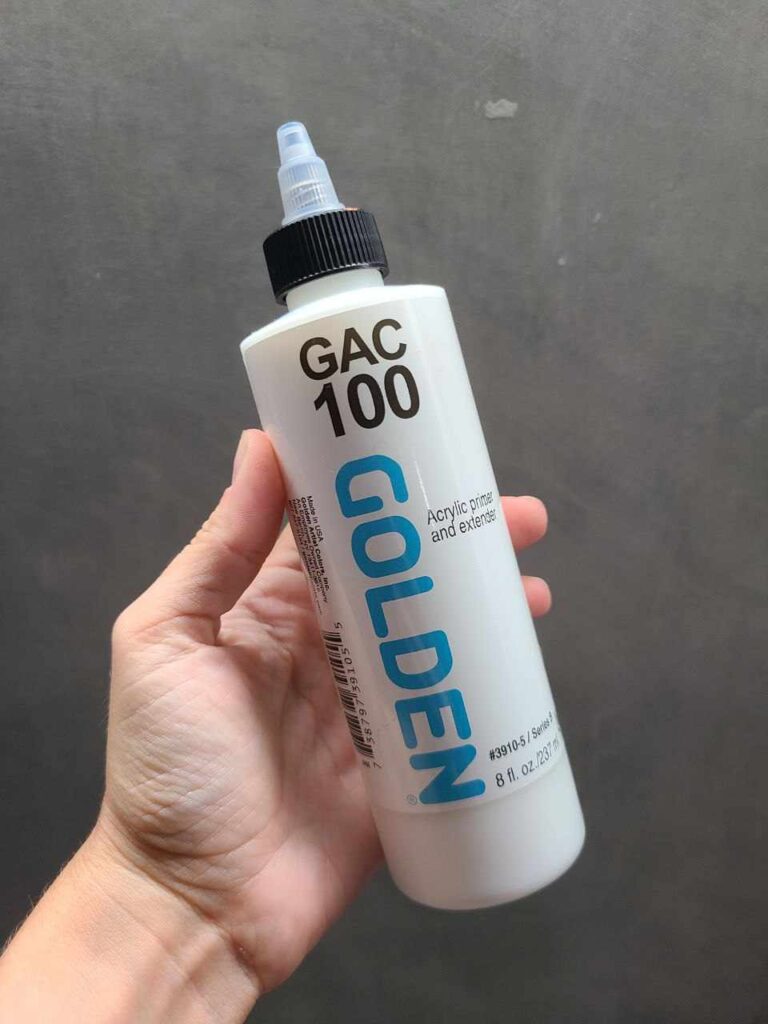
But still, both can damage the paint if you will used too much! Alternative to water is GAC100 for acrylic paints.
You will also need water to keep brushes clean during the painting process, make sure you have 2 jars/containers: one where you clean brushes in between colors and one with completely clean water.
Read also: How to Thin Acrylic Paint: 3 Correct Ways & 3 Dont’s
SUPPLIES TO FIND AT HOME
TRASH BAGS AND TAPE
These are a cheap and easy way to protect all surfaces from paint, as acrylics are quite hard to wash off from almost everything porous (wood, fabric).
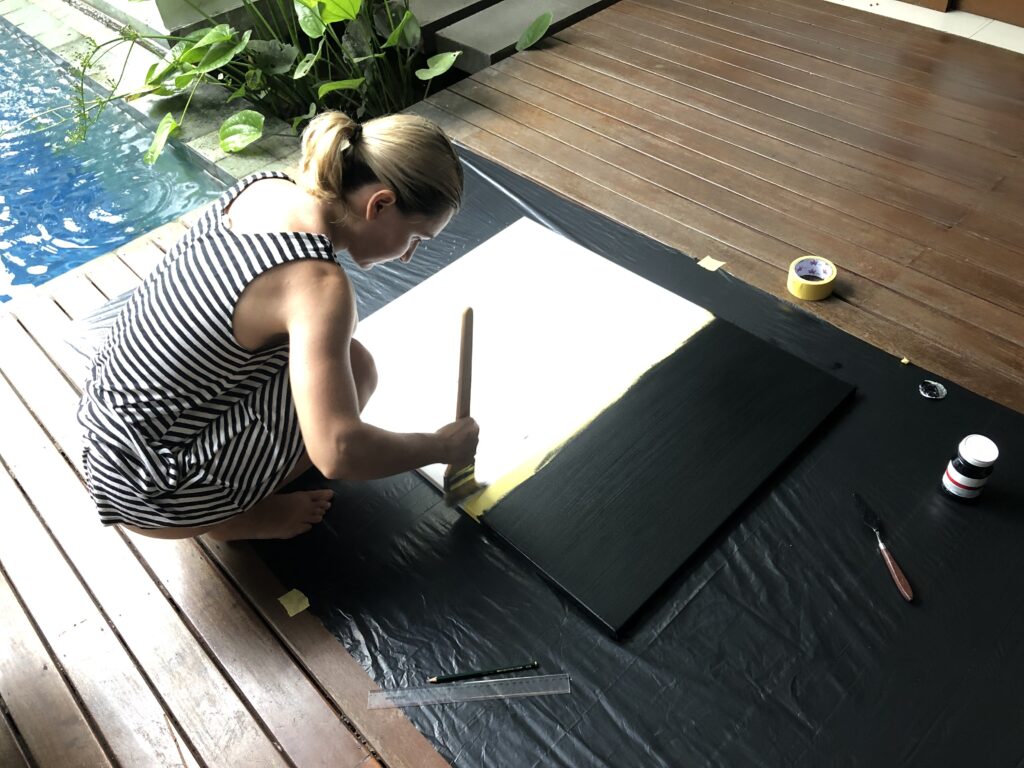
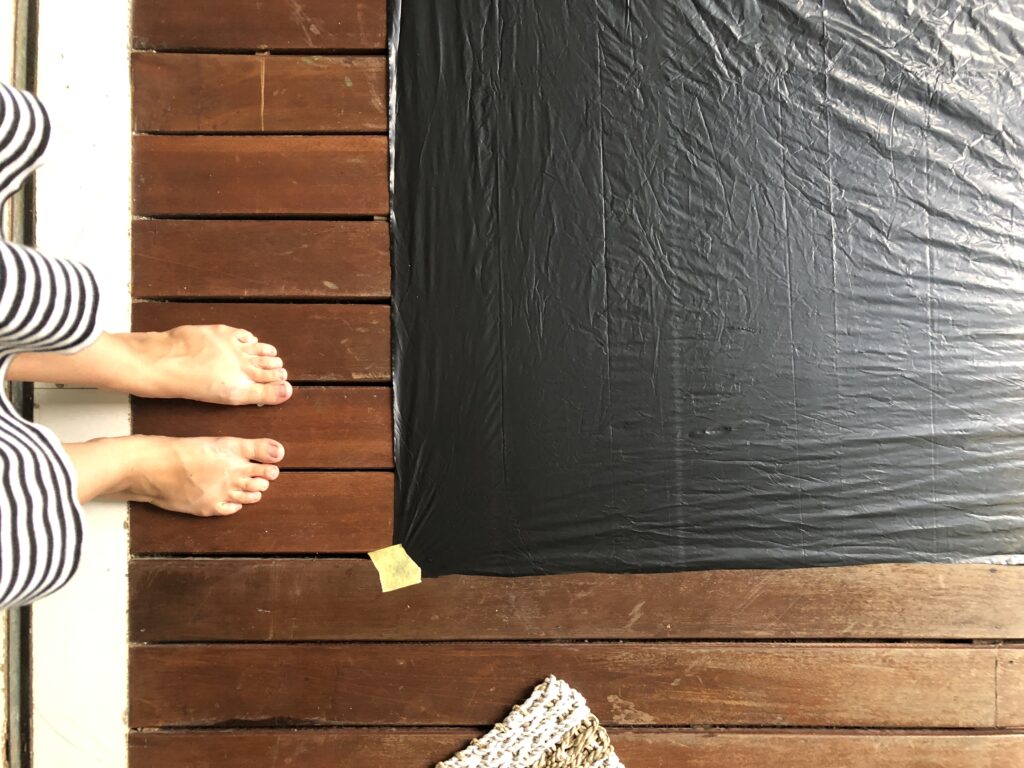
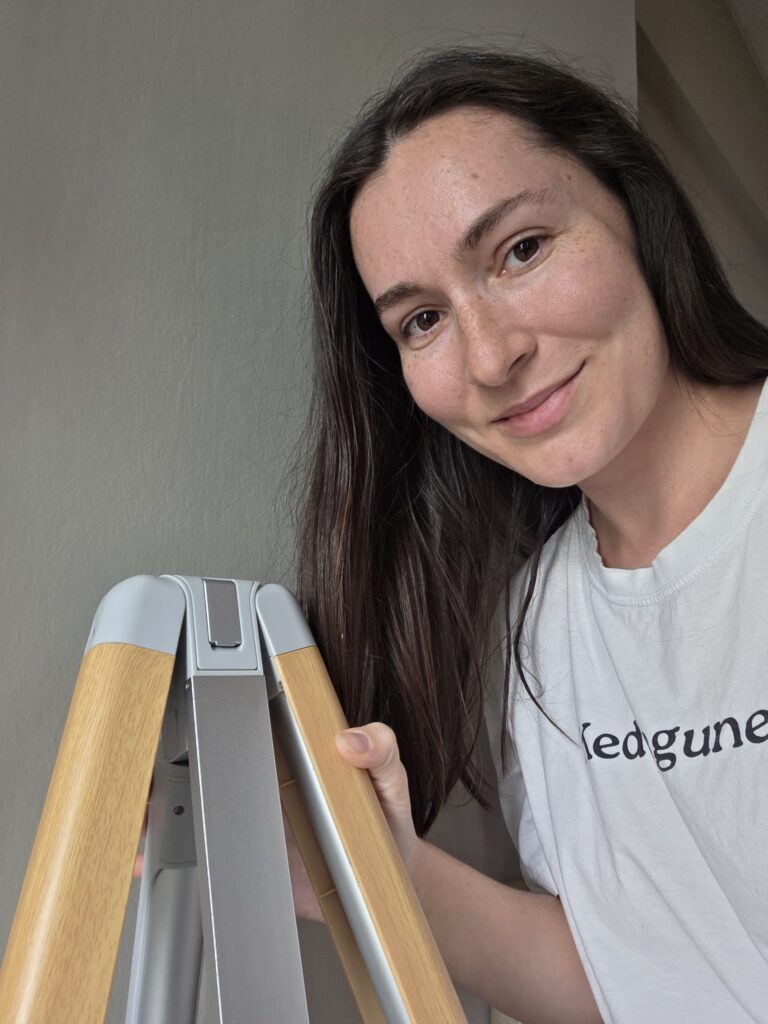
Cut a big trash bag and fix it on the floor/table and other surrounding furniture with tape. After painting, remove it and save it, you will reuse this protective system next time.
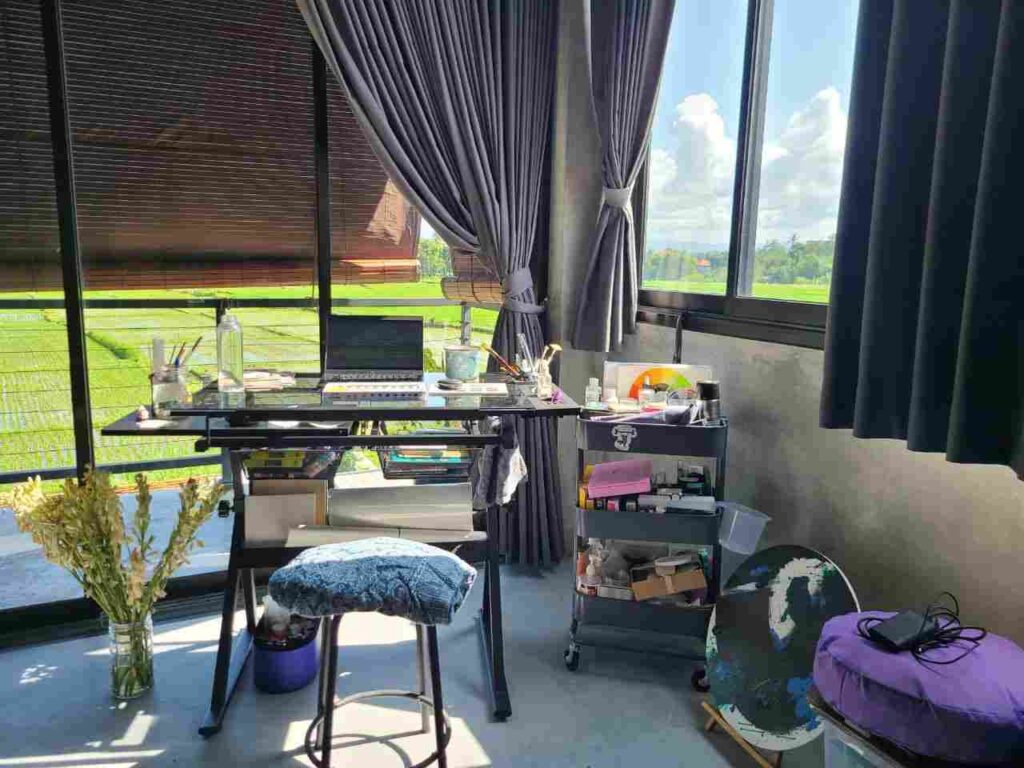
This is me working on a protected surface 😉
SPRAY BOTTLE
As we already discovered, acrylics are fast-drying.
It means, that when you are a beginner, sometimes you don’t have enough work time within one layer of paint.
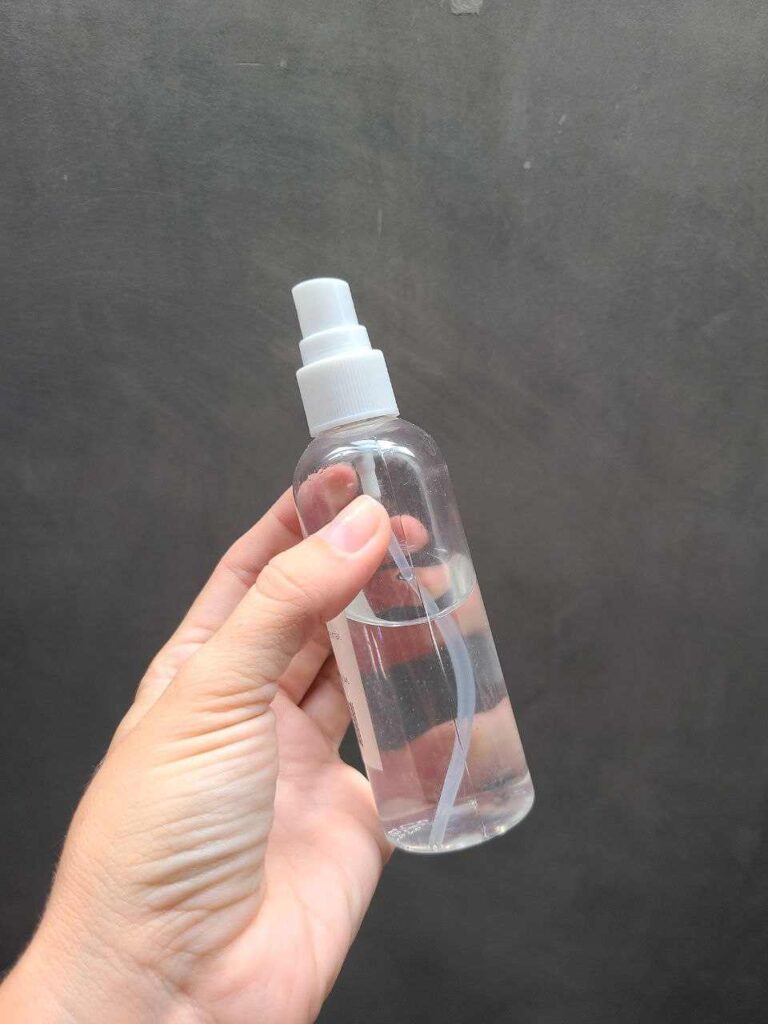
There are multiple ways to slow down the drying process (here are at least 15 methods listed), but one of the easiest ones is just to spray the back of the canvas, or palette.
And it is also the cheapest one – you just re-use a spray bottle from any beauty (or other) product, fill it with water and that’s it!
TOWELS
I use a piece of an old towel to dry my brushes or to clean the excess paint from a dry brush if I’m not using water.
The easiest way is to use simple kitchen paper towels in case you need to clean your hands, handlers, brushes, or for any other purpose.
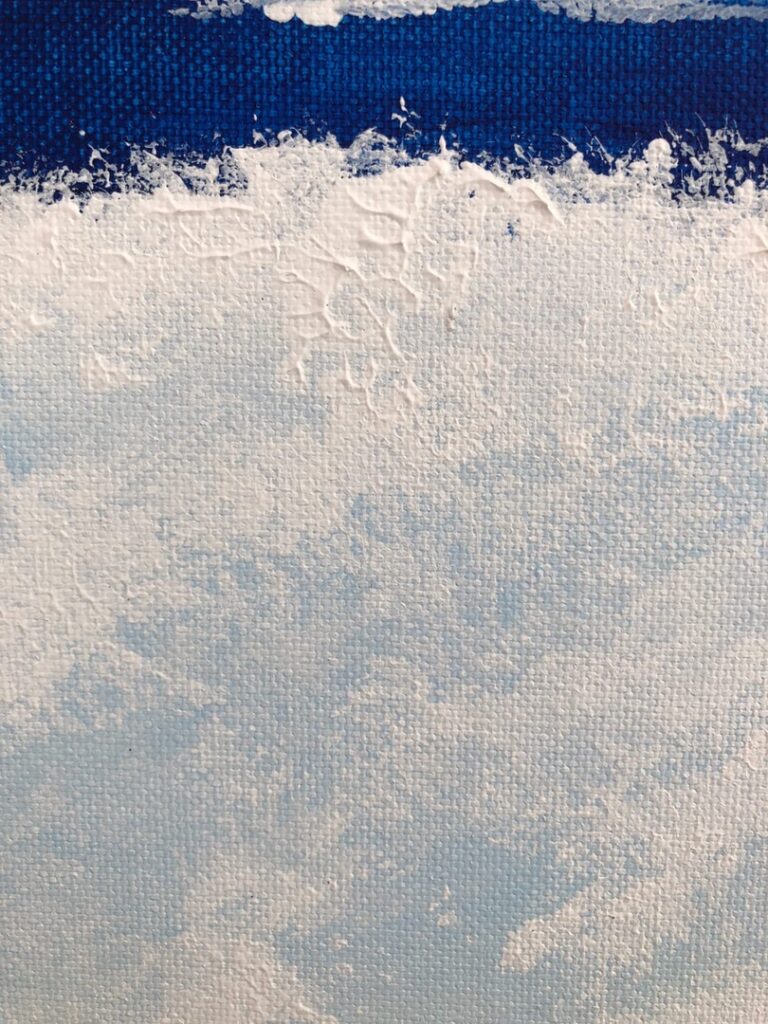
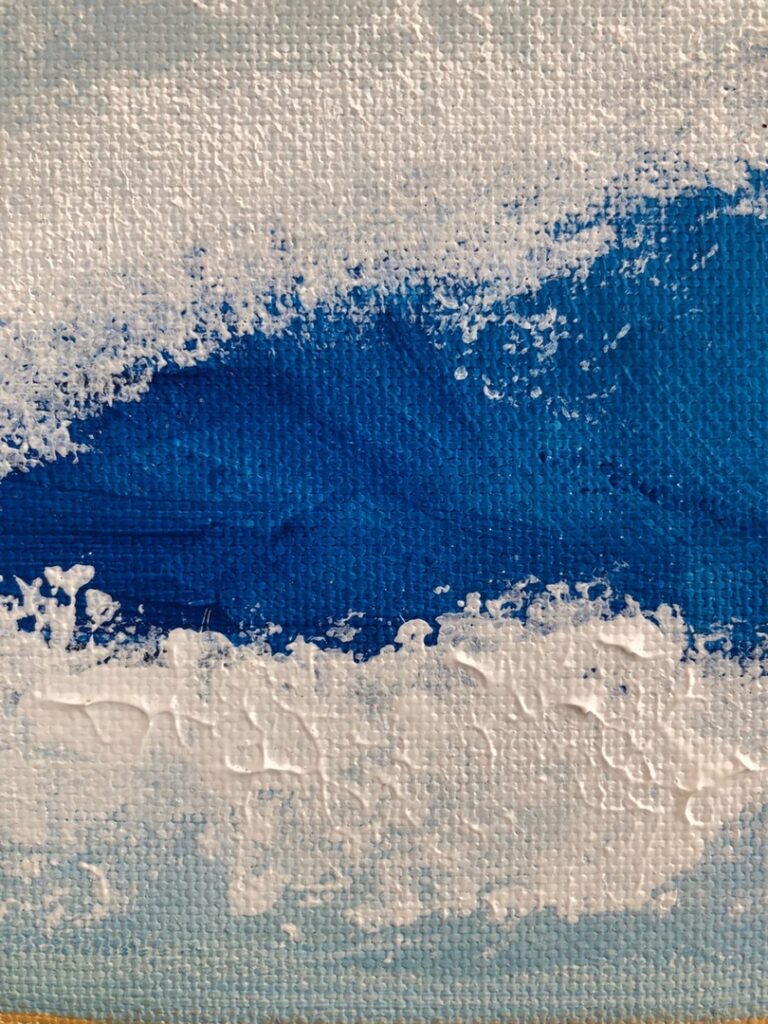
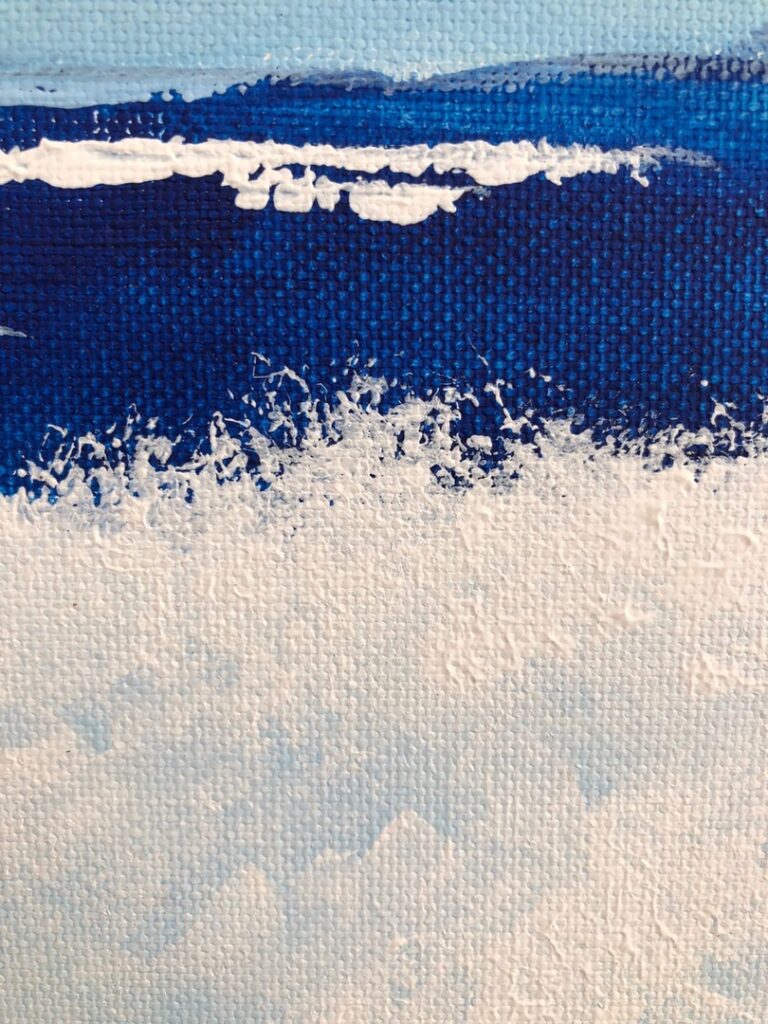
Another interesting way I was using a small piece of a towel was to create a new texture effect.
It was my first painting of waves and I just cut a piece of towel, dipped it in the white paint, and created foam for waves, here is the result of that experiment:
HOW TO USE ACRYLIC PAINT ON CANVAS IN 3 STEPS
Painting is fun, it’s a sort of meditation, but it is also a skill and creative process.
You can always neglect all the rules, but for a few first times, get to know acrylics as it is and try to follow the process step-by-step, this way you will understand better how and where you can ignore the “school” and do it your way.
I split acrylic painting process into stages:
- the first stage is the preparation of the surface, supplies, and yourself,
- the second stage is an actual painting, and
- the third one – is the protection of the painting. Many beginners never think about protection and stop when the painting is finished. It is not a professional approach and we will learn it today.
Finally, I added a bonus for you, step number 18 to make some money selling your art;)
PREPARATION:
- Prepare the surface
- Dress up / apron
- Prepare water
- Get a canvas and easel
- Get paint
- Prepare brushes
- Get a printed reference
PAINTING:
- * Gesso
- Sketch
- Mix paint
- Dark to light: start from medium or dark areas + sides
- Paint in layers, blending + dry
- Light and details
- Dry
PROTECTION: 3 steps
- Protective finish / varnish
- Protection / framing
- Maintenance
MONETIZATION
- *Potential sale
How to paint with acrylics on canvas?
1. Prepare the working area
Acrylic paint stick to every absorbent surface, wood, fabric, and paper. If you paint using an easel, cover the floor, if you use an easel on a table or paint on the table horizontally, cover the table.
Some people used old newspapers to protect their surfaces, nowadays not even every house has some newspaper, so we can use trash bags.
I take one big bag, cut it and tape it to the surface(use painter’s tape for paintings for covering you can use any safe to remove tape).
If your floor is tile, you will be able to remove paint from it, even if you accidentally dropped some on it, as tile does not soak acrylics.
2. Dress up
For some reason (acrylic is hard to wash off from clothes), you need either to get dressed in some “painting” clothes or put on an apron.
It can be a fabric (denim or cotton) apron or disposable plastic aprons.
You know yourself better, I do not wear an apron as I am pretty careful and never happened to drop paint on myself, and I don’t want to spend extra money on it too.
3. Prepare water and learn to thin the paint
Water helps us:
- to keep brushes clean and wet – this is why we need the 1st container or jar with water, wet brush gives smoother application
- to clean brushes in between using different colors – this is why we need 2nd container or jar with water,
- to keep canvas or paint dry slower and give us more time to work – this is why we need a spray bottle with water.
Do you mix water with acrylic paint?
Yes you can use acrylic paint mixed with water to make it more fluid, easy to flow and more transparent.
But it is not mandatory to add water to acrylics, especially if you are looking for textured paintings, thick layers or using some unique dry brushing or abstract art techniques.
Do you wet the brush before using acrylic paint?
You can paint using both dry and wet brush.
Dry brush gives rough texture, while a wet brush leaves a smooth nice line. To blend colors more easily use slightly wet brush.
I’ve already mentioned that, in fact, excessive use of water will not only thin or slow down the dry time, but will destroy the paint composition: pigments and binder will no longer stick together as tight as it was and as it supposed to be.
What does that mean?
It could possibly lead to cracking when the painting is dry and affects how long can the painting last.
However, people still use tap water to thin paint.
If you are a beginner and you are practicing, don’t overthink this.
Some painters use distilled water instead of tap water to protect the paint, but still, have an easy and cheap method to make it fluid and keep it from drying.
A professional artist will opt for an acrylic medium to thin the paint, like Golden GAC 100 or similar.
Related post: How to Thin Acrylic Paint: 3 Correct Ways & 3 Dont’s
4. Get a canvas and an easel
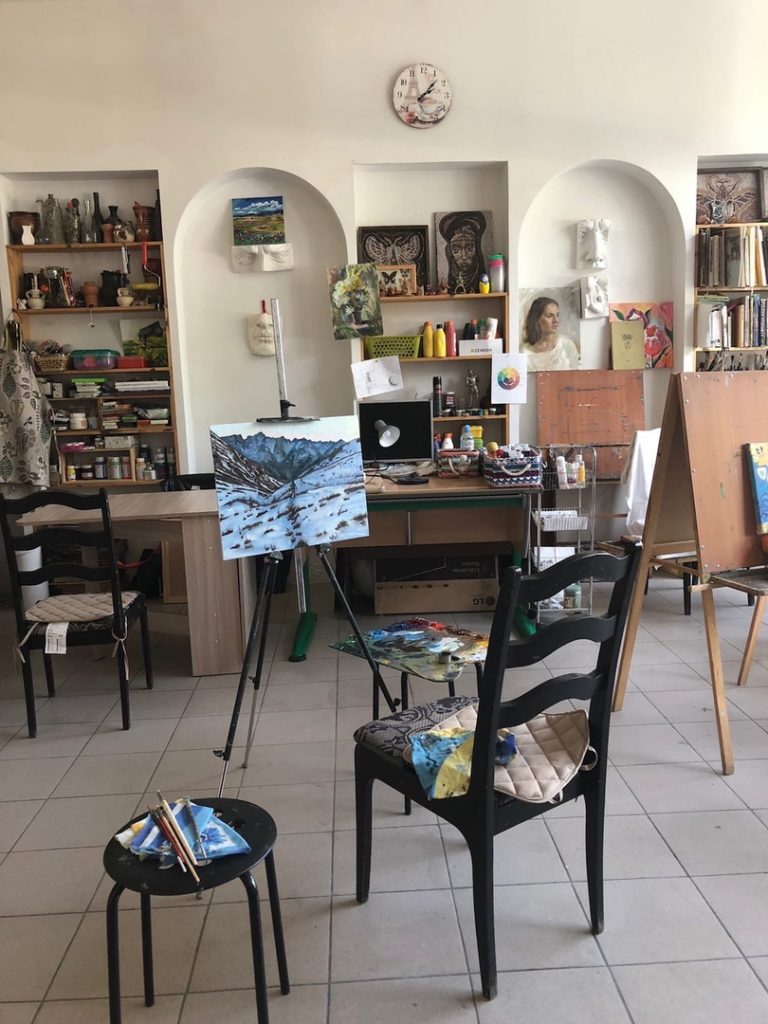
It is often recommended for beginners in acrylics to start painting with an easel.
True, it makes life easier – when you start painting horizontally, it will be hard to create right proportion and perspectives.
An easel helps you to fix the painting, keeps it vertically, and can be adjusted to any size of canvases.
When I was working on oil painting, I always did it with an easel, seating in front of my painting.
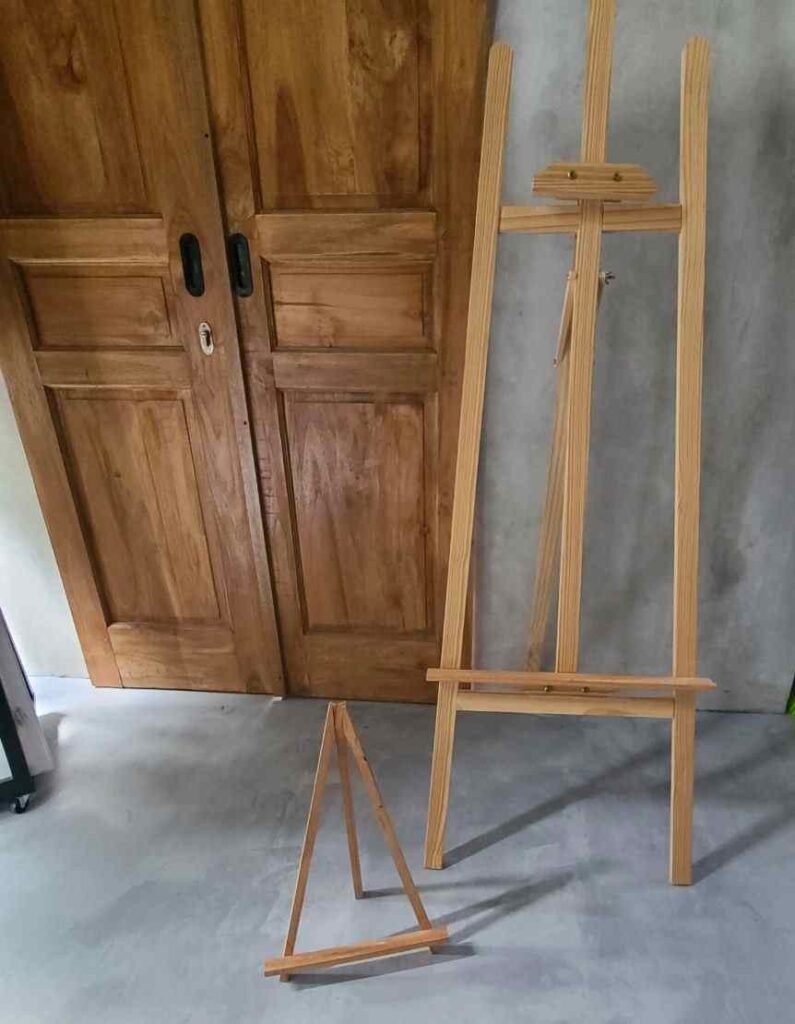
If you consider buying an easel, I’d recommend doing it in an art store, where you can touch it, and check how comfortable is it for you.
If you still are more of online shopping, try tabletop easels – they are cheaper, need less space, and portable (in case). Tabletop easels are one of the cheapest options yet durable, I don’t really like flimsy easels, and I am a happy owner of Kraft Geek plein air easel.

It is also important to stand up, and back up – to see the whole painting, to compare it with reference, if you have one, to check the proportion.
Canvas – is an element of success in painting.
Check the texture, the stretcher bars (if you buy a large canvas, it should also have one or two stretcher bars across it), and how the canvas is stretched (it should never be saggy or have any dentations), the priming.
Always read some reviews before buying online.
Triple primed, 100% cotton canvas, with good-quality wooden stretcher bars – it is a great and wallet-friendly option for a beginner.
I recommended Blick Premier Cotton Canvas, but you are free to choose from more options among the canvases that I reviewed.
Related post: Best Canvas for Acrylic Painting for Beginners that Professionals use
Pro tip! Some store-bought prestretched canvases may feel a little loose.
There are a few options how you can make it more durable:
- add wooden parts that came with your canvas in corners on the back
- epoxy the back of the canvas
- apply gesso or a washy paint layer on the back of the canvas and let it dry.
5. Choose Good Acrylic paint brands
Acrylic paint is extremely easy to buy online and at the art store.
As we already discovered above, you need artist-grade good quality paint from any of brand based on your budget.
I love Amsterdam paint for small projects, Hippie Crafter paint for pouring and Liquitex for all sorts of work no matter the surface!
Related: Best Acrylic Paint Brands for Beginners and Professional Artists
Acrylics come in tubes and jars, mainly. I prefer tubes, but it is fully your preference.
At this stage do not open and squeeze paint!
6. Prepare brushes
All brushes should be clean and dry.
A good brush has a tight bristle which doesn’t leave hairs and brush strokes (unless it was intentionally). As we know, we use synthetic brushes.
Related: The Best Brush for Acrylic Paint on Canvas
Based on your idea and feeling, prepare shapes and sizes.
For painting a background a flat brush of size 10+will be good. A round brush of the size 2 to 8 (depending on the size of the canvas) is good for lines, plants, leaves, etc.
You can use this table to make sure you made the right choice, but ultimately, it is fully your experience.
7. Get a printed reference
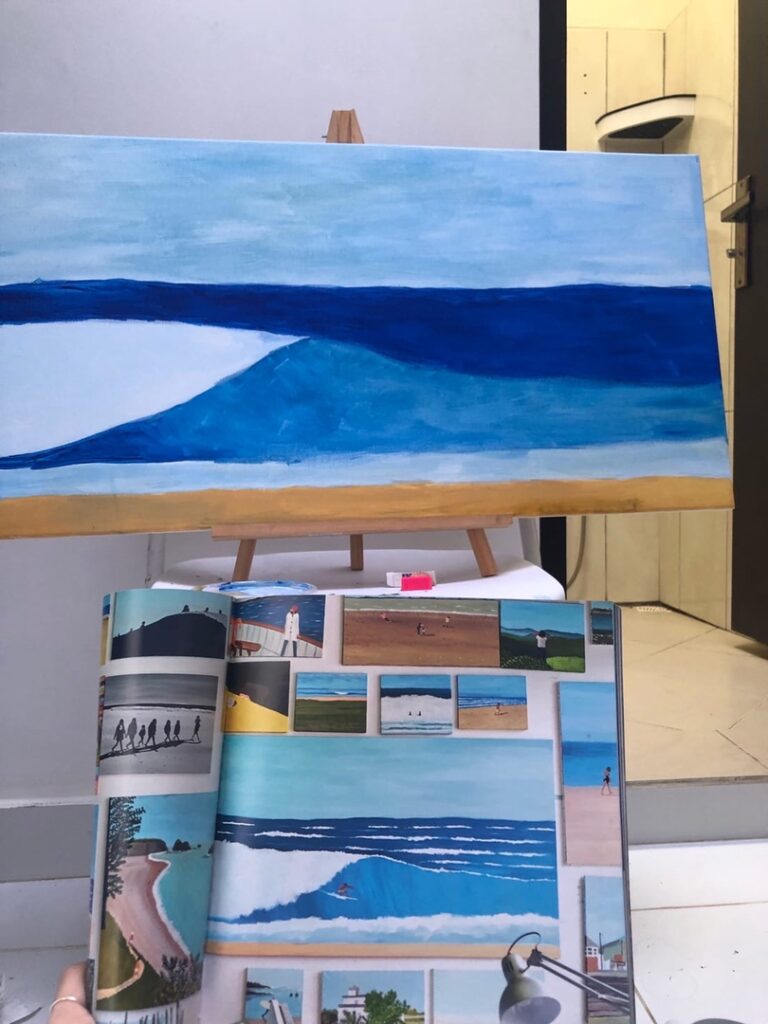
If you are a beginner, it may be easier for you to have a reference in front of you.
Where to find it?
Well, my first paintings were my favorite photos from trips and of my cats.
You can choose any photo, find some inspiration on Pinterest, or even copy your favorite artist – why not if you are learning?
Print it as big as your canvas is (if it is possible) or just the max size – A4.
Print it in color, of course.
Adjust it either on the easel next to you or the wall – the way that you can see it, compare your painting to it when you will back up.
Sometimes I found references in magazines, it can work too!
Need inspiration?
I got you!
I have tons of easy painting ideas for acrylics and of course, you can jump into that rabbit hole on Pinterest:
- 101 Easy Acrylic Painting Ideas for Beginners on Canvas
- 55+ Easy Star Wars Painting Ideas & Crafts for Star Wars Day
- 55+ Easy Christmas & Winter Canvas Painting Ideas For Beginners
How do you start an acrylic painting on a canvas?
8. Gesso to Prime the Canvas
If you have a pre-primed canvas and you like how smooth it is, skip this step.
If you do not have a pre-primed canvas or you are not satisfied with how smooth it is, keep reading.
Q: Can you paint acrylic directly on canvas?
A: Yes you can paint with acrylics directly on canvas, even unprimed, some artists do that. However it is more common to paint directly on primed canvas.
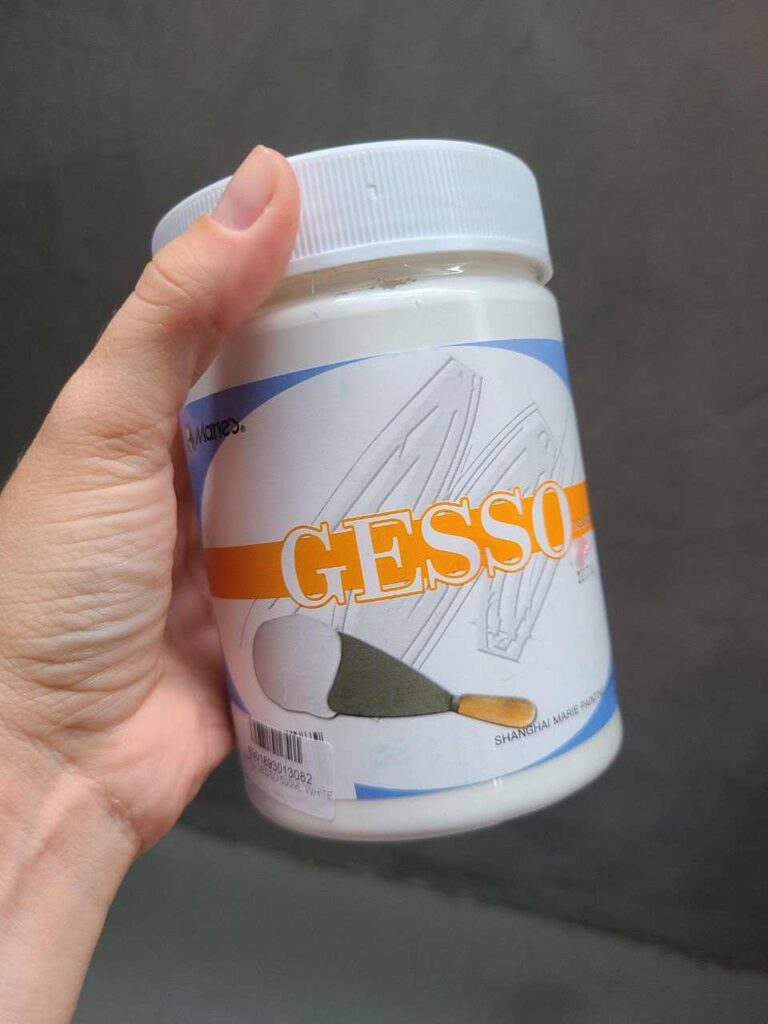
Gesso – is a primer for all surfaces. It makes the surface smooth and adhesive.
Generally speaking, without gesso you will never have the same expected results. Yes, artists can paint on raw (unprimed) canvas, when they know exactly what they are doing!
The best gesso I can recommend is Golden Acrylic Gesso – it is artist-grade gesso, quite affordable (from $13 for 8oz).
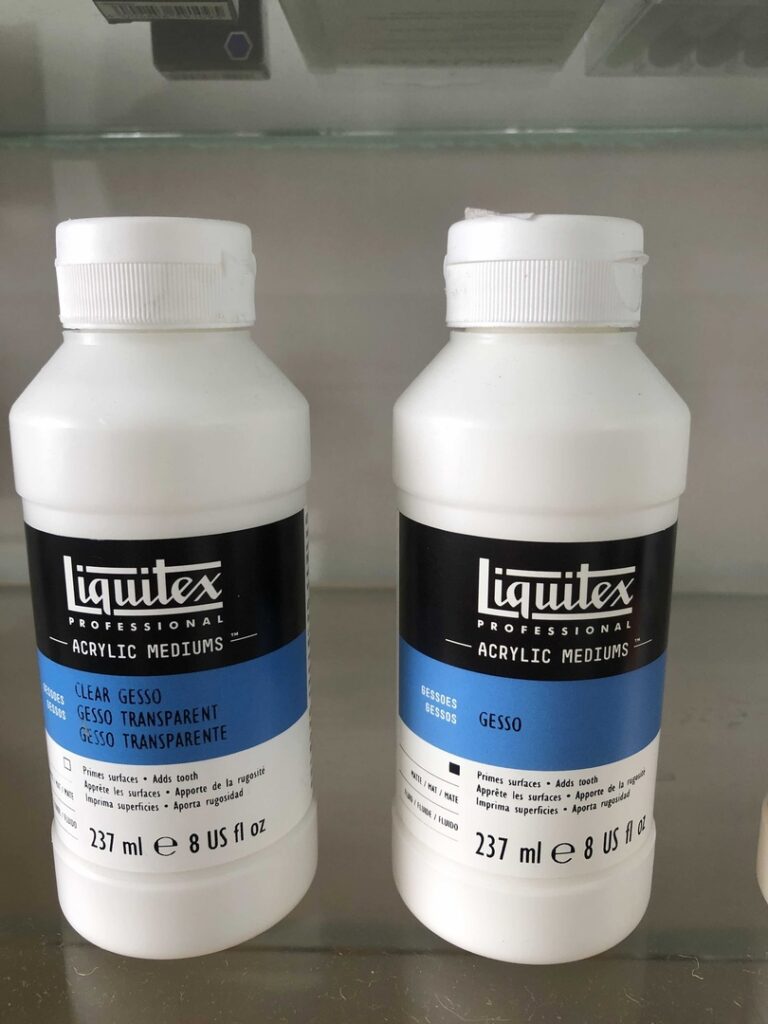
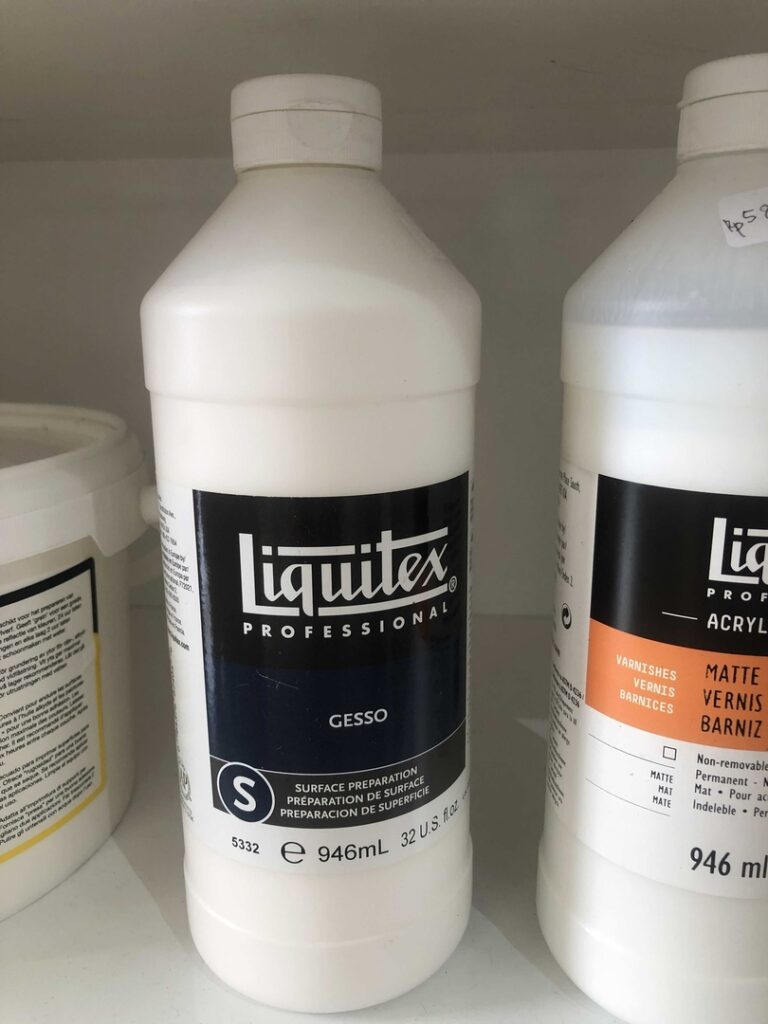
Another great option is Liquitex Gesso but it is slightly more expensive than Golden.
Priming a canvas is quite a simple process, you can just follow the manufacturer’s instructions, or, if you are not so sure, read this full step-by-step guide about priming and gesso.
You can apply additional layer of gesso on store-bought primed gesso.
The preparation process may vary depending on the surface:
- How to Prime Wood for Acrylic Painting
- How to Paint Fabric with Acrylic Paint Permanently: Full Guide
- Painting Leather with Acrylics: How to Paint and Seal Leather
- Can You Use Acrylic Paint on Glass? 9 Best Sticky Acrylic Paints for Glass!
- Bakeable Acrylic Paint Guide for Ceramics and Glass & 4 Best Bakeable Paints
- 11 Amazing Painting Surfaces for Acrylics: What Do You Use Acrylic Paint on?
Some artists also apply an underpaiting with a cool or warm color, especially if working with landscapes, portraits and still life:
- washy first layer like a glaze, it can be semi-transparent. You just cover the whole canvas with one color. This way you already have all the white of canvas and gesso covered and you can work on your painting.
9. Sketch before painting with acrylics
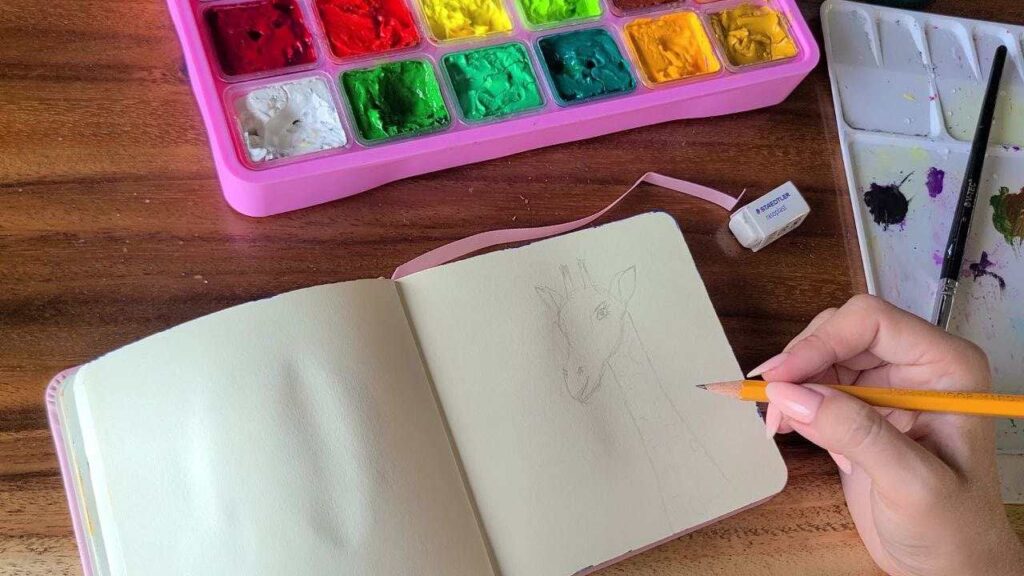
You have your reference in front of you, now take a pencil or charcoal and create an almost invisible sketch, just to locate all the objects and adjust it to the size of the canvas.
Related: 11 Easy Methods on How to Sketch on Canvas Before Acrylic Painting
If you have a reference, but you are willing to add your details, this step is a must!
Another good practice both for beginners and professionals is to paint the whole idea on paper or a canvas pad before actually painting it on a big canvas.
This way you can try the technique, colors, effects, and additional elements and see if it is going to work out or not.
It is great for practicing and it means you will create better results on a real canvas, but it takes time and patience.
10. Mix paint and learn to blend paint for smooth backgrounds
Lay out your paint to orgaise your palette setup.

You may work with as many colors from your paint set as you want.
But if you are learning color mixing and are a bit more advanced I suggest using only 3 primary colors in their warm and cool variants (warm and cool red, warm and cool yellow, warm and cool blue) and
On your palette, squeeze colors following the color wheel but with white first, then cool yellow, warm yellow, cool red, warm red, cool blue, warm blue.
Pour some GAC 100 as well.
Leave enough space in between to make sure you won’t contaminate them and have a good spacious palette to have enough space for mixing.
But laying on the palette the paint will dry out and seal, so you should get a mister filled with water to constantly rehydrate your paint.
Color chart and mixing, as well as blending, can be one of the most frustrating parts in the beginning.
But over time you will love to create colors on your own, as you can discover more nuances, you can find out that mixed colors can be even more opaque than purchasing one.

Let’s talk about mixing colors.
A handful thing is to buy a color chart to make it easier for a few first times.
- Get your paint, your reference, a palette knife, and a palette or anything you use like it.
- Always squeeze small amounts of paint because acrylics are fast drying and once they are dry too hard on your palette you won’t be able to undry it or reopen it.
- Always mix colors with a palette knife. Keep it clean and dry.
- Make notes on how you’ve mixed colors, and make patches – it will save you time in the future.
- DO NOT mix all colors at one time, they will dry. Work gradually!
Here are some “recipes” on how to mix paints for brown, grey, purple, orange, green colors with most acrylic paints:
- Light brown: Gradually add a white color to your brown.
- Warm brown: brown + red and/or yellow color.
- Cool brown: brown + some blue color.
- Darker brown: brown + dark blue.
- Grey: a lot of blue colors + a small amount of orange color + white color.
- Purple: red + blue 1:1.
- Reddish Orange: yellow + red 1:2.
- Yellowish orange: yellow + red 2:1.
- Orange: yellow + red 1:1.
- Green: yellow + blue.
- Muted green color: yellow + blue+red
If you want to know more about mixing, primary and complementary colors – How To Mix Acrylic Paint? – Your Complete Color Mixing Guide
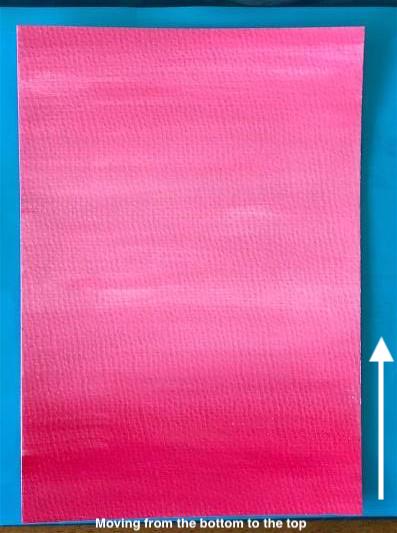
At the same time blending acrylic paint is a challenging skill you need in order to create smooth backgrounds, nice sunsets and skies, and beautiful effects.
I didn’t actually know when I started that there are more than 10 ways to blend paint and some of them are very doable even for a complete beginner!
I gathered the whole guide to blending and shared it with my readers.
Don’t be scared of blending, it is really satisfying and easy!
Quick tip – it may be easier to blend wet paint for beginners.
Related: 11 Ways on How to Blend Acrylic Paint Smoothly
11. Paint Dark to light with acrylics
When we paint with acrylic paint, we work in the following order: from darker colors and areas to lighter ones.
Dark colors create depth and it is not necessarily black paint.
To learn why we do that and what are other options, check this post: Do You Paint Acrylic Light to Dark or Dark to Light?
Look at your reference and identify what objects are farther and darker – this will be where you start.
At first, your painting will look not as you expected and it’s fine – it is called the “ugly stage”.
Be consistent, have patience and follow the direction from larger, darker objects to smaller, lighter, and closer details. The highlight will come last!
Imagine mountains.
You paint one, darker, the main color first – it could be dark green or blue or even black, depending on your reference and vision.
Then you start to create slopes and shades, but small rivers, small snow areas, and rare trees will only come last.
This painting I created from dark to light:

Don’t confuse acrylics with watercolor – they work completely in a different way!
While painting, don’t forget to paint sides too – they are part of the painting and if you will leave them blank, it can look unprofessional.
Upskill quickly with my selected 60+ acrylic painting tips: 60 Acrylic Painting Tips for Beginners You Should Know
12. Layering acrylic paint – the most important acrylic painting technique
Painting acrylic always means painting in thin layers.
It seems easier just to apply one thick layer and let it dry, but it is not the best decision.
Thin layers are easy to paint, they dry fast.
It is easier to cover a mistake and create a more professional look for your painting than with a single layer.
Each layer should be dry when you start the next one. Brushes should be clean and dry for each layer.
Imagine a cake mille-feuille – Napoleon – this is your painting! It only tastes so good because we have so many layers of pastry and cream!
The only time we can play with thicka pplication is when we are looking to create interesting textures. But it’s more advanced acrylic painting techniques.
13. Details and Brushstrokes
You’ve done all the process, all the layers are dried, and now it is time to add final highlights and details.
In this step, you can also experiment: sometimes artists add pencils or charcoal to create small details, lines, or abstract figures.
However, sometimes you would like to avoid brushstrokes and that is something most beginners are struggling with.
Related: 18 Tips To Avoid Brush Strokes In Acrylic Painting
14. Let it Dry
You’re right, acrylic is fast-drying, but…
In fact, there are, generally speaking, 2 stages of drying:
- the first stage is when the paint is dry to touch, which is 5-10-20 minutes depending on the brand. And this is what happens in between layers. Here are 20+ paint brands dry times for your convenience.
- the second stage is when the painting is fully dried or cured – when it is no longer sensitive to water or to be reopened (we can’t paint anymore).
So, after you finish painting, you will wait until the second stage is done – usually, 24 hrs will be enough.
Why is it important?
It is actually vital because the cracking and peeling of the paint occur right because of the improper drying process.
When there are any shifts in dry time or temperature, your painting can have cracks.
Which is not nice, right?
One more thing about painting and drying – it has to be in a good environment:
Humidity level: 40-50%
Temperature: 65-75F (18-24C)
Well-aired
No direct sunlight
Your painting is done!
But the process is not, we still need to make sure it will last long enough.
As we know acrylic paint dries super fast by nature, within 5-30 minutes depending on the brand, if you are impatient or it takes too long already, try using a hair dryer.
Some brands may dry darker on fabric or canvas, but it is not always what we need.
If you need to alter the drying time of acrylic paint or its opacity, I got you some simple tips:
- 7 Ways How to Make Acrylics More Opaque & Full Opaque Colors List
- 15 Proven Ways How to Make Acrylic Paint Dry Slower & Homemade Acrylic Paint Retarder Recipe
- 5 Proven Ways How to Make Acrylic Paint Dry Faster
When you are done, whipe out your palette, clean your brushes and dry them with towel and store heads up.
Quick note on how to choose what acrylic painting technique to go with…
Read the full comprehensive guide: 26 Acrylic Painting Techniques For Beginners to Paint like a Pro
Even though there are many interesting and advanced acrylic painting techniques, some ar quite common and easy to master.
In fact, layering that we discussed earlier is exactly one of the most important techniques to learn.
Some acrylic painting techniques you may try:
- dry brushing – uses a completely dry brush for visible strokes, for light addition and highlights like clouds sitting far on the background. It gives light visible texture.
- wet on dry and wet on wet – allow smoother strokes, watercolor like paintings and transparent layers.
- glazing – when we are applying a thin transparent layer over solid layer. Helps creating reflections on water.
- impasto – allows texture and thick application of the paint. It is like we are creating 3D paintings.
- acrylic pouring is already one of the painting styles to me, but actually it is a technique. You need to add special acrylic medium – pouring medium to your paints, and literally pour them! Creates stunning works from galaxy paintings to mesmerizing patterns.
PROTECTION
15. Protective finish/varnish your acrylic painting
An acrylic painting needs protection for some reasons:
- it adores dust – it collects tons of it
- it tends to fade or even yellow sometimes
- you cannot touch or clean acrylic paint directly
- it can last less without protective finishes
To protect acrylic paintings we should, first of all, store or showcase them in an appropriate environment.
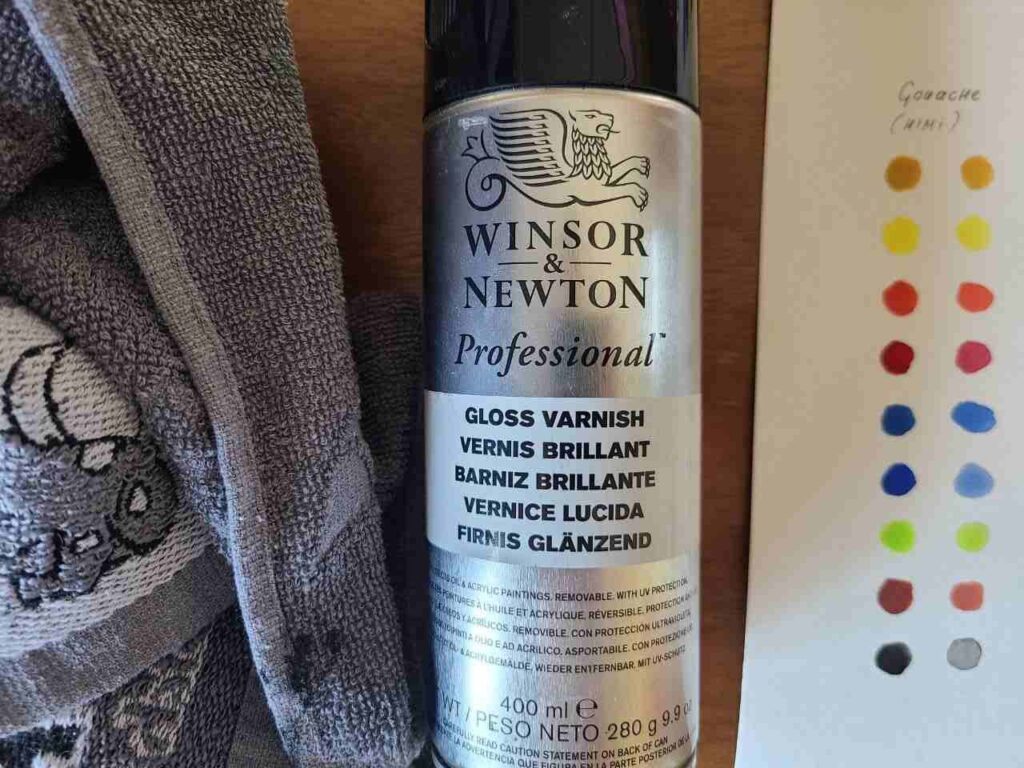
Second, we need to apply for special protection – the old way to do it is to apply a coat of varnish.
It is a protective film, tricky to use, but durable.
Varnish should be removed in 25-50 years and replaced by another coat of varnish.
If you decide to varnish your painting – be very careful and follow these guidelines.
The painting should be fully cured before varnishing and you also will need an isolation coat!
The best varnishes on the markets are Golden Polymer Varnish and Liquitex Acrylic Varnish – both are in the same price range, high-quality and well-known!
Another option (more cost-efficient) is a protective finish like MinWax Polycrylic Protective Finish – high level of protection, easy to use, no need for an isolation coat, no yellowing over time.
Full protection process in 5 steps I described here.
16. Framing
Framing is a very solid way to protect a painting, but framing with glass is not as popular today as it was years ago.
Nowadays artists do box framing (or ‘tray’ frame, ‘shadowbox’ frame, or ‘floating’ frame).
And instead of glass, we use plexiglass, which is lighter, more transparent (glass sometimes has a green or yellow tint), and less fragile.
Still, you don’t have to frame all your paintings if you don’t want to.
17. Maintenance
Your painting is protected, dried, and amazes everyone.
Now you need to follow easy recommendations to help it last years:
- clean it with a feather duster or any other gentle tool. If you put your painting under the glass, clean the glass
- If you left a painting without glass, try not to touch it, our skin contains oil that can affect the protective finish over time
- maintaining the temperature, the humidity level, and airflows.
- if you used varnish, make notes of what varnish with and replace it when the time comes.
- don’t forget to clean brushes and store them vertically to let them last longer.
It is so simple, right?!
What if something happened?
The most common issues with acrylic paint are cracks and peeling.
Sometimes they add a nice touch to the painting, but sometimes it is ruined.
There are 2 ways to salvage your painting and you may want to consider them especially if you had an expensive canvas: How To Fix Cracked Acrylic Painting in 3 Easy Ways
LEVEL-UP AS PROFESSIONAL ARTIST
As an artist, you will constantly improve your skills and paint better every year!
To keep your small hobby running you can start your social media dedicated to your art, sign up for the best online galleries to sell it, and even travel around the world to connect with other painters at artist residencies!
a) Potential online sale for artists
It may seem odd that I included this extra step here, but let’s be honest – being an artist can be not only your hobby!
Don’t underestimate yourself, just look at some cheapest acrylic paintings for sale, and I know that the average sale price is about $1000 and up to $100 000!

There are a huge amount of online galleries, but I like 2 of them – Artfinder and SaatchiArt.
They are well known and trusted by buyers which is most important.
These galleries have commissions but they also have tons of visitors, so I think it is fair.
To apply you need to have at least some work, take a great photo, and write a motivational letter. The full list of requirements: for Artfinder on their official website, for Saatchi Art.
Related: Art Selling Websites Successful Artists Love to Easily Make Money
b) Social Media
Abstract artists and fluid art are extremely popular on Instagram.
Pinterest is our field as well – art & crafts are the number one search topic on Pinterest!
You can get all this juice and hundreds of new followers and potential buyers through social media.
You need to adapt though: since 2022 videos such as reels and Pinterest stories are more popular than posts, however, you can publish a post on Instagram and pin it on top as well!
Most people struggle with social media as they don’t know what to do with Instagram and how to promote themselves.
I’m sharing exact hashtags you may want to use and how to find a perfect hashtag in this post along with 200+ captions if you feel like your brain freezes when you need to write something:
>> 201 Best Art Captions & Painting Quotes for Instagram [+ Painting Hashtags]
c) Artist Residencies
It is no longer true that only pro artists can join artist residency programs, today emerging and mid-career artists are welcome to programs all across the globe.
Some programs you need to pay for, and some offer a stipend for promising talents.
Normally, the artists’ residencies are seasonal and are fully booked way in advance, but I have an 80+ programs list on my blog to help you keep a few bookmarks and maybe join one when you feel like traveling and doing some art!
Options for artist residencies in Africa, US and Canada, Latin America, Europe, and other locations: 80+ Artist Residencies to Boost Your Career [FREE + PAID]
YOU DID IT! YOU STARTED PAINTING!
I recommend you for your next step to look for easy painting idea you will remake next. Check out:
- Acrylic painting ideas section on my blog with more than 1000 beginner-friendly ideas
- Ready to go tutorials for acrylics and other water-based mediums,
Painting Acrylics on Canvas FAQ
Can you paint acrylic directly on canvas?
It is recommended for beginners to paint only on primed canvas that has 1-2 layers of gesso.
Unprimed canvas soaks more paint and it will affect drying time, you may end up applying too much paint and your canvas will be saggy.
However, pro artists often use raw canvases in their experiments because they already know how paint, canvas fabric, and other mediums work.
How do you start a canvas painting with acrylics?
To start a canvas painting, set up your working area and easel, get good paint and thin it if needed, and print a reference you’re painting.
First, do a simple sketch with a pencil or charcoal. Paint canvas in the following order: from dark to light, from the background and larger areas to smaller areas and details.
Always paint in thin layers and allow them to dry to touch in between. Varnish your painting once it is done and fully dried and frame it or leave it as it is 🙂
Do you need to wet canvas for acrylic paint?
You don’t have to wet canvas for painting acrylics.
Wet canvas helps you keep acrylics from drying too fast (because they are fast-drying by nature) and you can lightly spray the back of the canvas with water. But it is not mandatory, you can equally use a stay-wet palette or just work fast enough on smaller areas.
What do I need for acrylic painting on canvas?
You need a set of paint (basic 6 colors or more), a primed canvas, and a set of brushes or 2 brushes (round and flat). You can make a DIY palette from a cardboard or plastic sheet. Starting an acrylic painting is super easy and affordable!
Final Thoughts
I love painting with acrylics on canvas, wood, unprimed paper, watercolor paper, I love abstract paintings and dark colors, as much as I love contrast acrylic pourings.
Acrylics give me freedom to create texture, abstract, to really create an art piece.
Painting with acrylics is easier to learn, fun and creates amazing art looking like professional oil paints.
It is a beginner-friendly medium that is also quite affordable but at the same time sells pretty well!
If you chose to learn how to paint with acrylic paints, my blog is the right place to start and learn the basics on how to understand the paint and colors, what supplies to buy and not to buy and what easy paintings you can do in one go. Enjoy!

Masha Eretnova, born in 1991, is a Chiang Mai-based certified teacher, artist, and blogger with 20+ years of personal painting journey.
She started painting and drawing very early and is now an international abstract artist and educator passionate about acrylic painting, gouache, and crafts.
Her works are part of international exhibitions and contests, including ArtlyMix (Brazil), Al-Tiba 9 (Spain), Exhibizone (Canada), Italy, and many more.
Besides her artistic pursuits, Masha holds a post-grad diploma in Teaching Film Photography and 2 music school diplomas: piano and opera singing.
Last update on 2026-07-22 / Affiliate links / Images from Amazon Product Advertising API